As per my plan, I’ve made new, more colorful artwork for the sitting room. This is probably my favorite artwork project I’ve made to date. Sadly, no matter how hard I try, there’s no way to capture the how beautiful this is on an image. Every picture I take falls flat, because a picture simply can’t capture the sparkly goodness of the cut glass glitter that I used to cover the whole piece of artwork. But I’ll do my best, and I’ll add a video to my Instagram later today so you can see it “in action”, so to speak.
This artwork was inspired by one of my favorite artists I follow on Instagram, Kristi Kohut at Hapi Art. She has one piece in particular that I absolutely love and have admired for a long time now, which is her striped “LOVE” piece that is bathed in cut glass glitter. Her work is next level — only high quality art materials, framed in custom Lucite frames, some have custom lighting, etc. And that’s why hers cost in the thousands of dollars. Mine is a very simple version inspired by her creations.
This was my first time to ever use cut glass glitter, and let me tell you, that alone is next level! When you compare cut glass glitter to the regular craft glitter you find at your local craft stores, there’s simply no comparison. I had never even heard of cut glass glitter until I started following Kristi on Instagram, and then I had to go in search of it. I found it on Amazon.
It is absolutely gorgeous, and so incredibly sparkly. As the name would suggest, it’s actual glass (so be careful!!), and the tiny pieces are irregular shapes and sizes, so they all catch the light differently. The sparkle is so pretty.
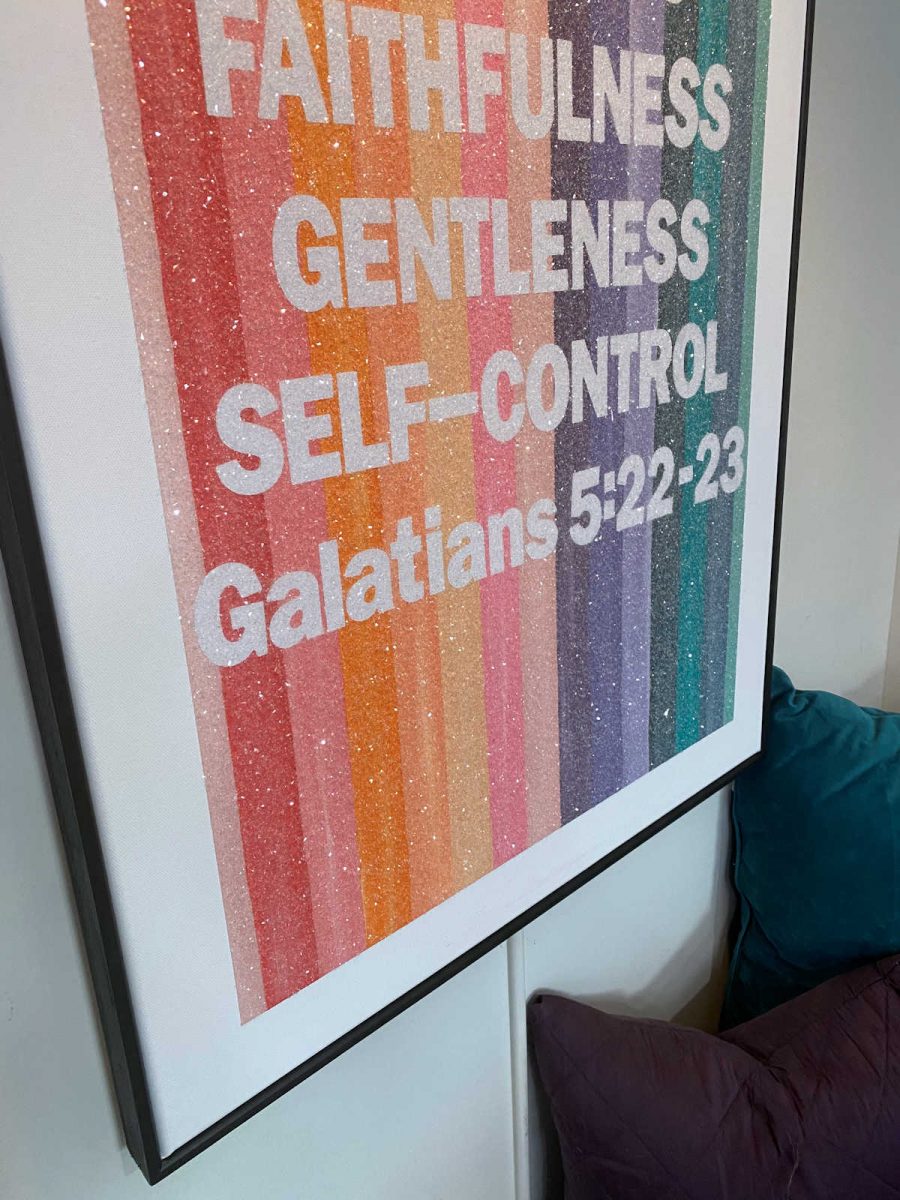
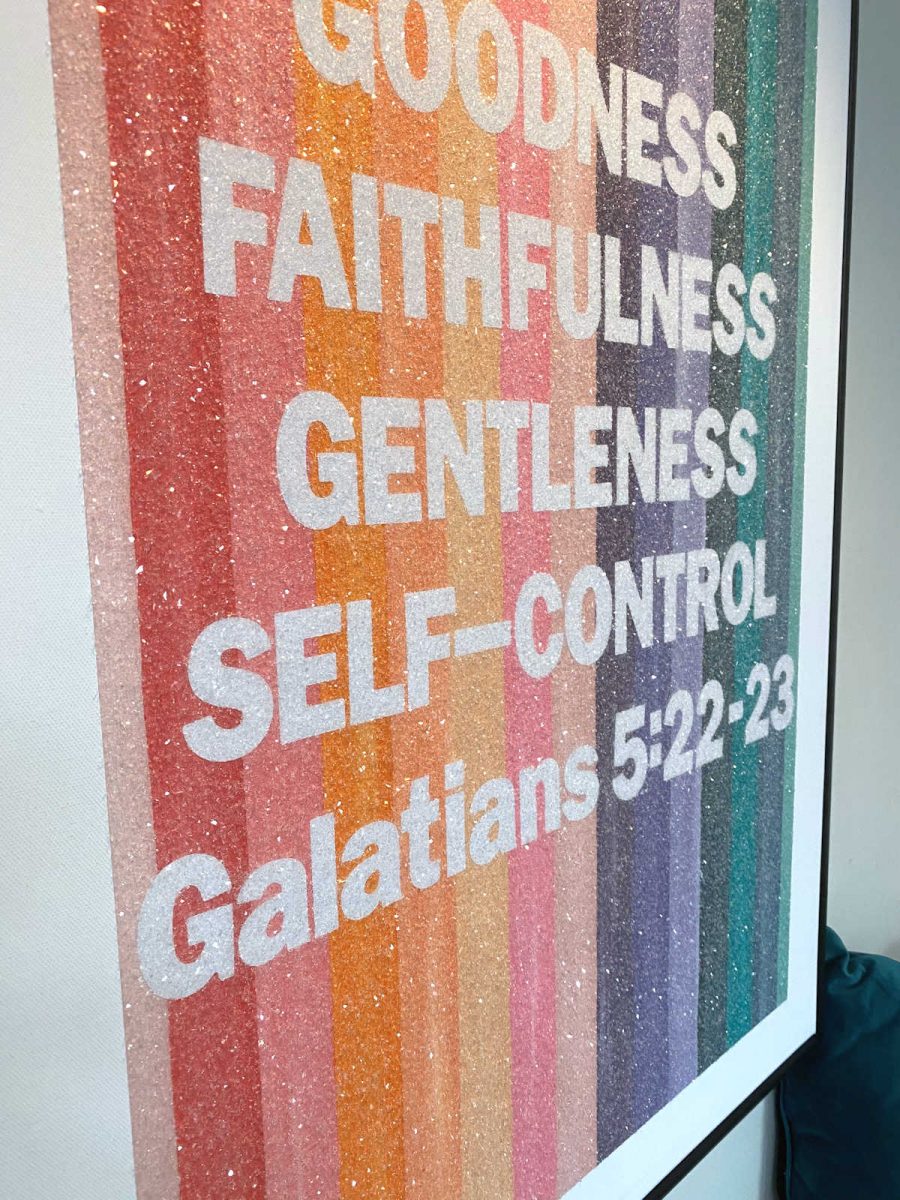
Anyway, I made two 24″ x 36″ canvases, and I wanted to do something different from just “LOVE” or other single words. So I decided to do something from one of my favorite Bible passages in Galatians that lists the fruit of the spirit: love, joy, peace, patience, kindness, goodness, faithfulness, gentleness, and self-control. Those are words that have more of a meaning for Matt and me, and I figured those are good things to be reminded of throughout each day.
I divided the words up into two canvases, and here’s how the second one turned out…
*Sigh* I so wish y’all could see these in person. The beauty of cut glass glitter simply cannot be captured on an image.
But anyway, let me show you the process.
I started off with a 24″ x 36″ canvas that I got on sale at Michael’s. Using 1.5″ painters tape, I taped off the edges and wrapped it around to the front of the canvas.
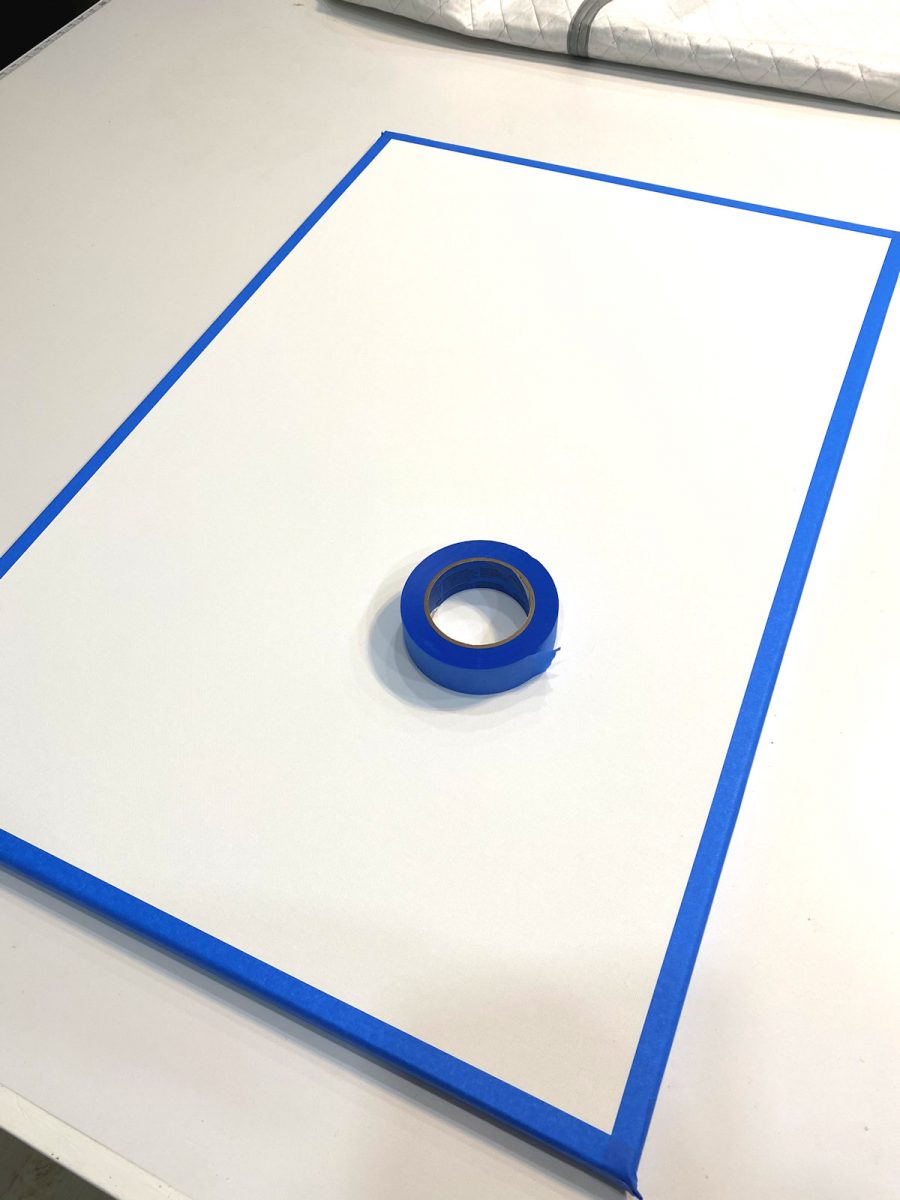
Then I used a second row of tape to create a white border around the edges of the canvas.
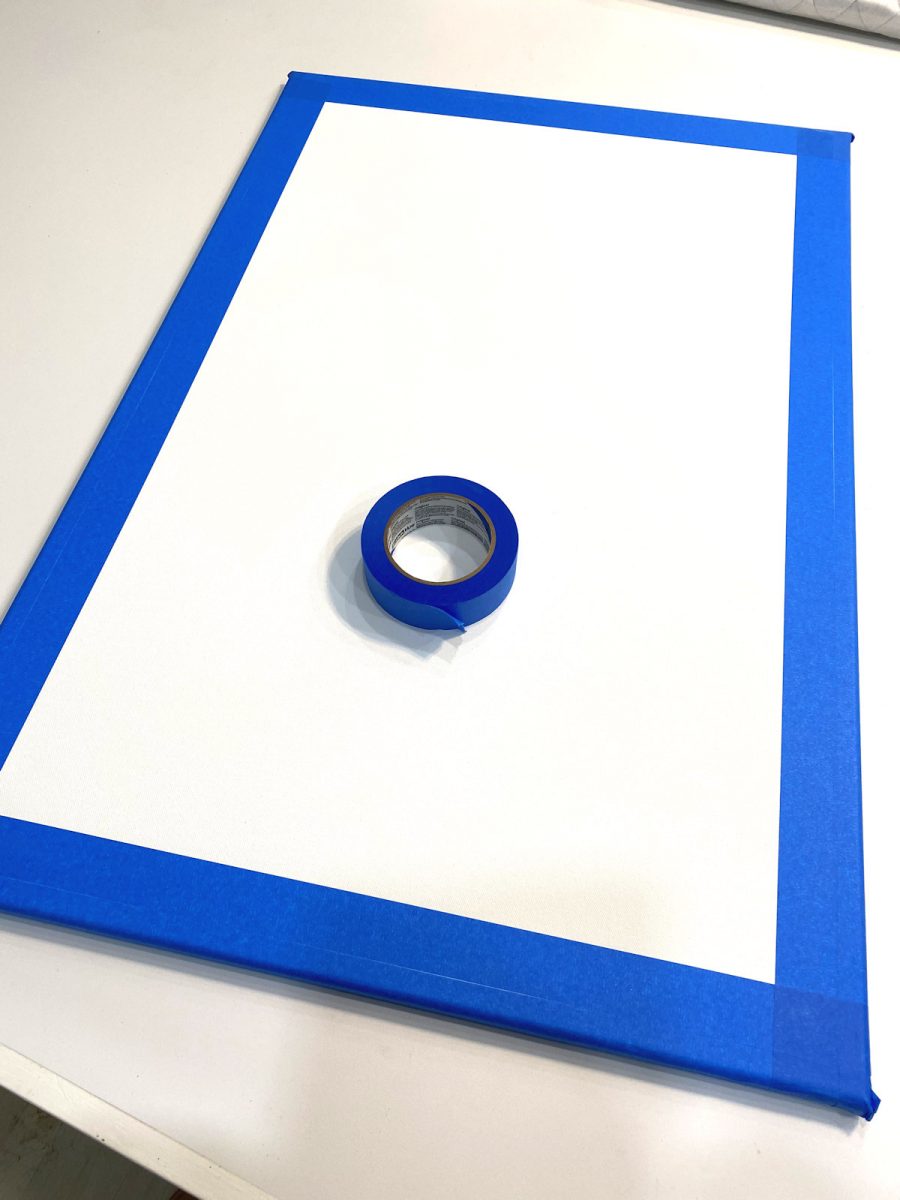
Next, I used that same painters tape to create stripes. I had already arranged my 15 paint colors in the order I wanted to use them. I used a combination of Behr sample paints, craft acrylic paints, and art acrylic paints, all of which I already had on hand. And then I started painting every other stripe.
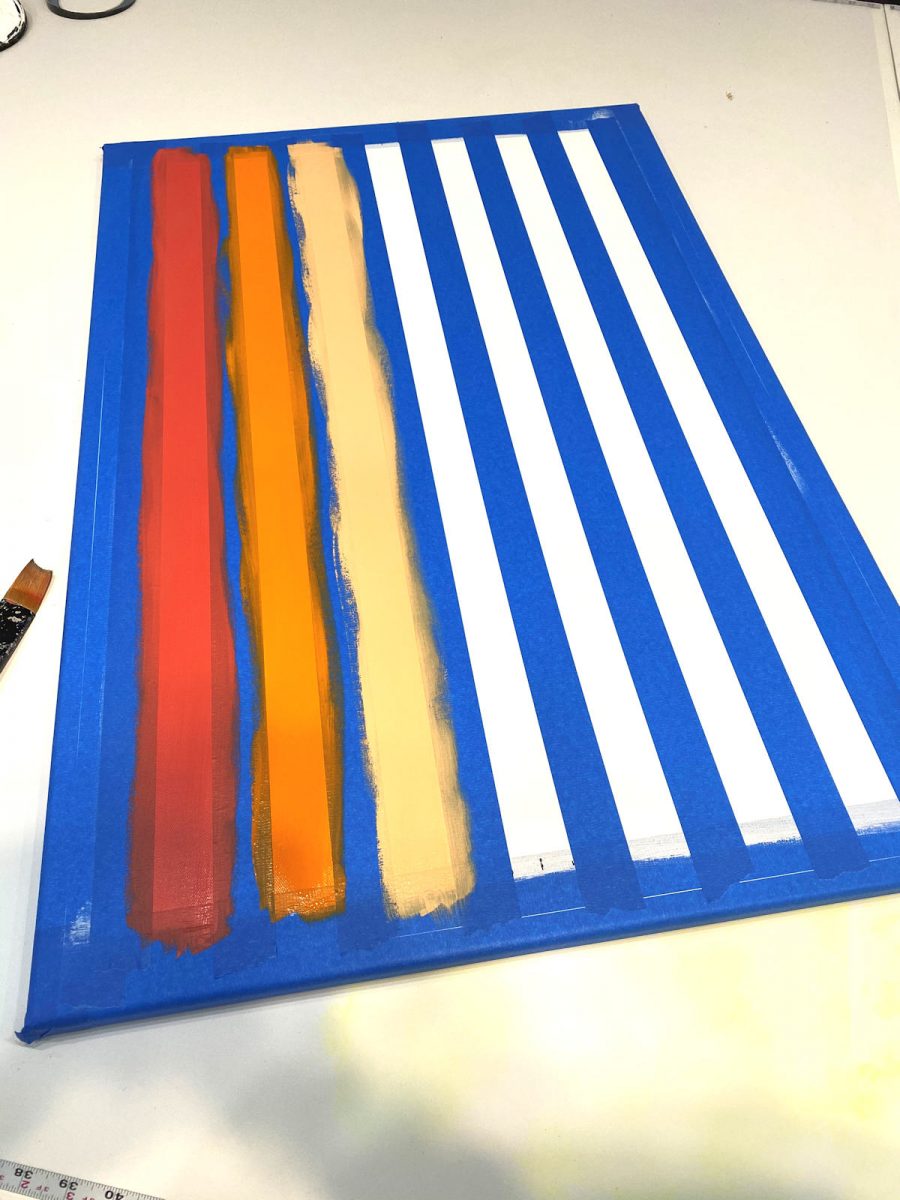
Once I had every other stripe painted, I removed the tape and painted in the rest of the stripes. I didn’t retape anything, because I didn’t want the stripes to be perfect. I wanted a very freehand, imperfect look.
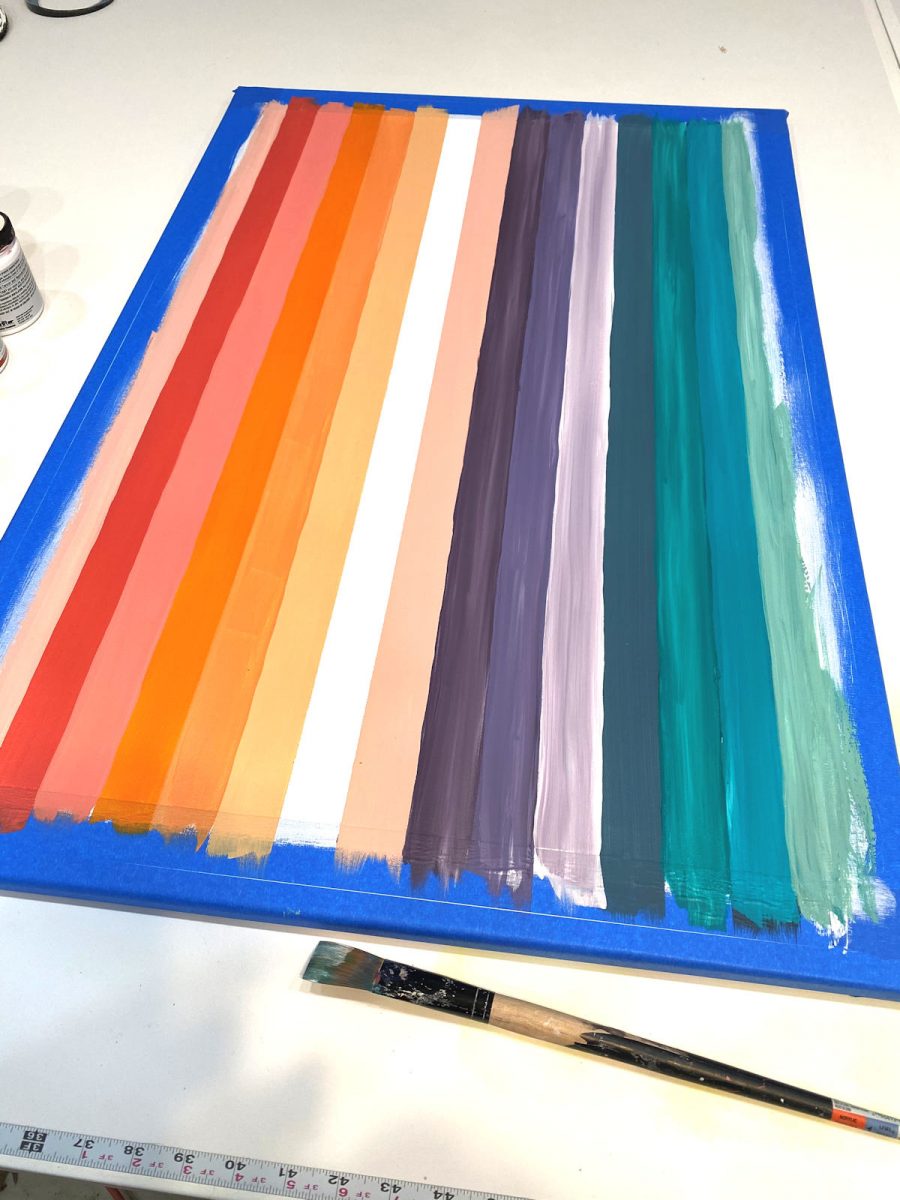
Once all of the stripes had two coats of paint, I went back and added more wet paint to each stripe, and then streaked in some white paint. You can see the difference below, where the stripes on the right have the white painted streaked through, but the stripes on the left do not.
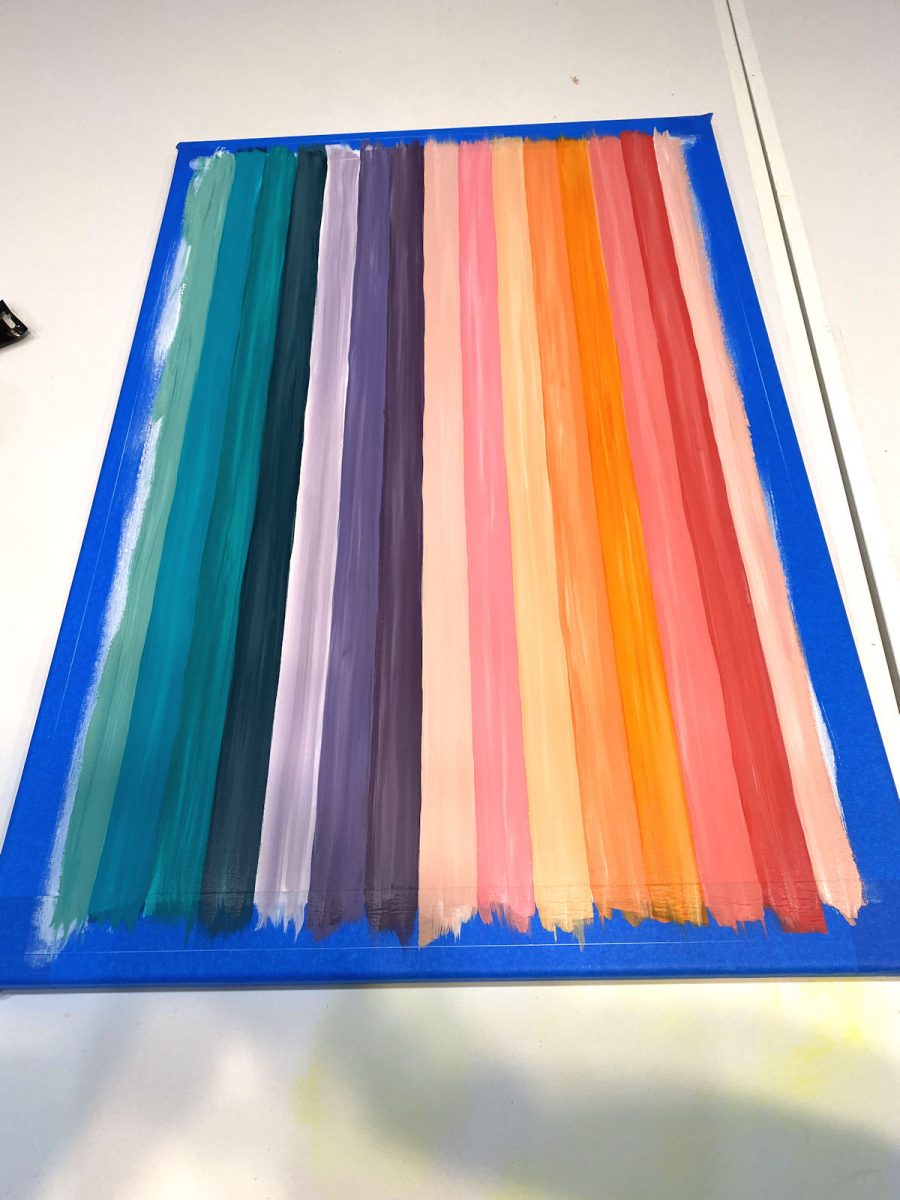
And here’s how it looked once all of the stripes had the white added to them.
Next, I used some 1/4″ tape to tape off where I wanted the words to go.
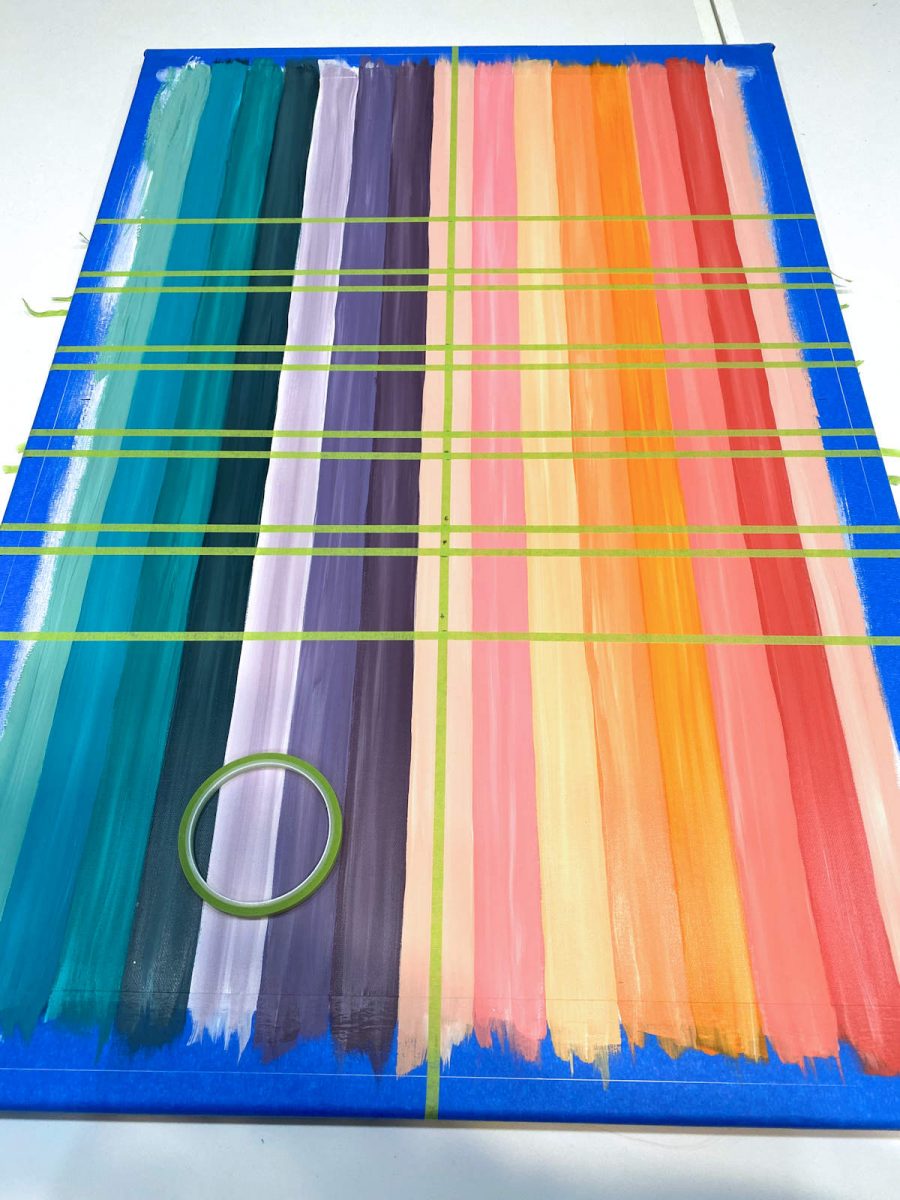
I had to search for these letters, but finally found them at Hobby Lobby in the scrapbooking section. So using the taped off lines, I added all of the words, trying to keep the spacing as consistent as possible. The letters were repositionable, so that was helpful.
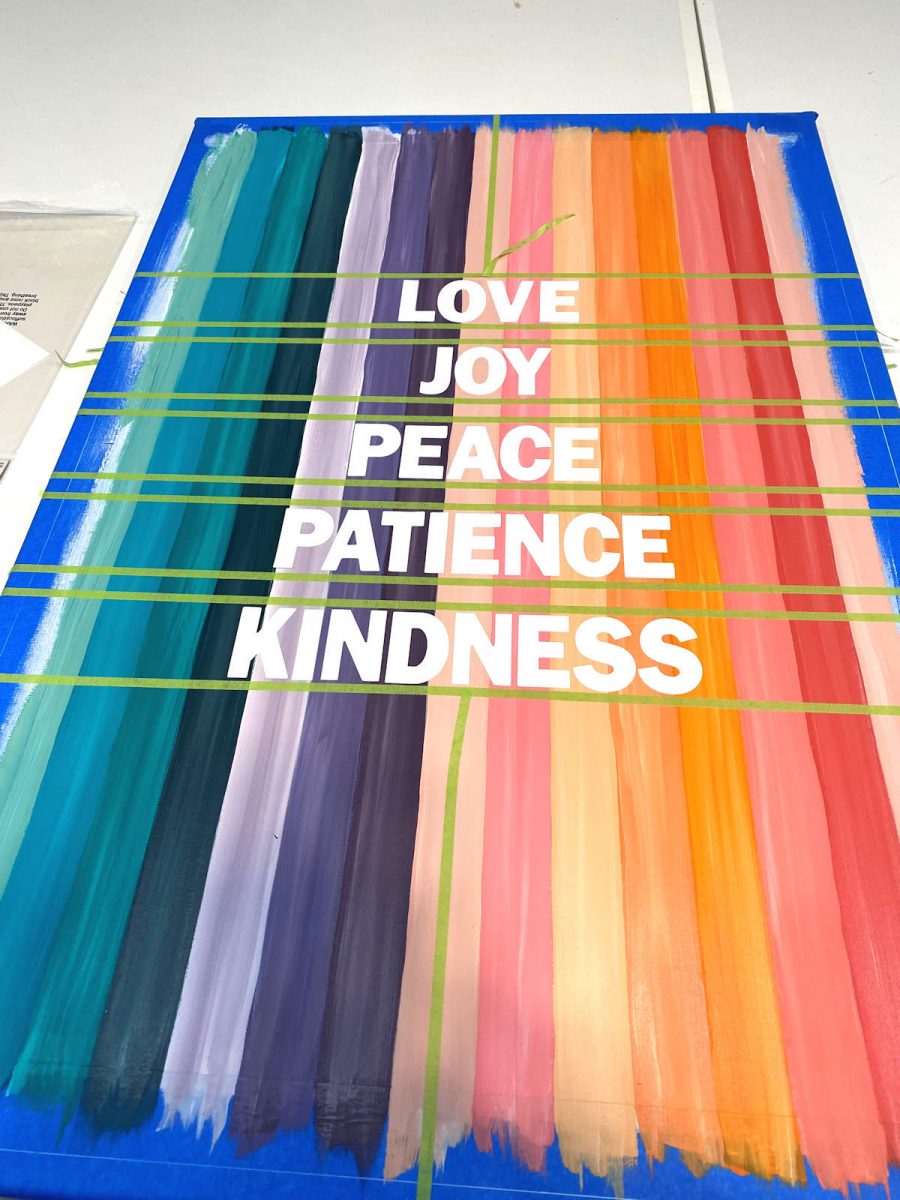
And here’s how it looked once the tape was removed…
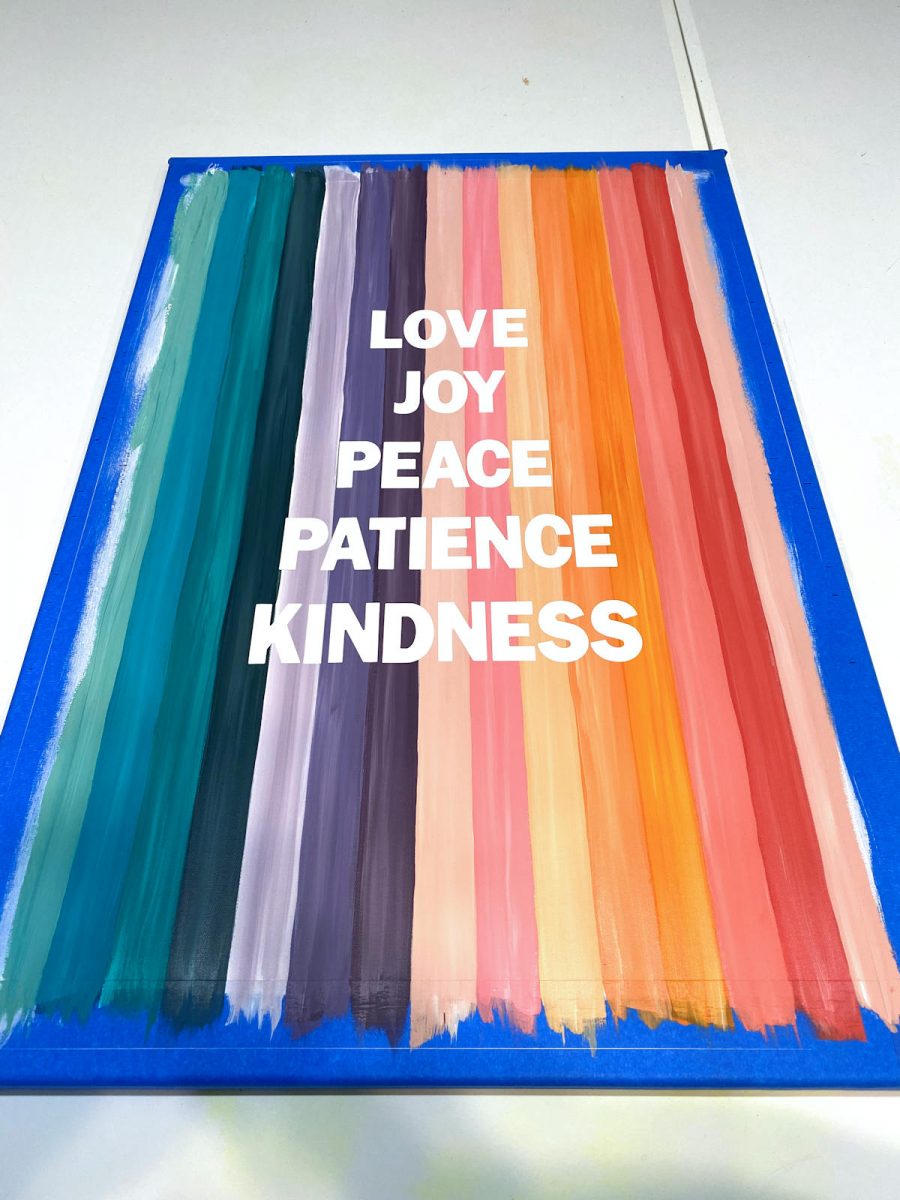
In hindsight, I wish I had spaced the letters a little more, but I only realized that after the glitter was on, so it was too late.
And speaking of glitter, I used a foam brush to spread original Mod Podge over the entire surface of the canvas, and then sprinkled a generous amount of glitter over the whole thing.
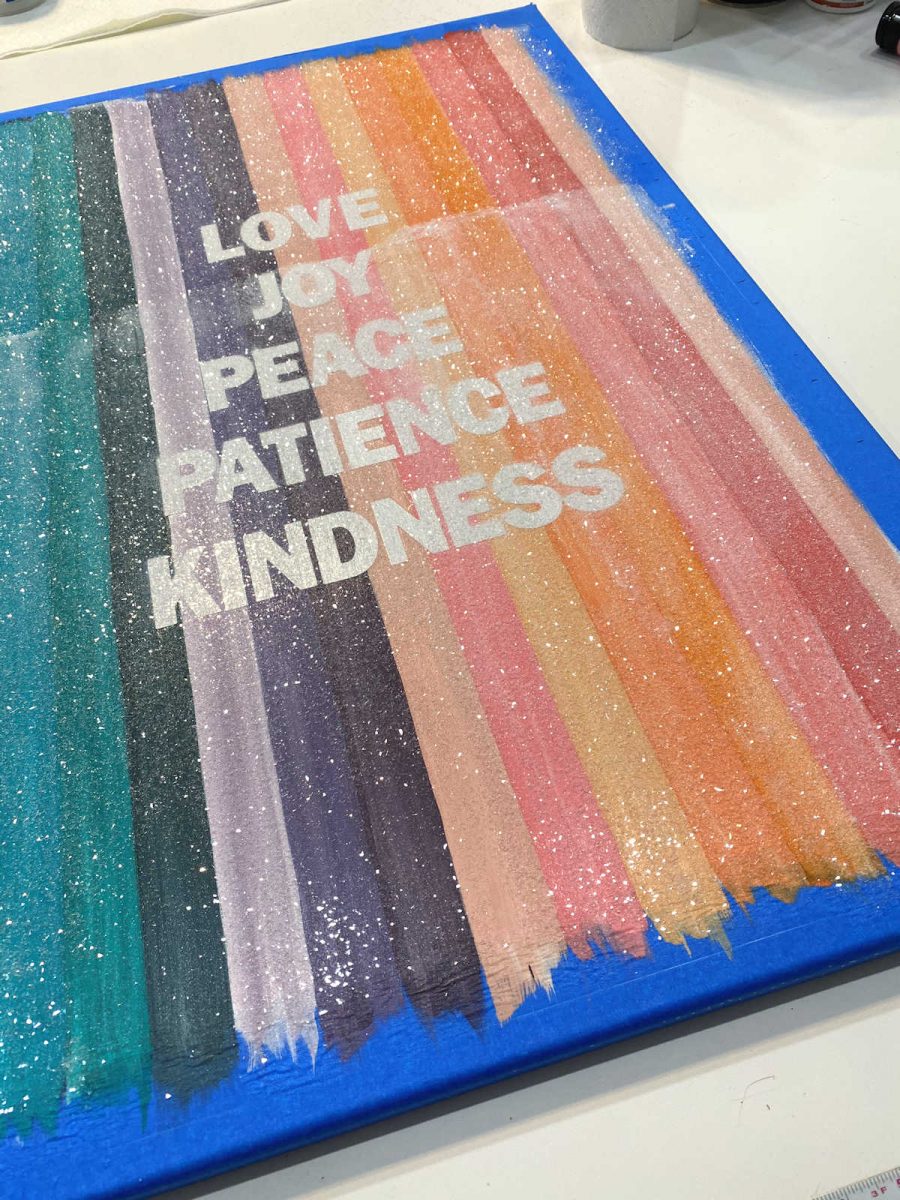
The first one was tricky because I didn’t really know what to expect. The Mod Podge dries (or becomes sticky) really fast, so on the first one, I ended up with that line just over “Joy” where you can see the Mod Podge was too thick. But it was already too sticky for me to spread it out more without making a bigger mess. Fortunately, it dried clear, but I can still see a difference in that area.
On the second one, I added a tiny amount of water to thin the Mod Podge, and that went much better. I still had to work very quickly, but I was able to get the Mod Podge on the whole thing very evenly, and then quickly get the glitter over the whole thing before any of it dried out.
After sprinkling the glitter on, I spent a few minutes pressing it down with my hands and making sure it was spread evenly (again…carefully…because it’s glass and will cut into your skin), and then I poured off the excess glitter (such an incredibly messy process!!) and removed the tape around the edges of the canvas before the Mod Podge had time to fully dry. I didn’t want to take a chance of actually Mod Podging the tape to the canvas.
Oh, how I wish y’all could see it in person! It’s not just the sparkle of cut glass glitter that is so pretty, but it’s also the texture. It’s irregular and chunky and gorgeous.

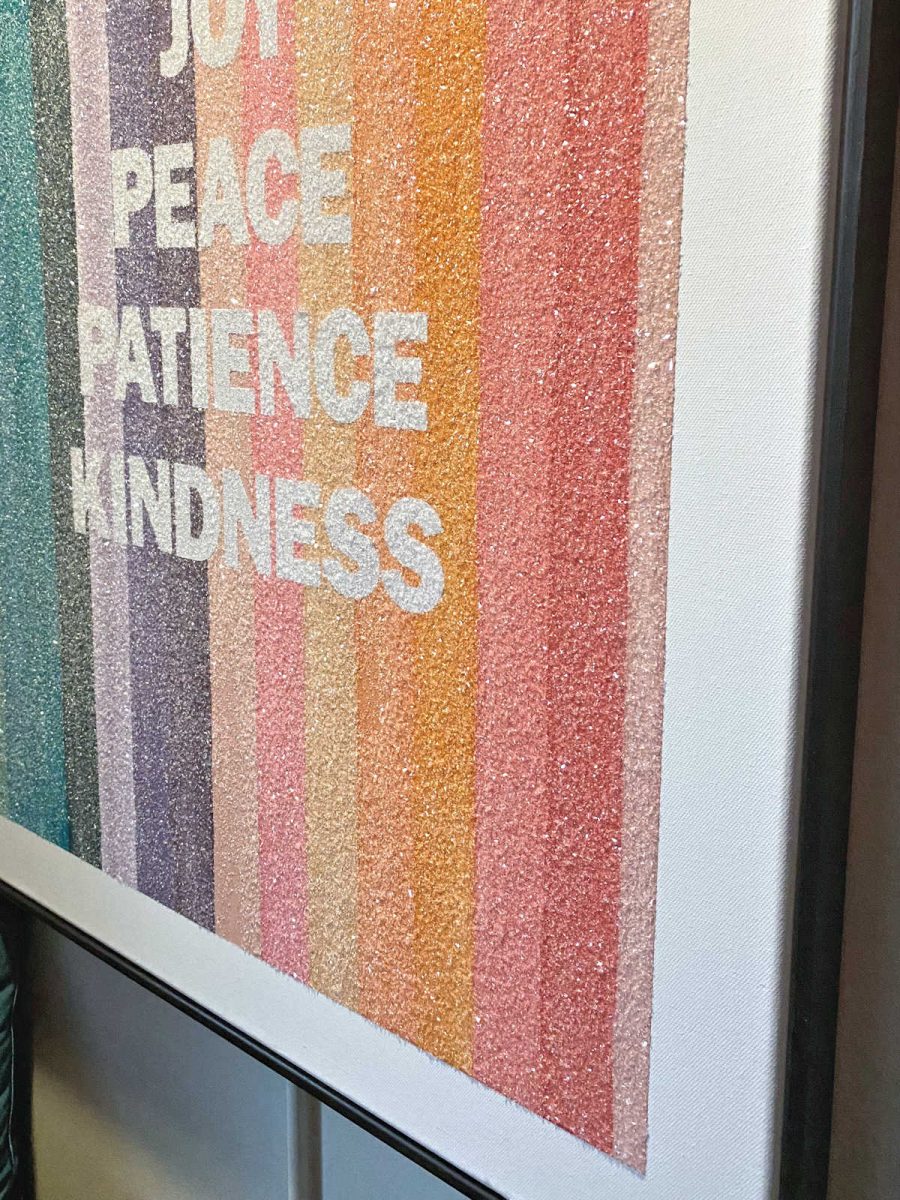
And I couldn’t help but to use my star filter app on my phone to get a picture. 😀

But even the star filter doesn’t do it justice. The glittery goodness of cut glass glitter simply must be admired in person.
But I’ll still try to get a video later and post it to my Instagram. Hopefully that’ll do it more justice than photos.

Addicted 2 Decorating is where I share my DIY and decorating journey as I remodel and decorate the 1948 fixer upper that my husband, Matt, and I bought in 2013. Matt has M.S. and is unable to do physical work, so I do the majority of the work on the house by myself. You can learn more about me here.
I hope you’ll join me on my DIY and decorating journey! If you want to follow my projects and progress, you can subscribe below and have each new post delivered to your email inbox. That way you’ll never miss a thing!