This past weekend, I focused mainly on finishing the DIY chest of drawers for our master bathroom. And while I got the bulk of the project finished, the rest of it is going to have to wait a few days. But I’ll explain all of that in a minute.
This is the second post about this project. If you missed the first post, you can click here to read it: DIY Chest Of Drawers — Part 1 (Walnut Storage Cabinet For Our Bathroom)
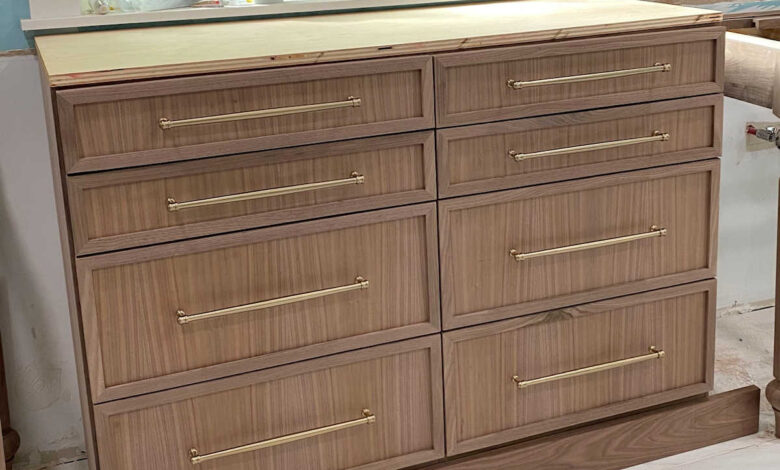
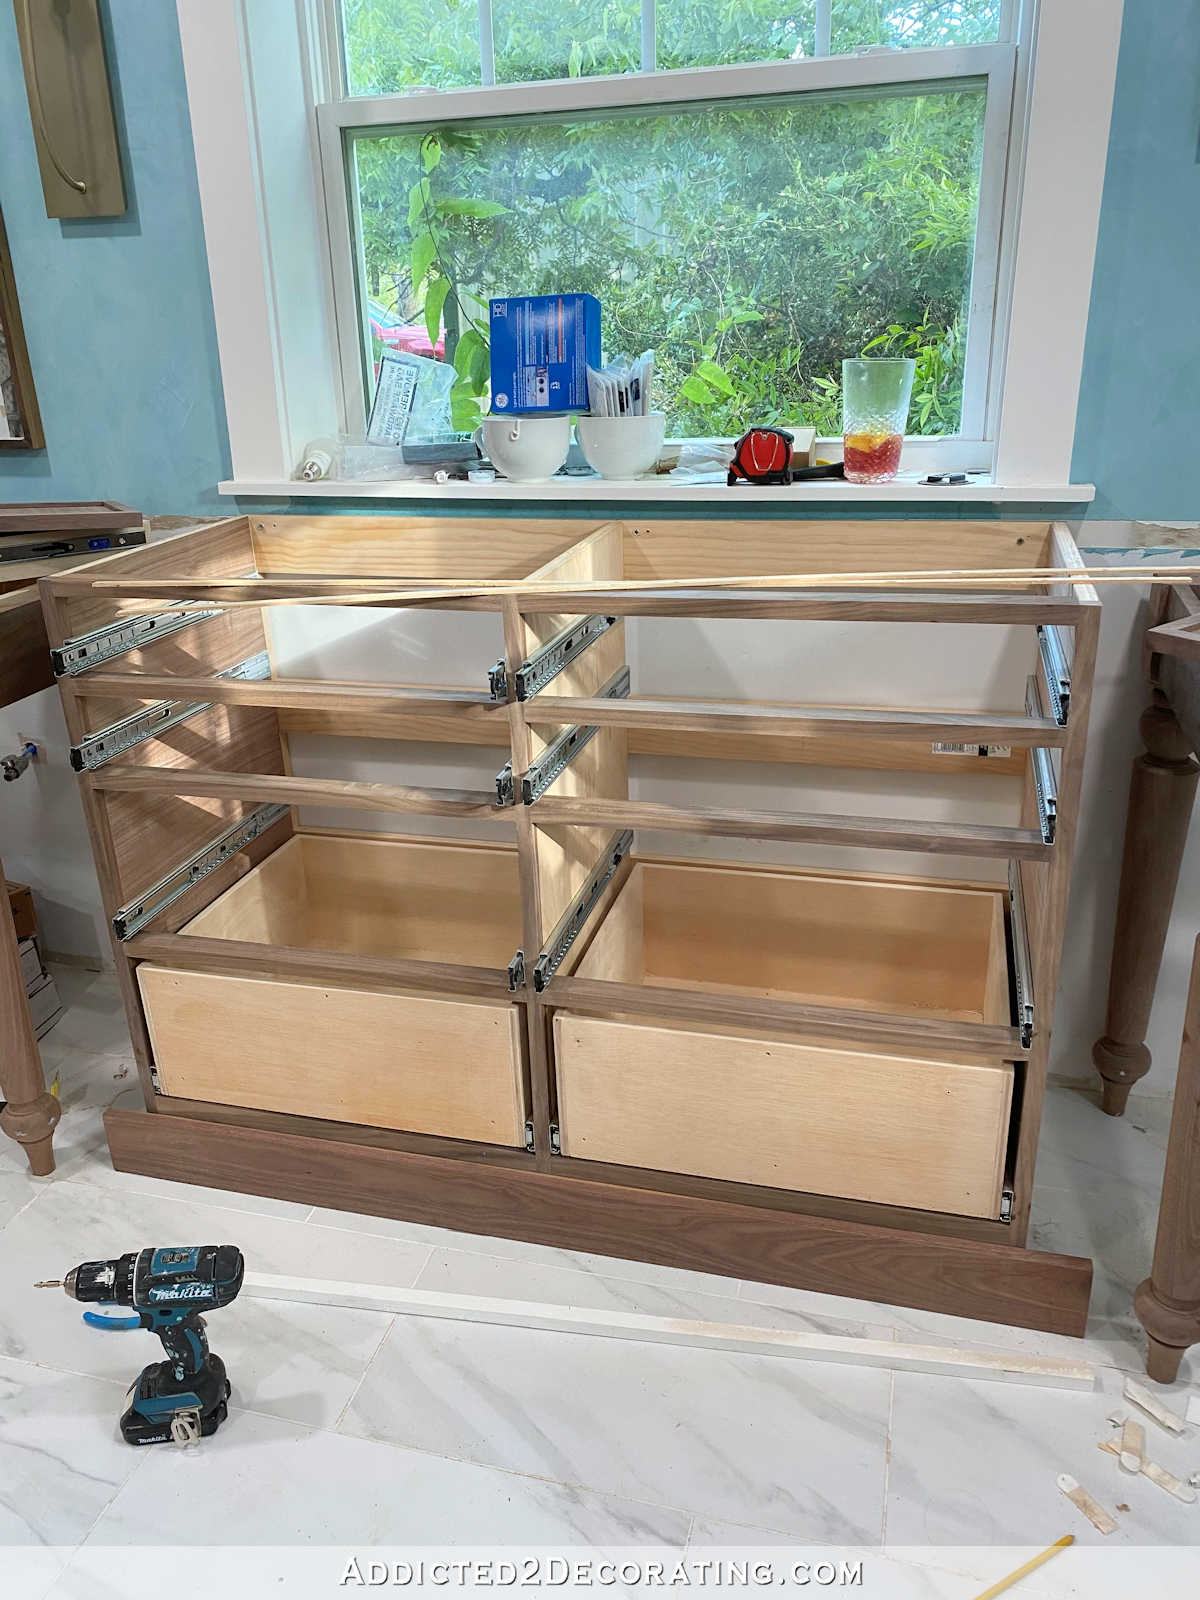
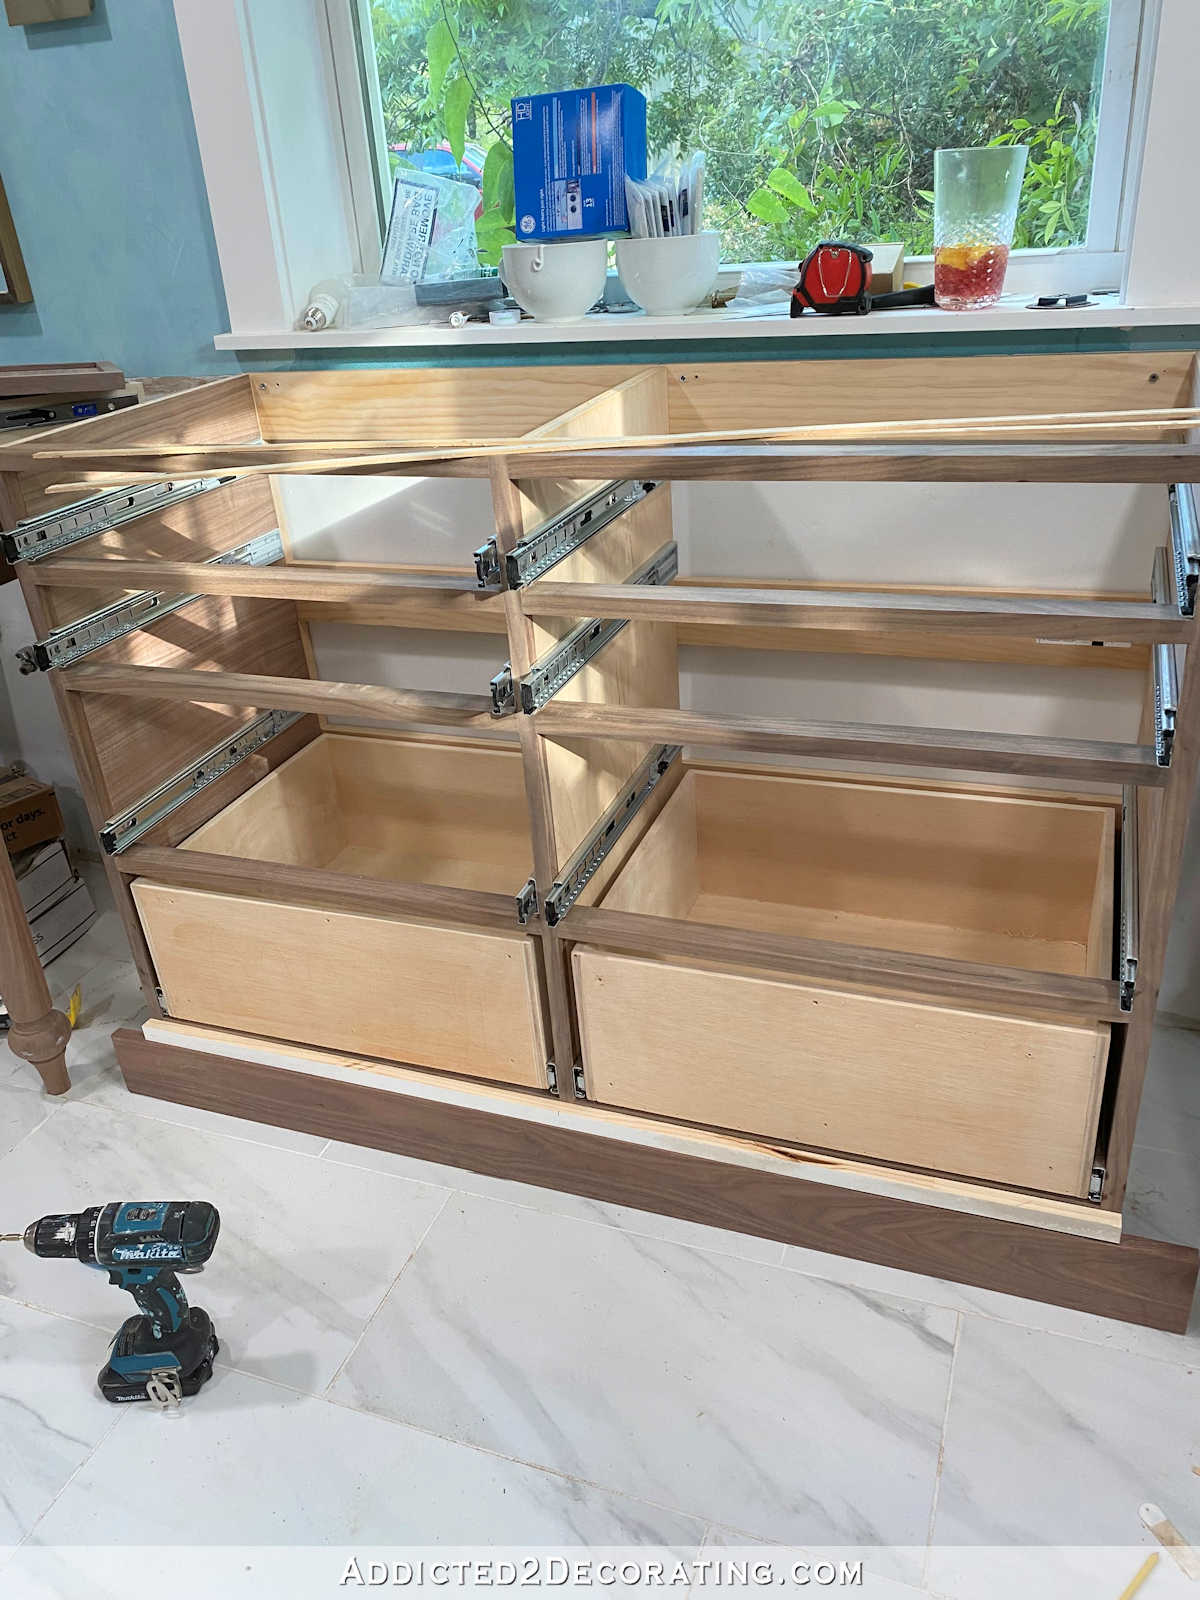
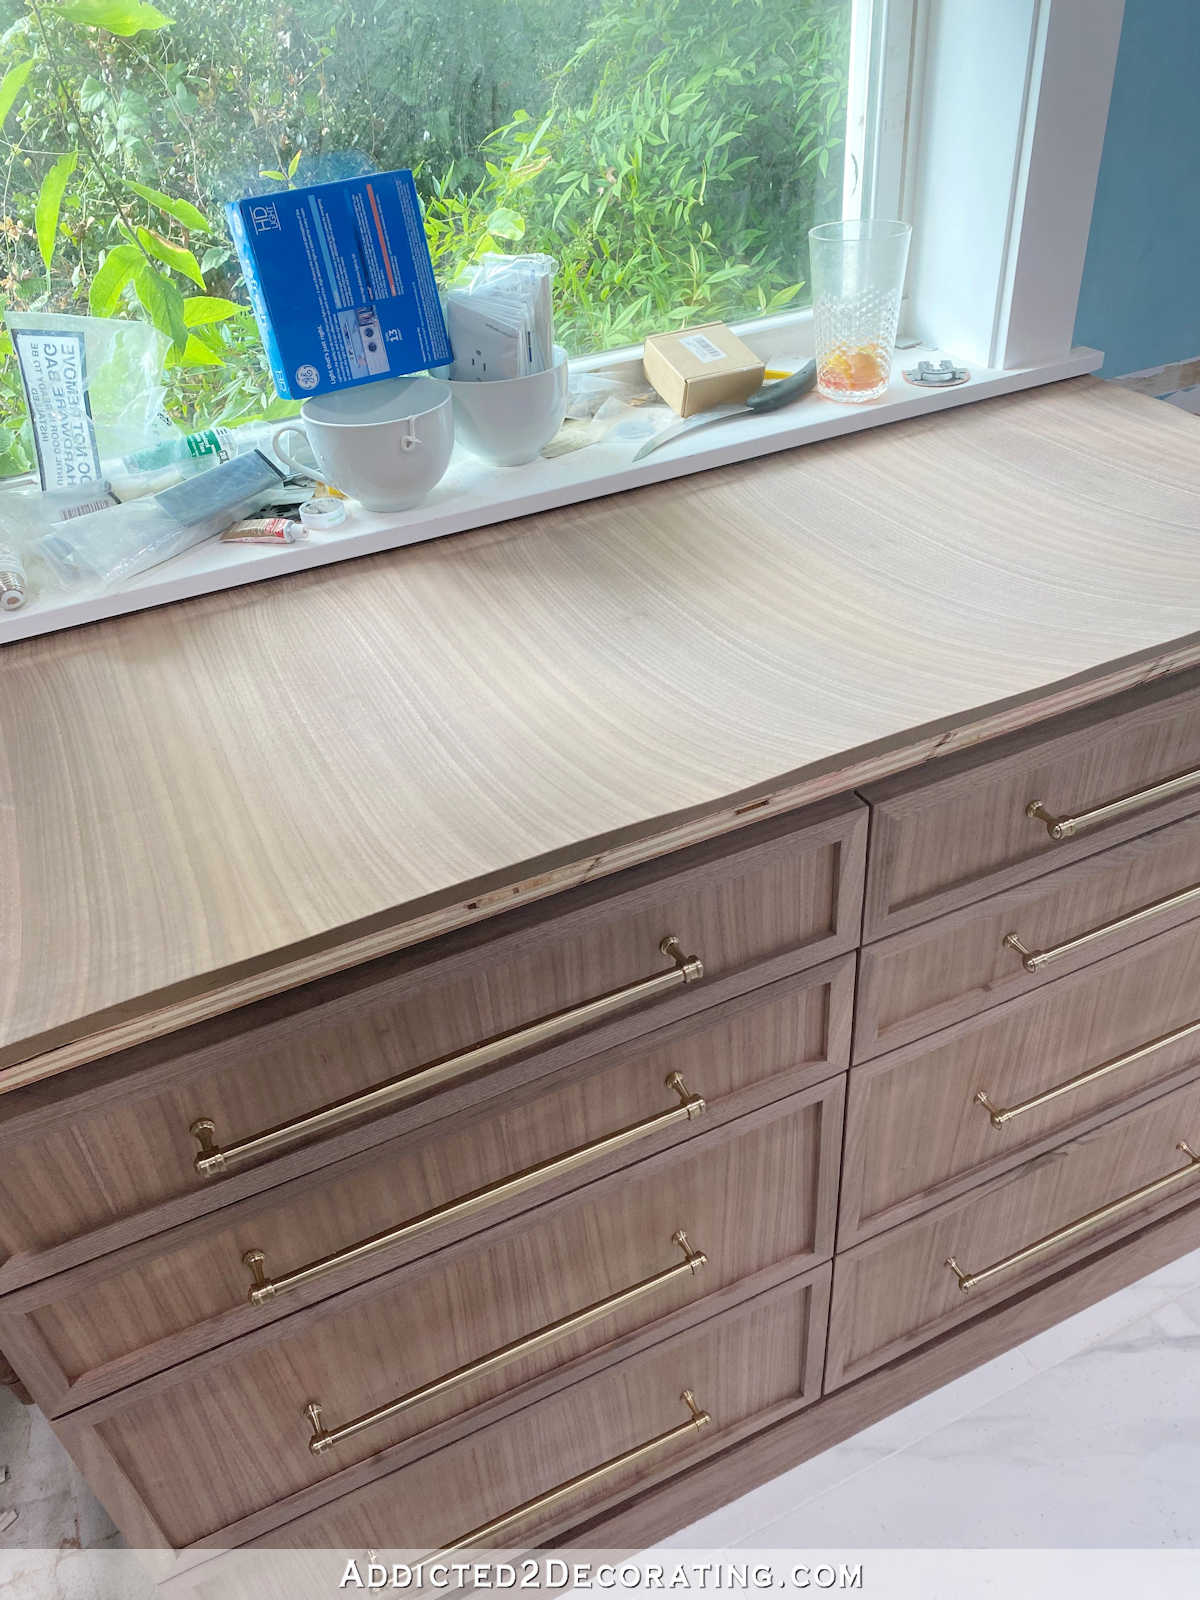
So let me show you how this walnut cabinet looks at this point…
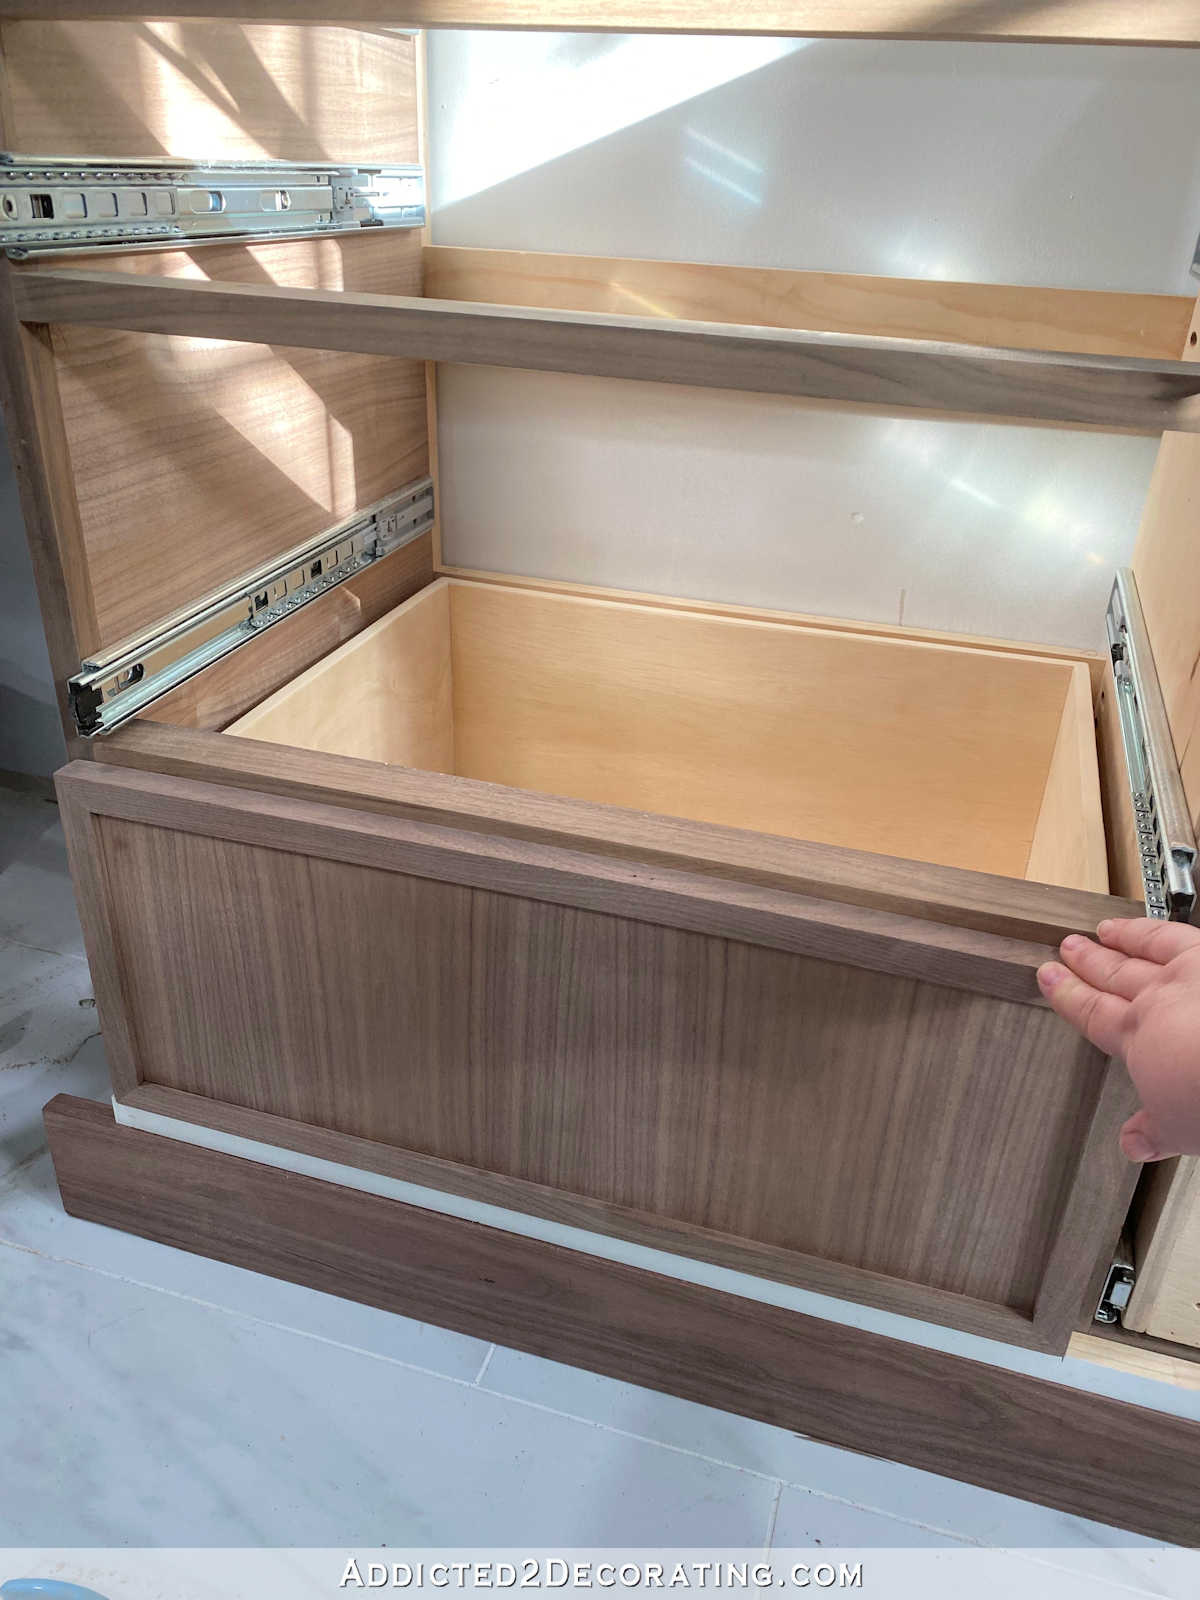
I still need to finish the top and attach the trim along the bottom, but I got the hardest part of the project done. I finished the drawer fronts, got them attached to the drawer boxes, and then installed the drawer pulls.
The Part 1 post about this project doesn’t include info about how I built the drawer fronts because I already covered that info in the post about the DIY table-style vanity. You can click here to read about that:
DIY Table-Style Bathroom Vanity With Drawers – Finished! (Part 2 — Making The Drawer Fronts)
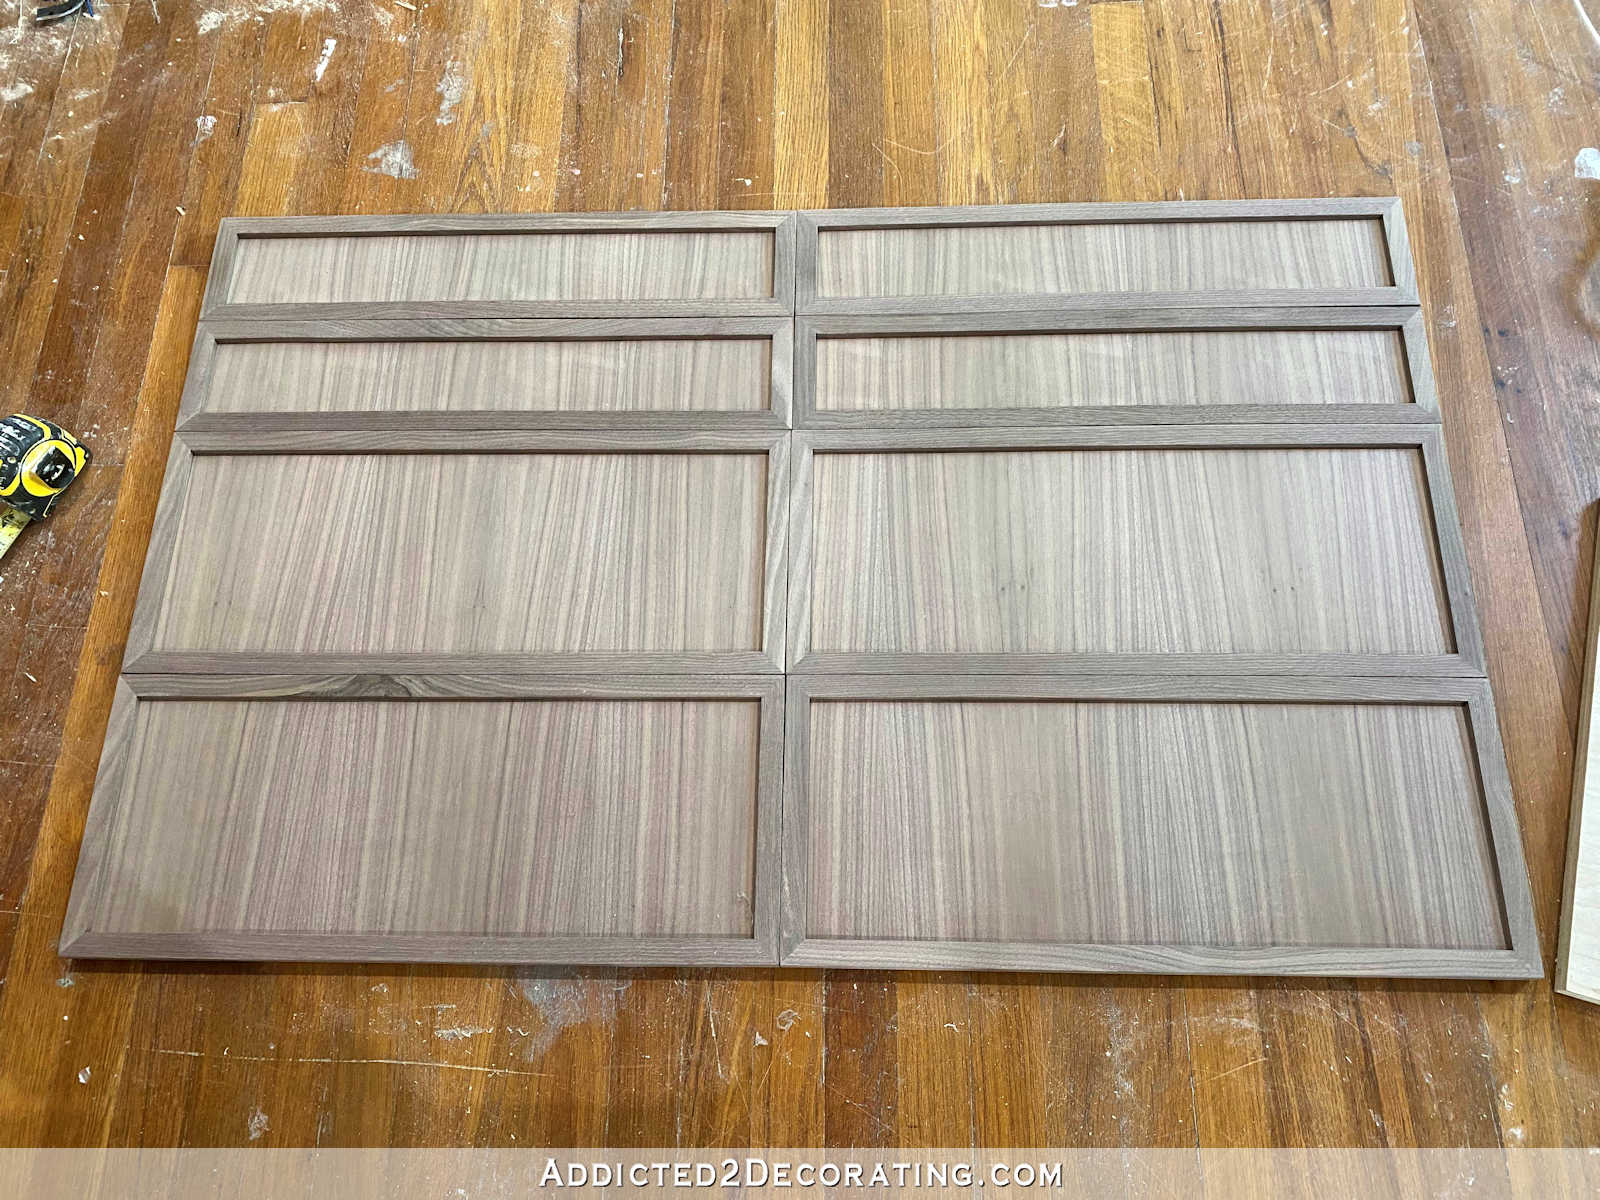
I followed those exact steps to make the drawer fronts for the storage chest. The one additional thing that I did with these drawer fronts is cut the veneer for each drawer front so that the grain would be continuous from one drawer front to the next. I was quite proud of that little detail. 🙂
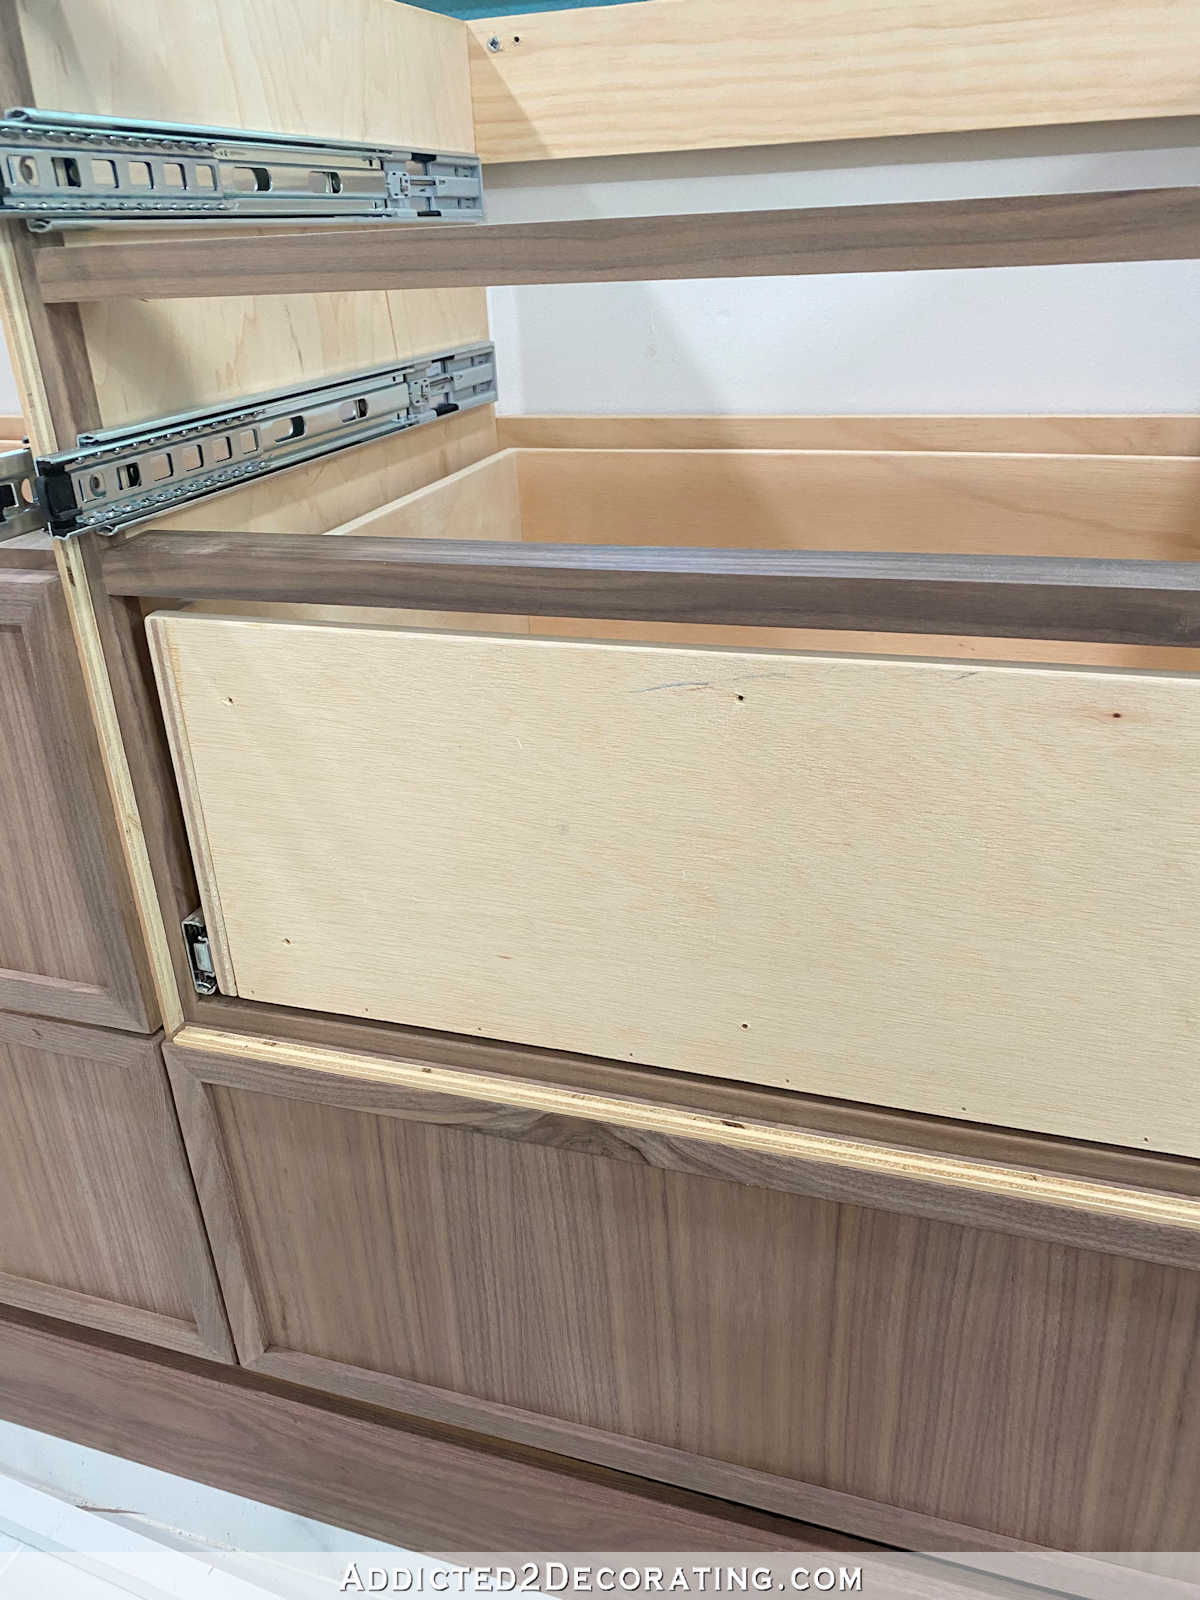
Installing these drawer fronts too me two attempts. The first attempt was a horrible failure. I thought it would be easier to place the cabinet on its back so that I could place the drawer fronts on the cabinet without having to work against gravity. I used sticky tabs to attach them, then removed the drawers and screwed the drawer fronts to the drawer boxes. I happened to have 1/8-inch tile spacers on hand, so I used those to get the proper spacing between the drawer fronts.
Well, somewhere in the process of sticking the drawer fronts on, removing the drawers, and screwing the drawer fronts to the drawer boxes, the drawer fronts shifted. The result was awful.
So after spending about two hours on that, and ending up with a complete mess, I had to undo everything I had done, and start over completely.
This time, I put the cabinet in place, and went ahead and leveled it and screwed it to the wall. And then I got the board that I’ll be using as the bottom trim and placed it at the bottom of the cabinet. I also removed all of the drawers except for the two lower drawers.
Then I used my table saw and ripped a piece of scrap wood to the width that I wanted the space to be between the bottom trim piece and the bottom edge of the bottom drawers. I think I cut it to about 3/4-inch. Then I placed that strip on top of the bottom trim piece…
And then I set the drawer front right on top of that spacer strip, lined it up horizontally so that it was in the exact place I wanted it to be, and then screwed it into place. With the other drawers removed, it was easy to reach right inside with my drill and screw through the drawer box and into the back of the drawer front.
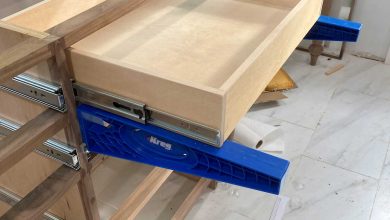
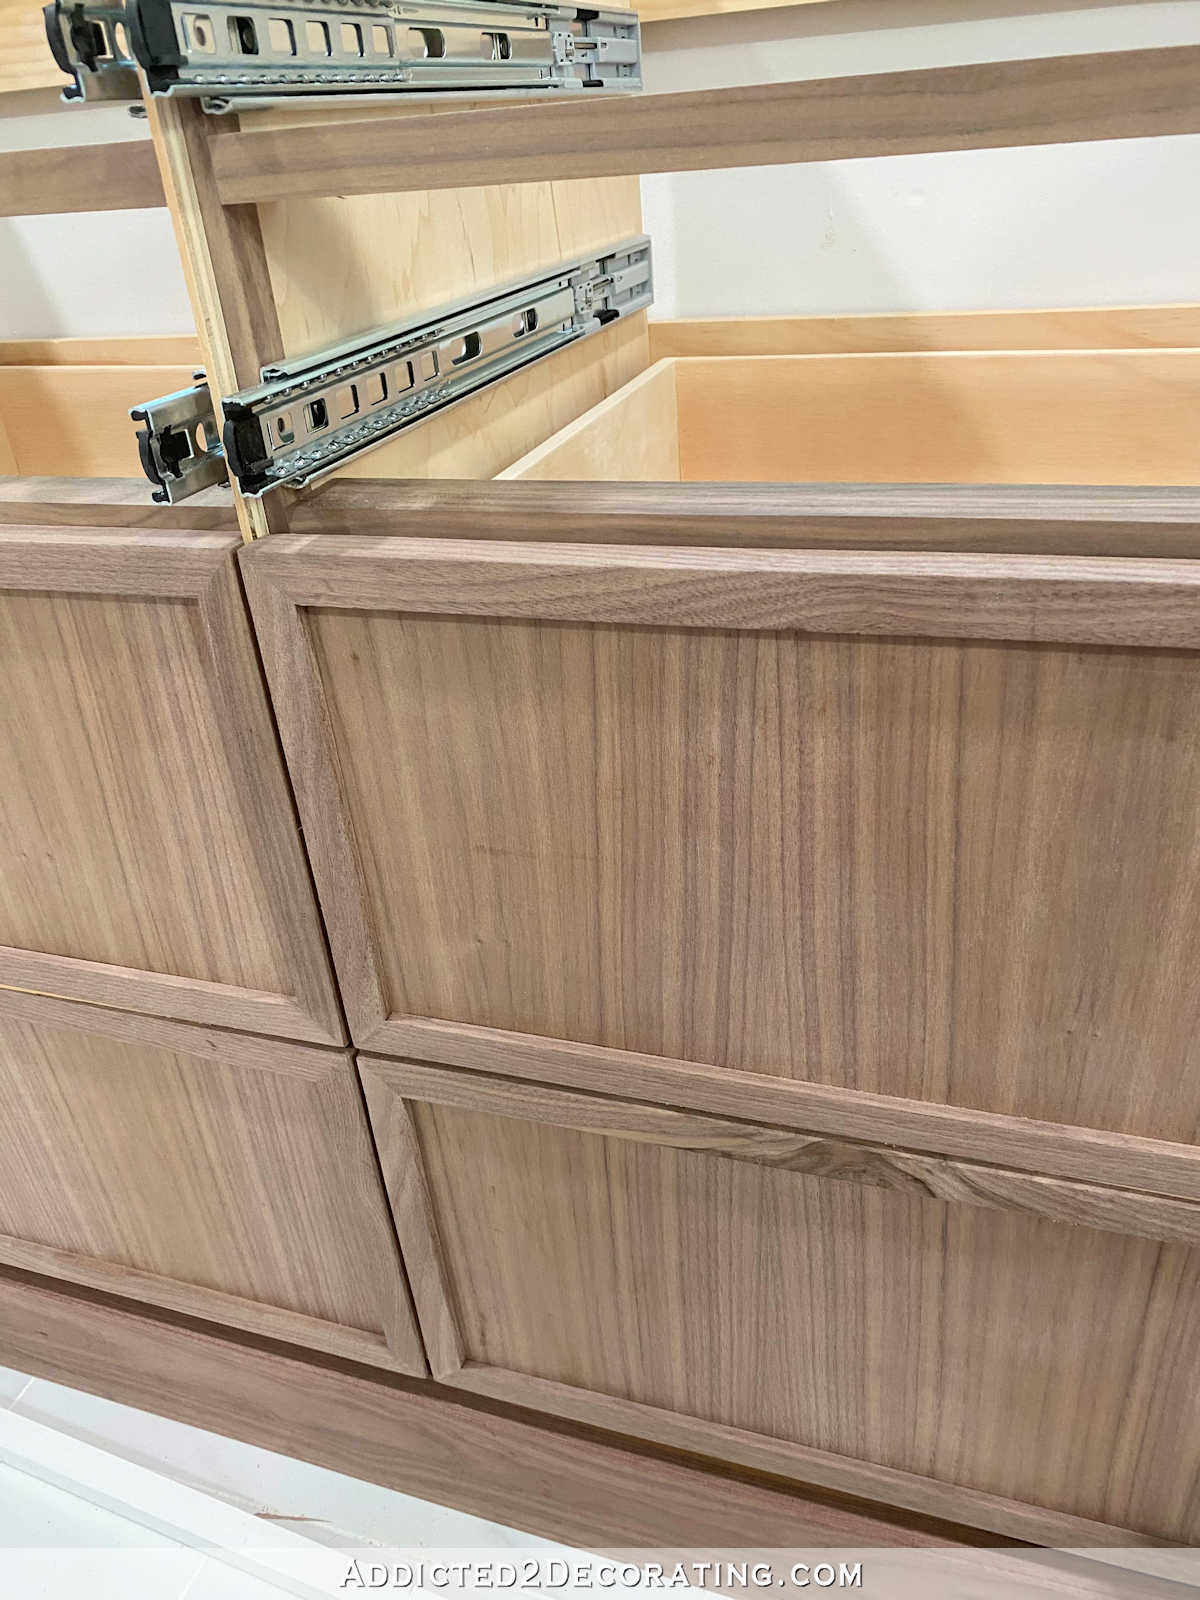
Before attaching the next drawer front, I used my table saw to rip two long strips of scrap plywood to 1/8-inch thickness.
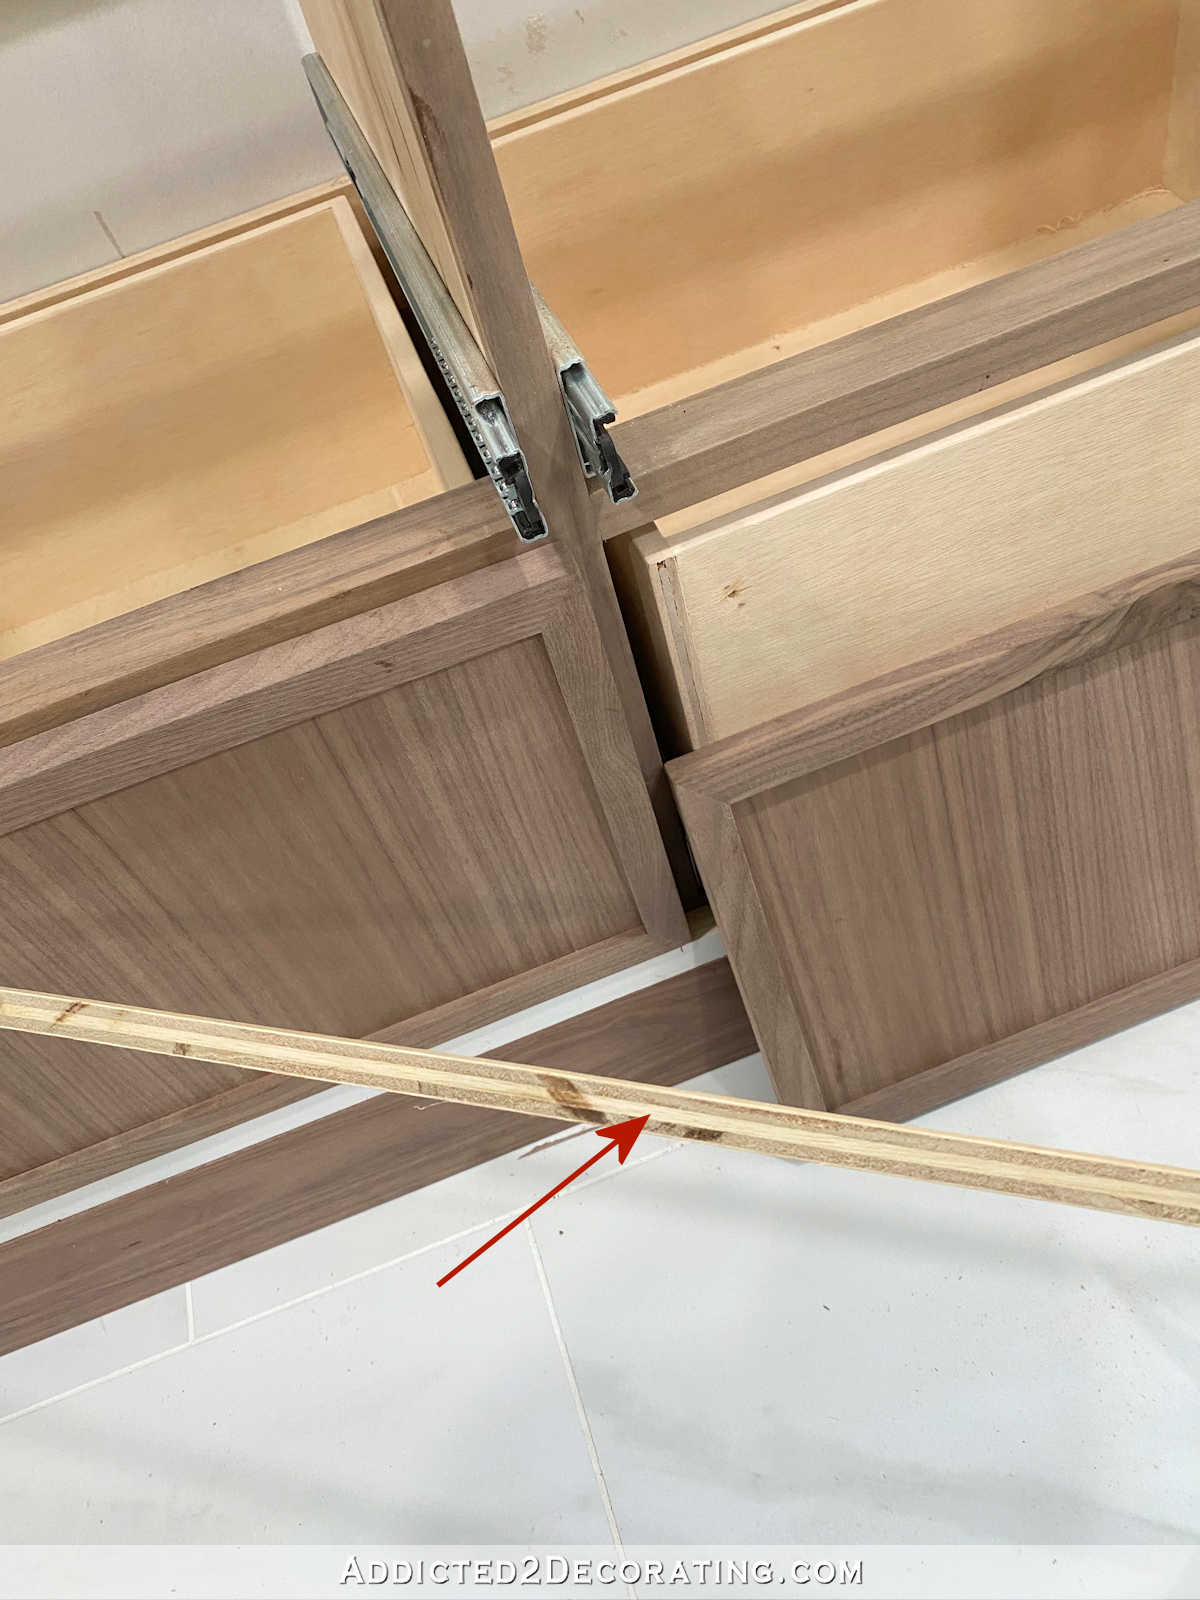
Here you can see how thick this plywood strip was…
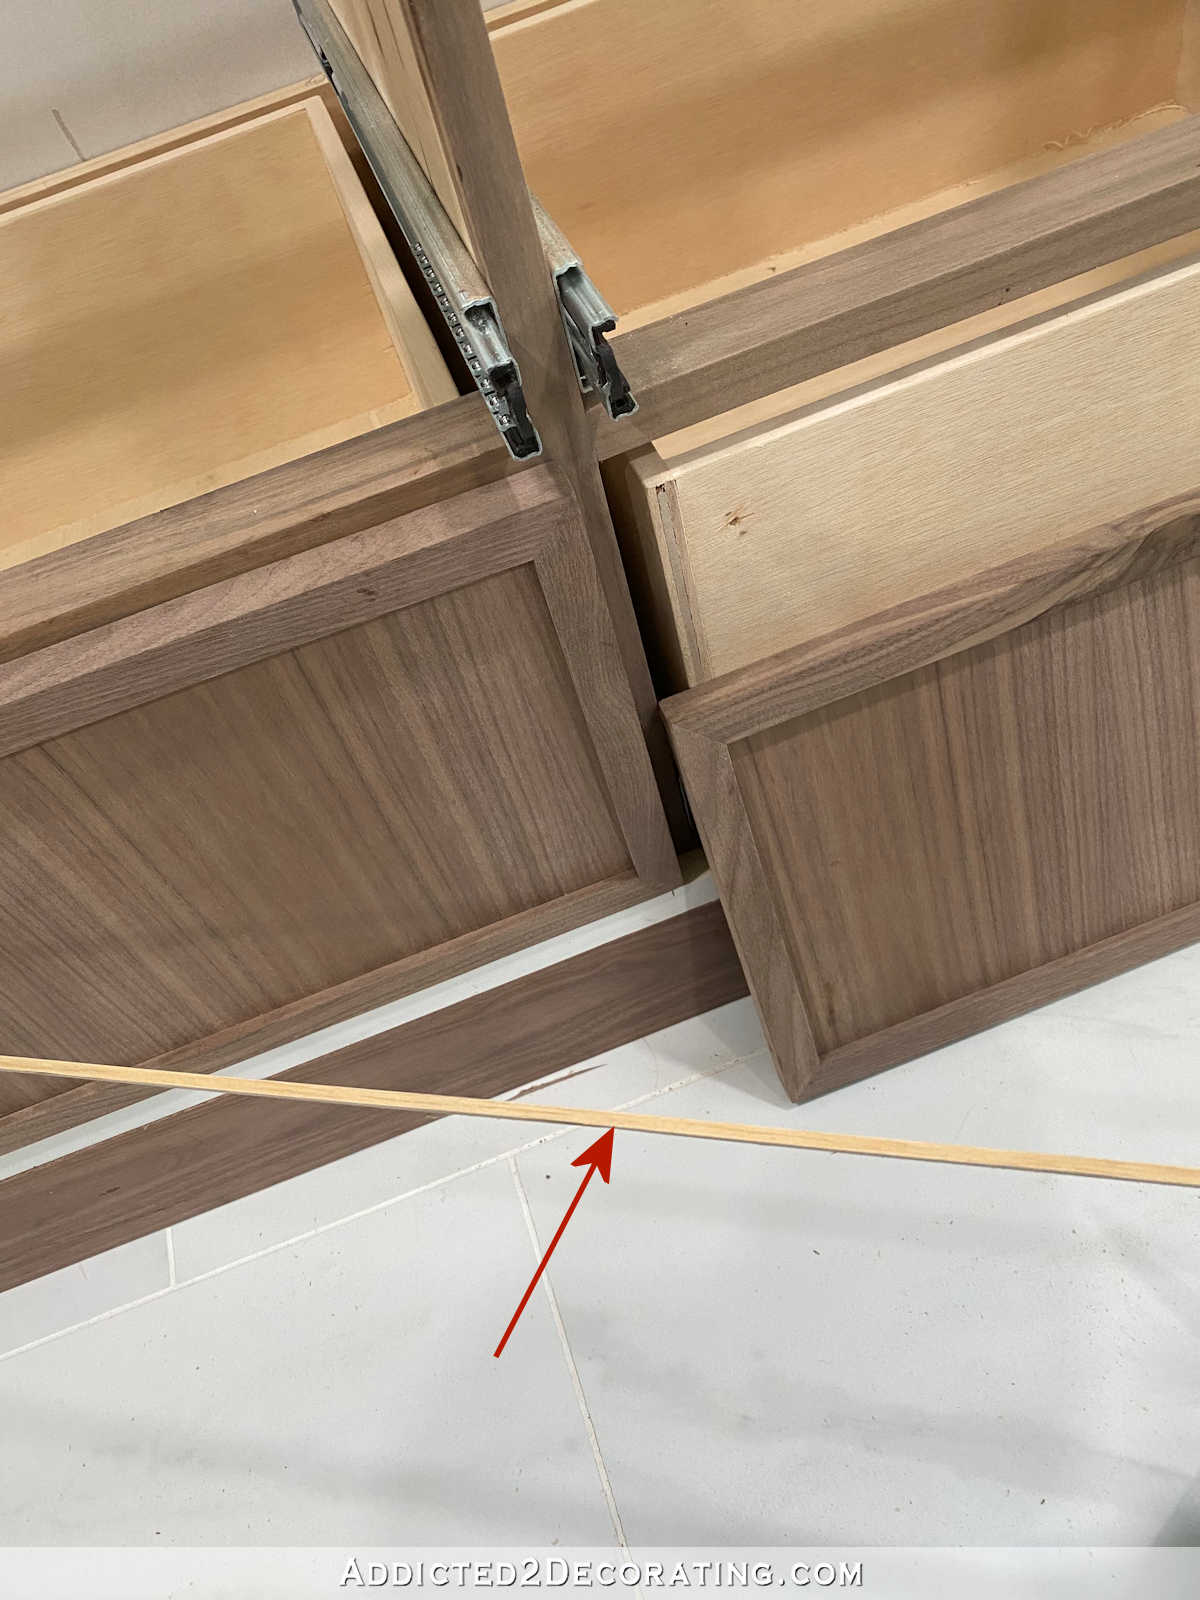
And I placed that strip vertically right next to the first drawer front that I had just attached.
Then I put the second drawer front on the lower spacer, snugged it up to that center vertical spacer, and screwed it into place.

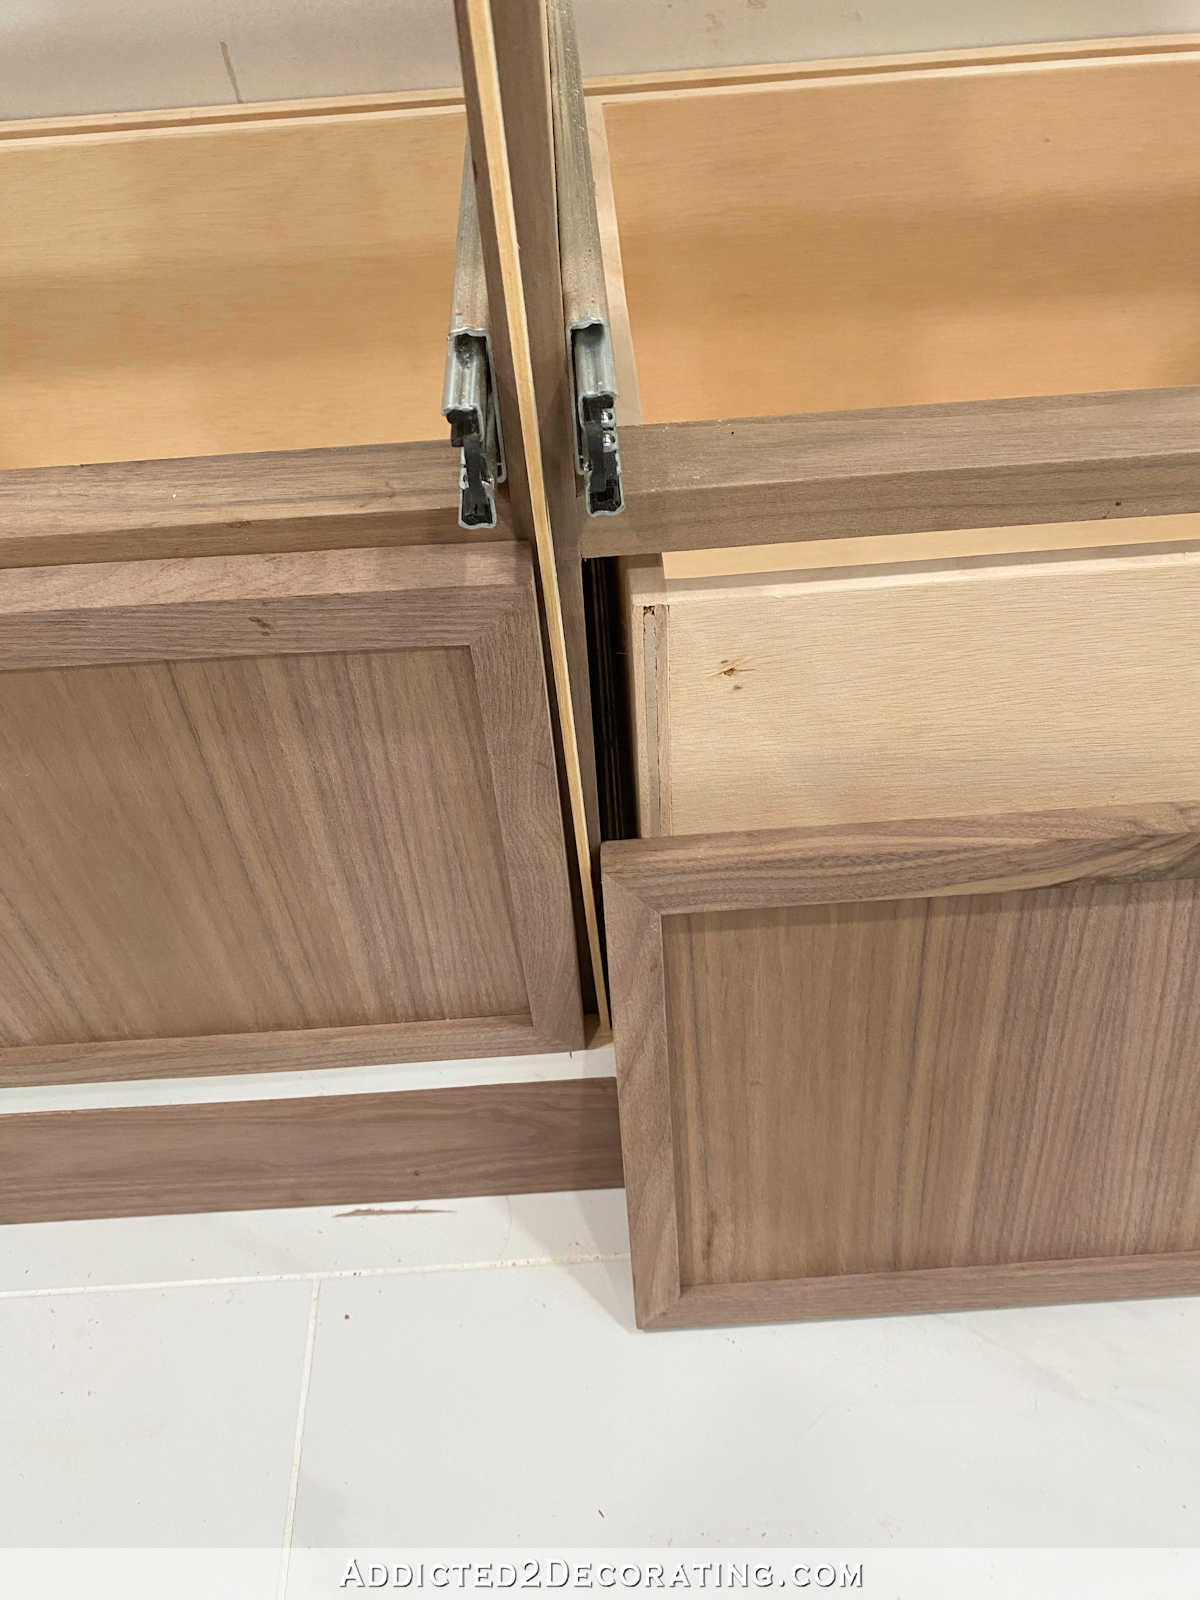
Before attaching the next row up, I placed another 1/8-inch plywood strip on top of the lower drawer fronts…
And then I continued with attaching the next row of drawer fronts, sitting the drawer front on top of the horizontal plywood spacer, and butting it up against the center vertical plywood spacer.
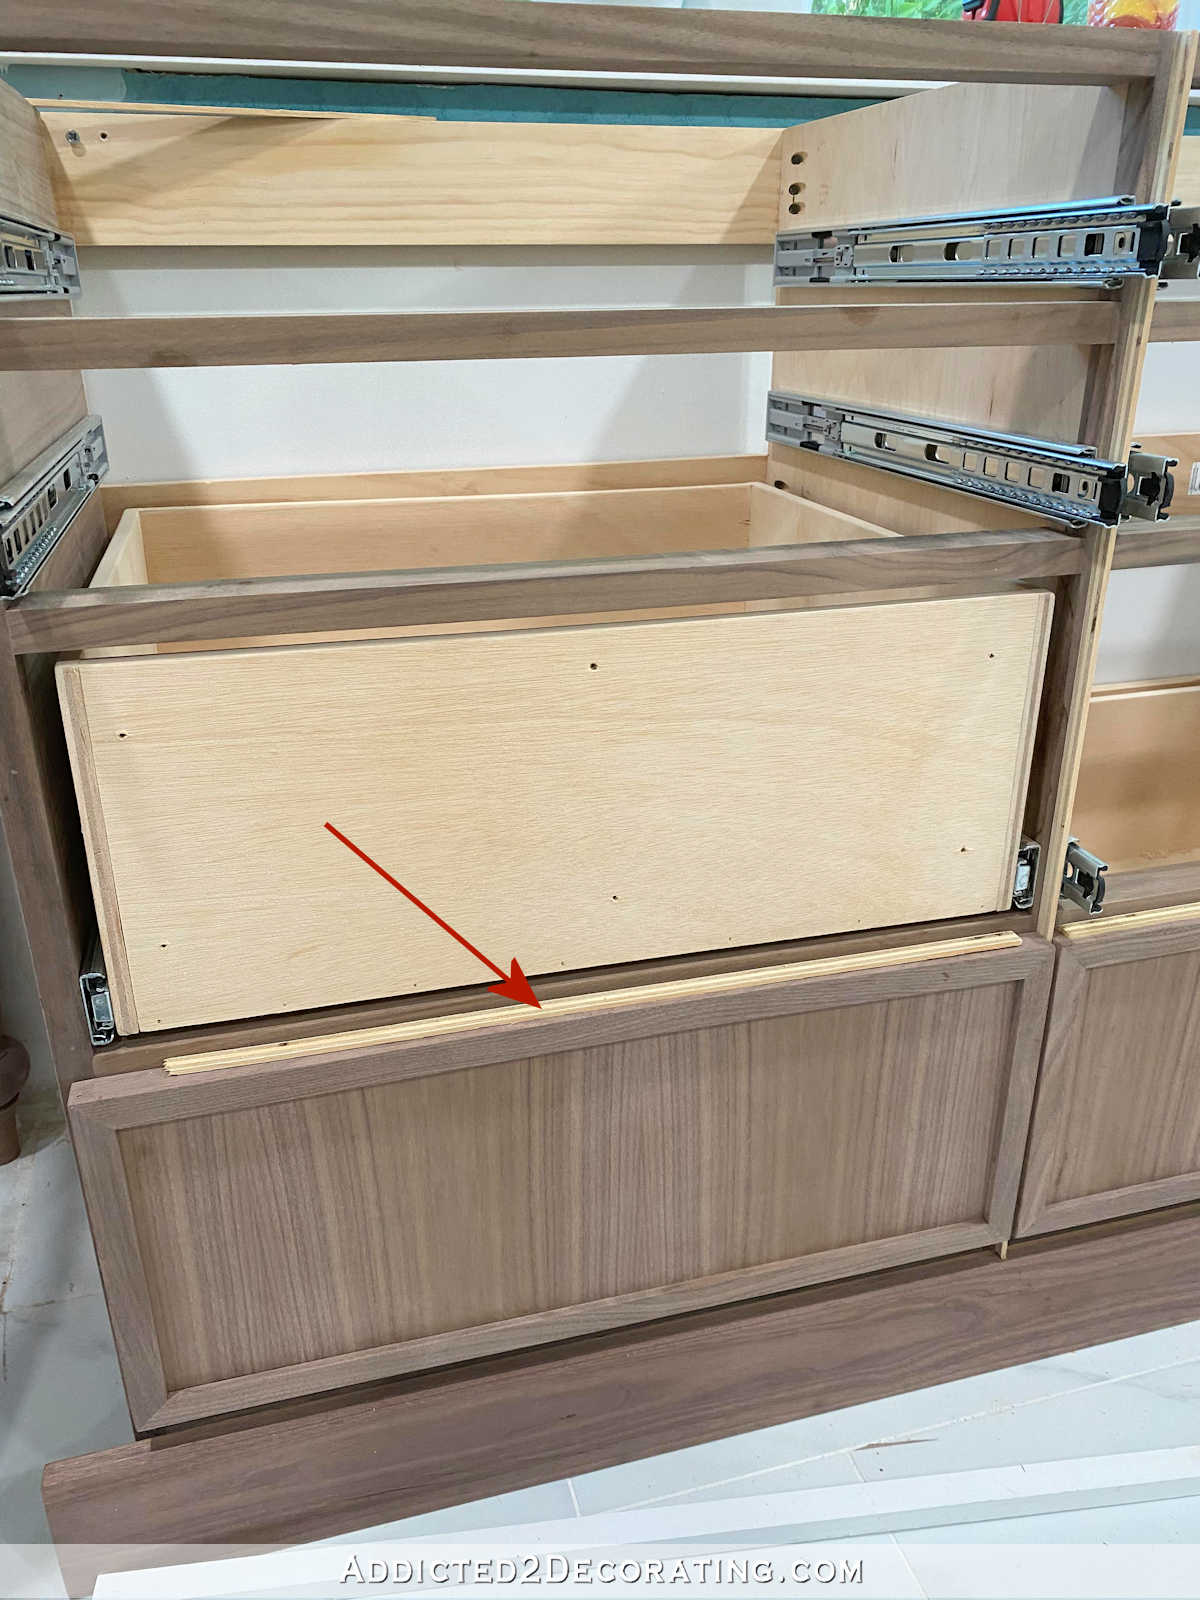
And I continued that process until all of the drawer fronts were attached…
Cutting that one center vertical spacer so that it was long enough to extend the full height of the cabinet made the process so easy.
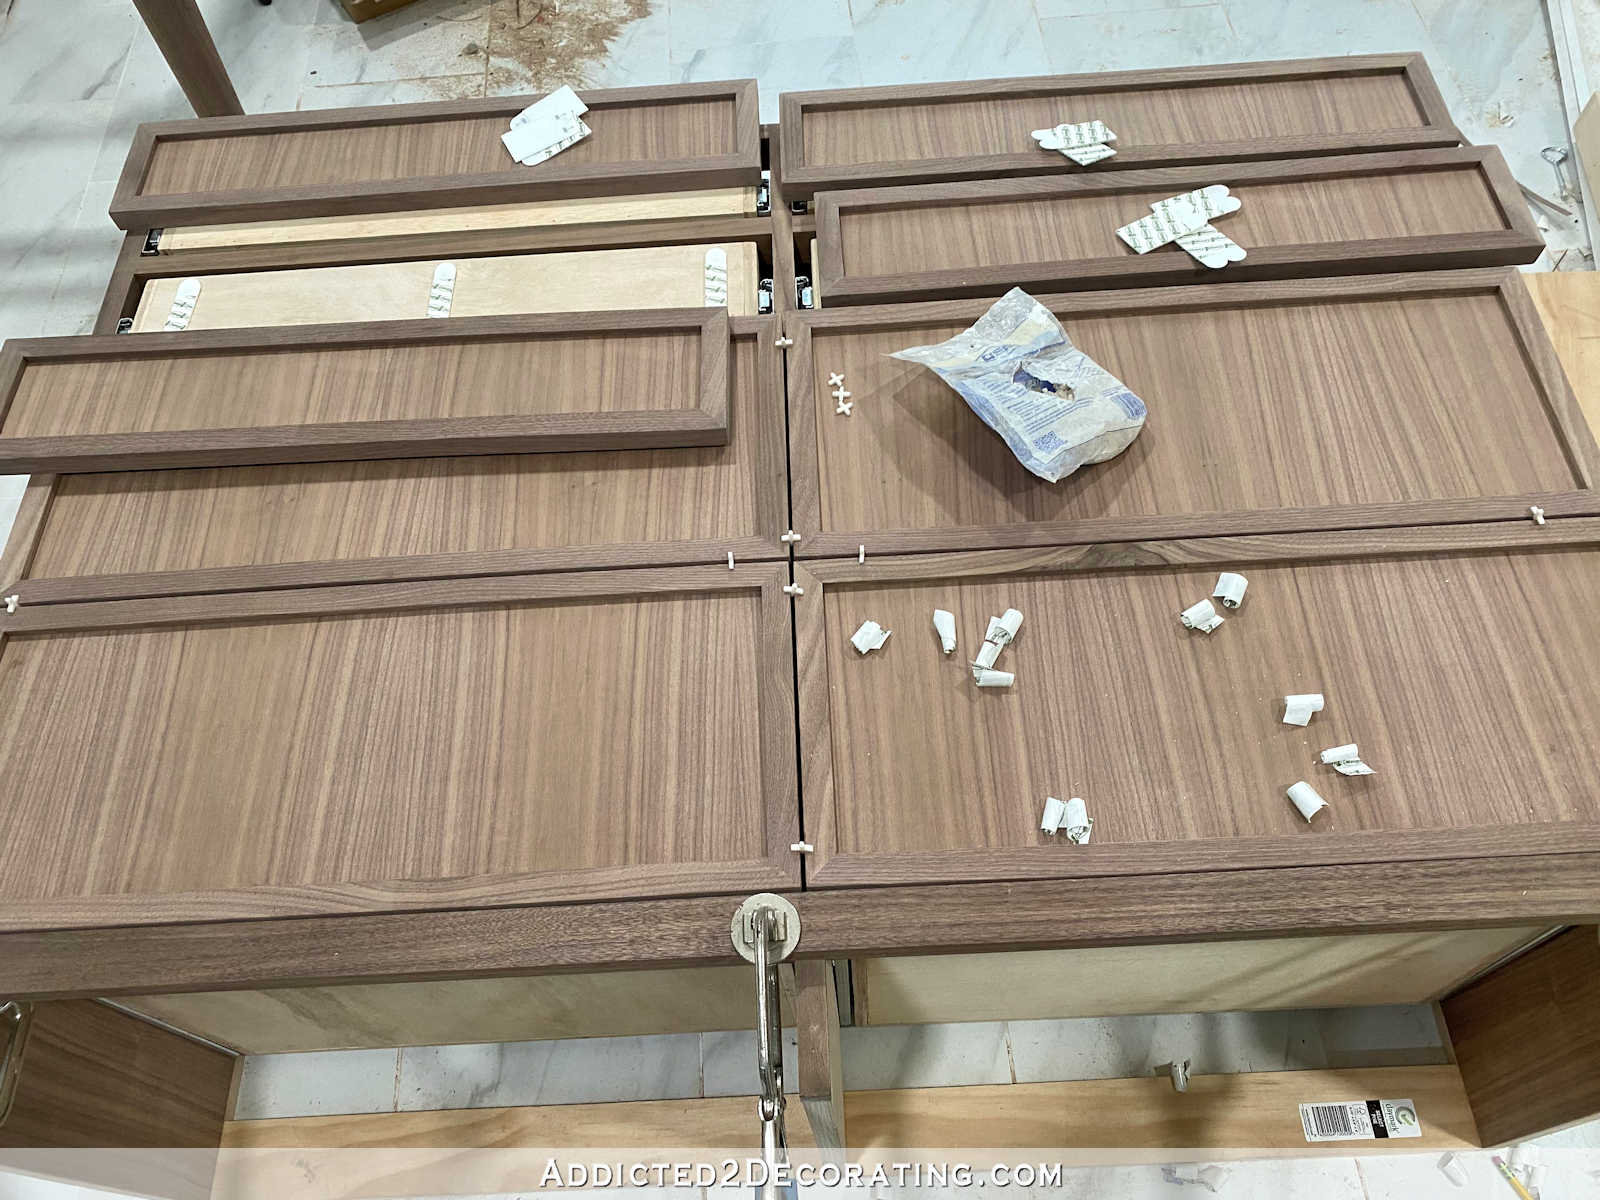
And once all of them were attached, I removed the spacers, and I had eight perfectly spaced drawers. I mean, they weren’t perfect, but pretty darn close!
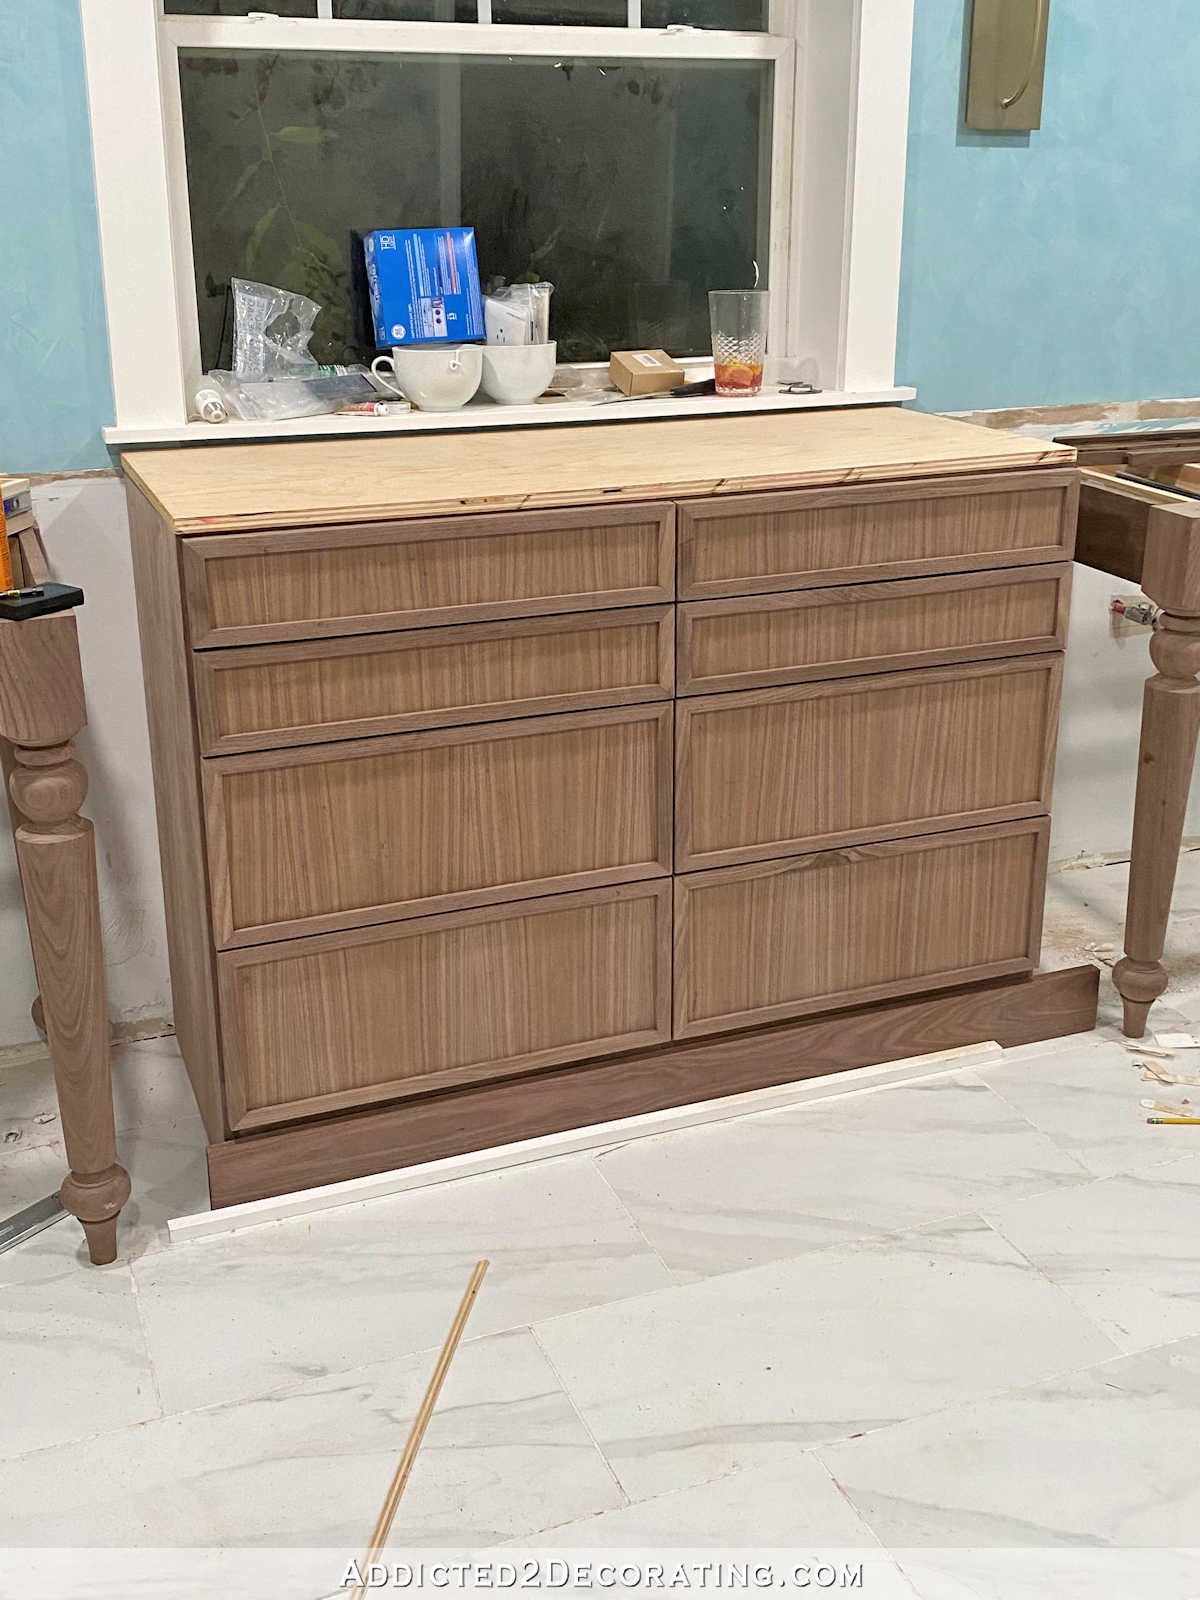
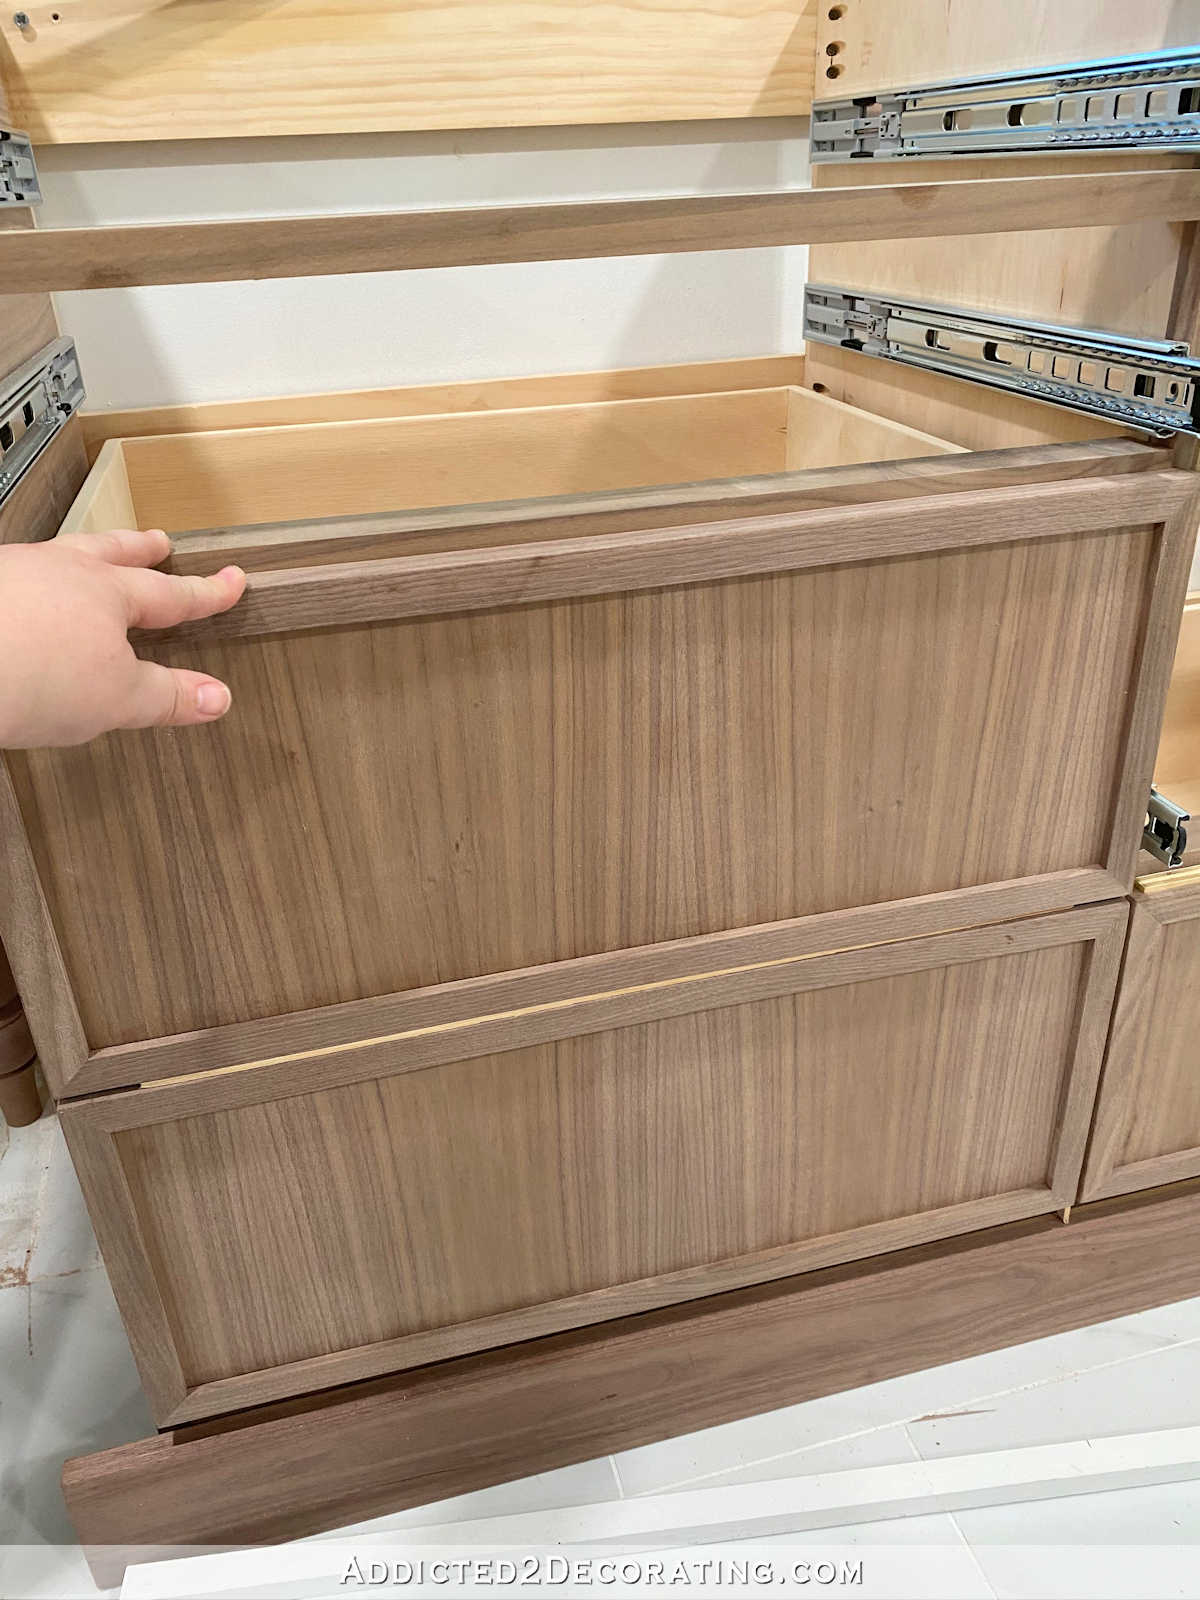
With all of the drawer fronts were attached, I then installed the drawer pulls. I always like to drill holes for knobs and pulls before applying the final finish on furniture and cabinets.
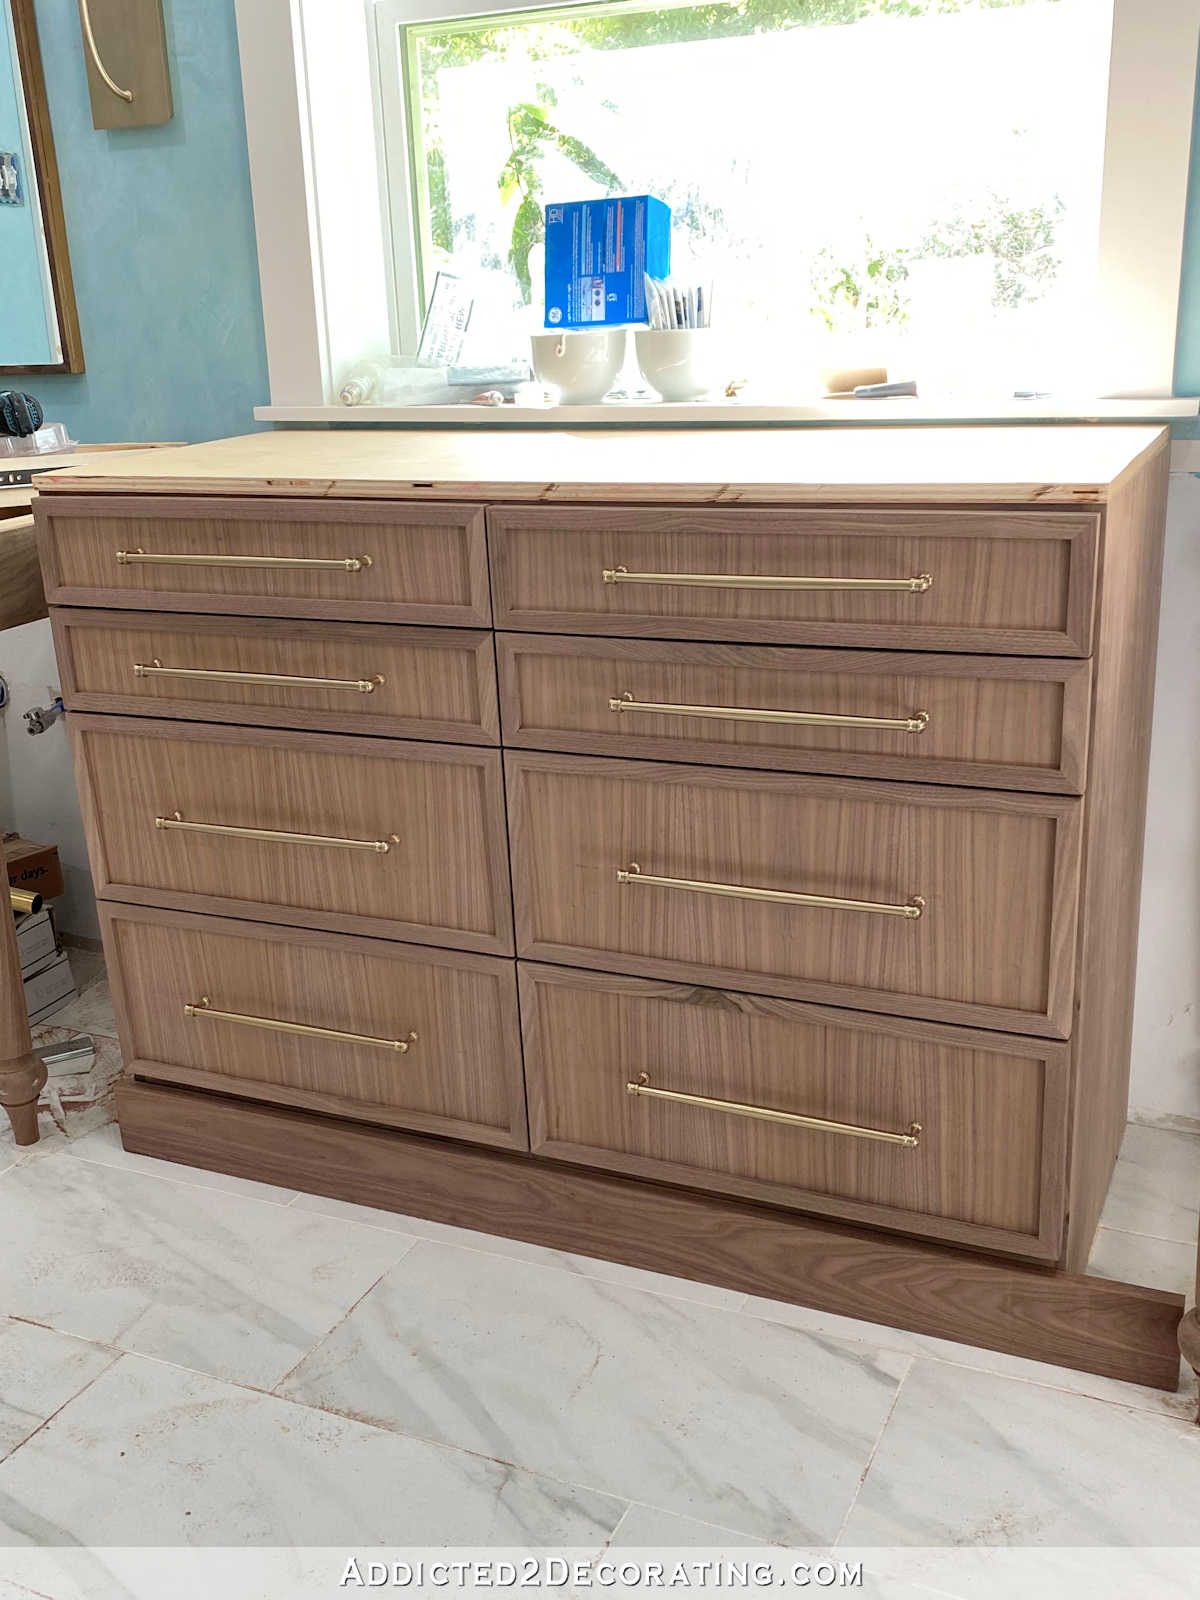
In hindsight, I wish I would have swapped out that one frame piece that has the funky wood grain on it (top frame piece on the bottom right drawer front), but I really don’t want to risk making things worse by trying to swap out that piece. So I’ll probably just live with the swirly grain in that piece.

Other than the swirly grain in that one piece, I’m absolutely thrilled with how this turned out. Unfortunately, it will be a few days before I can actually finish it. After cutting out all of the veneer for the rest of the cabinet and vanity drawer fronts, I had just enough veneer left to do both sides of the countertop…almost. The width was actually about an inch short, and the grain went front-to-back rather than side-to-side.
I originally had a “make it work” attitude about it, and came very close to just finishing the top with the veneer that was left. But right before I was about to start working on the top, I changed my mind.
I’ve spent far too much time and money on this bathroom to cut corners on such a focal piece of the bathroom. And the fact of the matter is that having the grain go from front to back just doesn’t look right. Also, having to “make do” and find a workaround because the veneer is an inch too narrow just didn’t set well with me. The top needs to be done correctly, not thrown together with inadequate scraps.
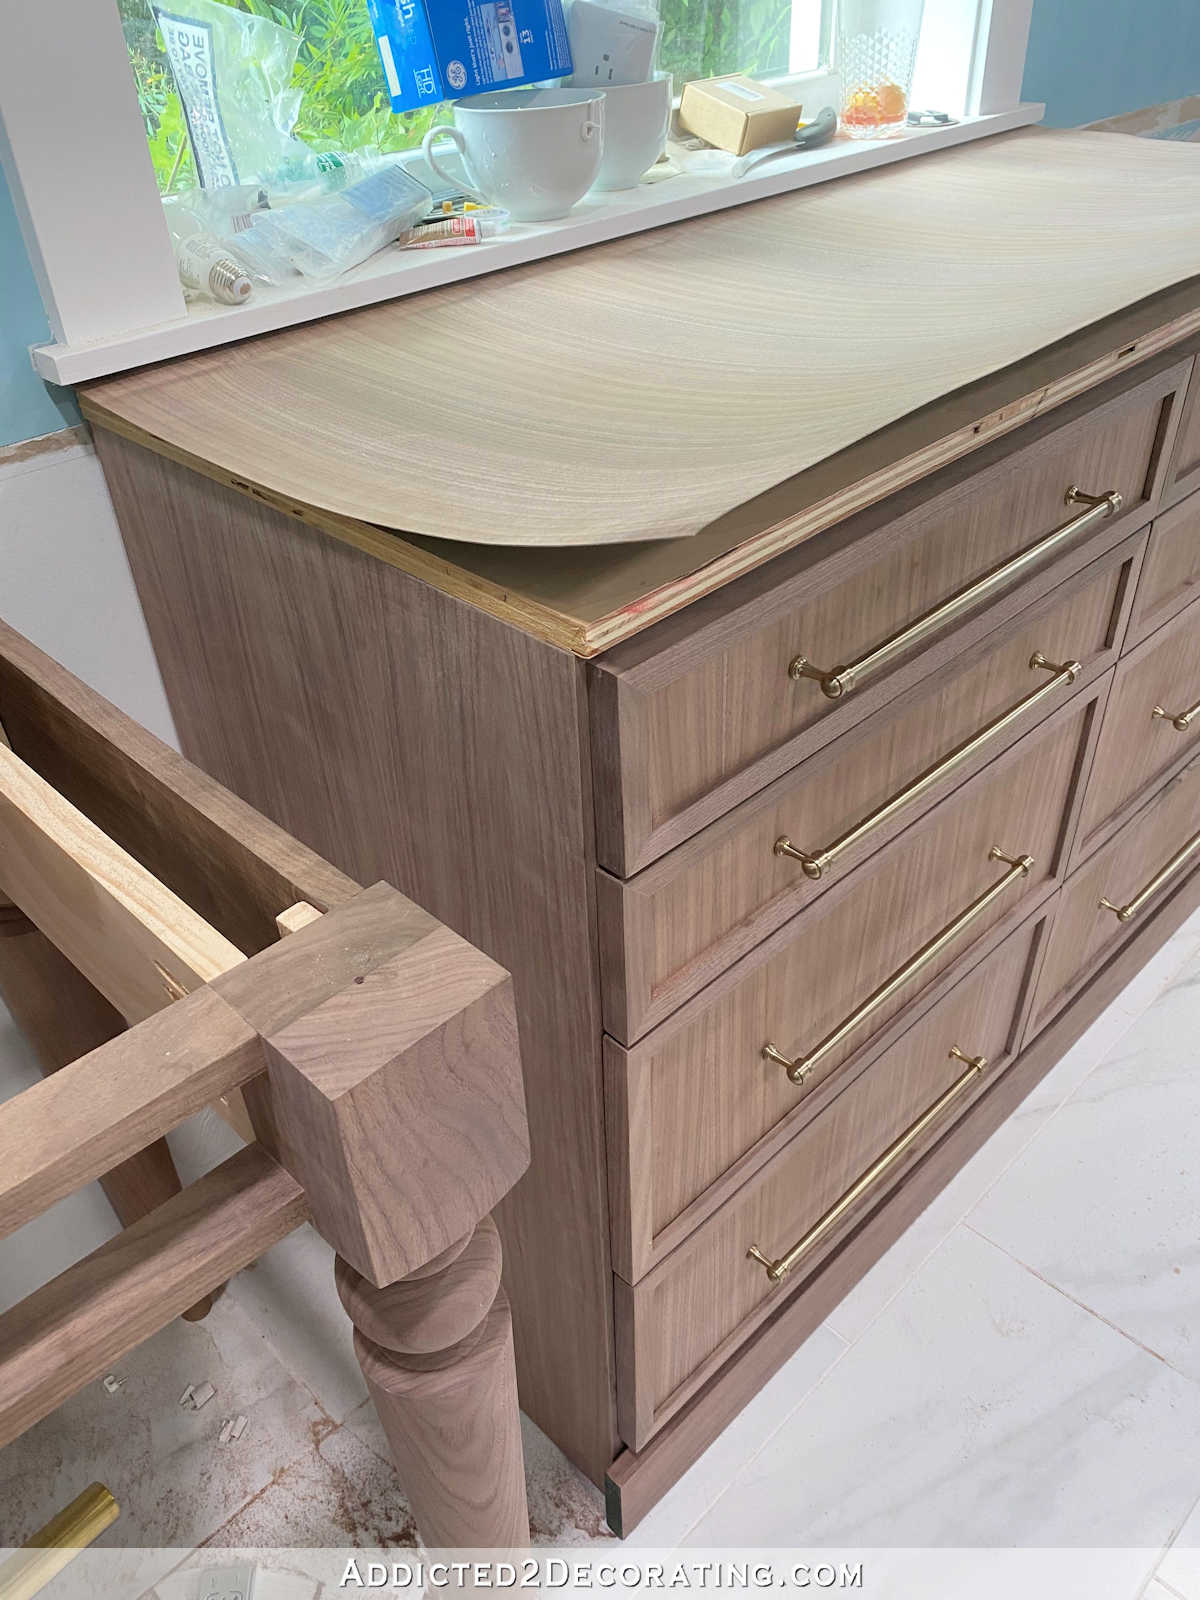
All of that to say that I decided to order another piece of veneer, so I have to wait until that arrives to finish the top. And until I finish the top, I won’t know exactly how I want to finish the trim at the bottom.
So this cabinet is at a standstill right now. Fortunately, it won’t affect the rest of the work that needs to be done. The top of that cabinet doesn’t need to be done in order for me to finish the walls behind the vanities, get the vanities installed, and get the countertop people out here to template for the quartz countertops. So the progress can continue.

Addicted 2 Decorating is where I share my DIY and decorating journey as I remodel and decorate the 1948 fixer upper that my husband, Matt, and I bought in 2013. Matt has M.S. and is unable to do physical work, so I do the majority of the work on the house by myself. You can learn more about me here.
I hope you’ll join me on my DIY and decorating journey! If you want to follow my projects and progress, you can subscribe below and have each new post delivered to your email inbox. That way you’ll never miss a thing!
Source link