DIY Wainscoting Part 1 – The Anatomy Of Judge’s Paneling With Tile Accent (Bathroom Walls)
I’m on the final home stretch with the bathroom remodel. The last big project is the DIY wainscoting, and for these bathroom walls, I decided to do a judge’s paneling with a tile accent. That should come as no shock since it’s what I did in the hallway bathroom as well, and it’s one of my favorite features of that bathroom.
So naturally, I’d want my favorite design feature to be repeated in this bathroom.
I haven’t gotten a section completely finished yet, but I did make great progress on this one section…
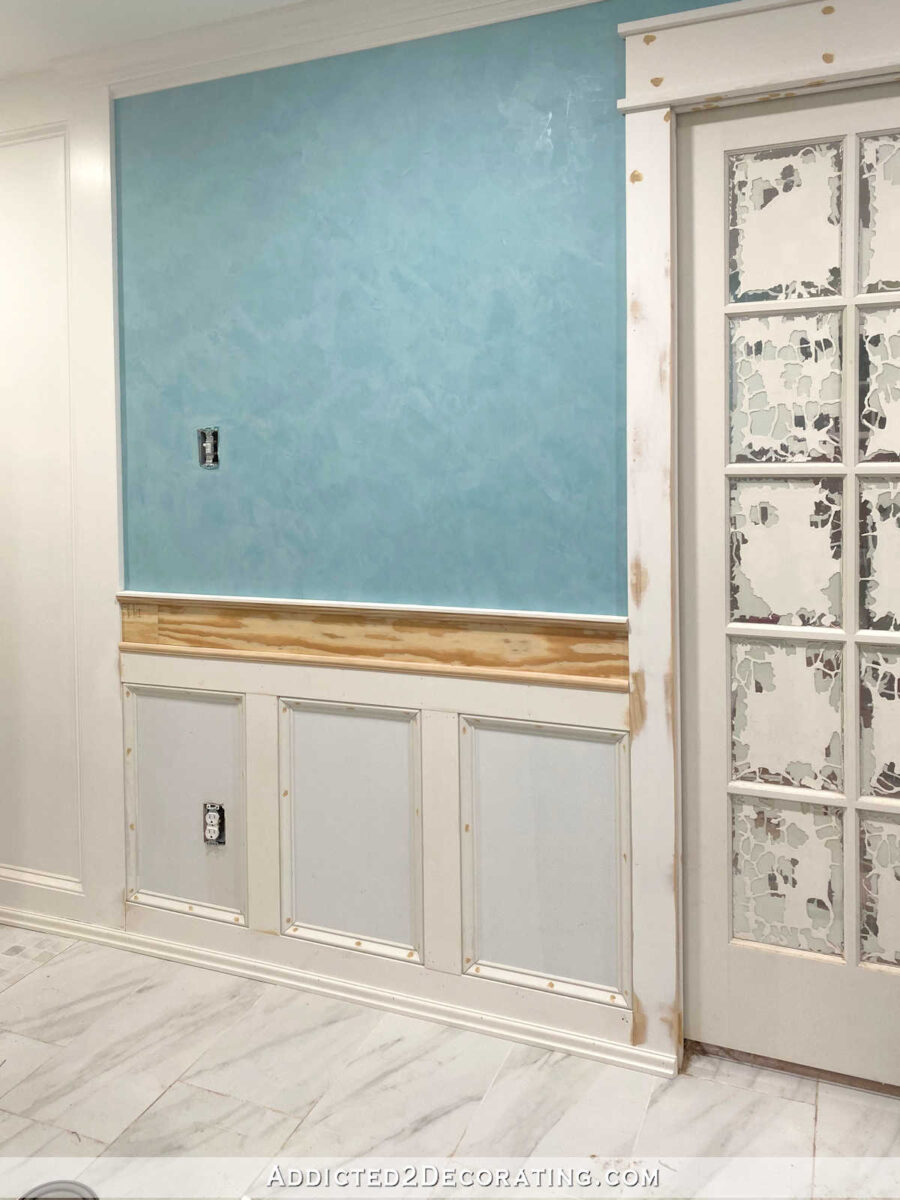
It just needs to be caulked, primed, and painted. And then I can add the tile accent, and this section will be done.
The biggest challenge is figuring out how to incorporate the tile accent around the vanity countertops. Because that will determine how the wainscoting needs to be applied to rest of the walls where there is no vanity or countertop.
I’ve done this two different ways in the past. In the hallway bathroom, I carried the trim and the tile all the way around the room, with both the trim and the tile included in the backsplash around the vanity countertop.
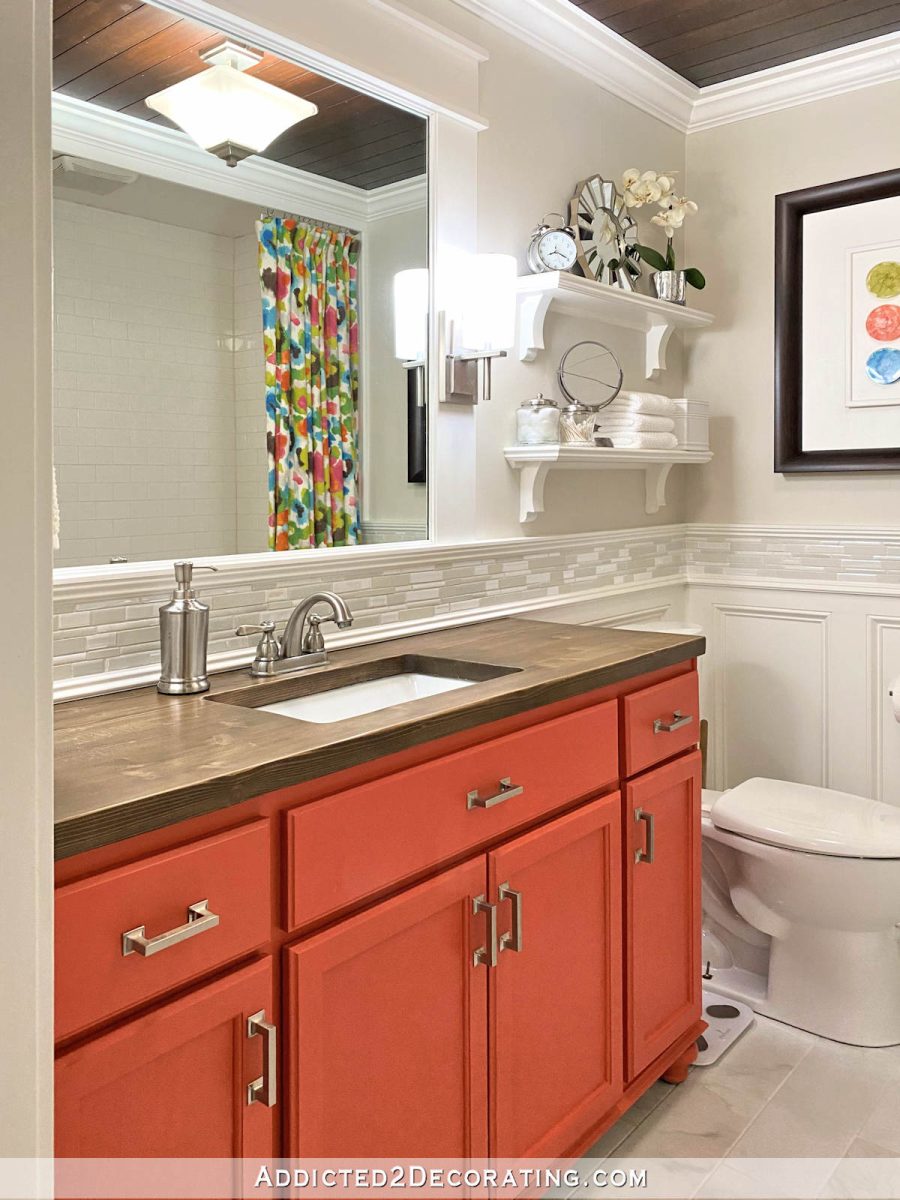
While I do like how it looks, I have to admit that cleaning around that bottom trim that rests on the countertop is quite a pain.
So when I did the studio bathroom, I decided to drop that bottom trim to the level of the countertop. So instead of resting on top of the countertop, it would terminate at the edge of the countertop. That would leave just the tile and the top trim as a backsplash around the vanity, and would eliminate that hard-to-clean-around bottom trim around the countertop.
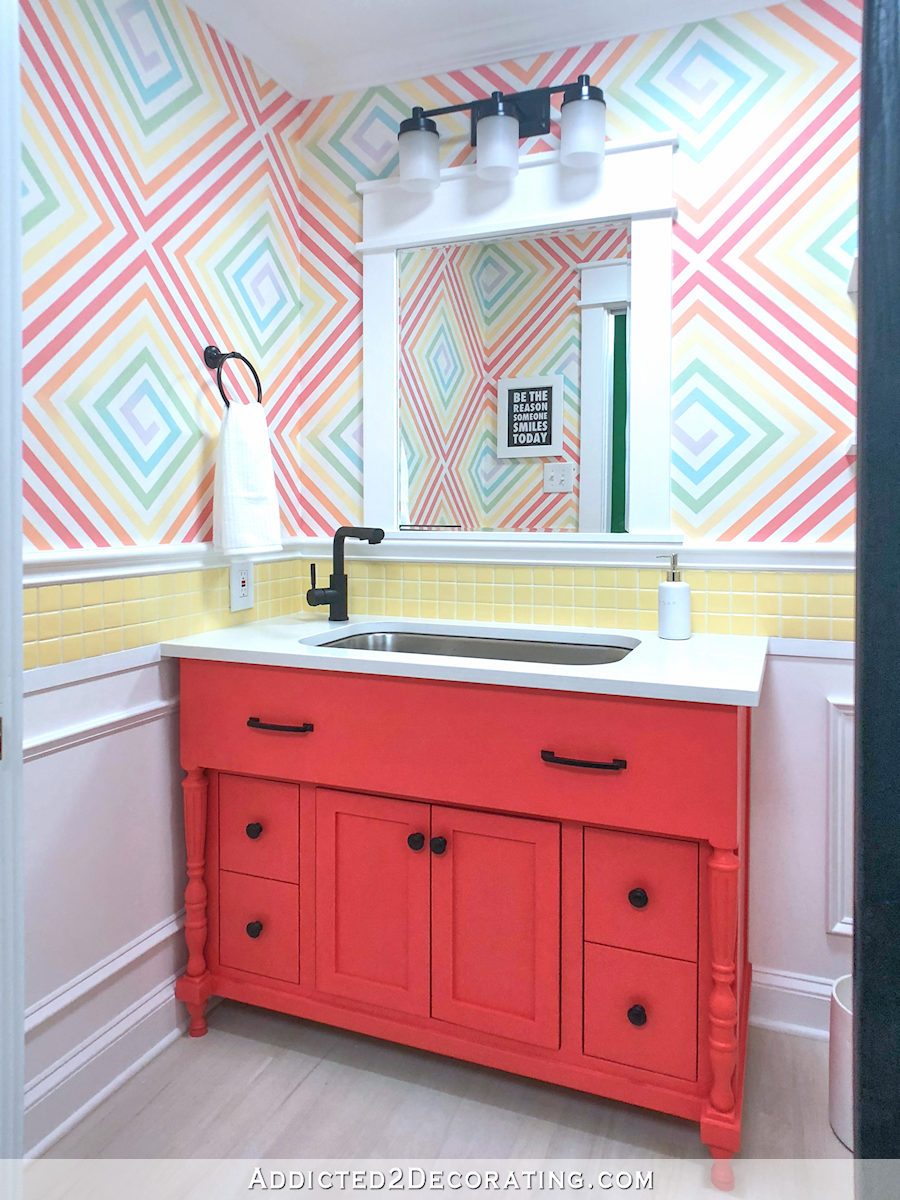
Just from a practical standpoint, I liked that so much better. It’s so much easier to clean.
So that’s how I decided to do it in this bathroom. The trim along the bottom of the tile accent would need to terminate at the edge of the quartz countertop.
So here’s how I decided to install this wainscoting to accommodate for that…
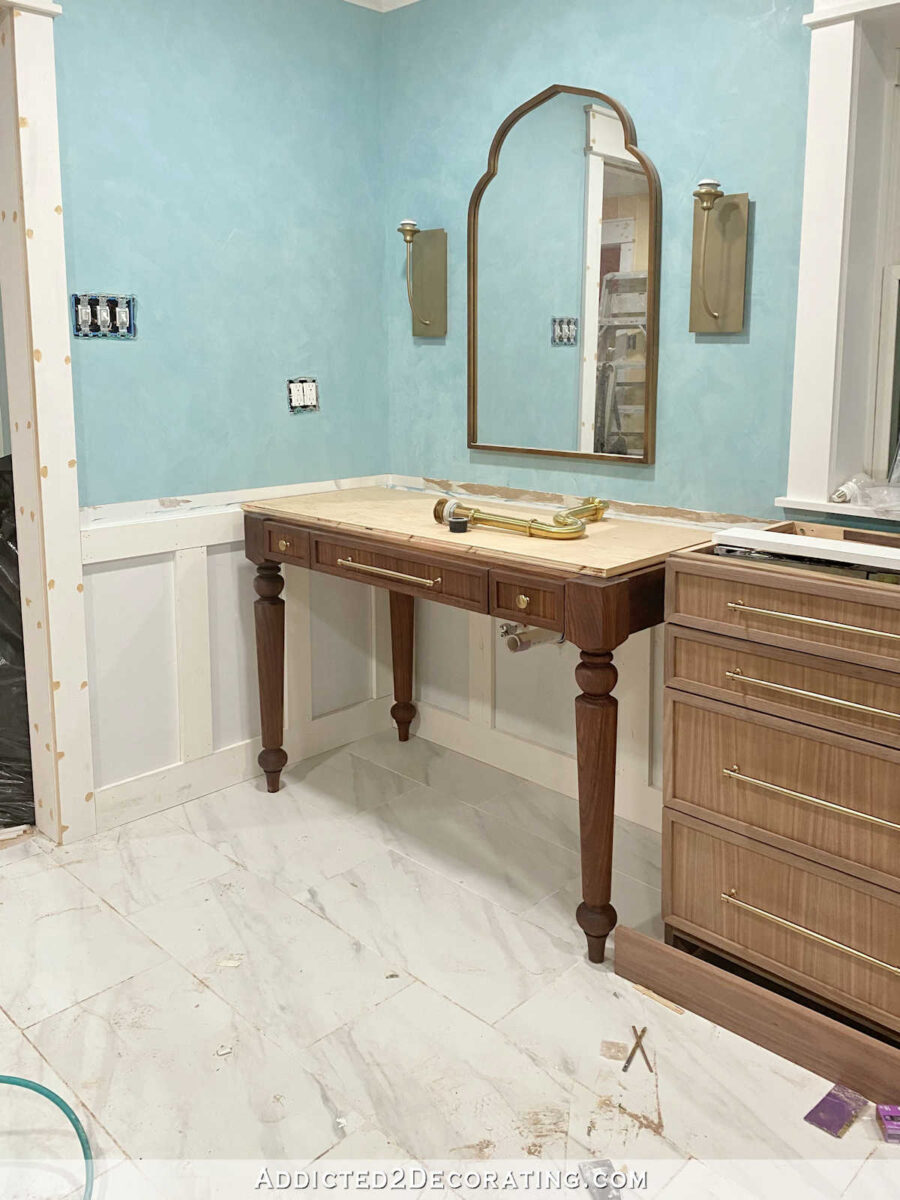
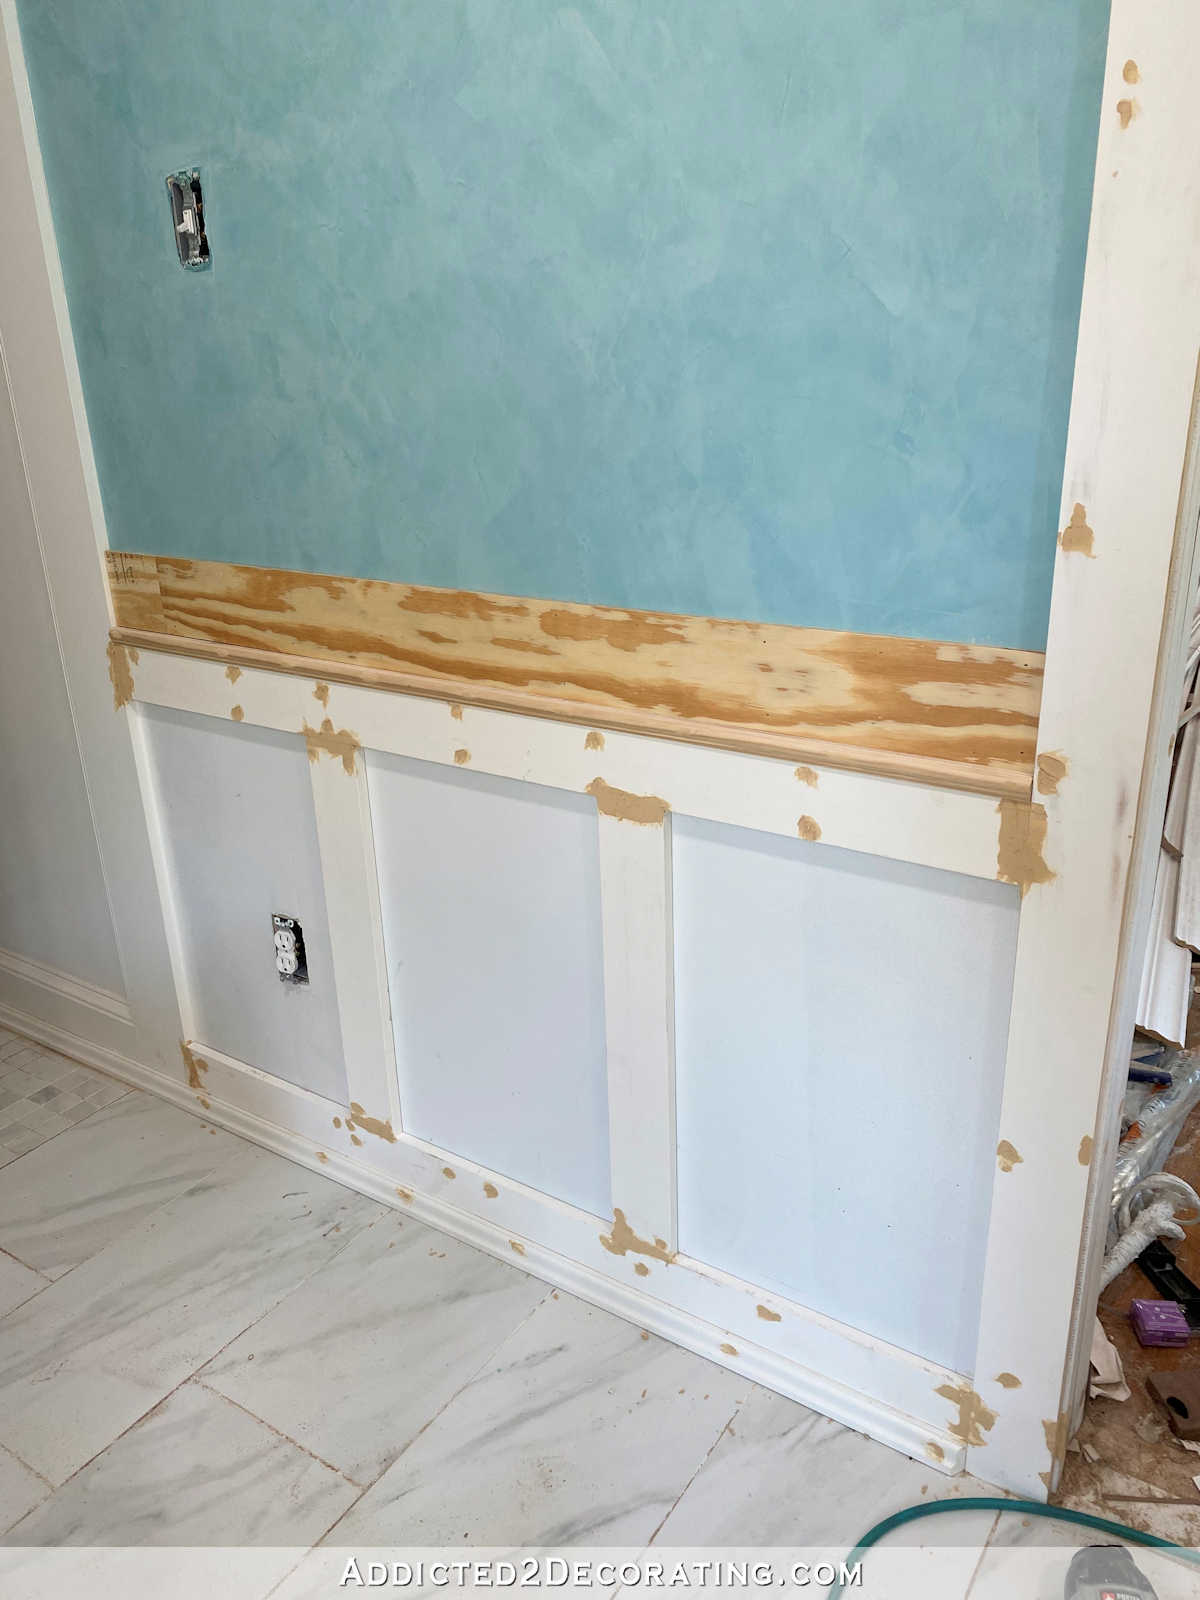
Let’s go back to this section of the wall around the vanity where I had already installed most of the pieces. You can see that I have the 1″ x 5″ board along the bottom near the floor. And then I measured up 32 inches and installed a 1″ x 4″ board horizontally so that the top edge of that board was at the 32-inch mark. That measurement put that 1″ x 4″ board just below where the countertop will meet the wall. In other words, the countertop will literally rest on that 1″ x 4″ board. The plywood is a stand in for the future quartz countertop.
My countertops will be 3/4-inch thick, so I needed some trim to fill in that 3/4-inch space all around the rest of the walls, and that would terminate into the edge of the countertops.
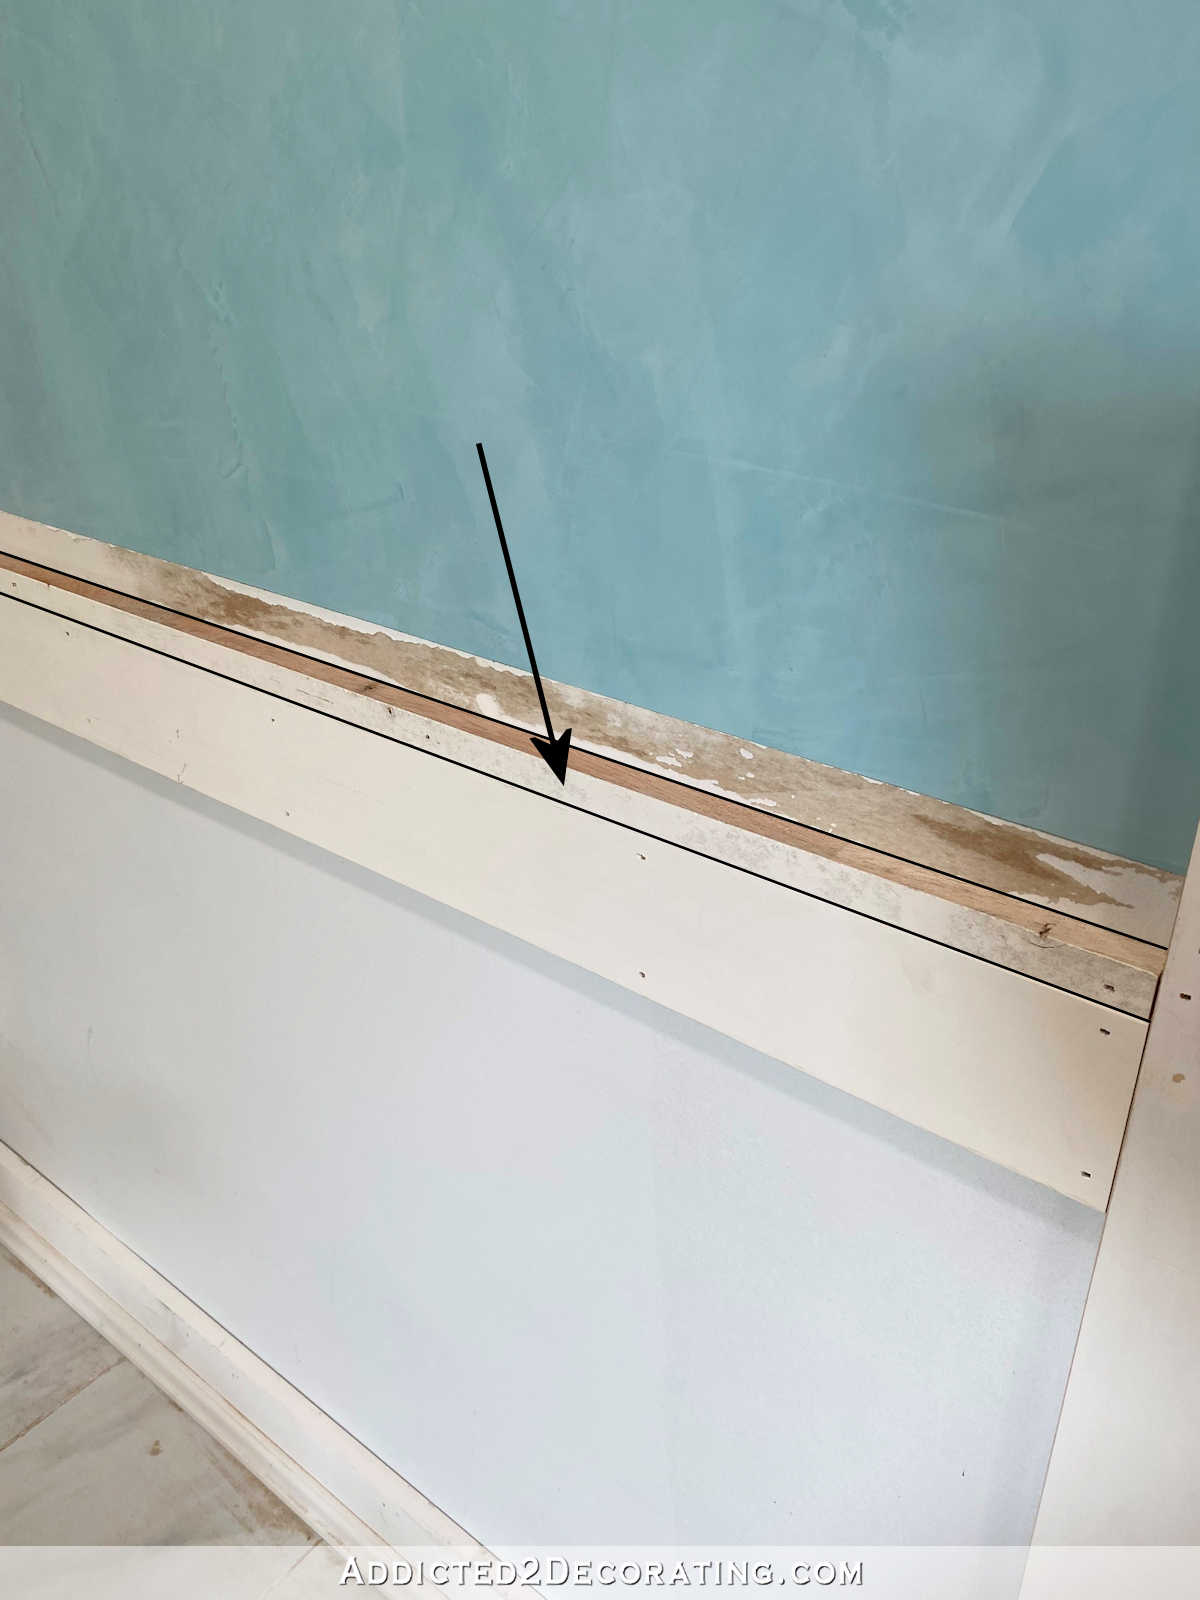
So going back to the other section of wall to the left of the door, I had already installed the 1″ x 5″ along the bottom at the floor, and installed the horizontal 1″ x 4″ at the 32-inch mark on the wall. (The top of that board was 32 inches from the floor.)
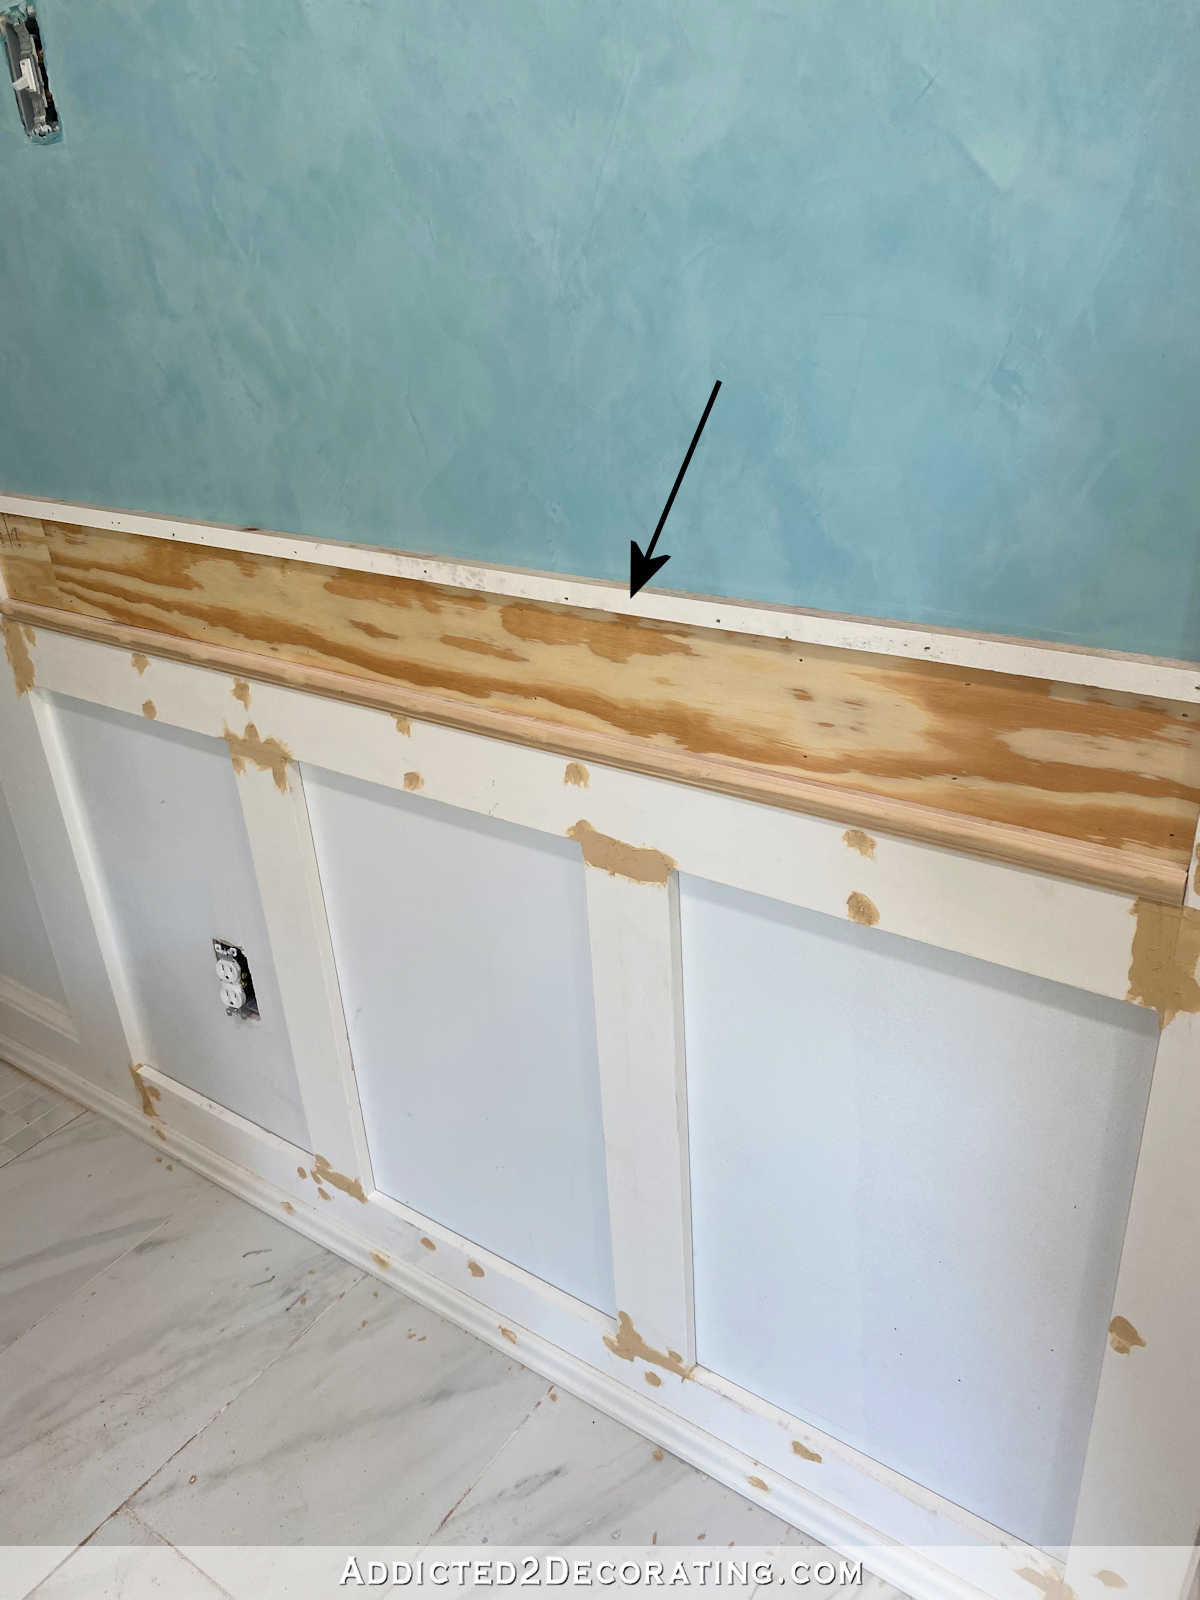
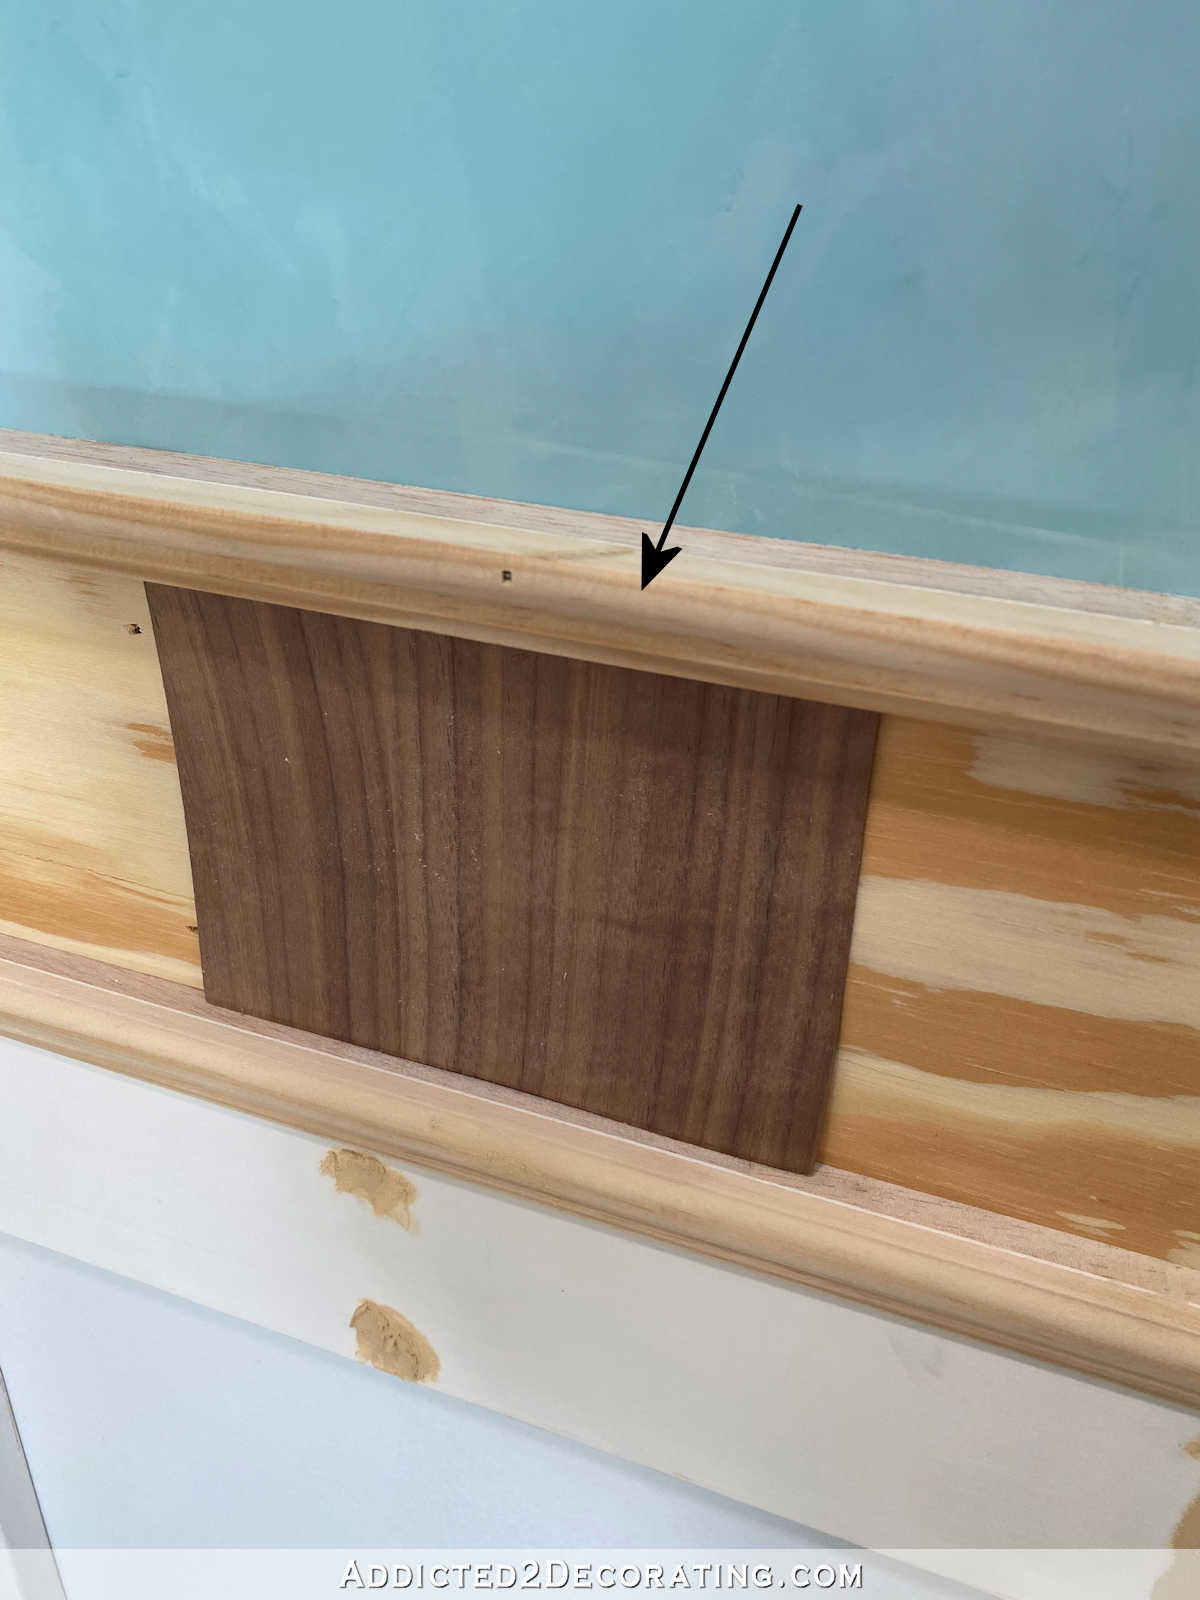
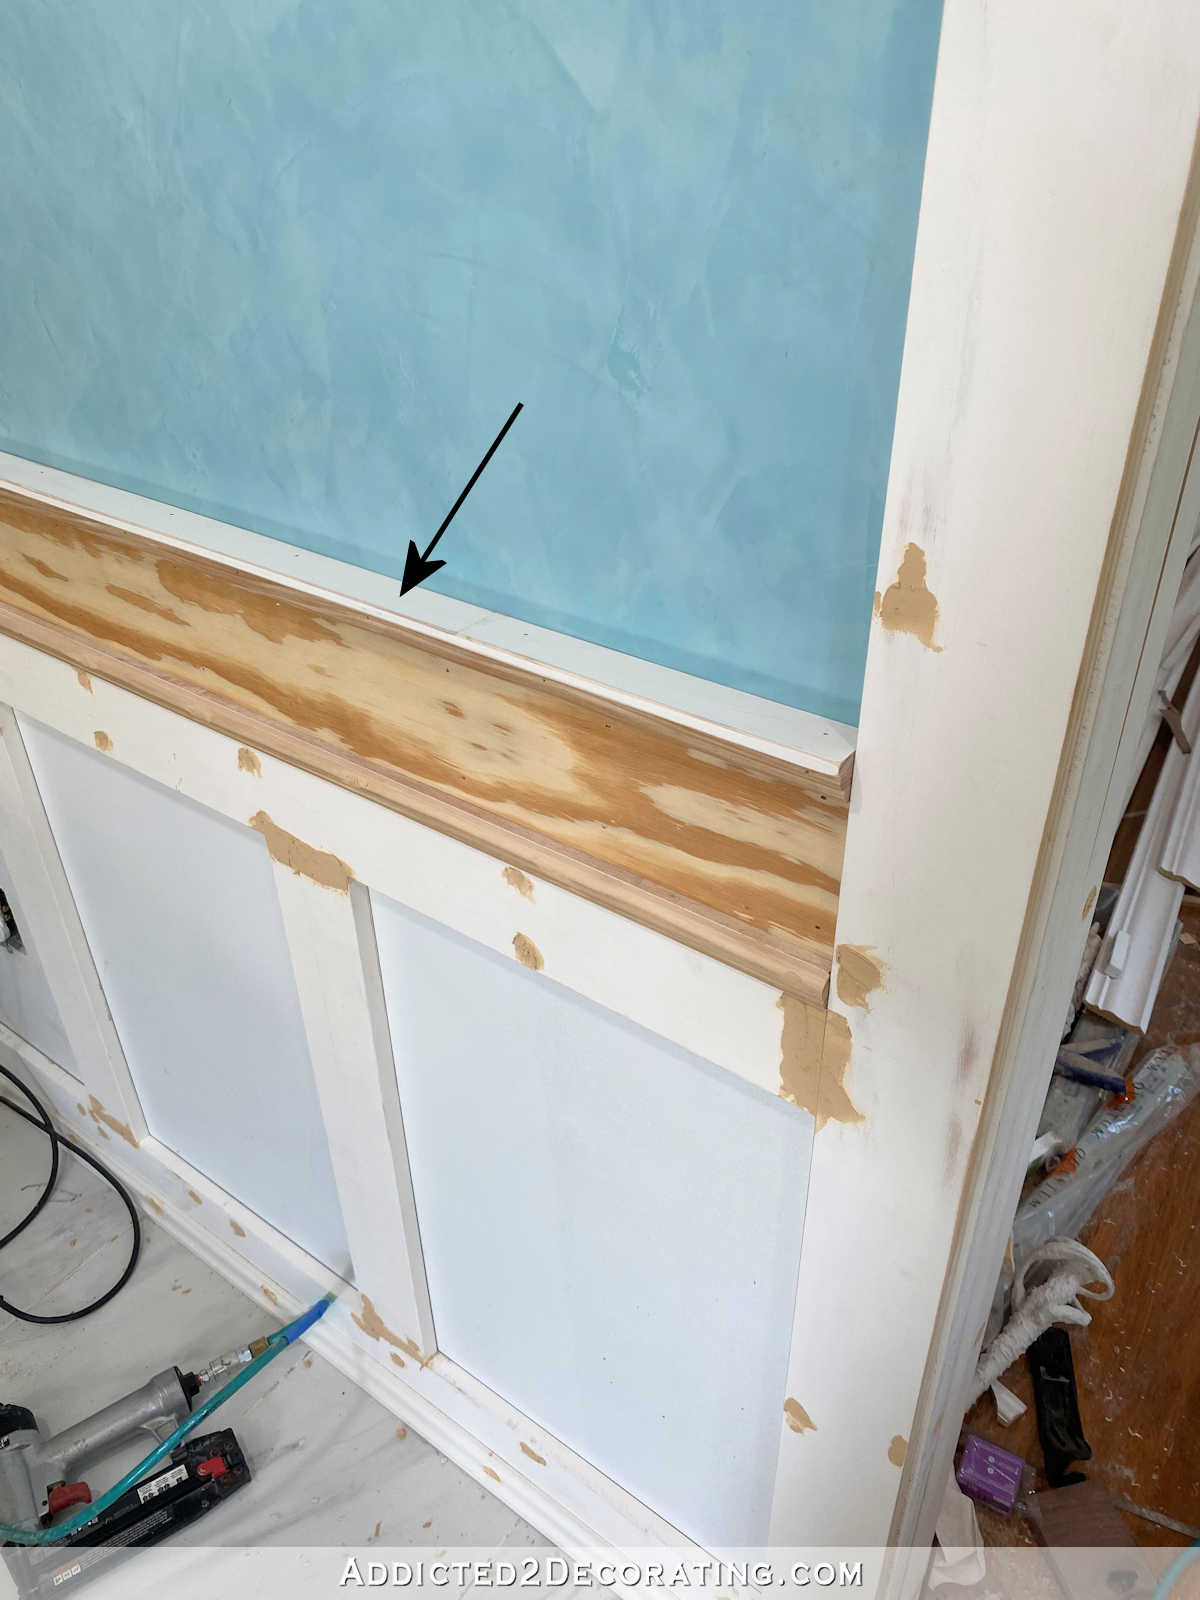
Then I used my table saw to rip a 1″ x 4″ board into strips that are 3/4-inch wide. Remember that 1″ boards are actually not 1″ thick, but they’re actually 3/4″ thick. So the finished measurement of this strip was actually 3/4″ x 3/4″. And I nailed that to the wall just above the previous board. I edited the photo below to outline this strip with black lines so that you can actually see it. Otherwise, it blended right in with the area of the wall that’s messed up right above it.
Next, I attached a 3/4-inch piece of cabinet trim right on top of that 3/4-inch strip.
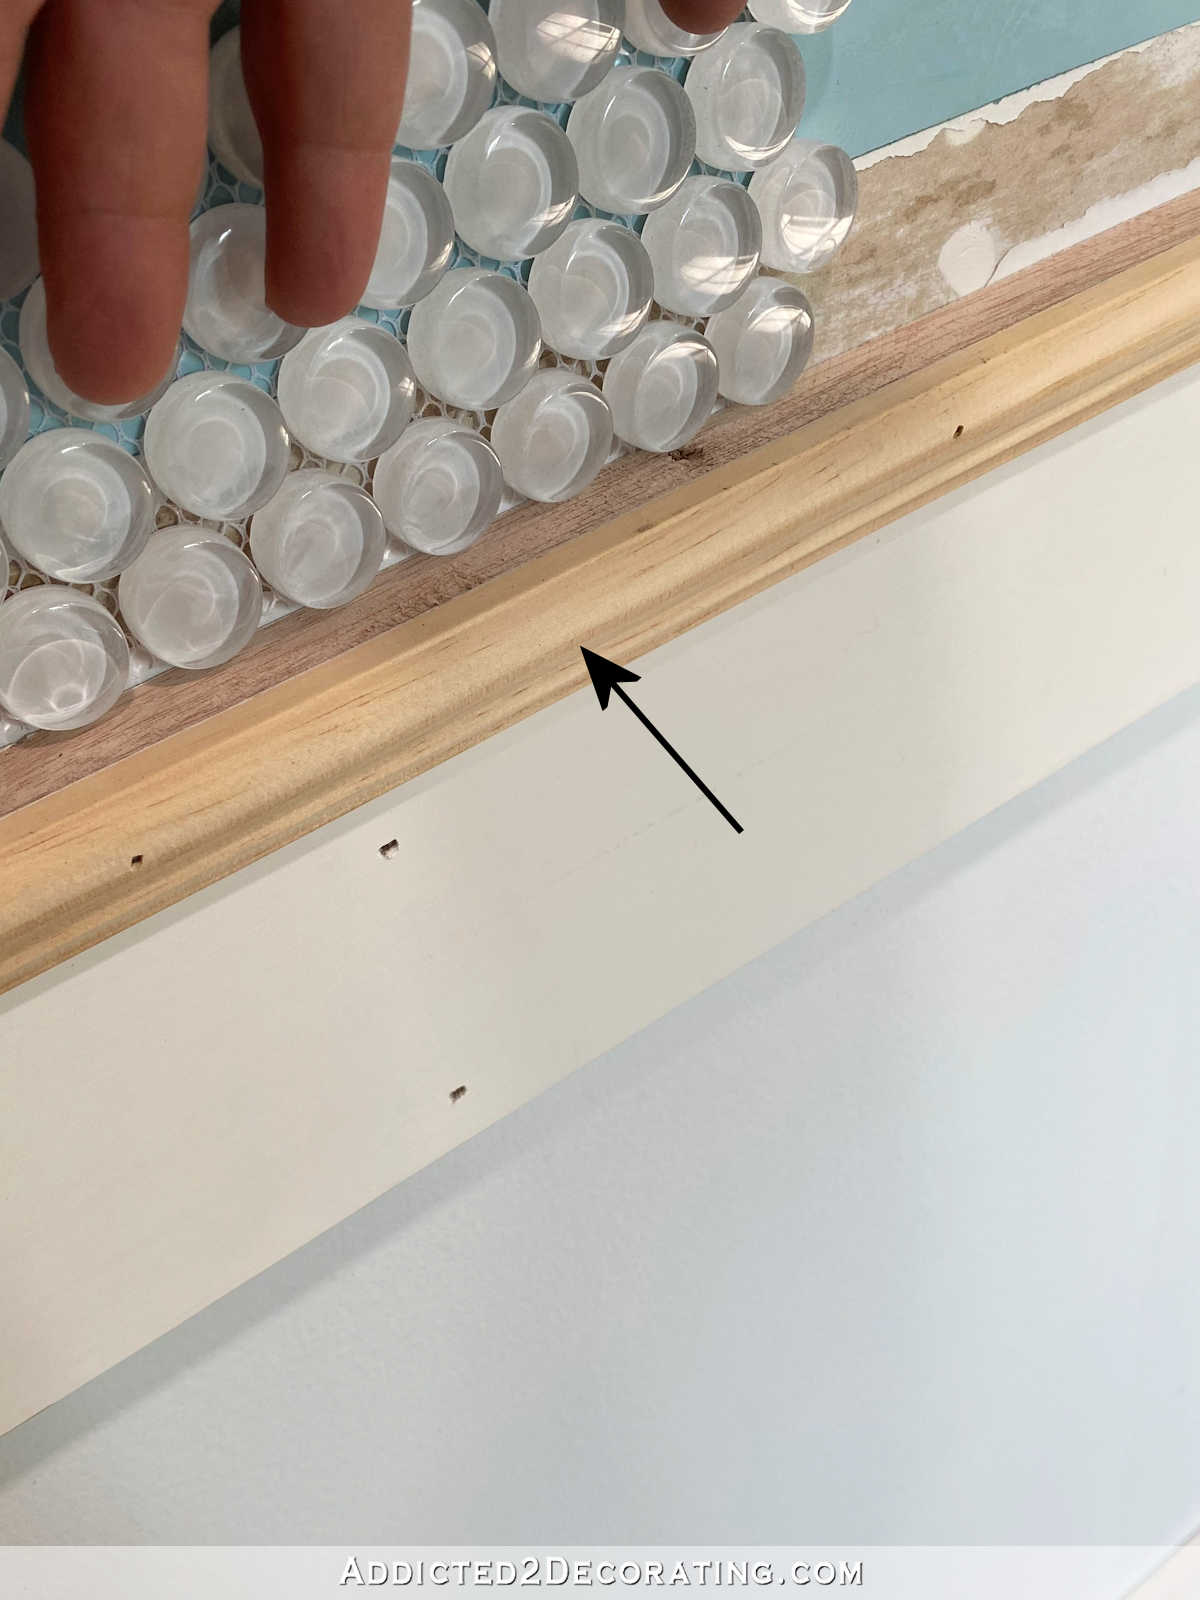
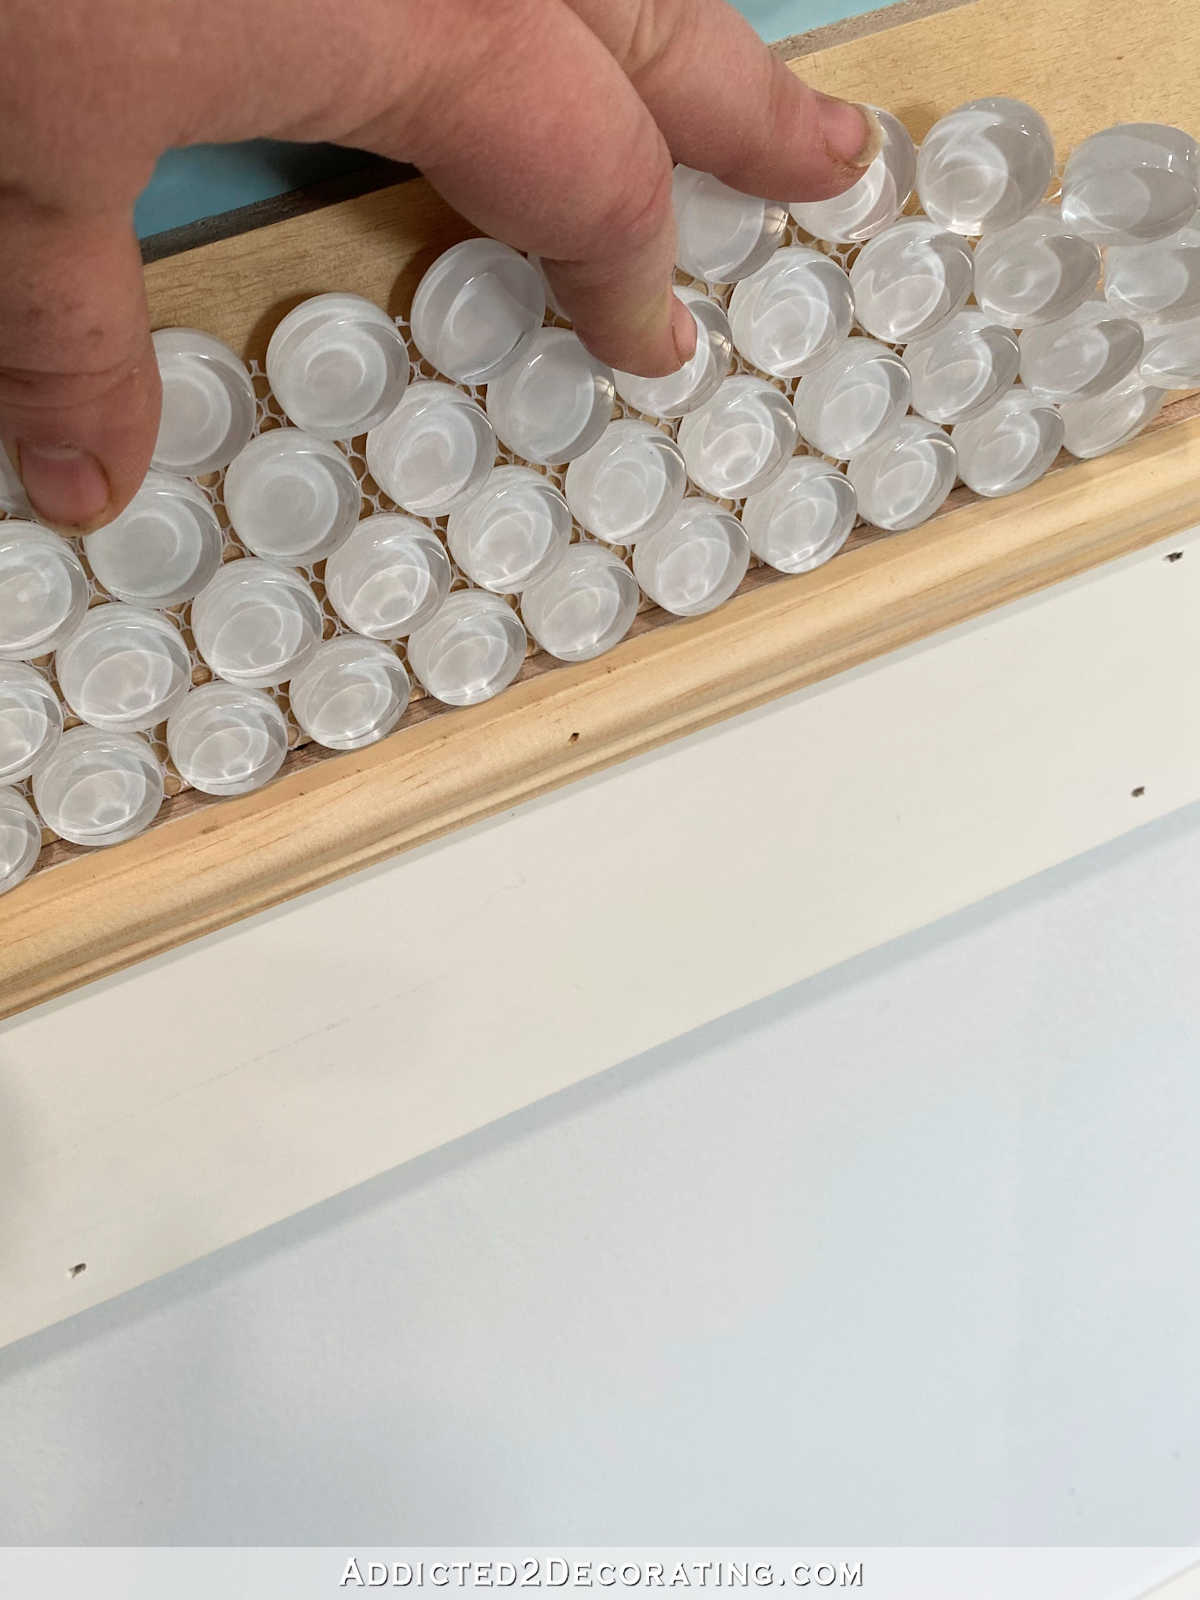
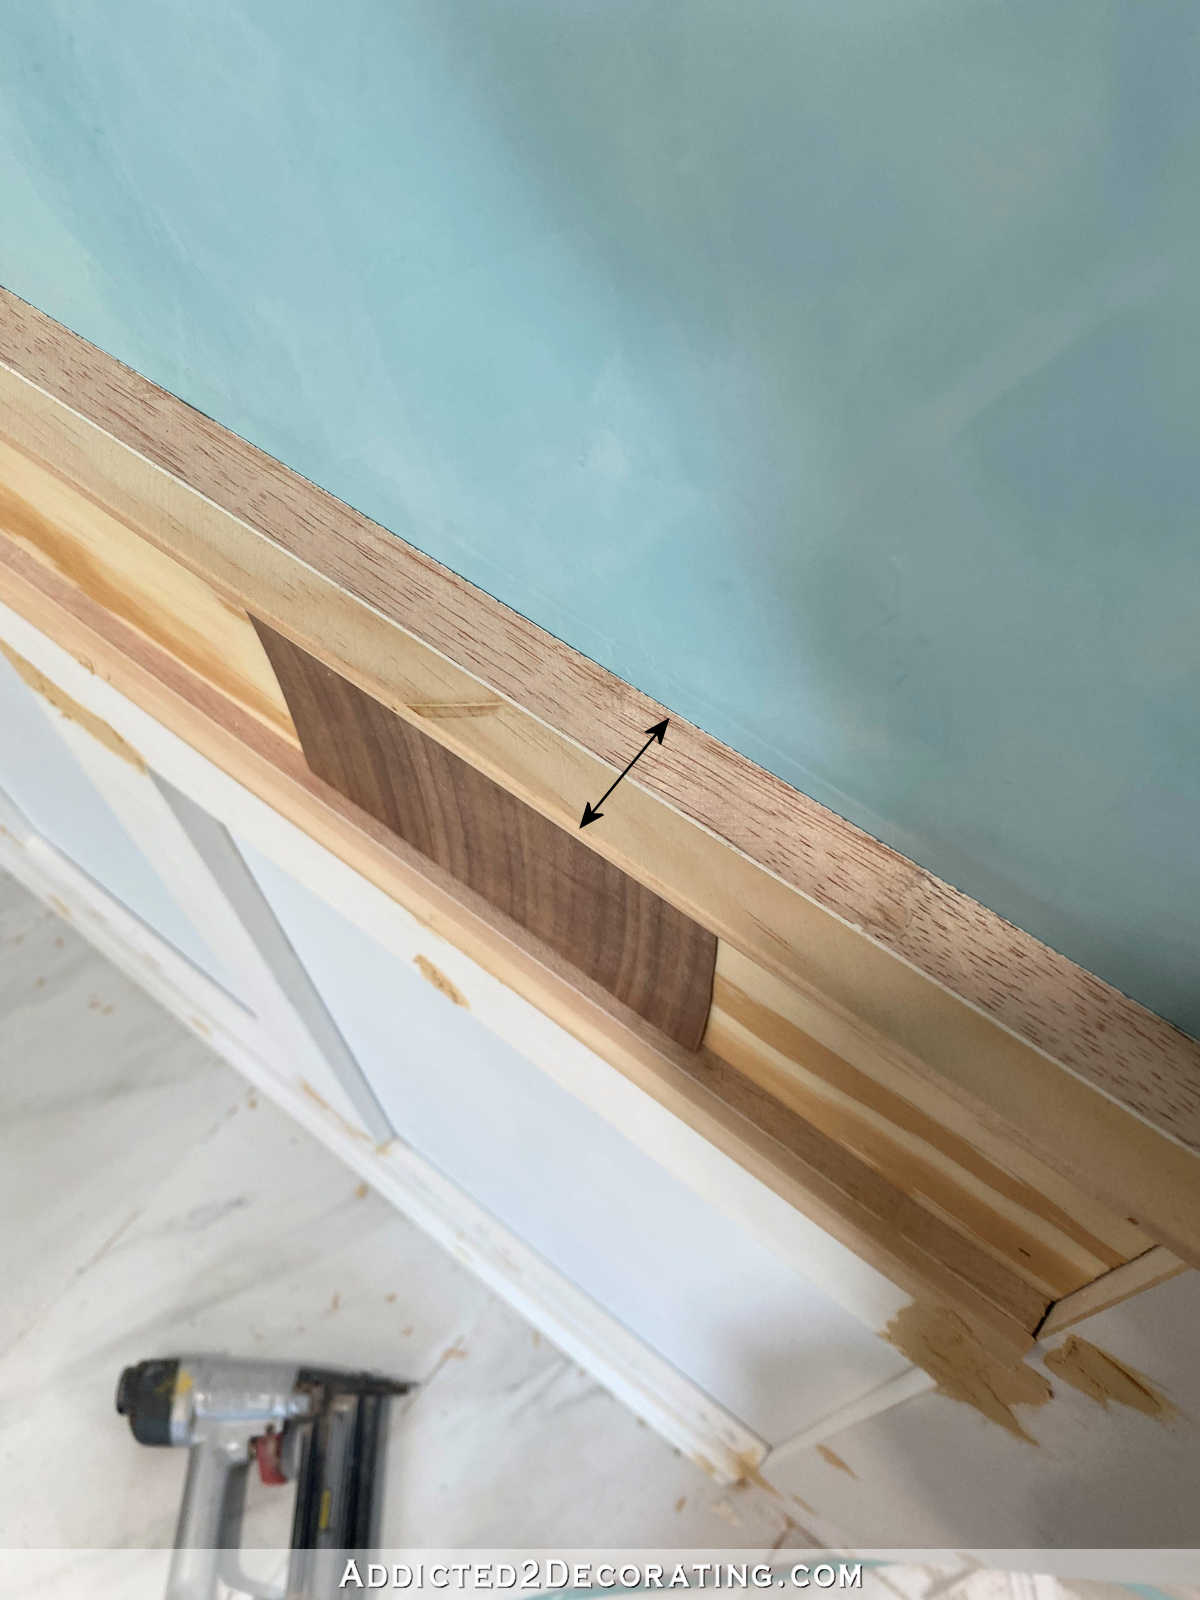
With that strip and the molding attached, you can see from the picture above that if I just installed the tile right on the wall, it would be set back way too far from the front of the trim, almost creating a ledge that would just turn into a dust catcher. That would not look good at all.
So next, I ripped a piece of 1/2-inch plywood, measured to a width that perfectly fit my tile strip (4.25 inches), and then nailed that to the wall.
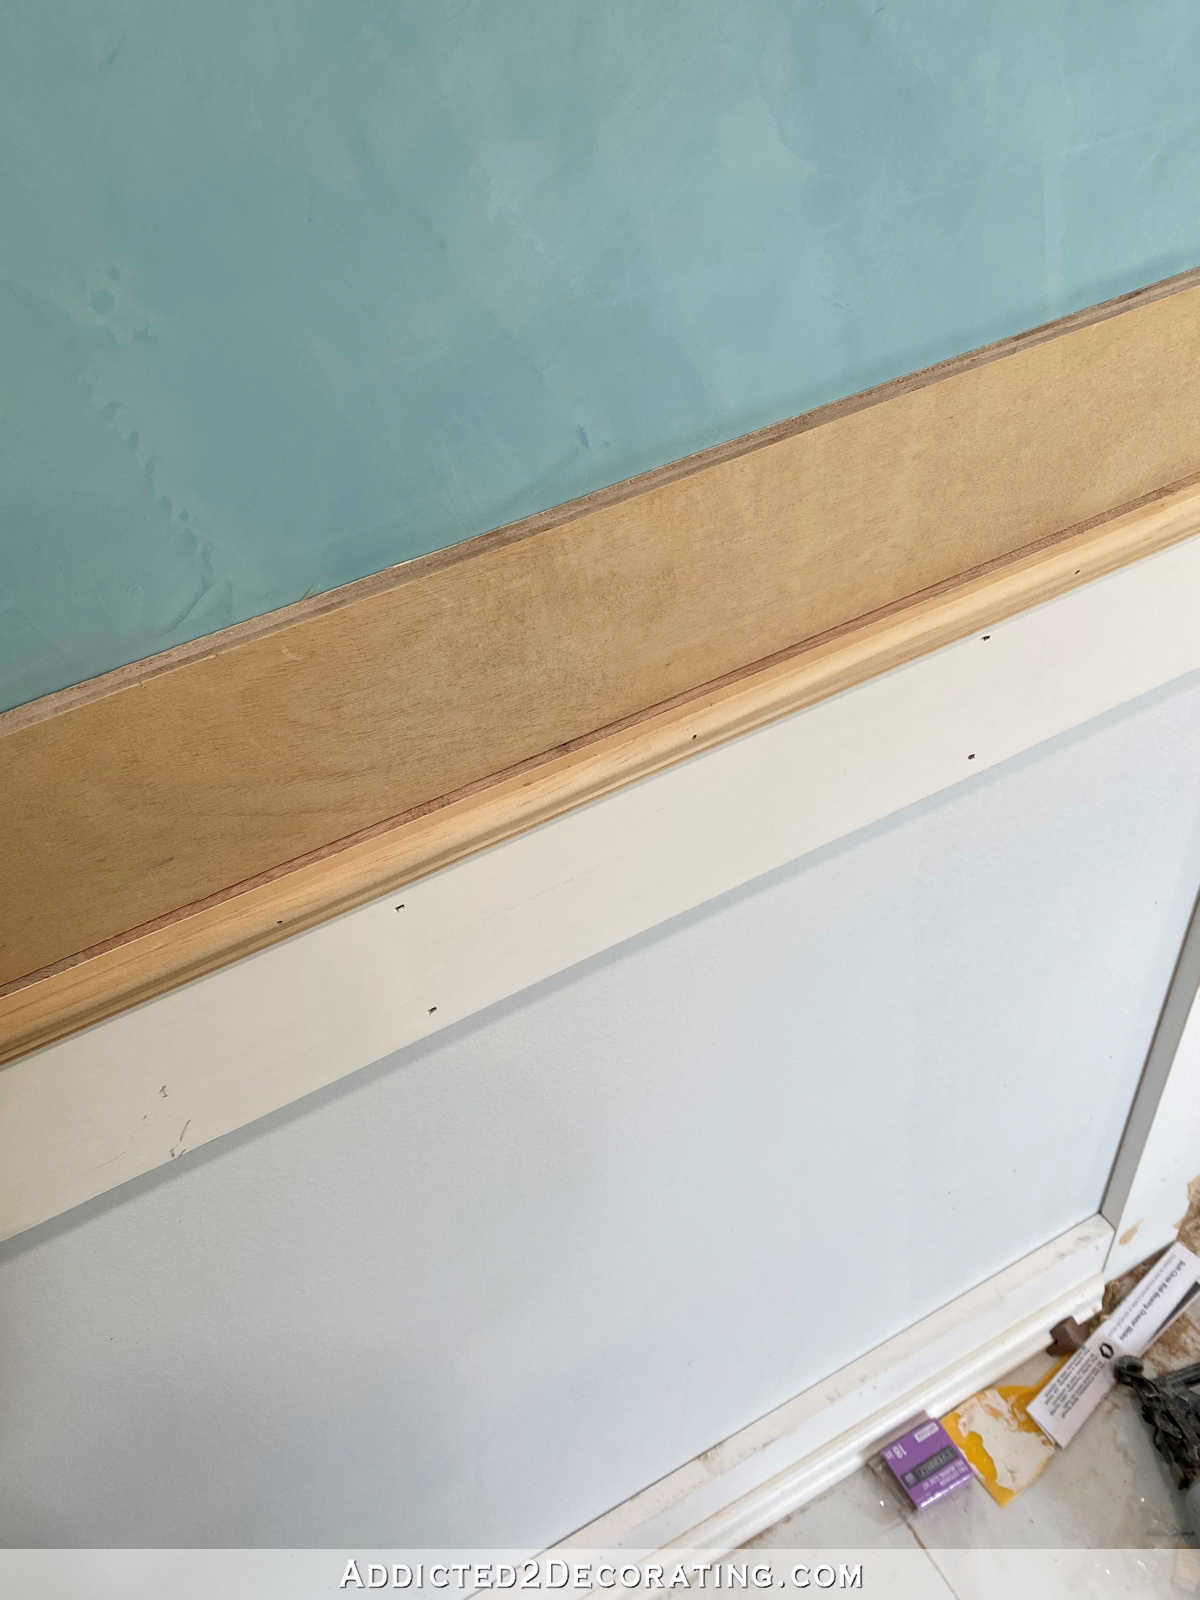
This thickness would bring the tile out from the wall a perfect amount. It’ll still be set back just a little bit, but not a ridiculous amount like before.
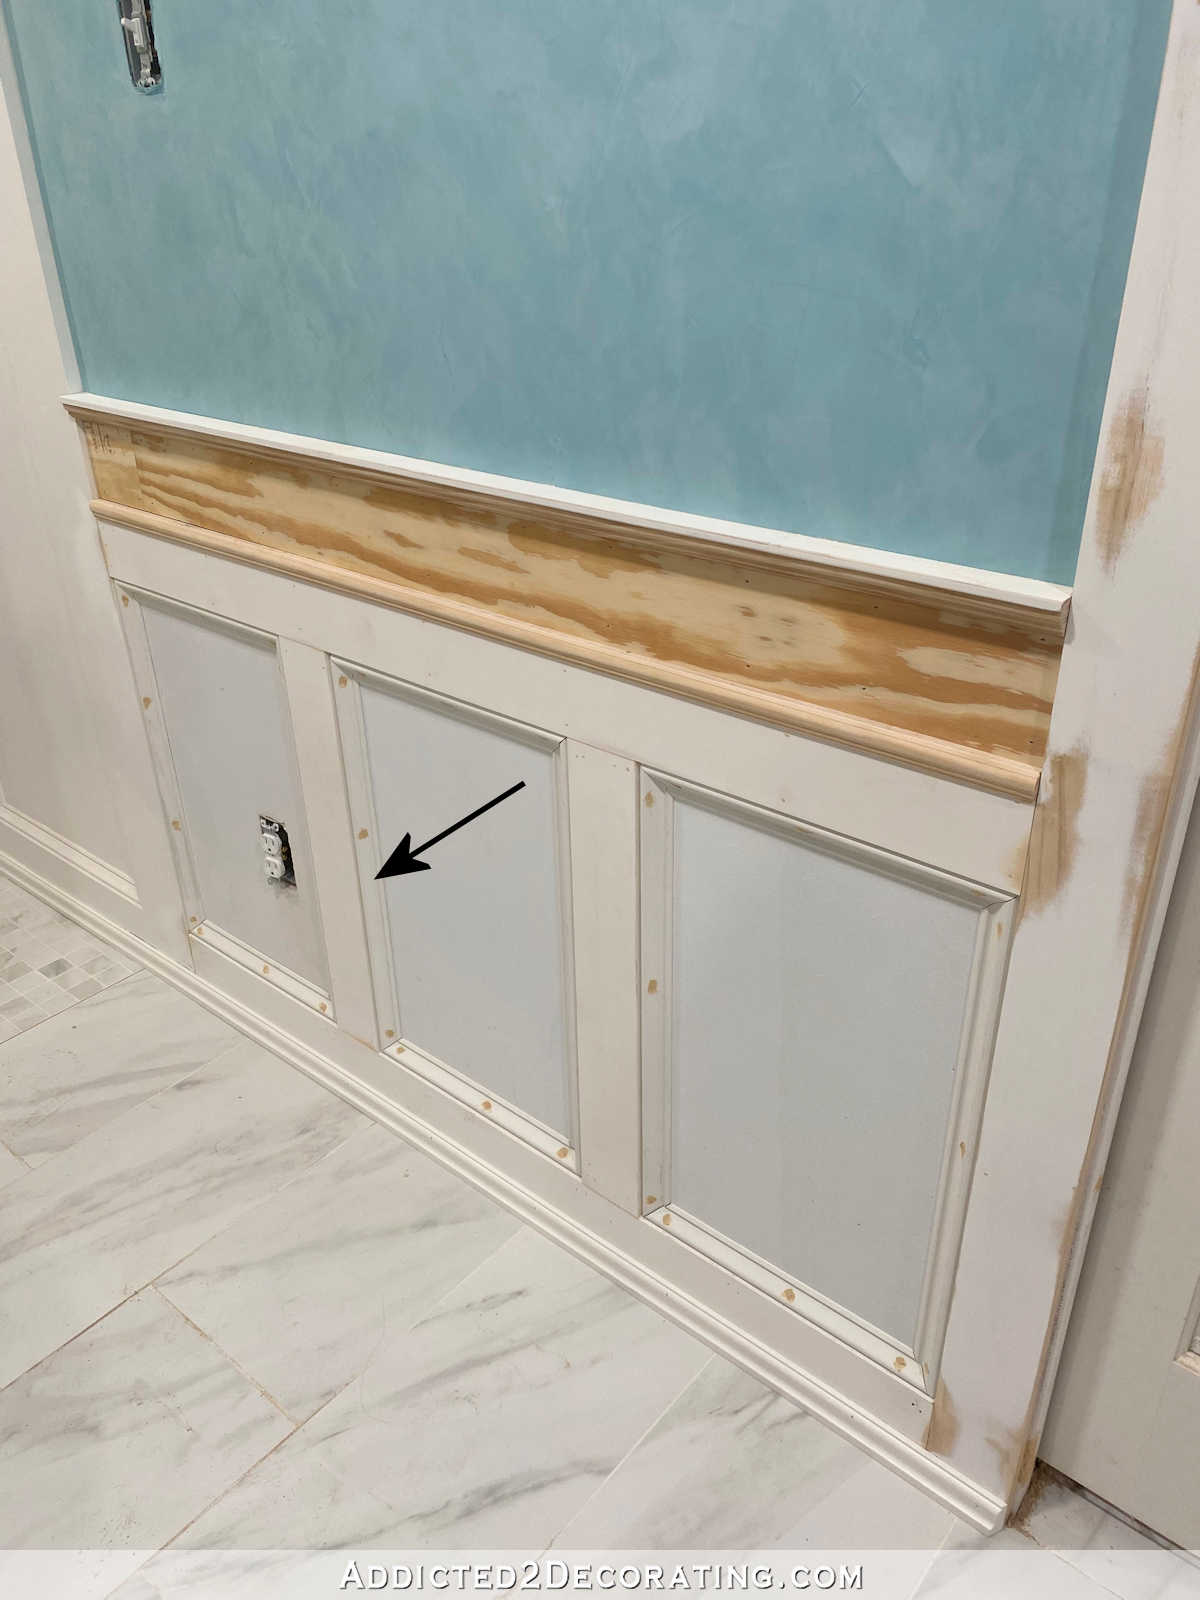
At this point, I took some time to add the vertical 1″ x 4″ pieces to the bottom area to section off three rectangles.
That way I could go ahead and fill the cracks with wood filler and so it could start drying.
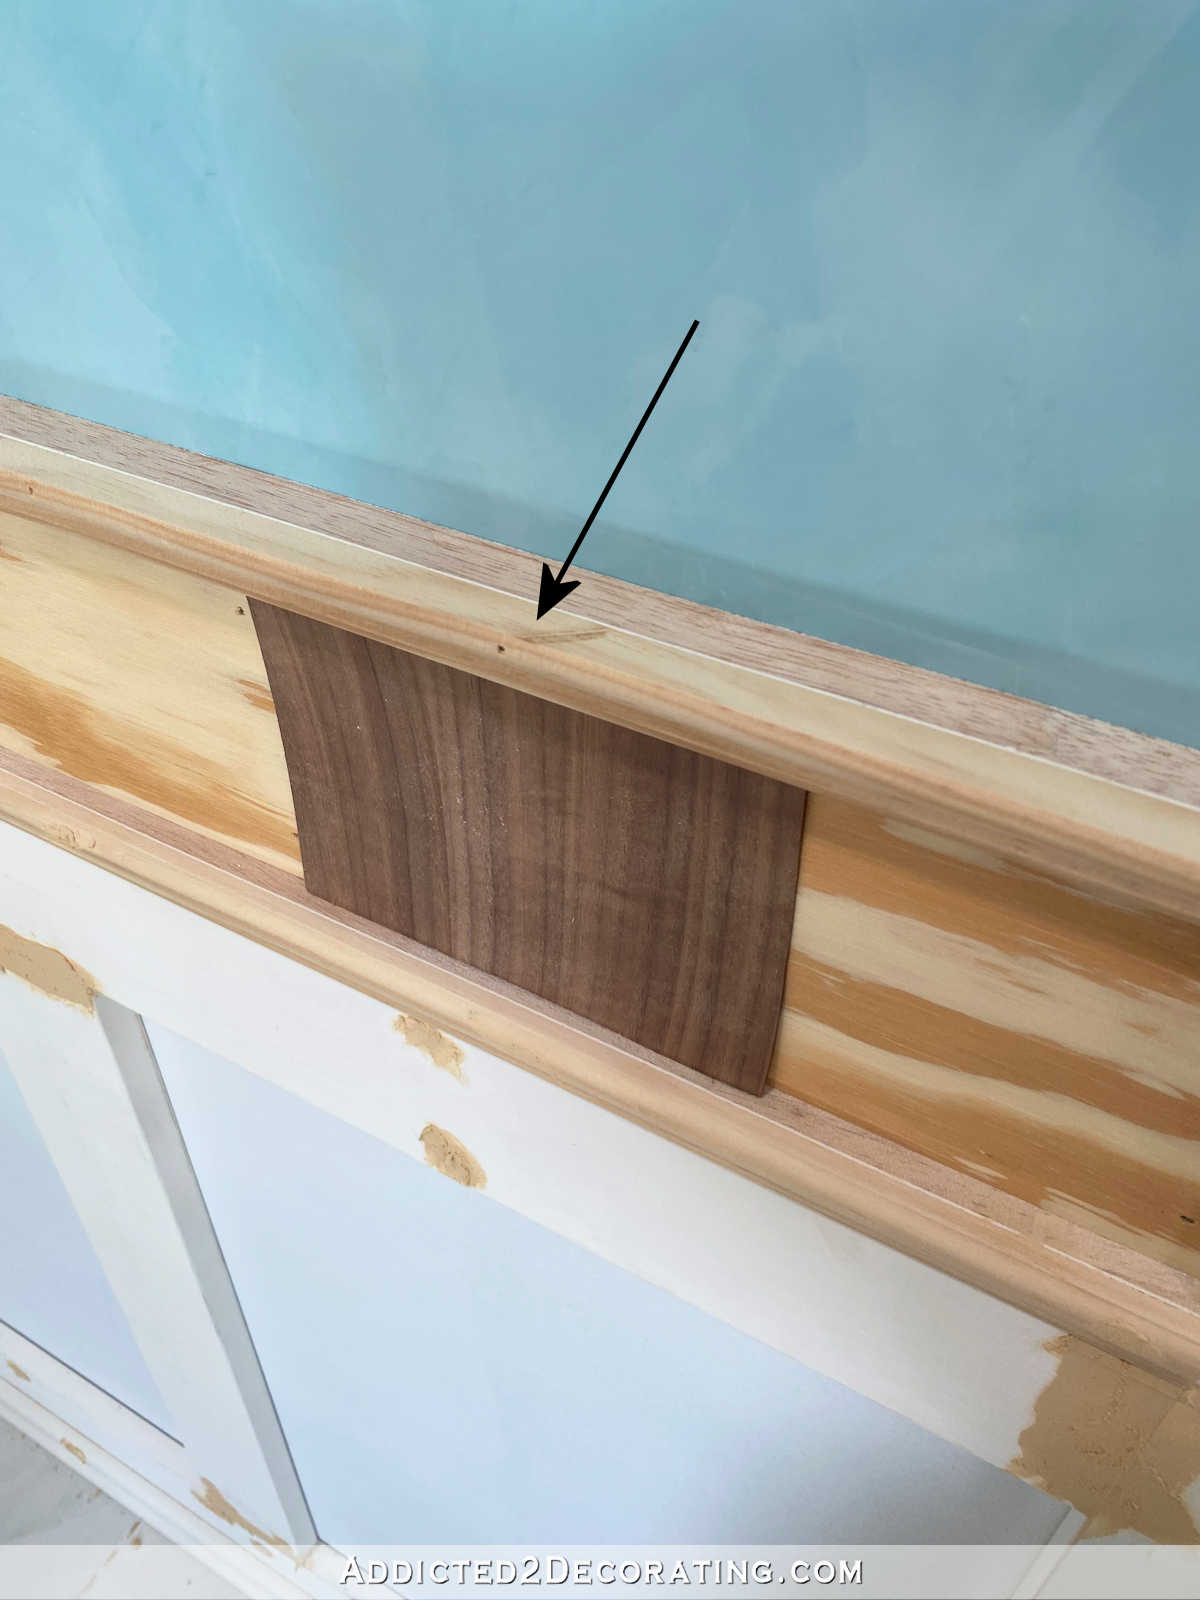
To finish off the top of the tile accent area, I cut another 3/4″ x 3/4″ strip and nailed it just above the plywood.
To finish off the front of that piece, I used 1.25-inch cabinet trim, but I used my table saw to rip it down to 3/4-inch. You can see in the picture below how the original trim looked (top) and what it looked like after I ripped it down (bottom).
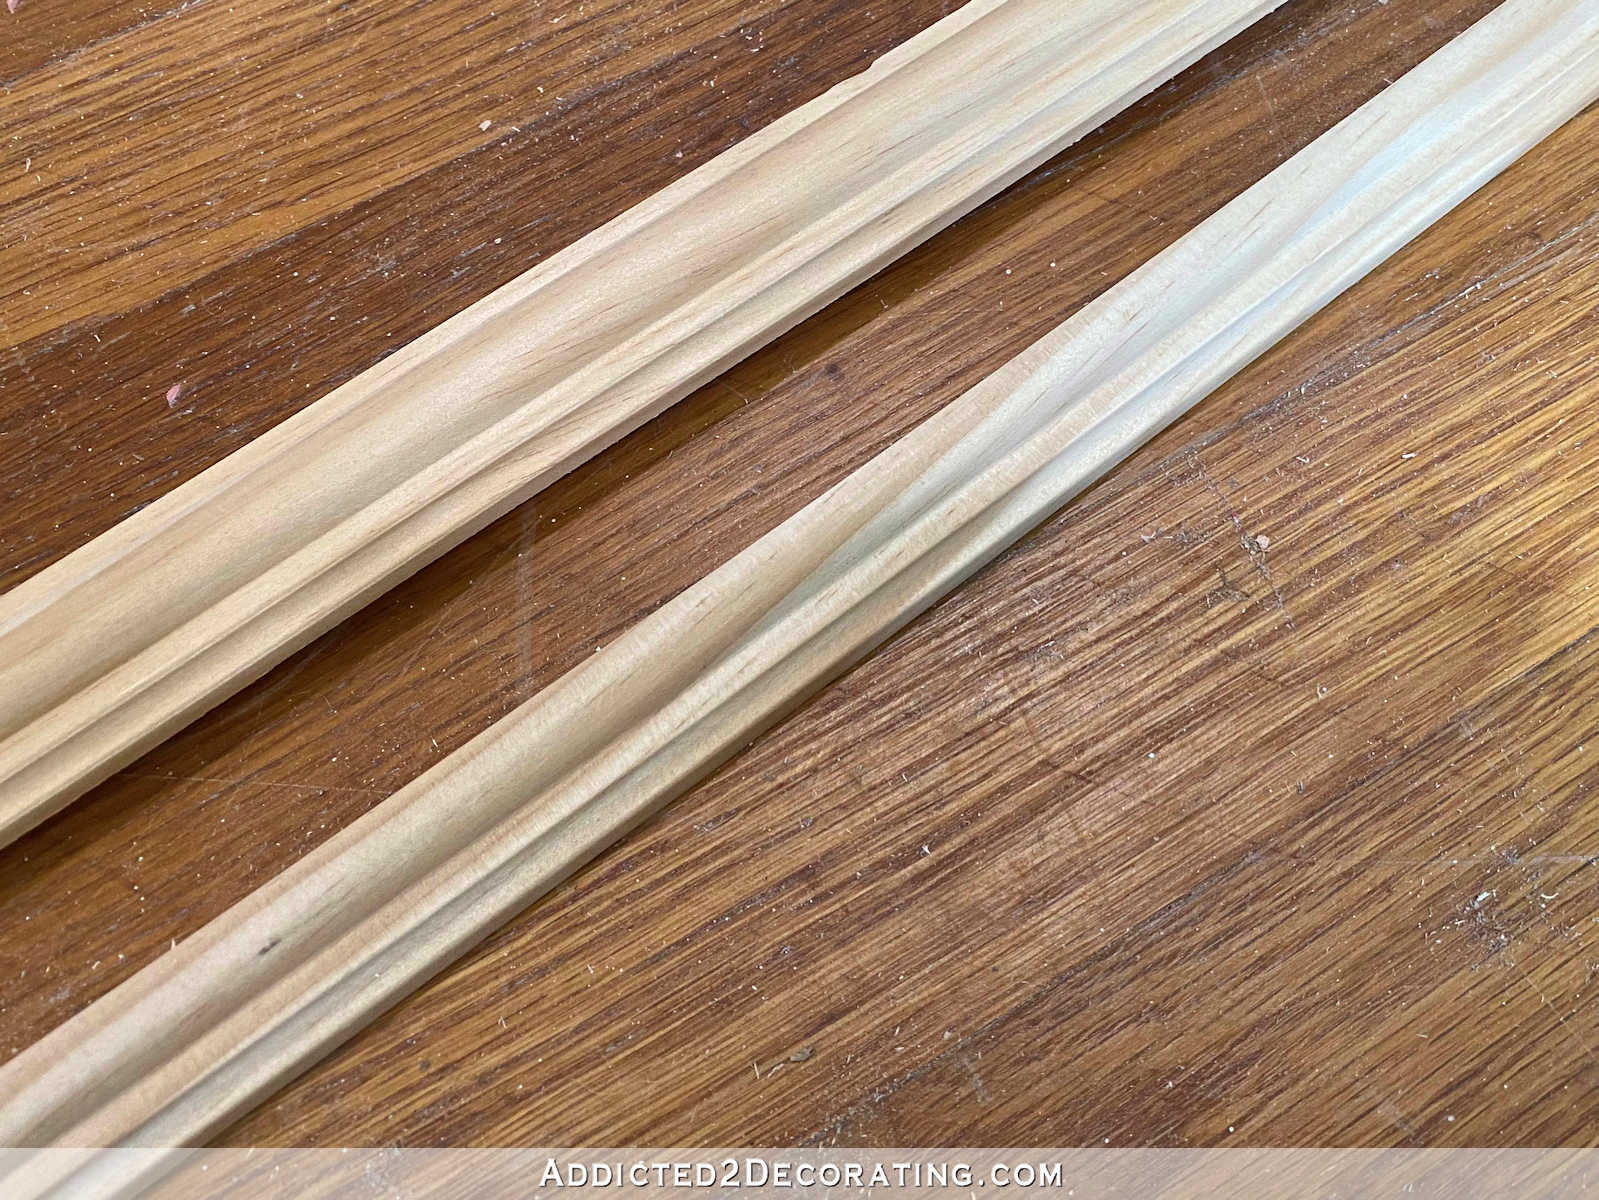
The reason I used this instead of just using a smaller trim is because I wanted the top edge of this trim to terminate right in the middle of that large bead, so that the finished trim would look kind of like a teeny tiny crown molding. The reason will make sense in the final step. If I had used a regular 3/4″-wide trim, the top of that trim would have curved back underneath the final piece too much, creating a crevice that would be hard to clean. That should make sense when you see the final piece go into place.
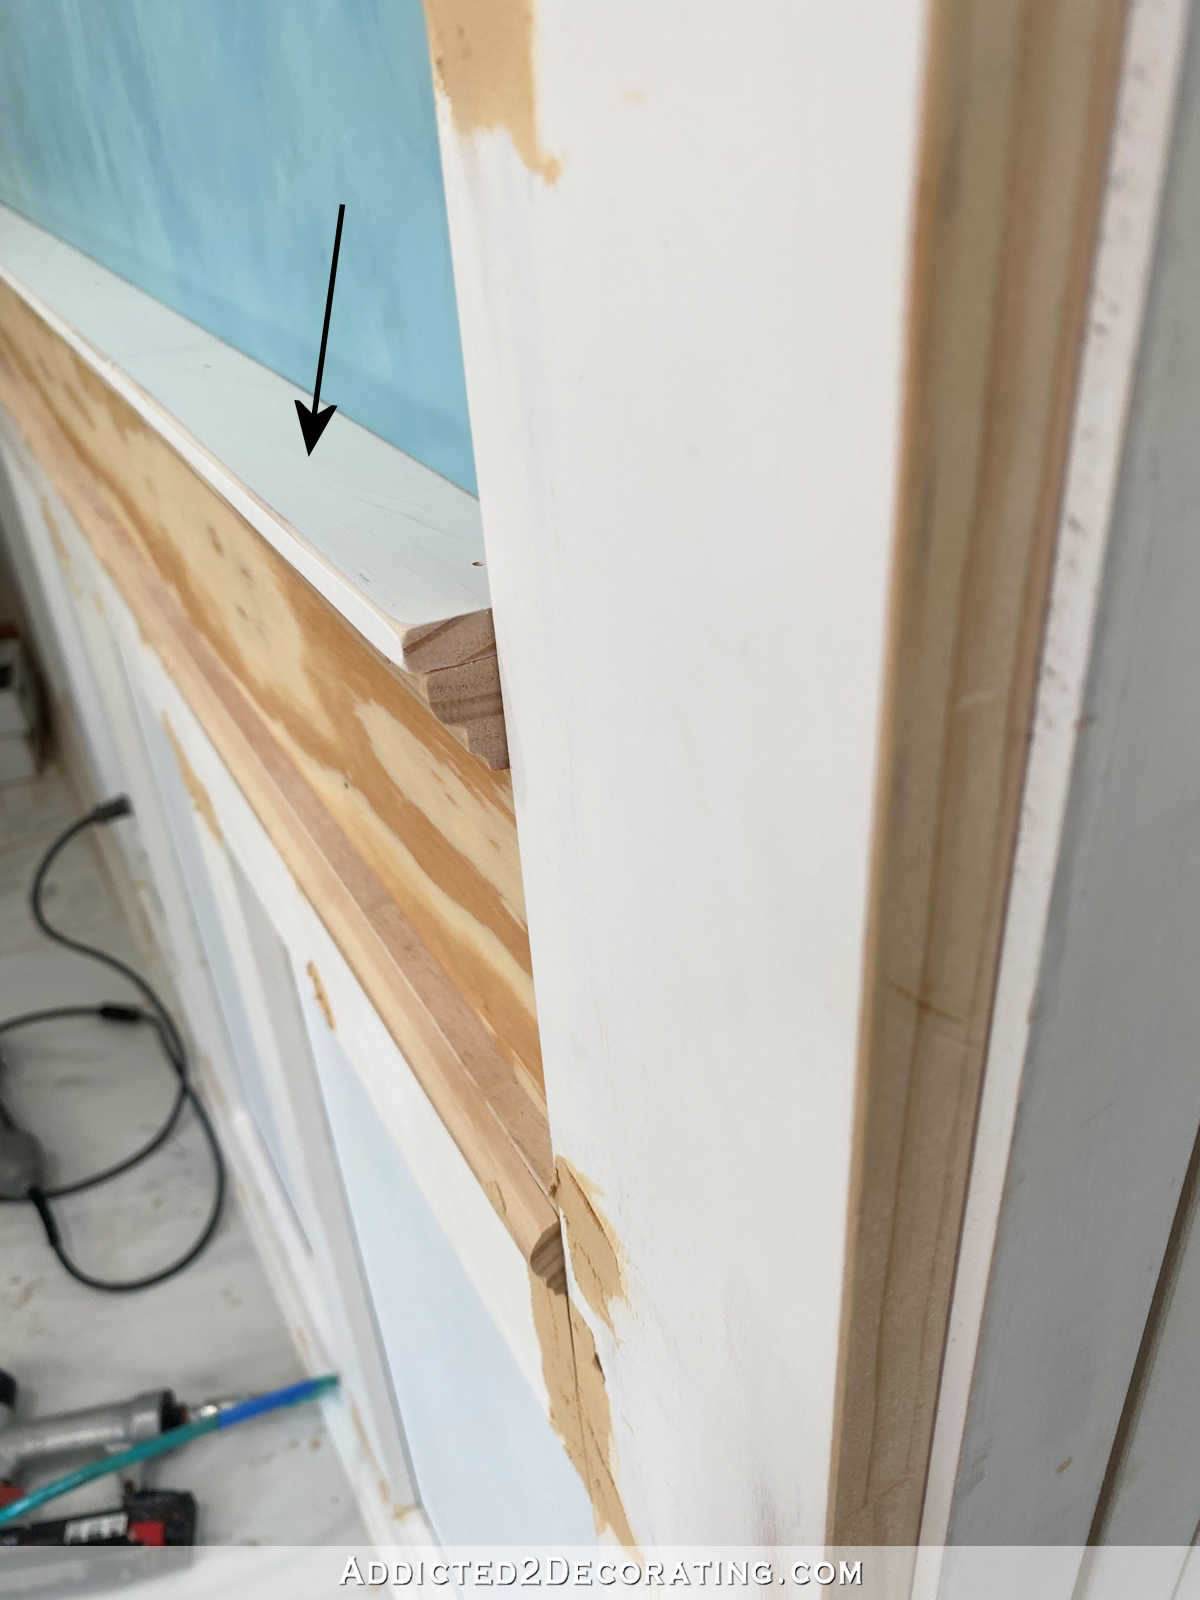
Anyway, I nailed that ripped piece of trim to the front of the 3/4-inch piece. I put the scrap veneer there just so that you could see the strip. Without that darker veneer there to create contrast, the trim piece blended right into the plywood and was very difficult to see.
And finally, I used my table saw to rip a piece of lumber so that I had a piece measuring 1.25″ x 1/4″ to cover the top of these pieces.
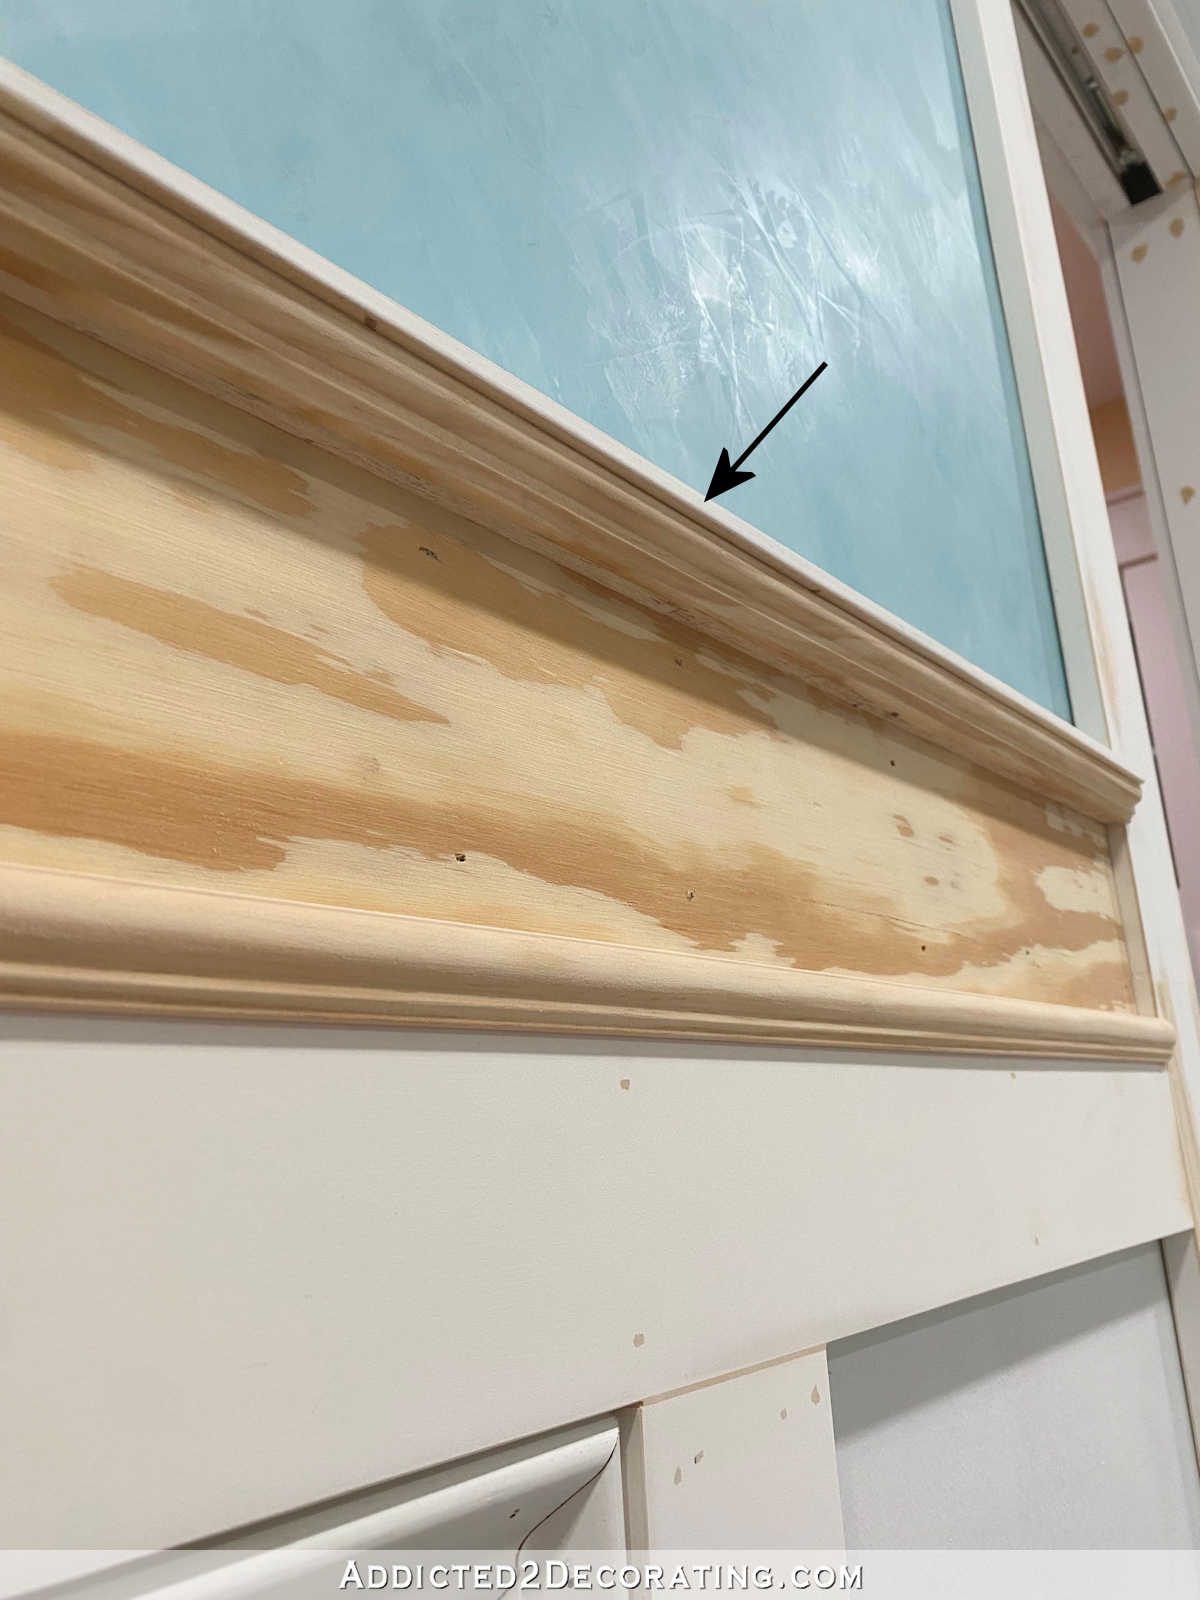
And I nailed it into place, finishing off the top of the wainscoting design. Hopefully now you can see why I wanted the top edge of that trim to terminate in the middle of that large bead rather than curving back towards the wall
You can see below that I added just enough width to this top piece so that it would have about a 1/4-inch lip.
To finish off the panels, I cut and installed base cap molding, mitered on the corners.
And that’s the basic wainscoting design. I’ll have this section (and hopefully all of the others) finished by Monday, so you’ll have to check back and see how it looks once it’s painted and has the tile accent in place.
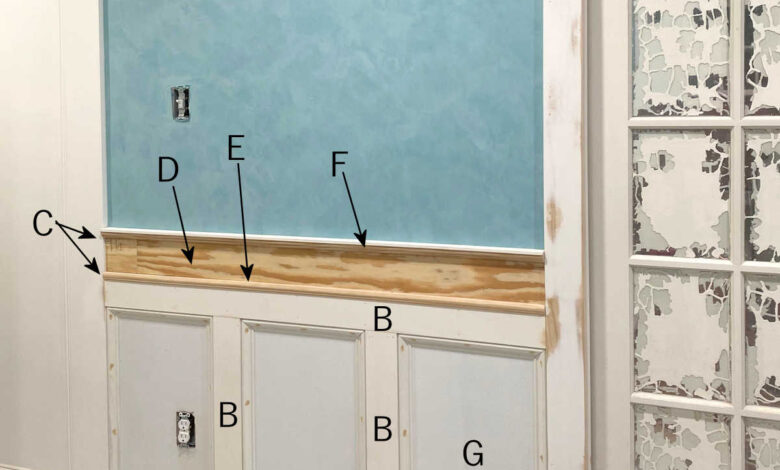
To review, here’s the basic overview of the anatomy of the judge’s paneling with the tile accent.

A. 1″ x 5″ (which is actually 4.5″ wide)
B. 1″ x 4″ (which is actually 3.4″ wide)
C. 3/4″ x 3/4″ strips (actual size, ripped on the table saw)
D. 1/2″ plywood
E. 1/2″ cabinet trim
F. 1.5″ cabinet trim (ripped to 3/4″ on the table saw)
G. Base cap molding
H. PVC shingle molding

Addicted 2 Decorating is where I share my DIY and decorating journey as I remodel and decorate the 1948 fixer upper that my husband, Matt, and I bought in 2013. Matt has M.S. and is unable to do physical work, so I do the majority of the work on the house by myself. You can learn more about me here.
I hope you’ll join me on my DIY and decorating journey! If you want to follow my projects and progress, you can subscribe below and have each new post delivered to your email inbox. That way you’ll never miss a thing!
Source link