*This post contains affiliate links.
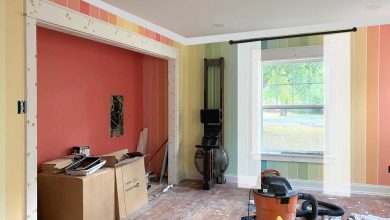
I’m finally starting on our home gym today! My goal over the next couple of days will be to clear out the rest of the stuff from the room (my paint cans, tools, and scrap wood from other projects always seem to land in that room), get all of the lights installed (six recessed lights and one ceiling fan/light combo), get the walls and ceiling primed, and then get the rest of the hardwood floor in the closet area installed.
But as you might expect, it’s not these basic projects that occupy my mind. It’s the fun stuff — the colors and designs that will go into the room. So this past weekend, I tried to finalize the design for the walls. I was having a hard time visualizing things in my mind, so I went to my favorite free floor planner, drew up a quick floor plan for the room, and saved some pictures of the room in the 3D view. Then I used my photo editing software (I use Paint Shop Pro) to add some color and design to the walls.
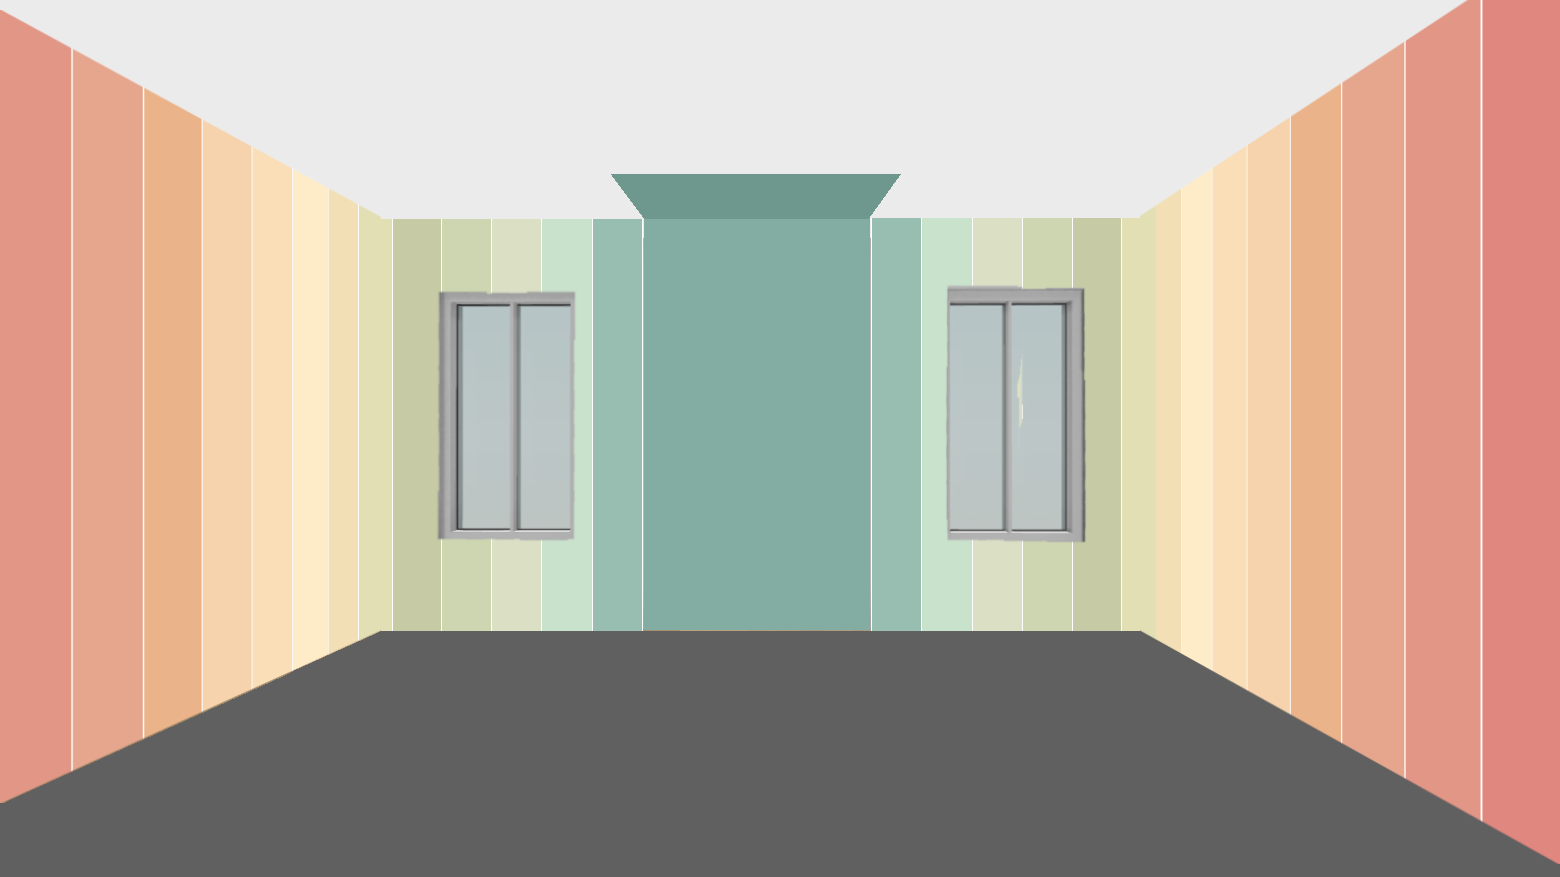
First, here’s the two-dimensional look at the room. When we made the hallway smaller to square up the future master bathroom (which has been delayed, but is still going to happen soon), it made the entry into this room longer. It’s an atypical room entrance, but I kind of like it. So as you can see, the wall with the two windows is the first thing you see when you walk into the room.
The middle of that wall is where I’m going to build a Swedish ladder. With that in mind, I don’t want a busy wall pattern behind the center 36 inches of that wall. I want that to be a solid color that extends onto the ceiling just a bit. So the wall design will have to start on either side of that solid 36-inch center part.
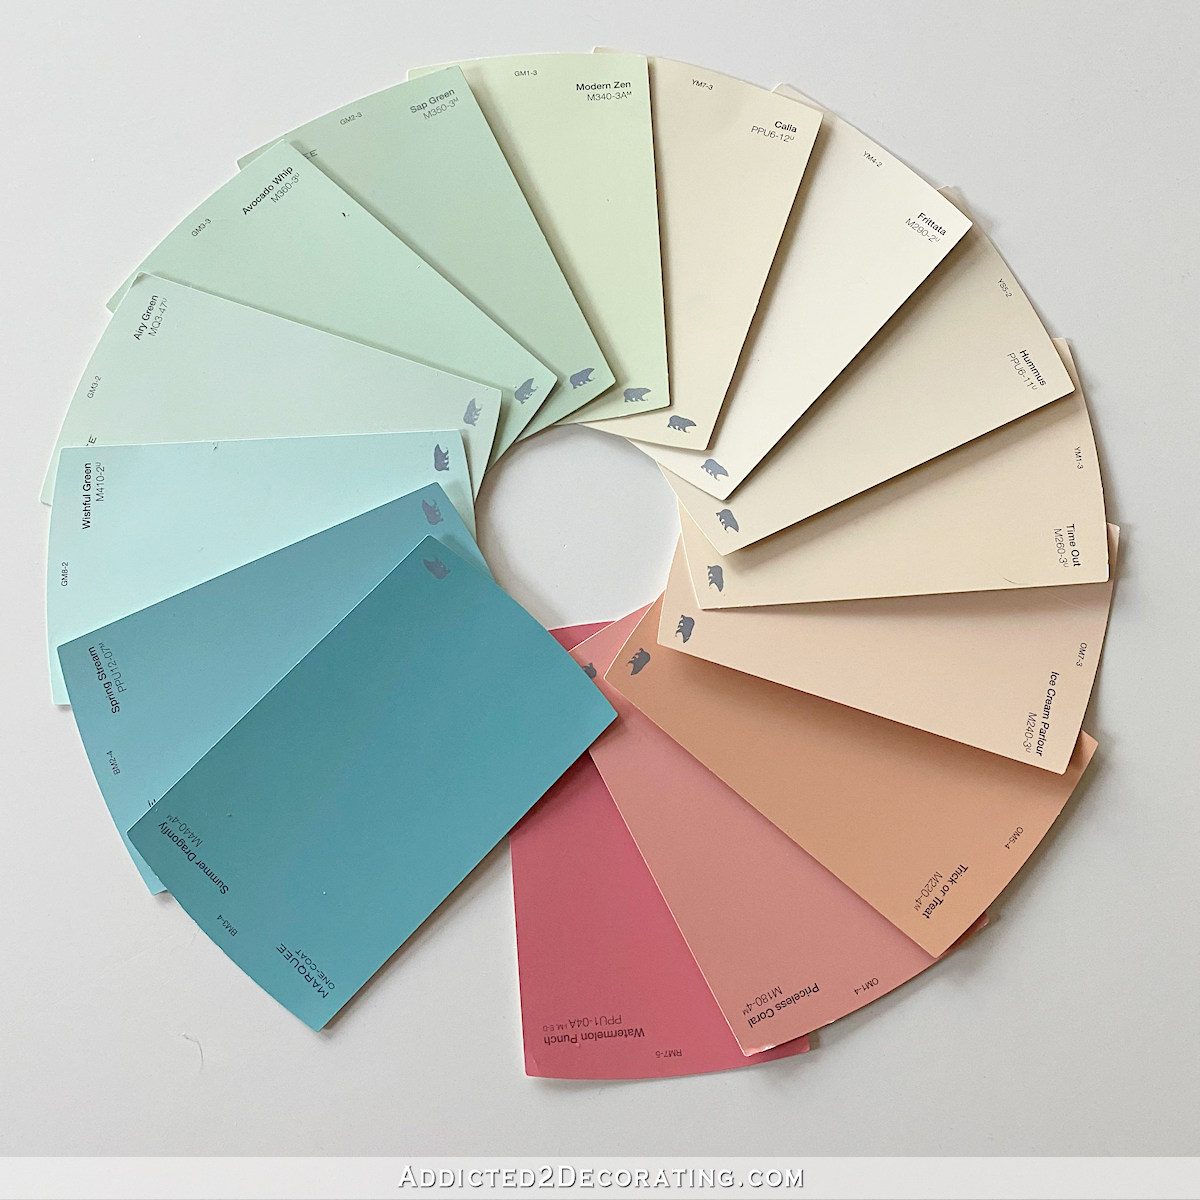
And just as a reminder, these are the colors I narrowed down for the room…
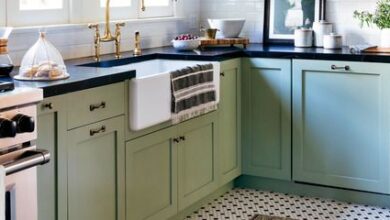
And this is the flooring that will go into the room…

(Note: If you’re reading this post on any website other than Addicted 2 Decorating, that means you’re reading on a site that is stealing my blog content. I hope you’ll consider joining me on my actual blog by clicking here.)
After trying to simply visualize the walls in my mind, and not having much success, I tried doing a very simple mock up just using my photo editing software. Those looked like this…

That was my attempt at trying out a horizontal stripe wall. But it’s hard to “see” it without windows and doors. I really don’t want horizontal stripes in that room, though. I have horizontal stripes in the hallway (neutral stripes in white and light gray), and I think it would be too much to have horizontal stripes in a connecting room as well.
And this was my attempt at a vertical stripe wall with a chair rail and white on the bottom.

It’s still hard to tell anything about that when it’s very two-dimensional.
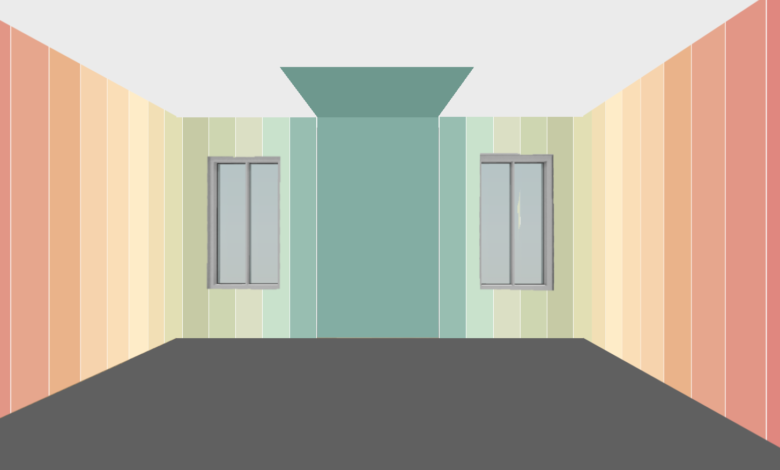
So that’s when I made a 3D floor plan and then started copying and pasting some stripes onto the walls. I didn’t do the whole room because that would have taken forever. But I did three different options for the main wall (i.e., the Swedish ladder wall) that you see when you walk into the room.
First, I tried out full floor-to-ceiling stripes with a white ceiling and the dark gray/black flooring. I didn’t put the baseboards or window trim in the picture, but those would be white. And I’m still undecided on crown molding. You can let me know if you would put crown molding with those walls. I do have crown molding in every other room of the house.
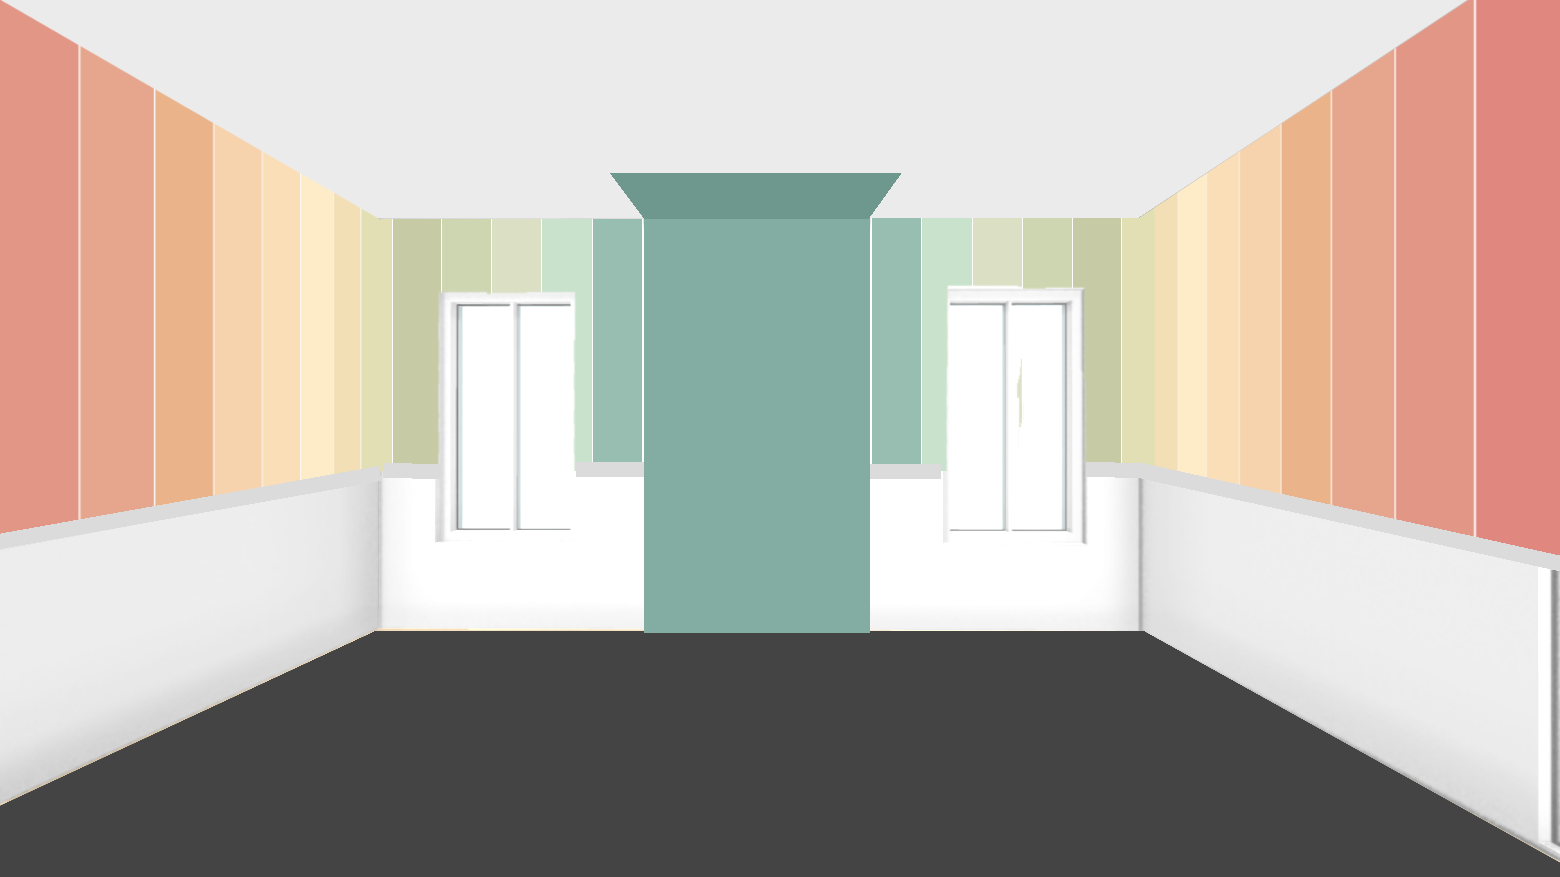
Then I decided to try out stripes just in the middle of the wall, with white on top and white below, inspired by something I saw by Racheal at Banyon Bridges (@banyonbridges) on Instagram. If you love color and pattern, and haven’t checked out her Instagram yet, you must! I have spent so much time perusing her photos and videos. It’s all so inspiring to me.
So here’s how this center wall design looked…

I love that one. It has a much more modern look to it than full floor-to-ceiling stripes. My only concern is that entire colors are eliminated when the design crosses windows and doors. On the doors, I could carry the design across the doors. But I’d still be missing full colors on the windows, and that’s kind of a bummer to me. Those colors would be repeated in other areas of the room, so I’m not sure if it would really be a big deal in the end. Maybe not.
And finally, I took it in a more traditional direction and turned it into an upper wall design with a chair rail and white walls underneath. I like that with this design, it’s not as in-your-face as the full floor-to-ceiling design, while you can still see all of the colors even in areas with windows and doors.
So this is as far as I got, narrowed down to three options. I can’t seem to get from three to one. But I do know the final design will be one of these three. Between the time I shared my initial thoughts with you a few weeks ago and this past weekend, I feel like I’ve looked at hundreds of wall options for this room, and finally came back around full circle to stripes. Stripes are just my happy place, especially when I really want to use all of these colors, and I want them to be in this order to get the gradient effect. That’s hard to do with any other design. Stripes are just perfect. Of course, I’d put stripes on everything if I could. 😀 For me, stripes are always the perfect option.
As of right now, the second option (center wall design with white above and below) is probably my favorite. But I don’t love the idea of entire colors disappearing in window areas. Is that a big enough issue that I should choose one of the other designs? What are your thoughts?

Addicted 2 Decorating is where I share my DIY and decorating journey as I remodel and decorate the 1948 fixer upper that my husband, Matt, and I bought in 2013. Matt has M.S. and is unable to do physical work, so I do the majority of the work on the house by myself. You can learn more about me here.
I hope you’ll join me on my DIY and decorating journey! If you want to follow my projects and progress, you can subscribe below and have each new post delivered to your email inbox. That way you’ll never miss a thing!