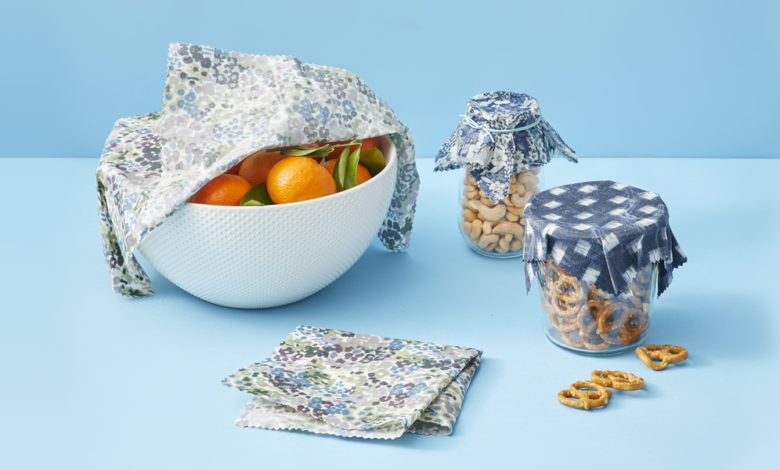
If you pack your own lunch every day (maybe your kids’ too), it might feel like you’re always adding cling wrap to your grocery list and throwing used plastic baggies in the trash. Disposable packaging definitely offers convenience, but it’s not the most environmentally friendly option. Enter beeswax wraps: The pliable covers fold up around foods and cover bowls of leftovers. Rinse clean with cold water and mild soap (hot H2O would melt the wax!) and you can reuse them time and time again.
These buzzy (pardon the pun) storage solutions sell for about $18 for a pack of three on Amazon, but if you’re feeling crafty, they’re super easy to DIY. Either way, you’ll easily recoup the cost by buying less sandwich bags and plastic wrap. If you use three plastic bags per day and a box of 150 costs about $10, you’re already spending more than $70 per year on something most people just throw away after one use.
FYI: Beeswax wraps aren’t air-tight and won’t keep highly perishable items (like raw meat) fresh. Betty Gold, Senior Editor & Product Analyst in the Good Housekeeping Institute, recommends using them to cover foods you’ll eat within a couple of hours or the next day, like a sandwich, bowl of pasta, or piece of fruit. For longer-lasting leftovers or smellier items like cheese, you’re probably better off sealing them up in reusable glass or plastic containers. With that in mind, here’s how you can make your own beeswax wraps with just a few supplies and an oven.
1. Cut the fabric.
Preheat the oven to 200°F or the lowest setting. Cut the fabric into sizes that will fit on your baking sheet. For a snack bag, use a 7″ by 14″ piece of fabric. A 14″ by 14″ square will cover most sandwiches. Pinking shears will help prevent your swatches from fraying, but scissors will also get the job done.
2. Place on a baking tray.
Line a baking sheet with parchment paper and place the fabric on top. If your fabric is one-sided, place the patterned side facedown. Use a fresh piece of parchment paper each time you make another wrap.
3. Sprinkle the pellets.
Evenly distribute a liberal amount of beeswax pellets all over the fabric. Make sure you get pellets near the edges too.
4. Melt and spread the beeswax.
Place the sheet in the oven for about 4-8 minutes. When the pellets melt completely, take the tray out and use a paintbrush to spread the wax evenly over the entire fabric.
NOTE: The beeswax will stick to the brush, so use one you’re okay discarding or saving to make future beeswax wraps.
5. Let dry.
Using tongs, remove the fabric from the baking sheet. It should feel cool to the touch after waving it for a few seconds in the air. Hang the fabric up to dry or set it on the back of a chair with the beeswax side facing up.
6. Customize your wraps.
Once the beeswax has set and is not very tacky, you can add buttons or hand-sew them into small pouches.
Snack Bags: Use a 7″ x 14″ piece of fabric. Once dry, fold the fabric in half with the non-treated sides facing inward. Hand sew the two sides together, leaving the top open. Turn the bag inside out, and add a button as a closure or stitch Velcro to both sides.
Sandwich Wraps: Use a 14″ x 14″ piece of fabric. On the patterned side, sew a button in two adjacent corners. To close, put the side with the buttons face down. Fold the fabric into thirds around the sandwich. Flip and fold the ends of the fabric up so the buttons are on top. Wrap twine around them in a figure-eight pattern for a secure closure.
How to Care for Your Beeswax Wraps
Wash your wraps by hand in cool water with a mild dish soap. Place them on a drying rack or clothesline to dry. Avoid any heat such as hot water, microwaves, or ovens that will cause the beeswax can melt, ruining your wraps.
WATCH: 5 Game-Changing Ideas for Packing Lunches
This content is created and maintained by a third party, and imported onto this page to help users provide their email addresses. You may be able to find more information about this and similar content at piano.io