I finally decided what I wanted to do to the walls in the water closet (toilet room) of our master bathroom! I just couldn’t have plain white walls in there, and tile was out of the question, so I wanted to come up with another idea.
A few days ago, I mentioned the possibility of doing a wood slat wall (as long as we don’t call it “shiplap” 😀 ), but most of you didn’t like that idea. But several of you had other ideas, and as I was pondering those ideas, it led me to my final decision.
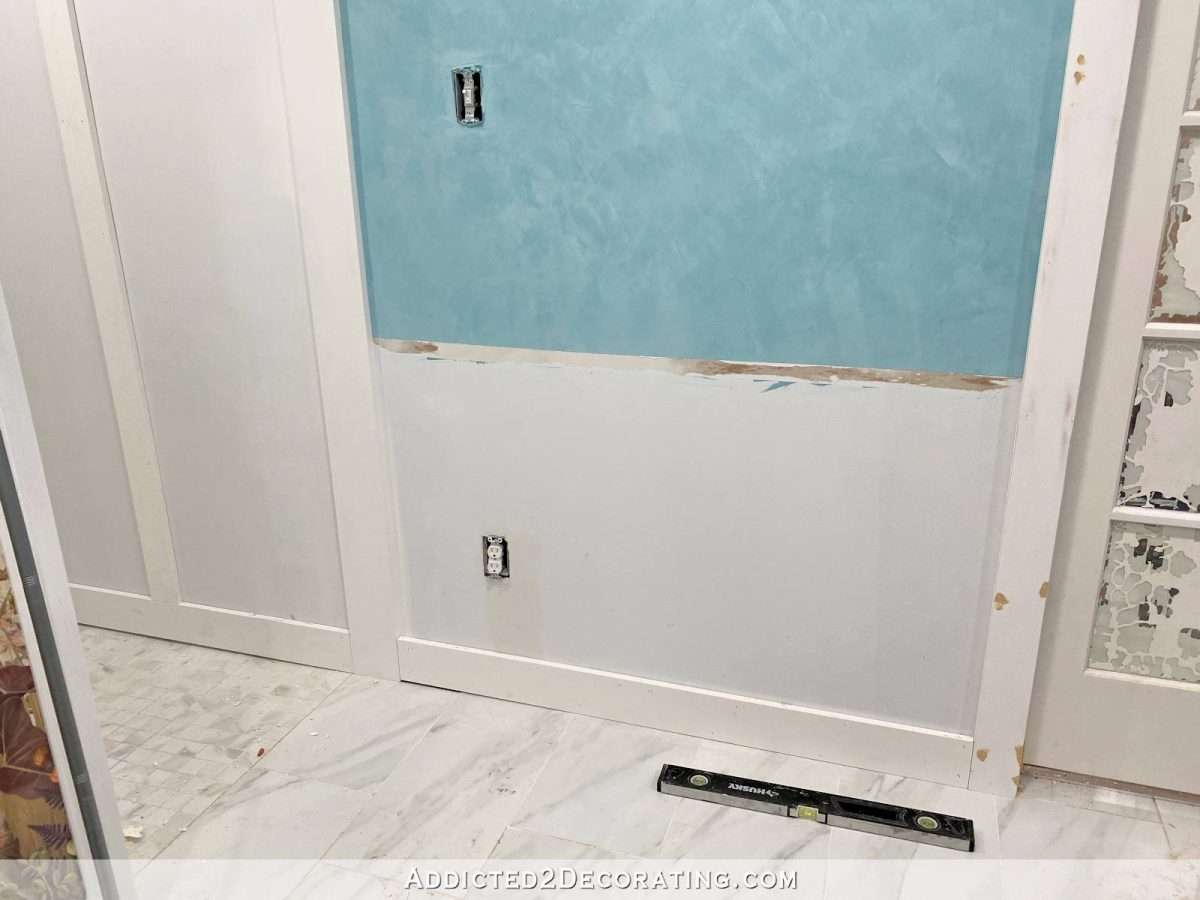
So let me back up a bit and explain that the walls in the main part of the bathroom will be the Modern Masters Venetian Plaster finish on top (which is already done), and then the lower part of the walls will be white wainscoting just like I have in the hallway bathroom…
I contemplated using simple picture frame molding on the wainscoting, like I have in the music room, but I finally decided that this style of wainscoting (which I believe is called judge’s paneling) is my favorite. So naturally, it should go in our master bathroom.
Anyway, several of you suggested that I just carry the walls of the main bathroom area in to this water closet, but that’s out of the question. There’s just no way I can have an all white shower to the left of the mural wall, and then an area with teal upper walls and white lower walls to the right of the mural wall. That kind of asymmetry would send me over the edge. At a bare minimum, I need symmetry of color, meaning that the shower and the water closet, at the very least, need to be the same color. So that means the water closet needs to be white.
But the idea of just having plain white walls didn’t sit well with me. I’d be tempted to hang artwork on a plain white wall, and then there goes my symmetry of color, and it would draw the attention away from the mural. But I LOVED the idea of carrying the wainscoting into the water closet.
I thought through some different options, and I loved the idea of doing the lower walls the exact same way as the main part of the room (just like in the hallway bathroom), and then adding the same wall treatment above the chair rail as well, and painting it all white.
The problem with that idea is that I’m still planning on incorporating the glass penny tile into the wainscoting in the main part of the room, and I did NOT want to add tile to the water closet. I couldn’t come up with a way to have the same lower wall design in both areas, but have the main area with the glass tile, and the water closet without the glass tile, and make that look intentional and planned. I think it would just look like I ran out of tile and had to make do.
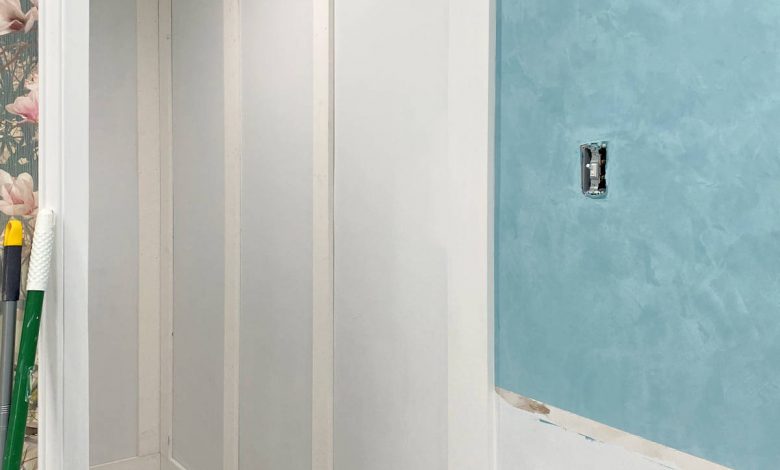
So in the end, I decided to do the judge’s paneling in the water closet, but take it the full height of the wall. And then the whole thing will be painted white. Obviously, this addition won’t be perfectly symmetrical with the shower, but really, there’s no way to achieve perfect symmetry with the shower unless I’m willing to tile the walls in the water closet. And I’m not. But as long as both areas are white, I’m okay with that.
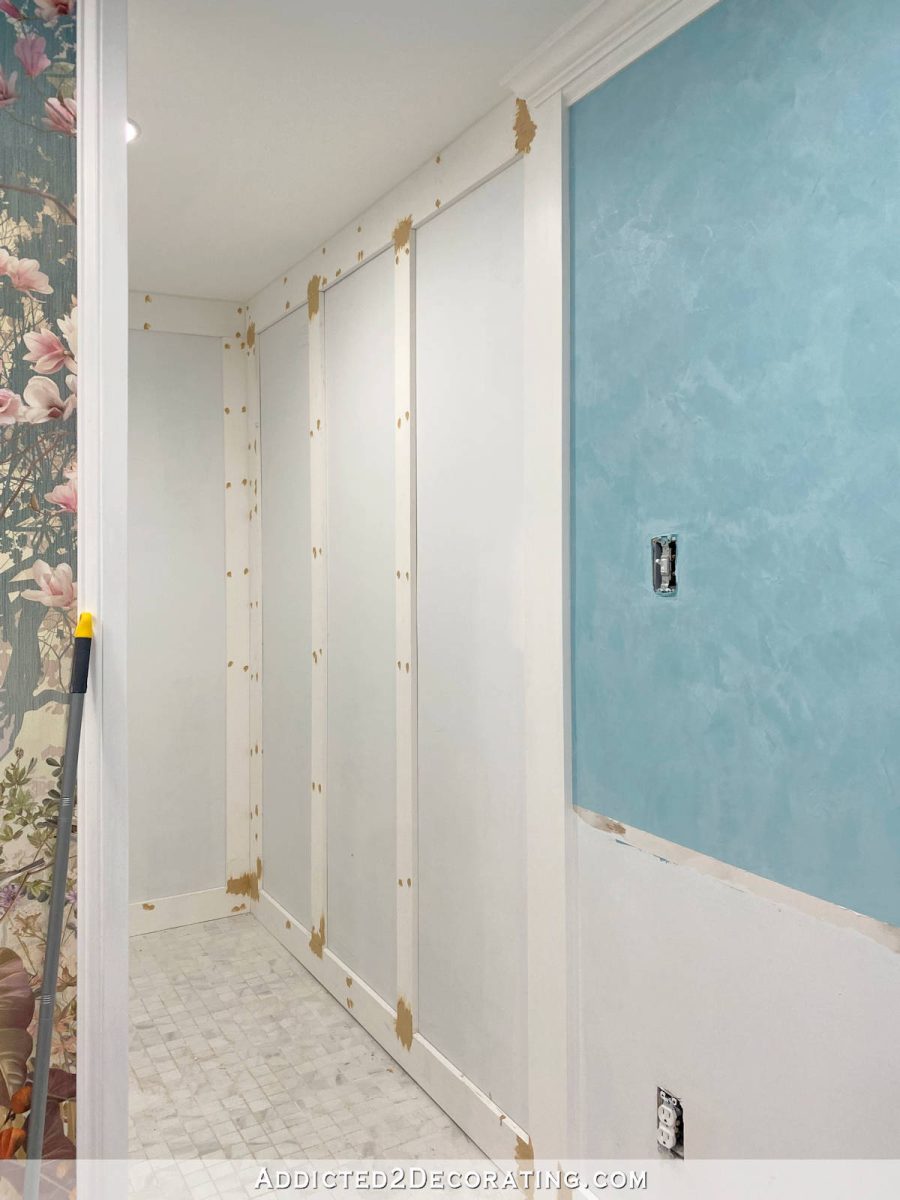
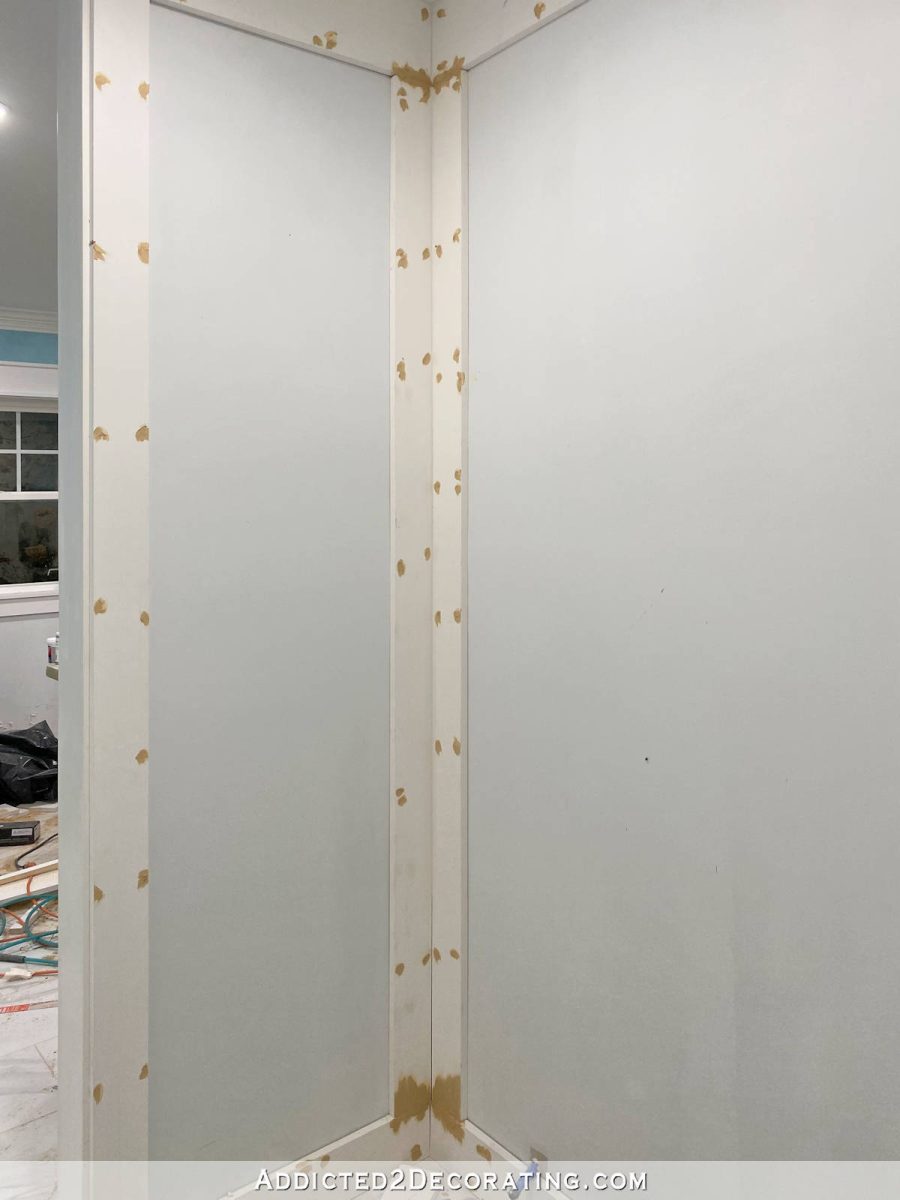
I got quite a bit done on this little area yesterday. I started by adding baseboards along the floor (using 1″ x 5″ pre-primed lumber), and then added some horizontal pieces around the top of the walls at the ceiling. For those, I used 1″ x 6″ pieces. And then I added the vertical pieces, which are 1″ x 4″ lumber.
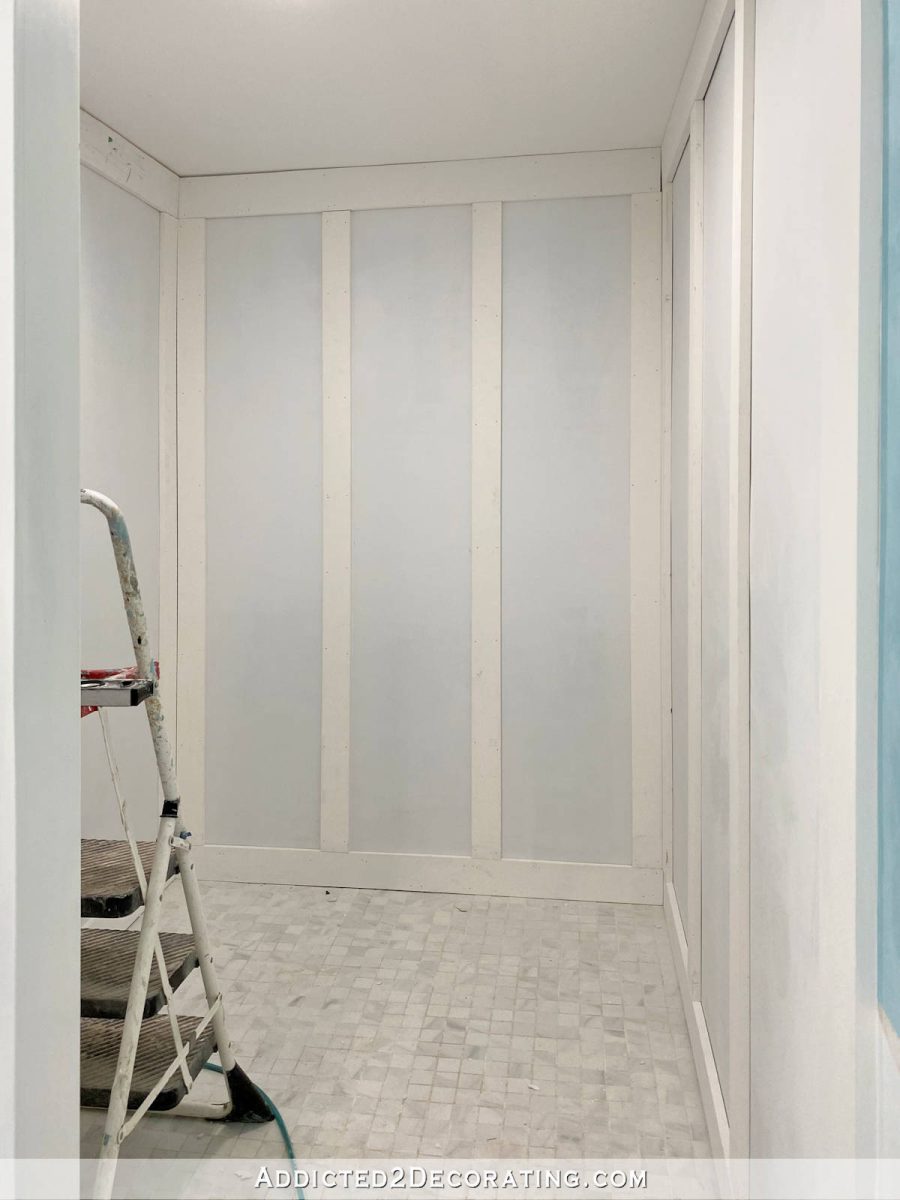
At this point, it looks pretty plain, and kind of has a farmhouse board and batten look to it. And if you want that full height farmhouse board and batten look, this is where you’d stop. You’d just fill the nail holes with wood filler, caulk the areas where the boards meet the wall and ceiling, and paint.
But of course, the farmhouse board and batten look isn’t quite what I’m going for in here, so I still have quite a bit of trim to add to take this from farmhouse to traditional, which is much more my style.
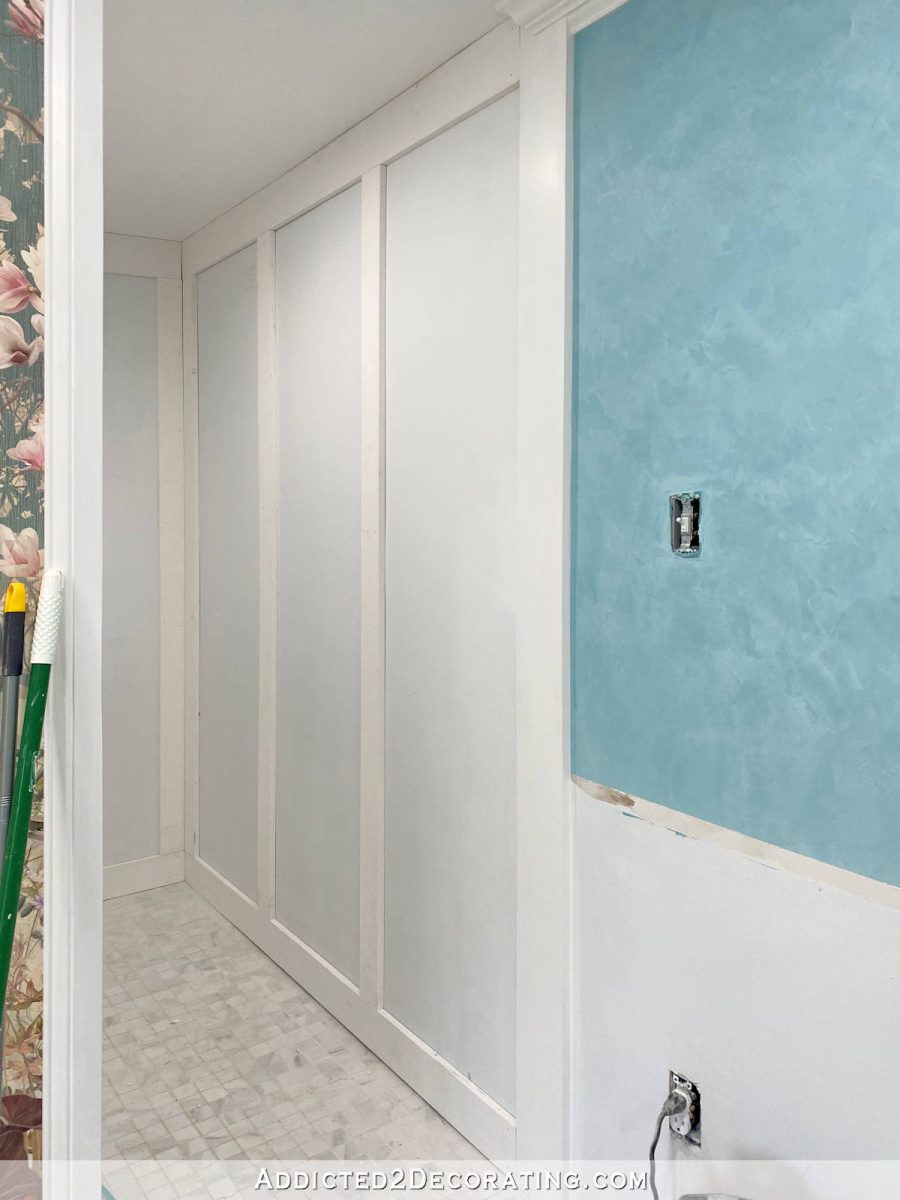
But hopefully you can kind of envision how the two will coordinate with each other. If you can, try to envision the hallway bathroom style of wainscoting below the upper blue walls, with the glass penny tile incorporated into the wainscoting, and then the same style of paneling installed full height in the water closet.
This is a much smaller area than the shower, so it was difficult to get a good picture of the wall that’s actually hidden behind the mural wall (perpendicular to the mural wall). This is the wall where the toilet will actually go, and this wall will not be divided into three sections like the other two walls.

I bought a space saving, wall-hugging toilet to go in here so that the toilet won’t stick out past the short wall (the mural wall), and if I divide that wall into three equal sections, that puts one of the vertical pieces behind the toilet. And I don’t have 3/4-inch to spare behind the toilet. Plus, I have a plan for this wall since it’s tucked away, and whatever I do there won’t detract from the mural. So on that wall, I’m trimming it out as one big rectangle rather than three.
Anyway, I got all of the main boards installed, did a little caulking around the ceiling, and then filled all of the nail holes and joints with wood filler.
I like to do the wood filling and sanding at this stage, rather than waiting until after the rest of the trim is installed, so that it can be sanded with a rotary sander. If I install the rest of the trim first, and then do the sanding, it all has to be done by hand because the rest of the trim sticks out just a tiny bit past these boards, and it’s impossible to use a rotary sander after that trim is installed and not mess it up with the sander. I know that from experience. 🙂

So it’s nothing pretty to look at just yet. I left it at this ugly stage, which I always call the “chicken pox stage” in my mind. It always reminds me of a person with chicken pox with calamine lotion on each little itchy bump. 😀
I’m just happy to have finally made a decision that I’m happy with — a decision that allows me to keep the room white while adding some interest to the walls in a way that will keep me from needing to hang artwork on the wall that will show from the main part of the room. And if you can’t envision it just yet, I should have much more progress to share with you on Friday.

Addicted 2 Decorating is where I share my DIY and decorating journey as I remodel and decorate the 1948 fixer upper that my husband, Matt, and I bought in 2013. Matt has M.S. and is unable to do physical work, so I do the majority of the work on the house by myself. You can learn more about me here.
I hope you’ll join me on my DIY and decorating journey! If you want to follow my projects and progress, you can subscribe below and have each new post delivered to your email inbox. That way you’ll never miss a thing!
Source link