I almost decided not to share my progress today just because I’m so tired of talking about shower tile, but I did promise to be accountable and keep y’all in the loop with my progress (it really does help me keep focused), so I’m here. And I really did make some good progress, but as is always the case, it’s just not quite as much progress as I had hoped.
At the end of last week, I shared how last week was kind of a wash for me. I tried a decorative accent stripe on the shower walls, didn’t like it, and ripped it out. (Read: A Bad Week For Progress, A Good Week For Clarity.) So at the end of last week, after a few steps forward and a couple of steps backwards, this was the progress on the shower wall tile…
As I ripped the tile off of the top of that wall, it also ripped off the waterproofing membrane I had applied. I used Semco waterproofing membrane in the shower, but it’s only available online. Not wanting to wait for a new order to arrive, I headed to Home Depot and picked up the red waterproofing stuff that they sell just to use on this back wall.
Had this been on a wall that would get consistently wet each time the shower is used, I would have waited for a new Semco order. But since this is on the wall that will get the least amount of water, and it’s also on the top of the wall, I was okay using the red stuff.

Now that I’ve used both brands in a relatively short period of time and on the same project, I can tell you that I really do prefer and recommend Semco. The Semco waterproofing is very easy to apply. It’s also a thinner product, which doesn’t sound like a positive thing, but it really is. It fills in pinholes and tiny hairline cracks much easier than the thicker RedGard does. And probably the main difference that I noticed is that RedGard dries much harder, where the Semco is very durable when dry, but it remains pliable. For something that’s meant to be a crack prevention membrane, I would think that pliability would be essential so that the membrane won’t crack as the house moves and shifts throughout the seasons.
So take that for what it’s worth. 🙂 My waterproofing membrane of choice from here on out will always be Semco, but obviously in a pinch, I’ll use the RedGard.
After letting that dry overnight, I finished up the tile on that back wall.
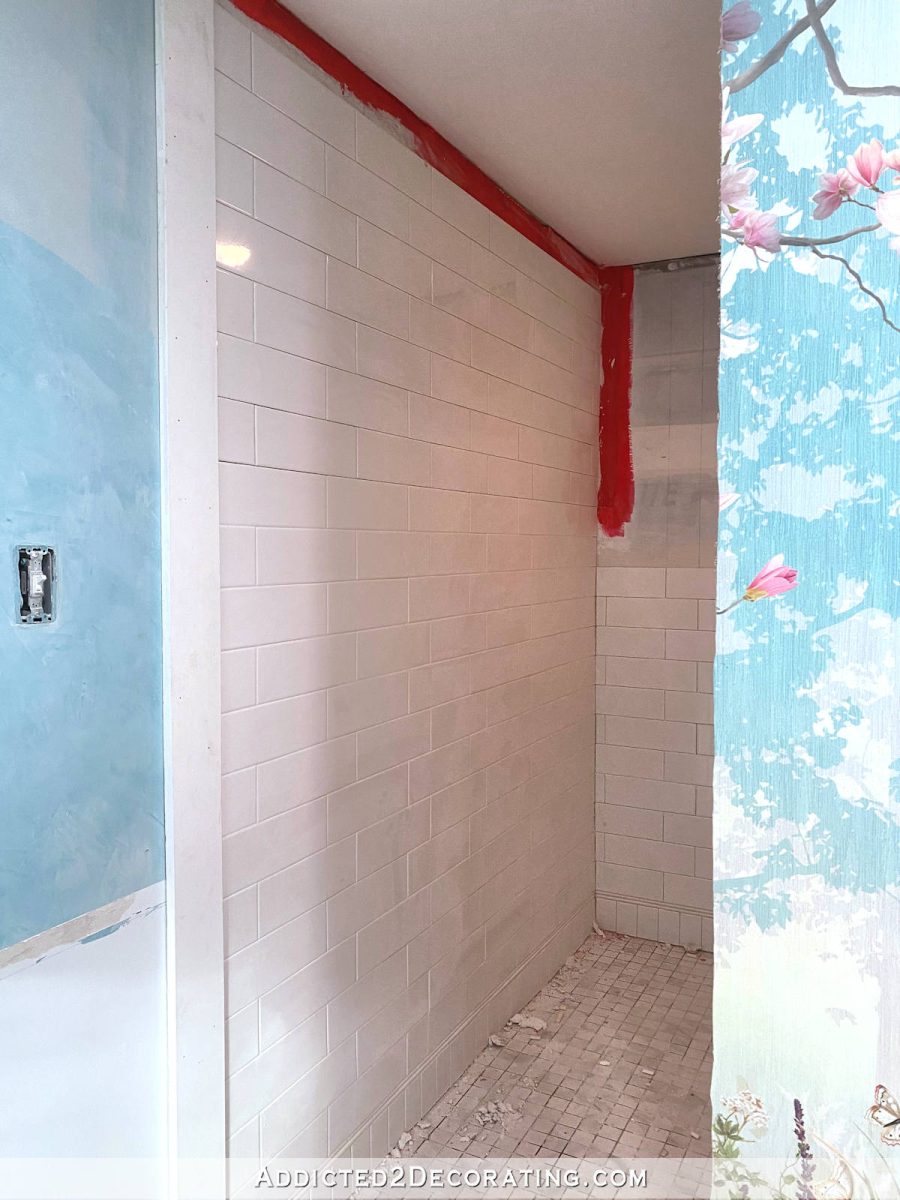
You can see that the bottom 2/3 of the wall is grouted (and still very hazy), but the upper 1/3 isn’t yet grouted. I didn’t take the tile all the way to the ceiling because I’m still contemplating a couple of different options for that area.
I had hoped that I’d get all of the side wall tiled as well, but when I finished up last night, working from bottom to top, I had only made it just past the niche. That niche really slowed me down because I had no idea how to handle it. I’ve never tiled a niche before. But I think I finally have it figured out. I still have to tile the inside, but at least I got all of the intricate cuts finished to go around the outside of the niche.

The rest of that wall, not including the inside of the niche, should be pretty easy.
So it’s getting there! It’s easy to get frustrated with myself for how slow this project is going, but I keep reminding myself that this isn’t a standard shower. This shower has a whole lot more tiled area than most do. The average master bathroom shower size is around 4′ x 3′ and has one or two glass walls. This shower is 7′ x 7.5′ with no glass walls, so I’m trying to cut myself some slack. But I’m so ready to be done with this so I can move on to something else!!! And I’m sure y’all are ready for that, too. 😀

Addicted 2 Decorating is where I share my DIY and decorating journey as I remodel and decorate the 1948 fixer upper that my husband, Matt, and I bought in 2013. Matt has M.S. and is unable to do physical work, so I do the majority of the work on the house by myself. You can learn more about me here.
I hope you’ll join me on my DIY and decorating journey! If you want to follow my projects and progress, you can subscribe below and have each new post delivered to your email inbox. That way you’ll never miss a thing!
Source link