I haven’t gotten as much done on the bathroom over the last two days as you’d probably expect, but keep in mind that I don’t work on Wednesdays. 🙂 But on Tuesday, I did make some progress with the tile on the bathroom floor.
I had been undecided on what I wanted to do on the floor in the toilet area. When I started tiling the floor, the plan had been to use the small 2 x 2 tile only on the shower floor, and then use the large tile on the floor in the toilet area.
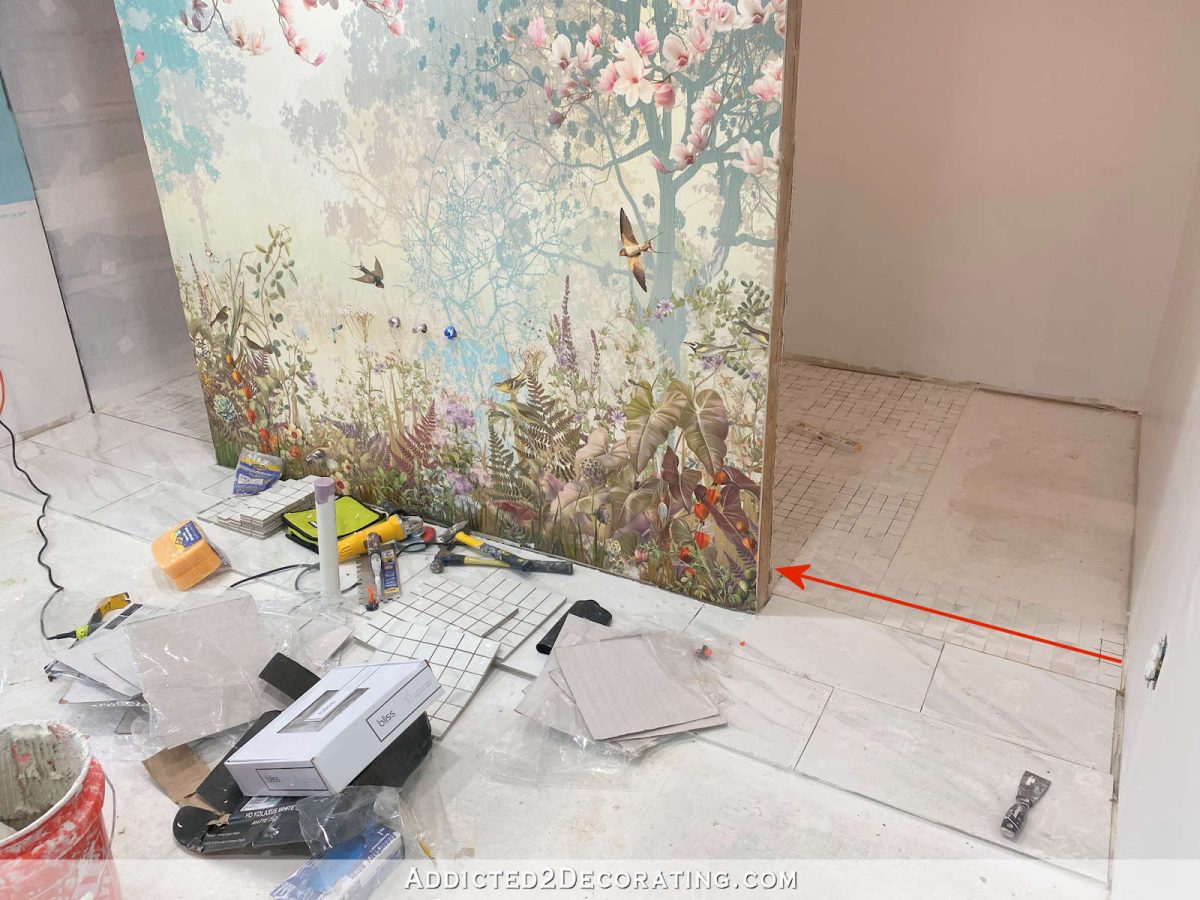
But when I decided to use the little brushed brass Schluter strip as a separator between the large floor tile and the 2 x 2 shower floor tile, that threw a wrench into my plans. Y’all know how much I love (need) symmetry, so I couldn’t do a brushed brass transition strip on the left side of the bathtub area (the bathtub will go in front of the mural), and not do a transition strip on the right side of the bathtub.
I briefly considered doing a transition strip on the right side and then continuing on with the large tiles in the toilet area, but that would seem random and needless. The transition strip only makes sense (in my mind) if there’s a true transition in the flooring used on either side of the transition strip.
So I went with symmetry, including the transition strip and the 2 x 2 floor tiles in the toilet area.
Here’s a view of the two areas. I seriously love symmetry. It sooths my mind. 😀
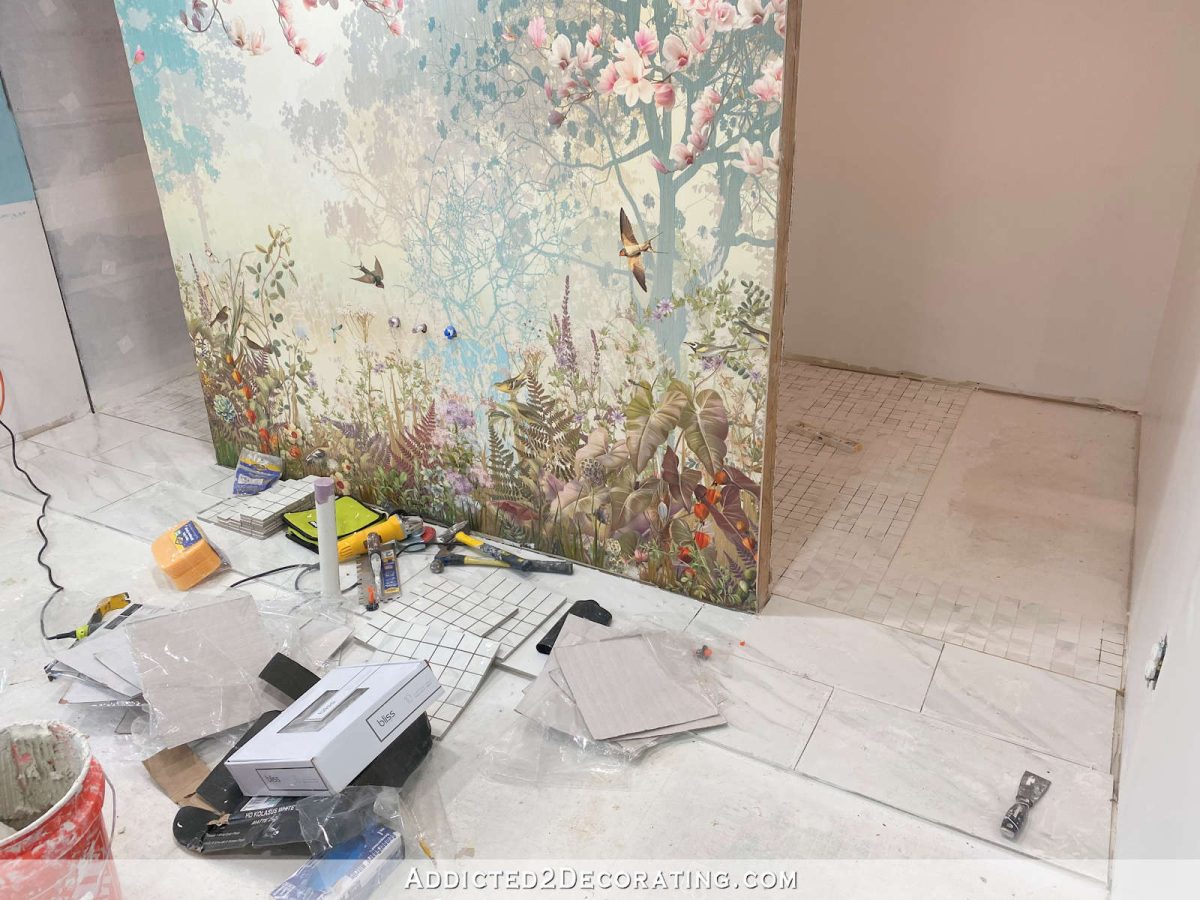
If this were a tiling job that I could have done by starting at the back wall and working my way out the door, it could have been finished in one day.
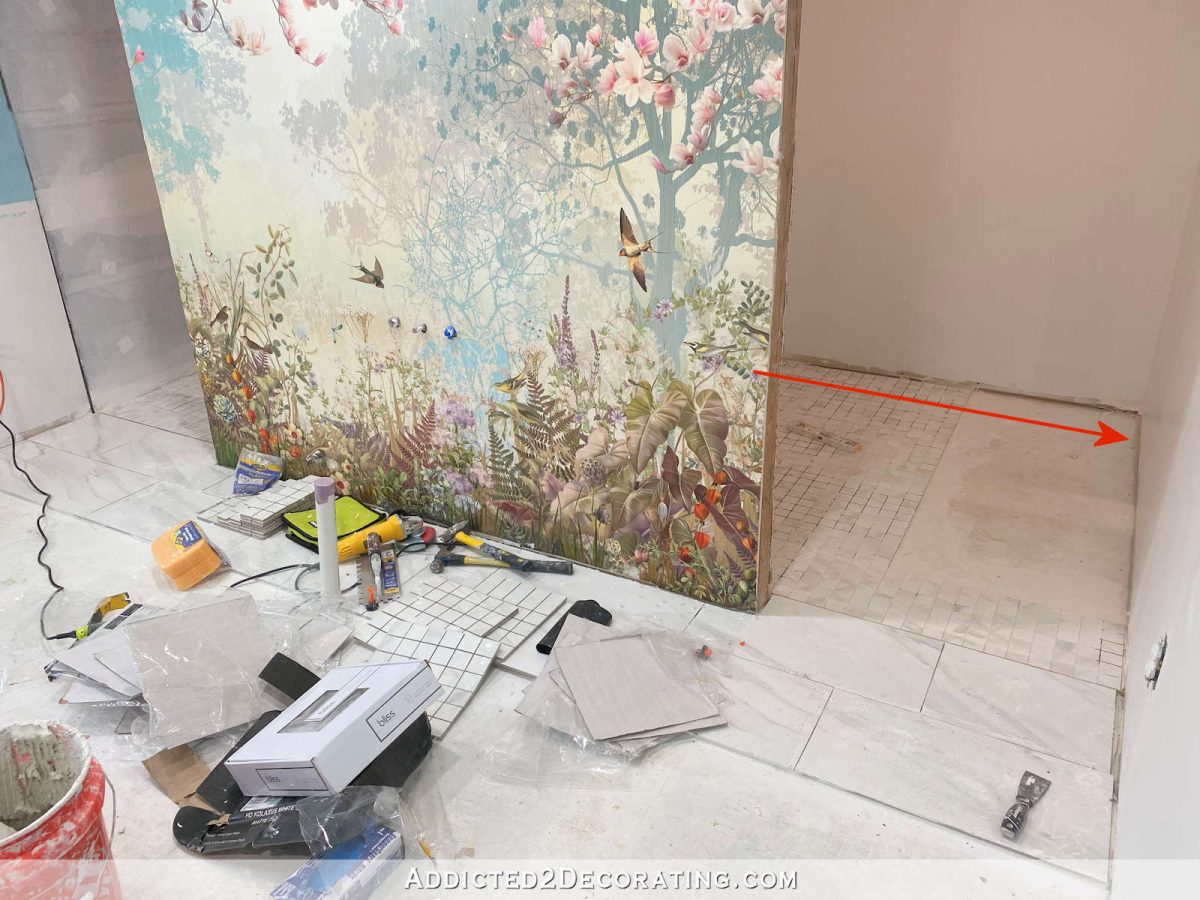
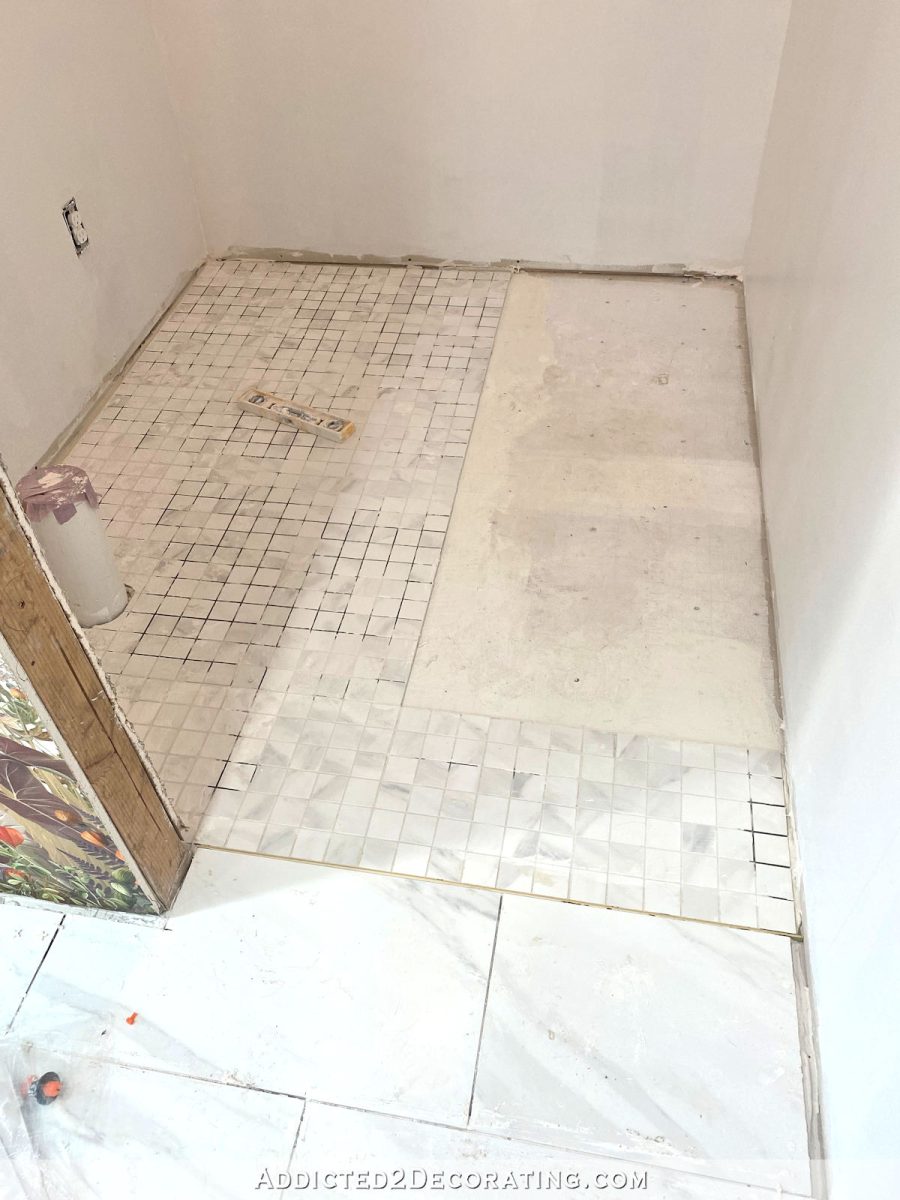
But had I done that, I almost certainly would have been left with cut tiles right at the transition strip. And it was very important to me that I have whole tiles on both sides of that Schluter strip. That means that I had to start with the row of tiles at the Schluter strip…
And then work on the rows perpendicular to that first one, starting at the side wall.

Once I had that much finished, I had to stop because that area was getting pretty tight for me working on my knees, plus my 5-gallon bucket of mortar, plus my 2-gallon bucket of water. I ran out of room to maneuver without stepping on and kneeling on tiles to work, and that wasn’t an option. So I had to stop and let these tiles dry so that I could go back (today) and be able to walk on and kneel on those tiles to do the rest of the floor.
It usually comes back to bite me when I say, “Today, I’m going to get X, Y, and Z done,” but I’m going to go ahead and make a goal. By the end of today, I’d like to have the rest of the tile installed in the toilet area, all of the excess mortar cleaned up, and have the shower floor grouted. That’s the goal, so we’ll see just how close I can get.
There will be one big way in which the shower and the toilet area won’t be symmetrical. You may have noticed on my “to do” list for this bathroom that one of the building projects listed is to build cabinets in this toilet area. (You can see my master “to do” lists for the bathroom and the home gym here.) I decided on this design when I was wrestling back and forth between having a window seat between the two vanities, or filling that area with more storage.
I finally decided that I really want a window seat, but I couldn’t sacrifice that much storage area without finding another place for storage. The toilet area was the perfect place. That area is huge, and even if I lose 14 inches of depth along the back wall, it’ll still plenty large. So the cabinets will go here…
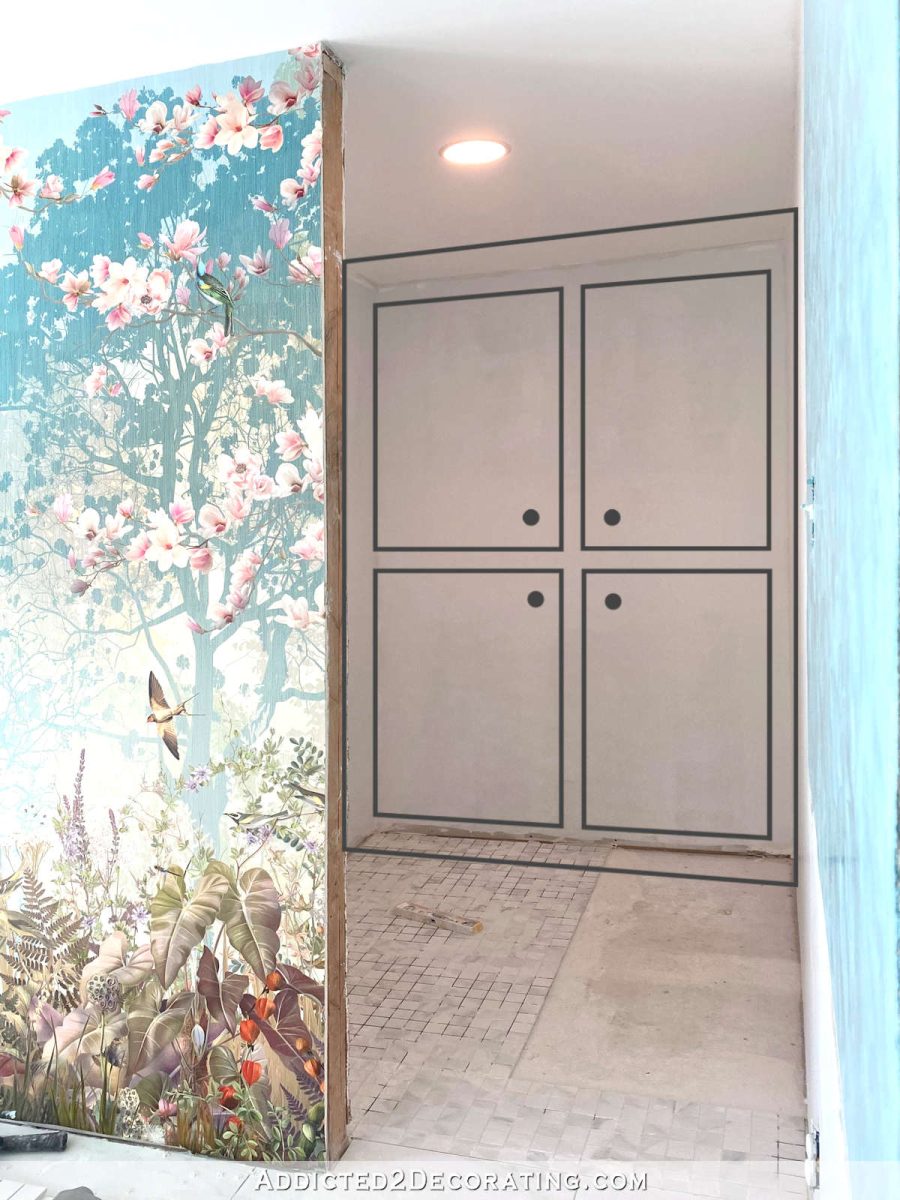
These cabinets won’t be walnut like the vanities. Because I want this area and the shower to be as symmetrical as possible, these will be painted white to blend in with the white tiled walls. So I will be sacrificing perfect symmetry, but for the sake of a load of storage in an area where there’s plenty of room to spare, I think it’ll be totally worth it, especially if it means I can get a pretty window seat in the main part of the bathroom where it really counts.
As a side note, I wanted to let y’all know that my hands were just fine after Tuesday’s tiling. I put coconut oil on my hands, and then put on two layers of the disposable blue nitrile gloves from Home Depot, and it worked perfectly. The outer layer did get a couple of holes and tears (but not as many as I had expected), but the inner layer remained perfectly intact, so nothing got through to my hands.
When I took the gloves off at the end of the day, my hands were waterlogged and wrinkly like I had spent an entire day in a swimming pool, but that went away after about an hour. And I would rather have waterlogged that go back to normal in an hour instead of dried, cracking skin and painful, swollen hands that take over a week to go back to normal. So double-gloving with disposable nitrile gloves for the win!

Addicted 2 Decorating is where I share my DIY and decorating journey as I remodel and decorate the 1948 fixer upper that my husband, Matt, and I bought in 2013. Matt has M.S. and is unable to do physical work, so I do the majority of the work on the house by myself. You can learn more about me here.
I hope you’ll join me on my DIY and decorating journey! If you want to follow my projects and progress, you can subscribe below and have each new post delivered to your email inbox. That way you’ll never miss a thing!
Source link