Twelve days. That’s how long I have to finalize the decisions on our master bathroom project, because we now have an actual start date for this project. The fun begins May 10th. So I’ve been trying to get all of the details worked out in my mind before I meet with our contractor next Monday to go over all of the finalized plans.
A couple of weeks ago, I shared a few wall murals and wallpapers that I could use as a jumping off point in this master bathroom design. You can click here to see the fifteen finalists. I’ve finally selected the winner, and it’s this mural from Photo Wall.
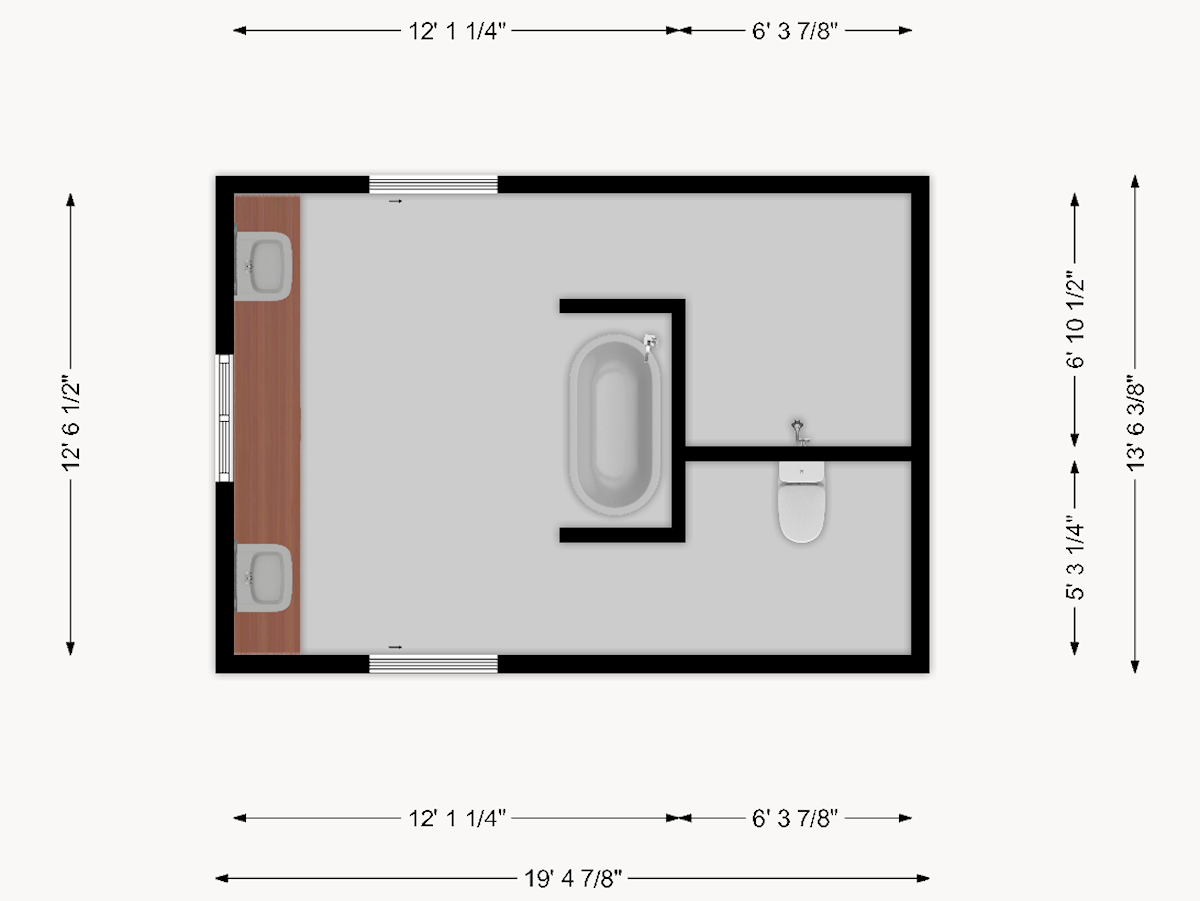
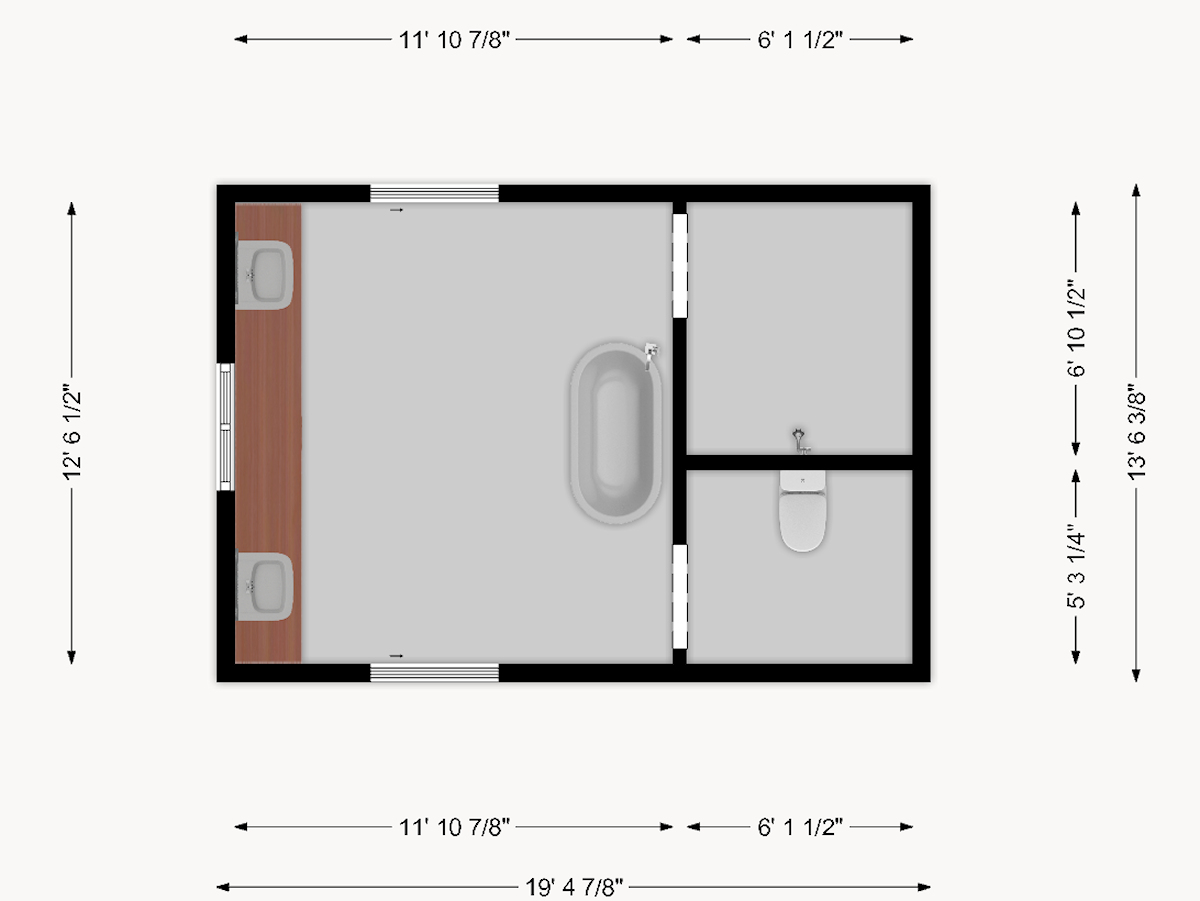
With that decision made, I needed to decide exactly how I want to use it. I took all new measurements of the room to be sure that everything was accurate, and then I used this free online floor plan tool to create a 2D and 3D floor plan of the bathroom.
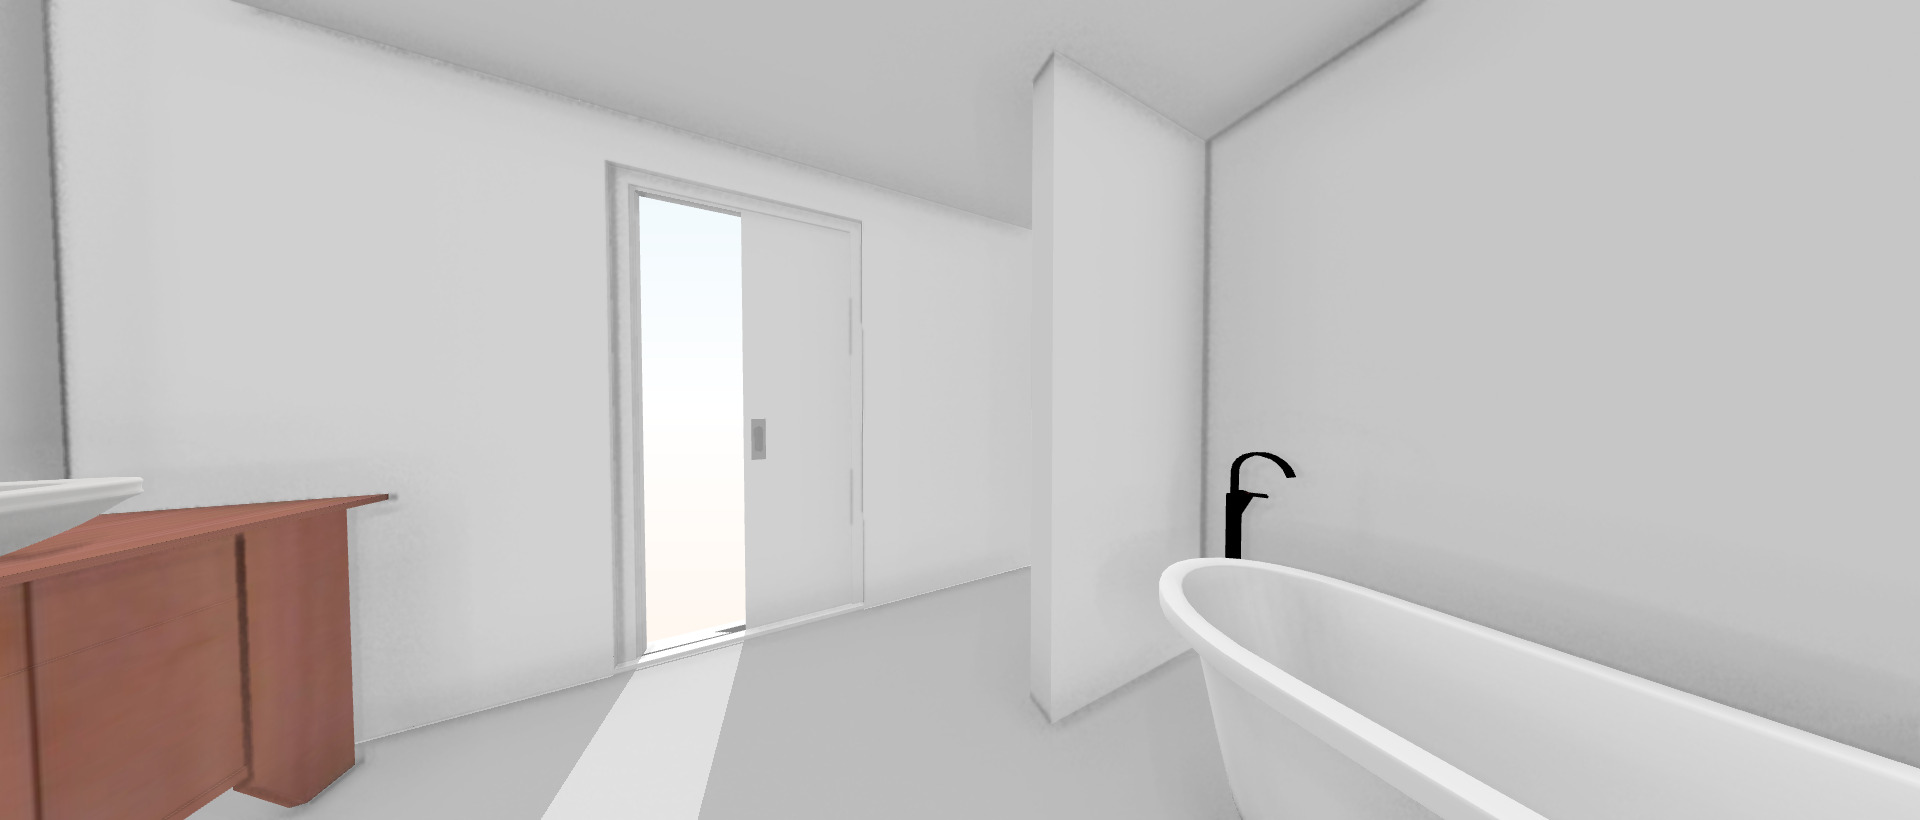
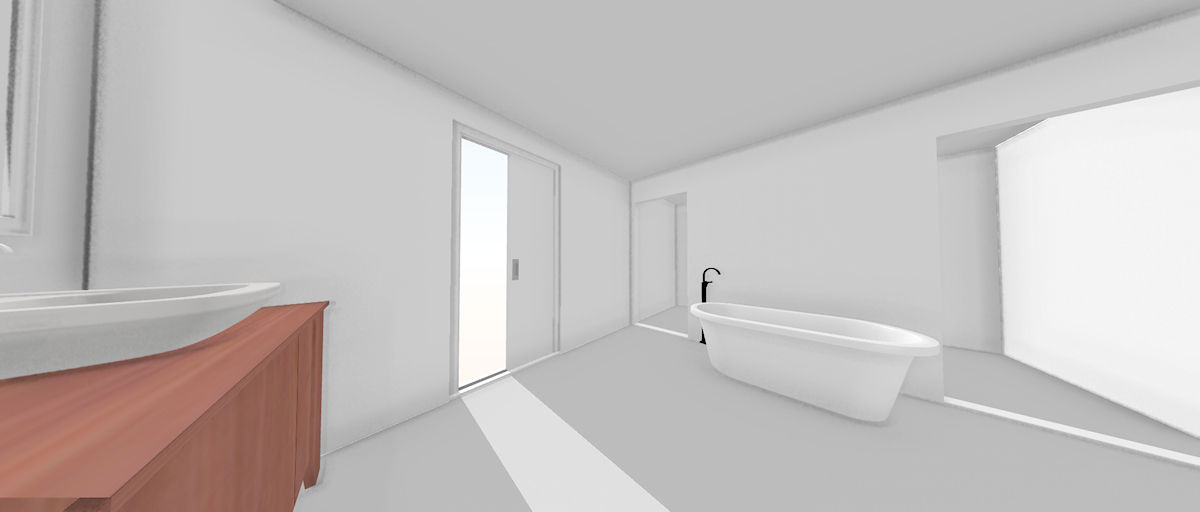
I started with my original plan of having the bathtub in its own little alcove like this…
The 3D walkthrough option of that tool makes the perspective look a bit off, but this kind of gives an idea of what that would look like. You can see the long vanity wall (the exterior wall with the window) on the far left. That doorway would go to the master bedroom. And then on the right sits the tub in its little alcove. That area between the tub alcove wall and the bedroom door wall would lead to the shower.
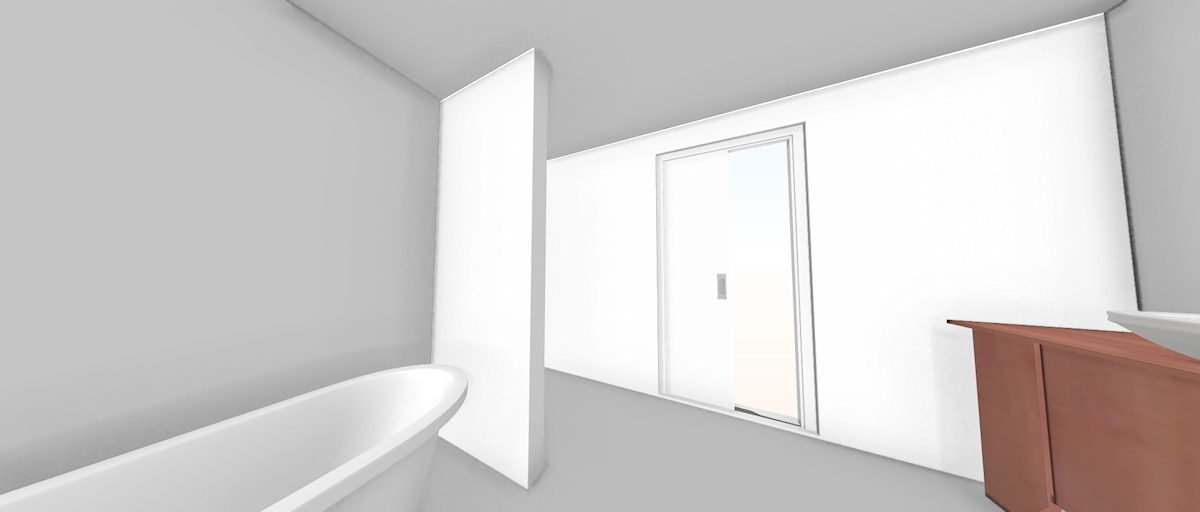
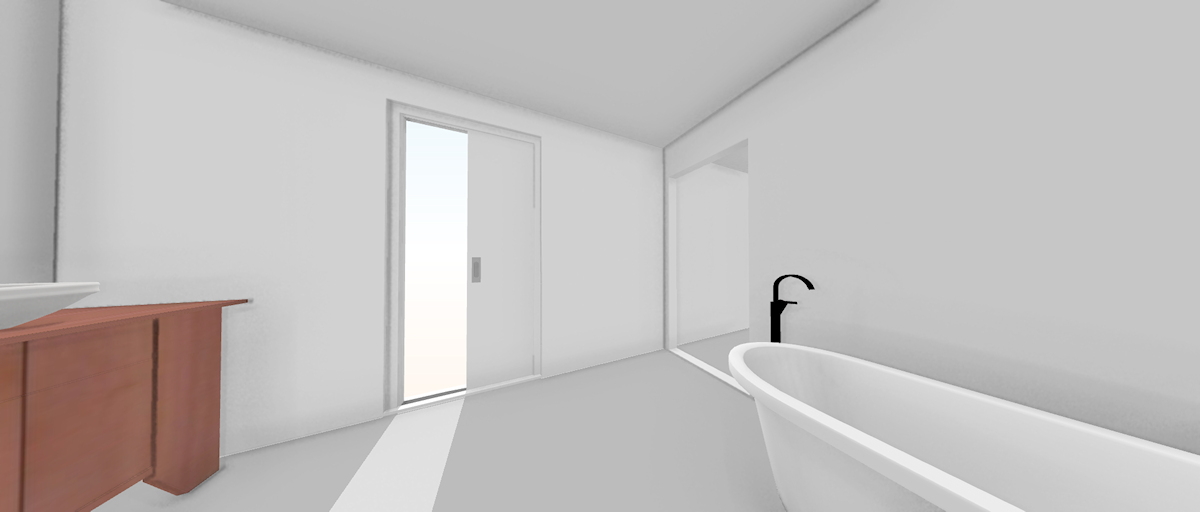
And this is looking the other way towards the door that leads to the home gym.
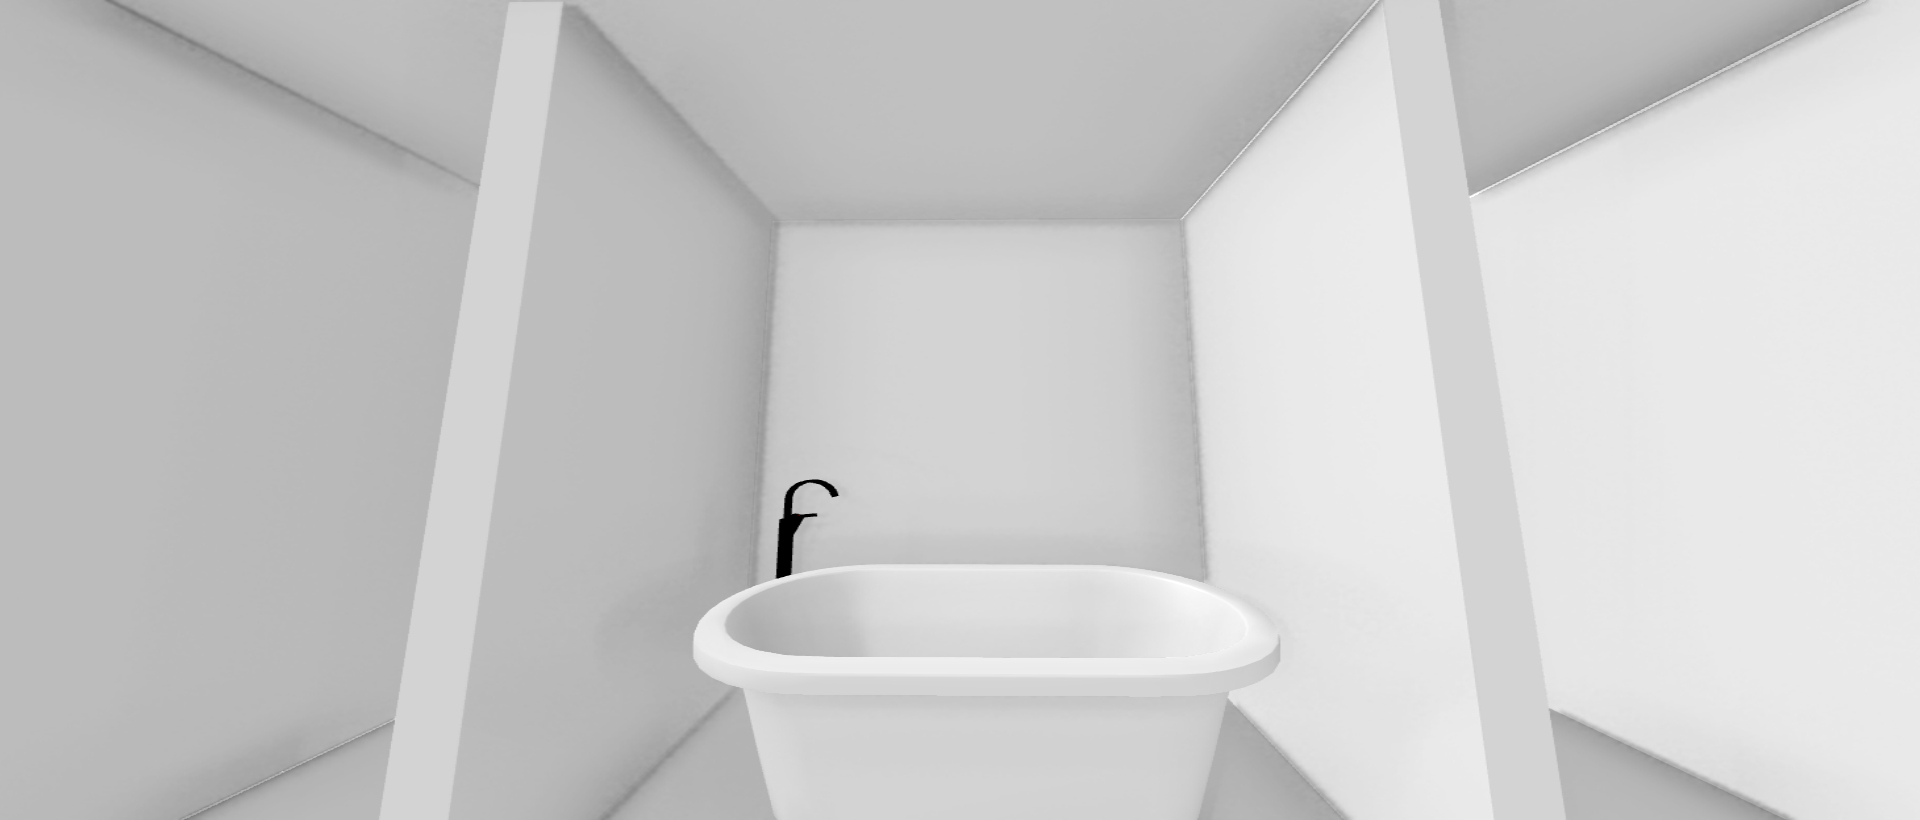
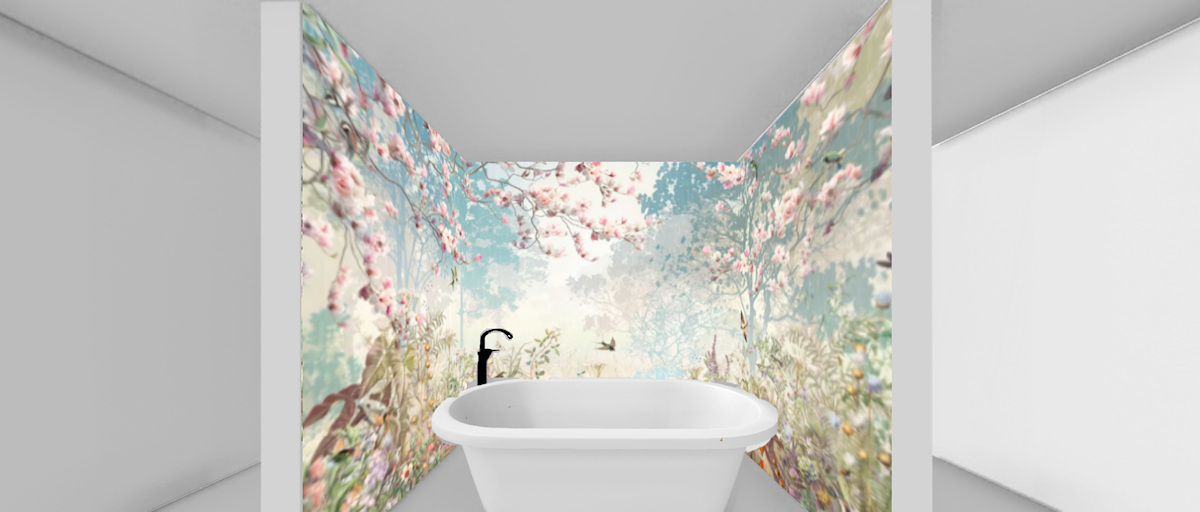
The view looking straight at the tub alcove is where things get a little funky. It makes the tub look so tiny. But the tub that I’m getting is only five feet wide, so it’s really not a big tub (or a wide alcove) at all.
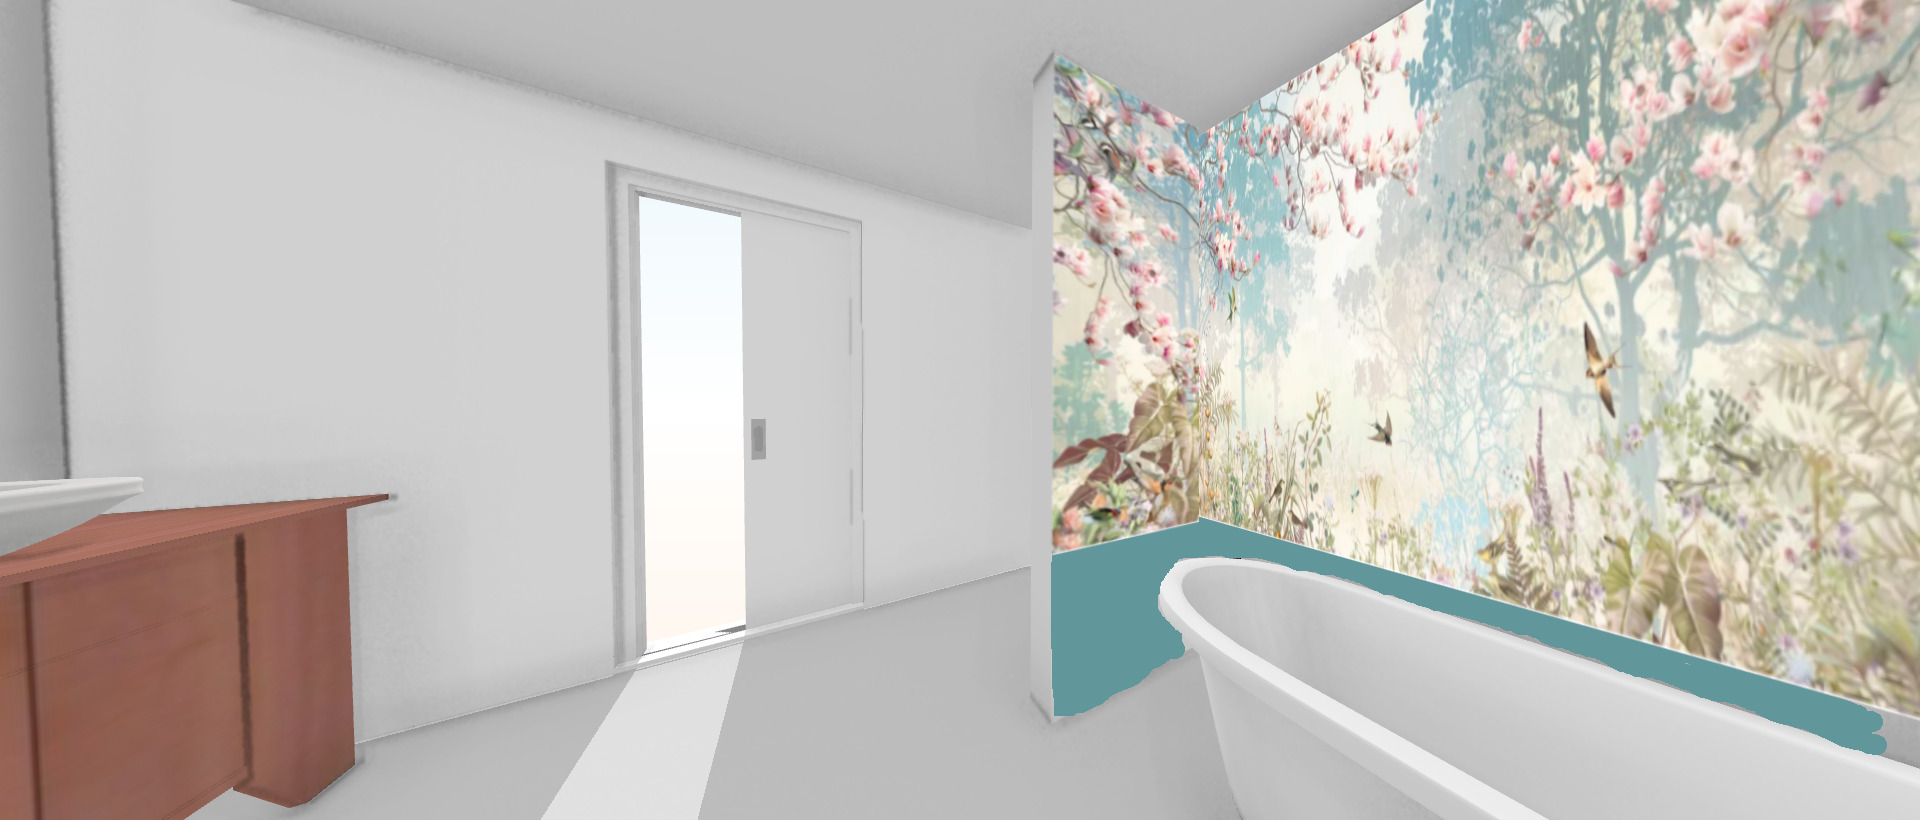
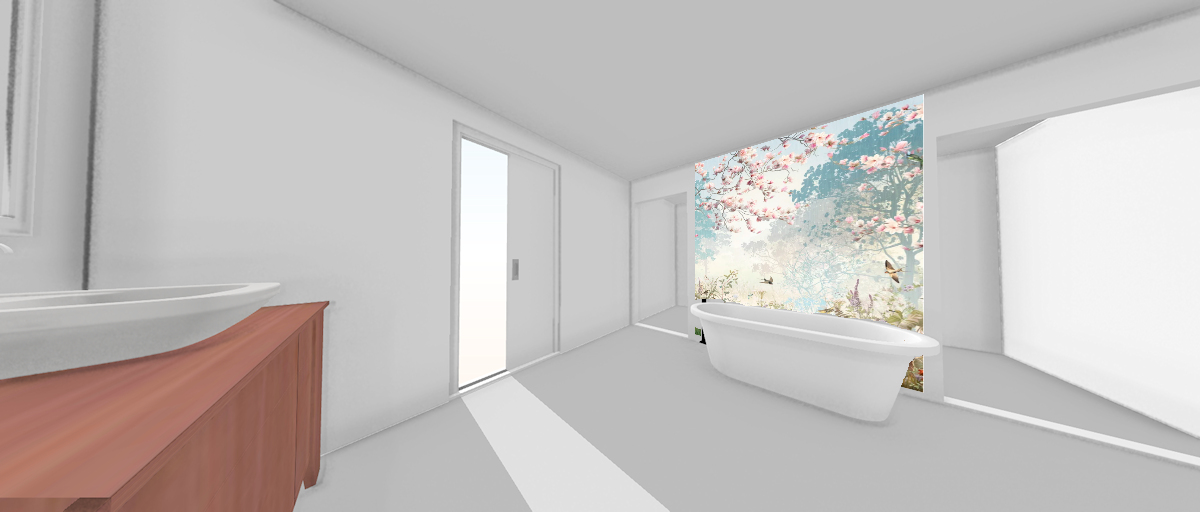
I had imagined that it would look something like this, with the mural on the top of the wall and some wainscoting on the bottom. Don’t pay too much attention to the wall color. That wasn’t really my focus at this point. That decision can be made later.

Or another option would be to use the wall mural from floor to ceiling. Of course, there would be crown molding and baseboards that aren’t shown here.
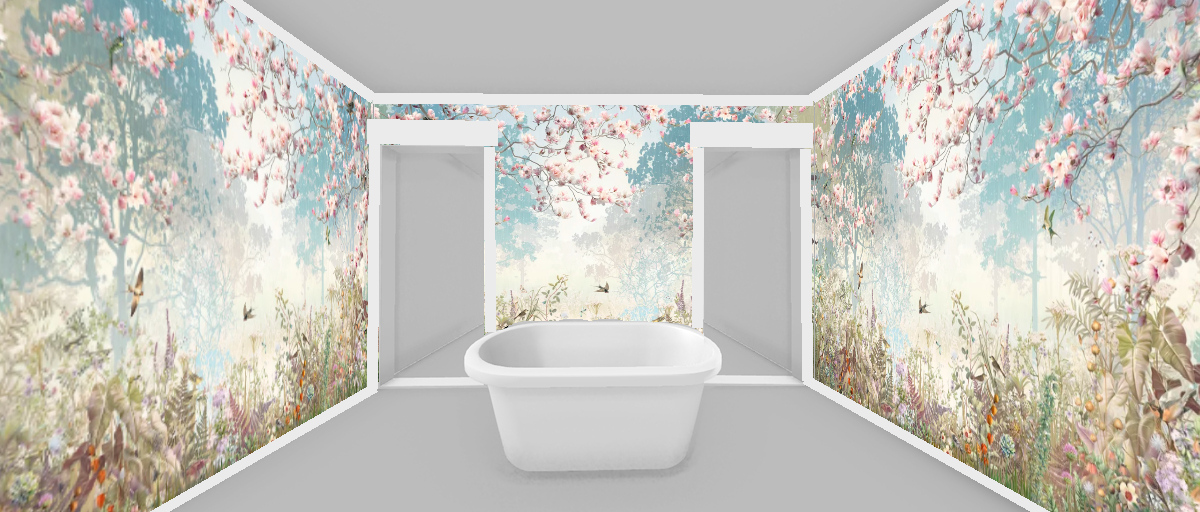
But on that last post where I shared the fifteen finalist wall murals and wallpapers, a couple of people mentioned that they didn’t like the tub alcove because it felt too closed in. I got to thinking about it, and five feet (which is exactly how tall, or rather how short, I am) just isn’t much space at all. And since I only have 12 feet 6.5 inches of width to work with in this room, which needs to accommodate a bathtub and two doorways, I could save some precious inches by forgoing the side walls of the alcove.
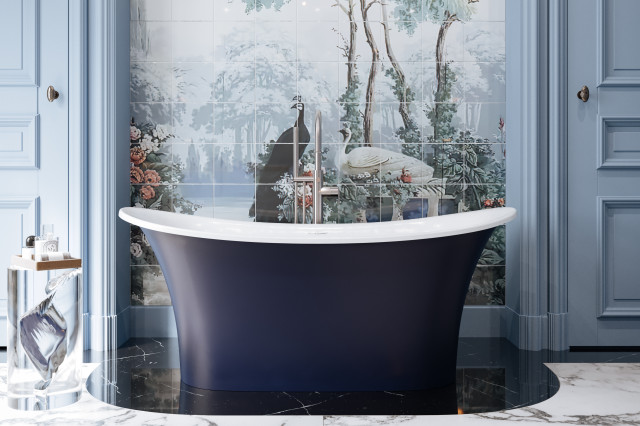
As I was pondering that decision, I saw this picture used on an advertisement for House of Rohl. It was perfect timing, and seemed to be confirmation that I could live without the alcove. It’s the exact setup that I would have with the tub (which looks pretty small in this picture) flanked by two doorways. And then it has a mural on the wall.
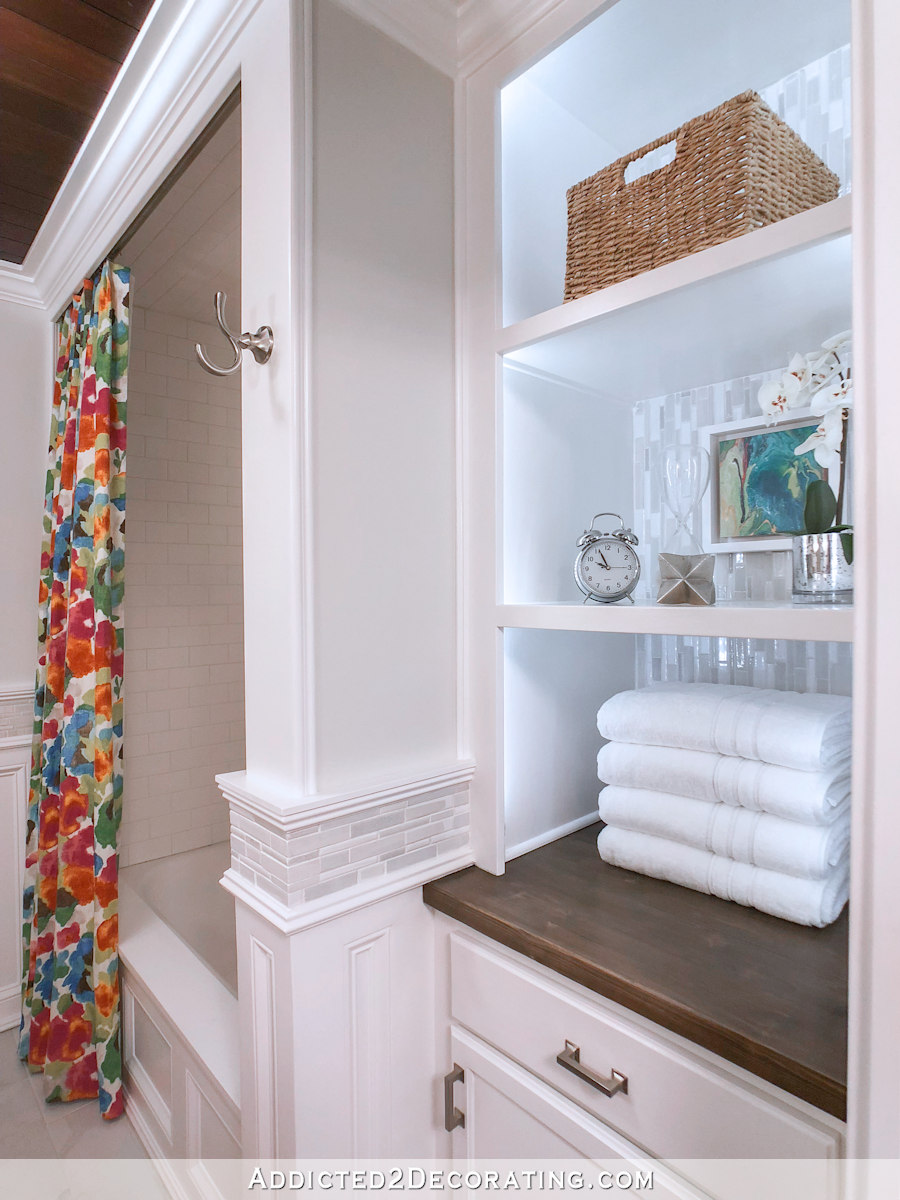
So I think (I’m not sure, but I think) I’ve decided to forgo the alcove. I really liked the idea of an alcove because that’s what I’m used to. I’ve only ever had built-in bathtubs that fit into their own little space, like the one in the hallway bathroom.
It’s very strange to wrap my head around using a bathtub that’s just sitting out in the open. I know it’s done all the time, but it will be new for me.
So with that in mind, I went back to the floor planning tool and removed those walls and did a few other little tweaks to see how that would look.
I know it’ll definitely make the room feel more open, but with this arrangement, I also feel like the openings to the shower and the water closet need to be cased openings (doors aren’t user-friendly for Matt), so I don’t plan on doors for either area), which means they have to be moved towards the center of the room about 3.5 inches to leave room against the outer walls for trim around the doorways.
So really, the area that I gained by removing the side walls of the alcove is now taken up by trim. I’m not sure that it really helped anything in that regard. The only net benefit seems to be that the room feels more open.
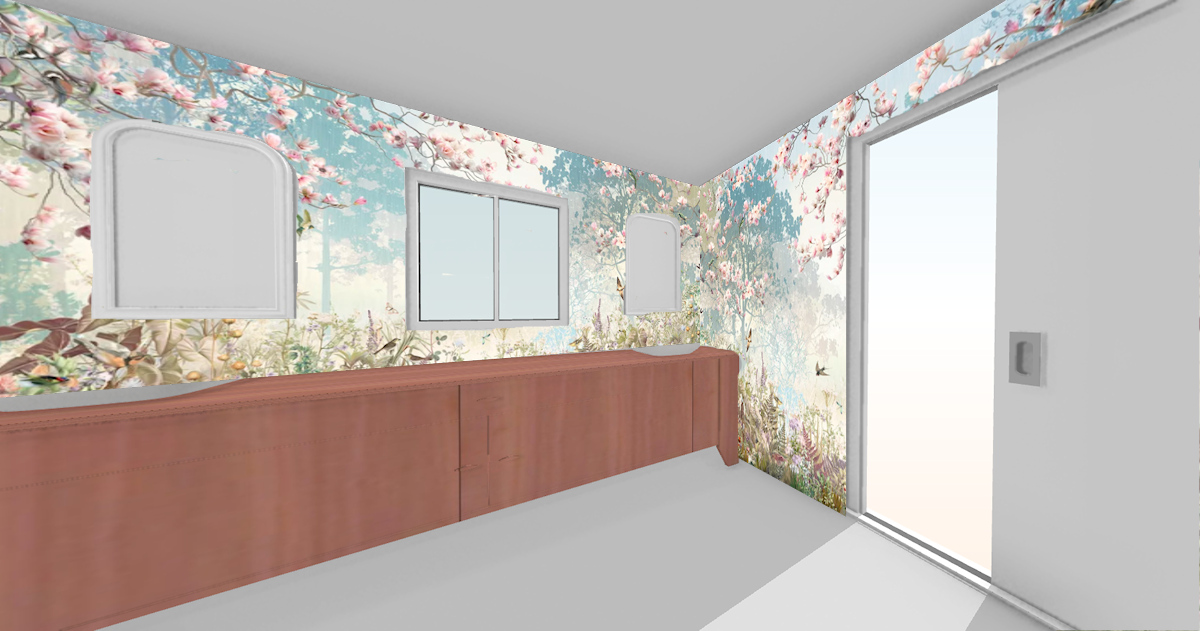
So then I started playing around with some ideas to figure out exactly how and where I wanted to use the mural. If you’ll remember, my original ideas was to use it just on the vanity wall.

But with a vanity, two mirrors, and a window (and possibly some sconces), so much of the mural would be covered up.
So then I tried it just behind the bathtub, like in the House of Rohl picture. But I hit a snag when I couldn’t find any more pictures of that bathroom, so I couldn’t see exactly how they finished off the areas above the doors. Does the mural (which I realize in their bathroom is a tile mural) go just in that area behind the bathtub? Is there actually a tiny little alcove there to set off that area? It kind of looks like there might be one there. So what’s above the molding around their doors? These are all answers I couldn’t find because, as far as I can tell, there’s only that one picture of that wall in that bathroom.
For the life of me, I couldn’t think of a way to only use the mural behind the tub without looking awkward. I’d trim out the cased openings, but what would I do in those few inches above the doors between the door casing and the crown molding? Nothing seemed to work in my mind.
With no clear solution coming to mind, I decided to try using the mural as a wallpaper for the entire room. Because the House of Rohl bathroom with its all blue trim was the inspiration that started me on this path, I decided to try the mural with wainscoting and trim all painted a color other than white. This was my first try…
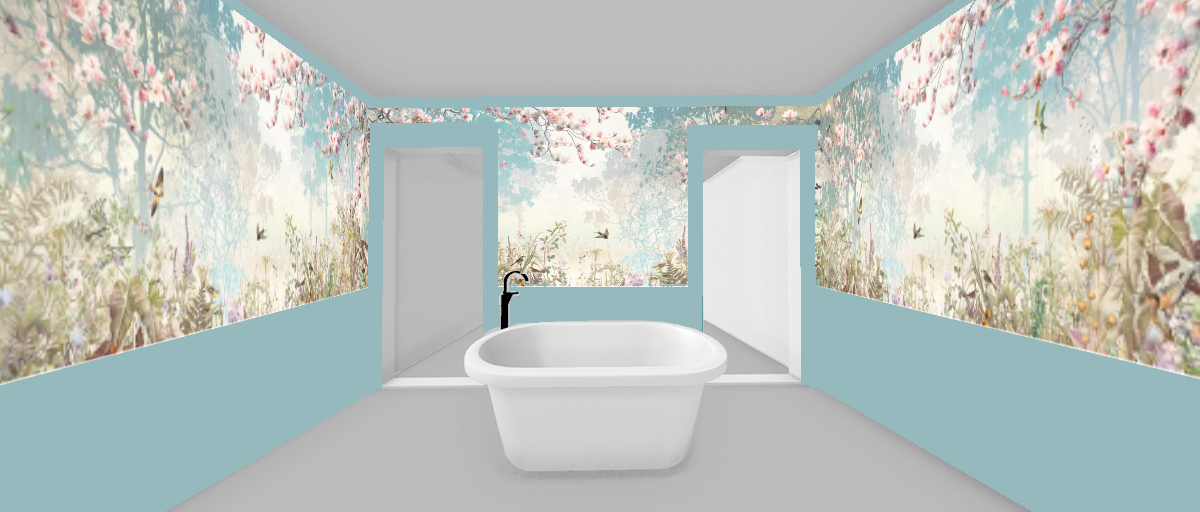
I tried a few other colors that I pulled out of the mural, but none of them really did much for me. Then I tried white…

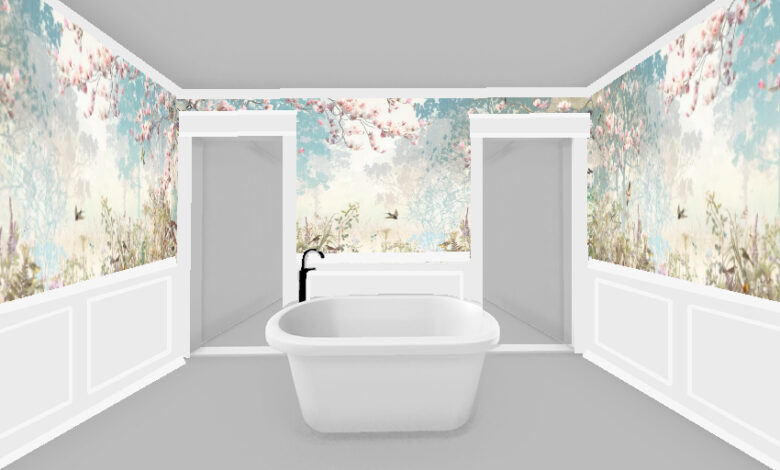
That one has really grown on me. I also tried it without wainscoting. I know this will be a bit too much for many of you, but I kind of love it.
So at this point, what I know for sure is that I will be using this mural in the bathroom. How? I still don’t know for sure. Will there be a bathtub alcove? I don’t know for sure, but I’m leaning towards no. I’m basically no further ahead than I was when I started playing around with that floor plan tool. (I used my photo editing software to add the wall mural and wainscoting to the wall.
But if I had to make a decision today based on the options above, this is the one I’d choose.
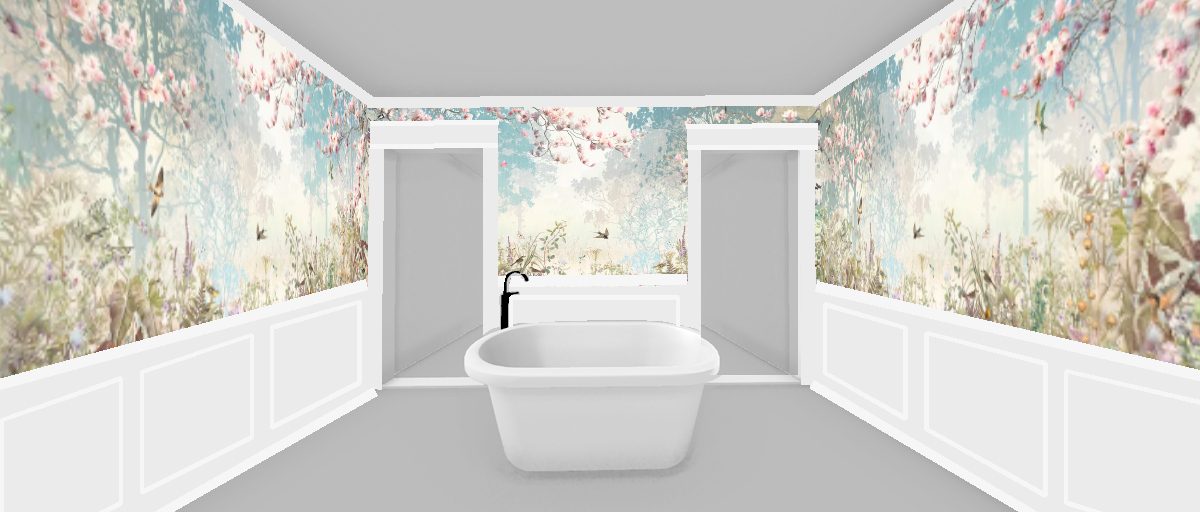
Everything about that seems more “me,” and it also fits with the rest of the house. I have white wainscoting in the music room, hallway bathroom, and studio bathroom, so clearly it’s something that I really like. And using the mural just on the top portion of the walls along with the wainscoting on the bottom adds some calm to the room. While I do love the mural used on the walls from floor to ceiling, I’m afraid it might be a bit overwhelming.
So that’s the direction I’m leaning right now. I’m open to any input right now! Because once I meet with the contractor this next Monday, there really won’t be any room for major changes after that. Now’s the time to consider any and all options!
Source link