*This post contains affiliate links.
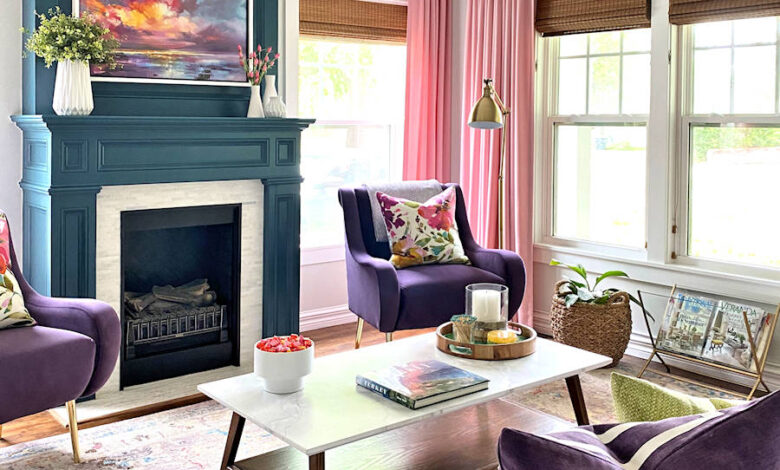
The living room is finally finished! That doesn’t mean I won’t make a few tweaks here and there in the future, but this is the first time in our 7.5 years in this house that I feel like this room is actually finished. I have no idea why, but this room has been the most difficult room I’ve ever done. Ever. I had so many starts and stops, so many different directions and ideas I tried (even trying to turn the room into a dining room at one point), and it was a source of continual frustration for me for so long.
But it’s finally finished, and I now have a living room that I absolutely love.
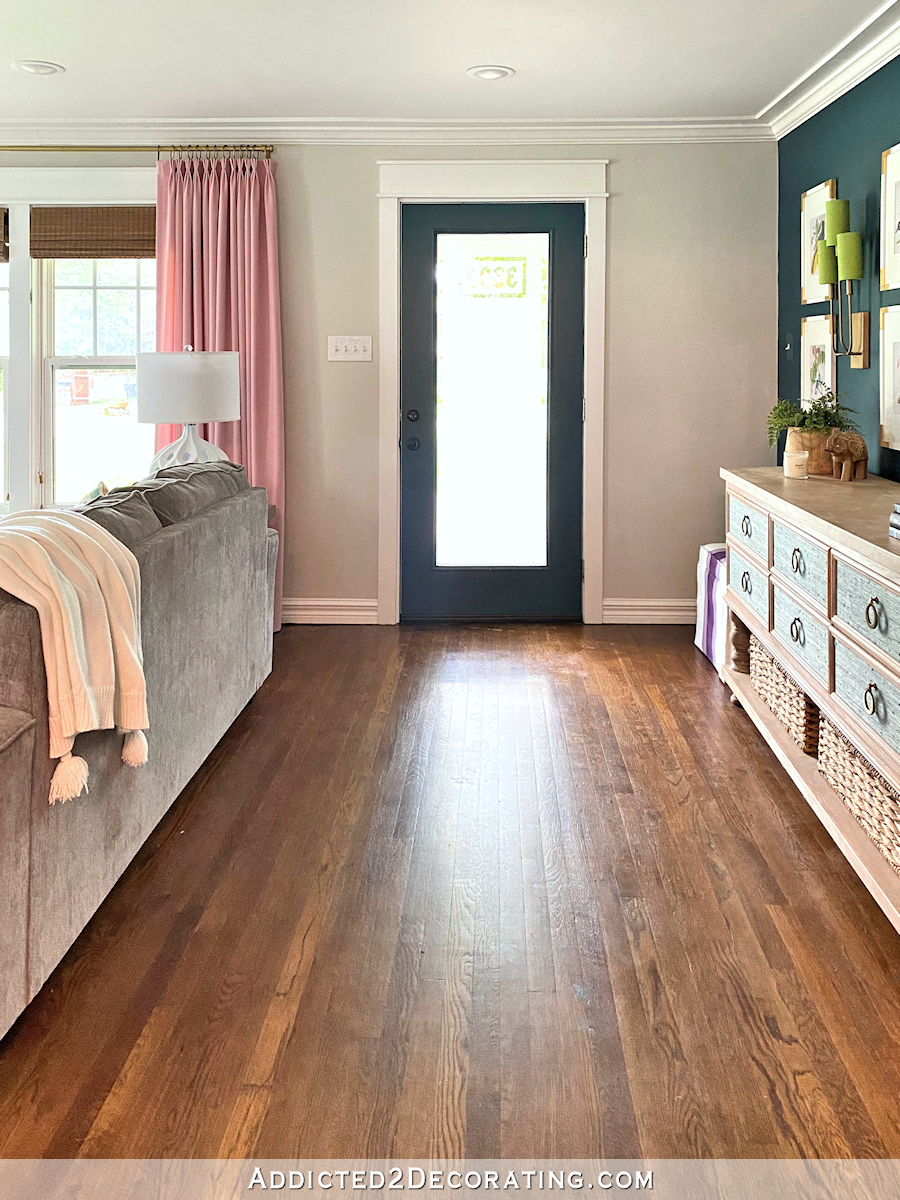
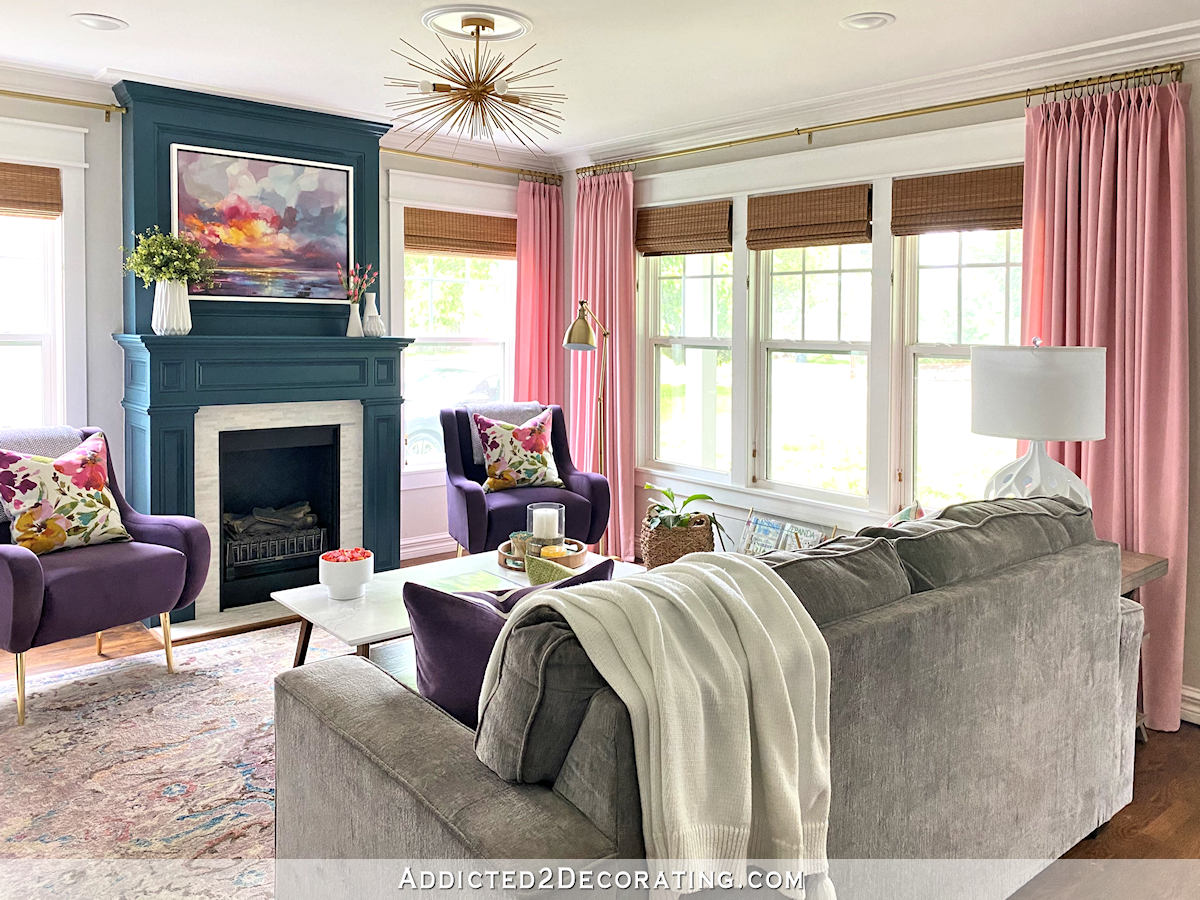
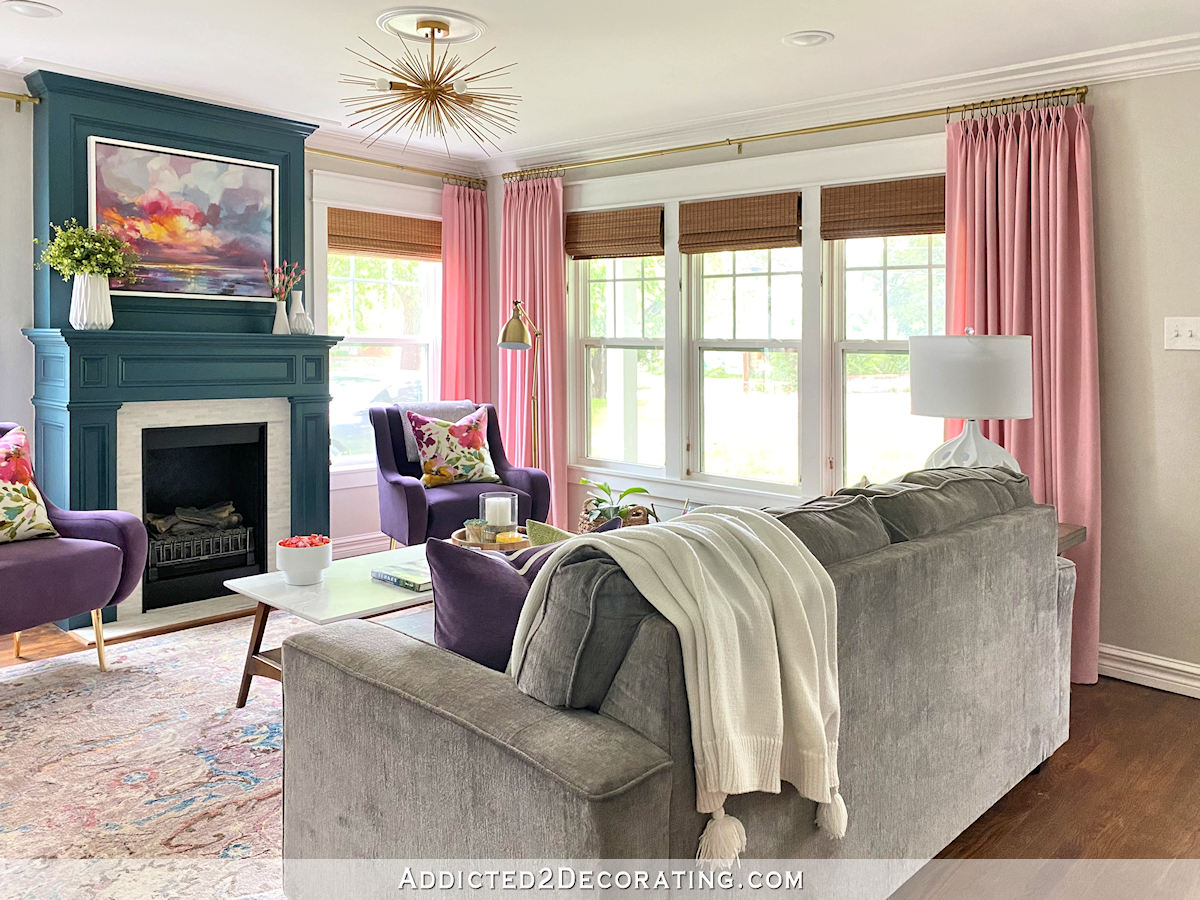
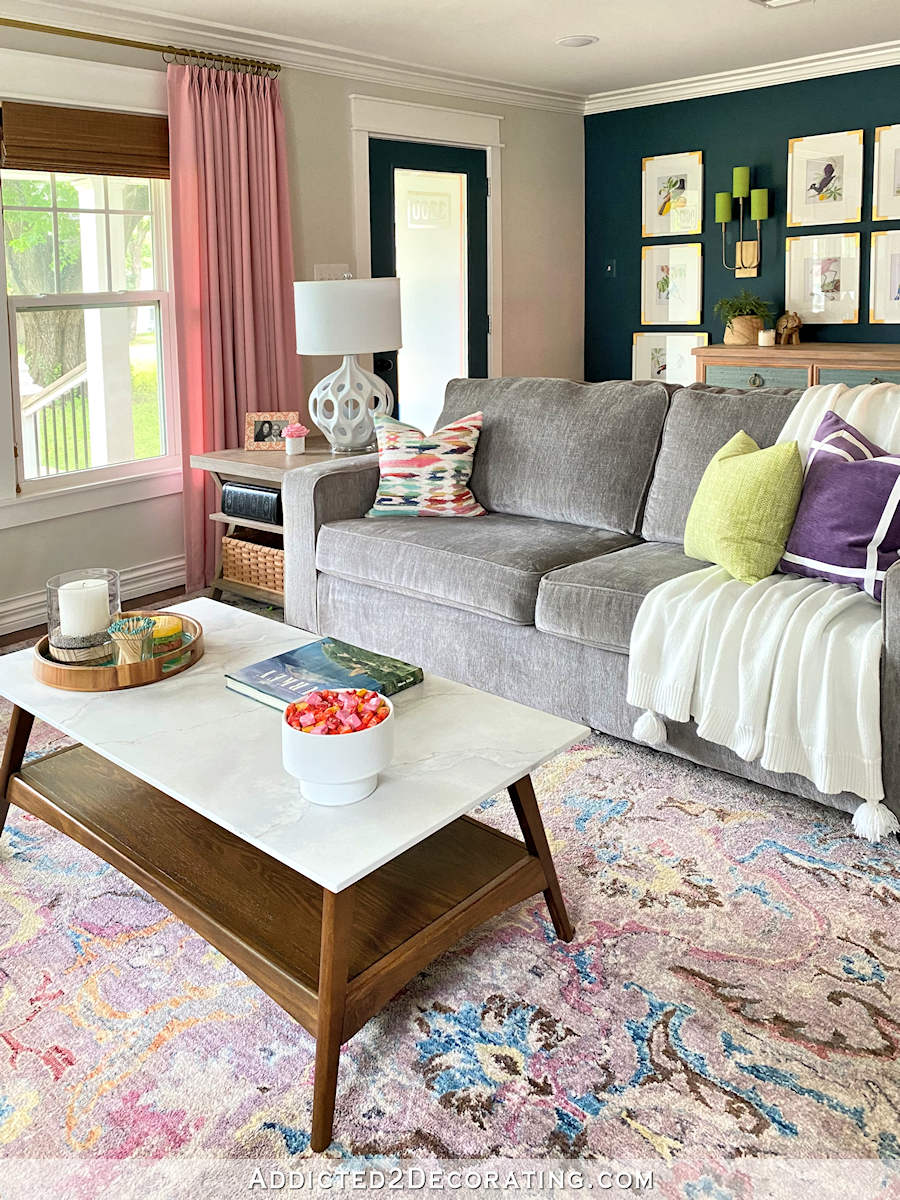
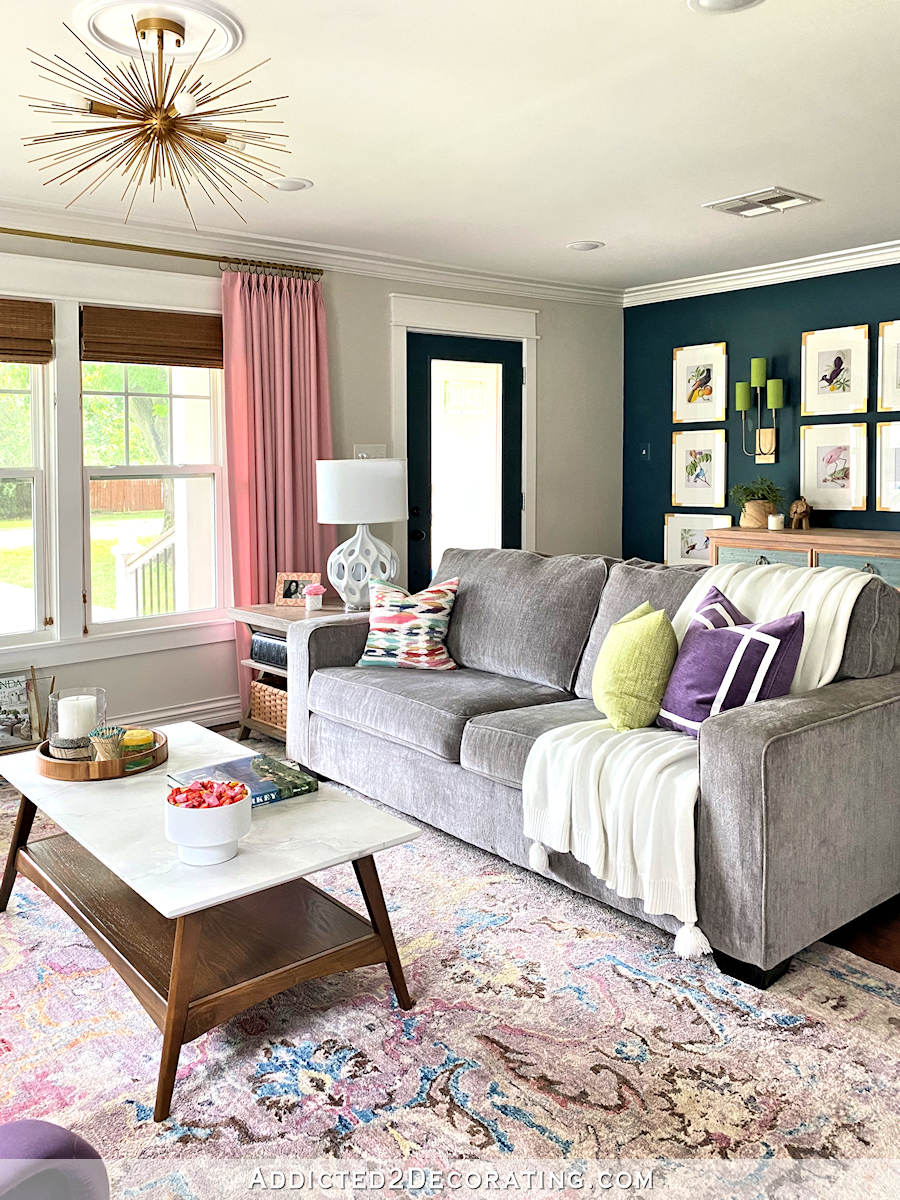
We don’t have a separate entryway in our home, so the front door opens up right into the living room. So I used the furniture arrangement to create the feel of a separate entryway and living room in the one large room.

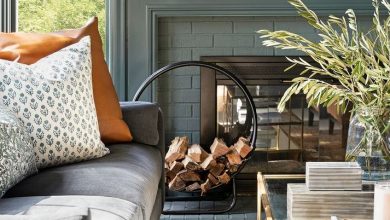
Here’s a peek at the area behind the sofa. You can see that there’s still plenty of space between the back of the sofa and what I call the entryway wall (i.e., the teal wall on the far right) for a spacious “entryway.”
(Note: If you’re reading this post on any website other than Addicted 2 Decorating, that means you’re reading on a site that is stealing my blog content. I hope you’ll consider joining me on my actual blog by clicking here.)
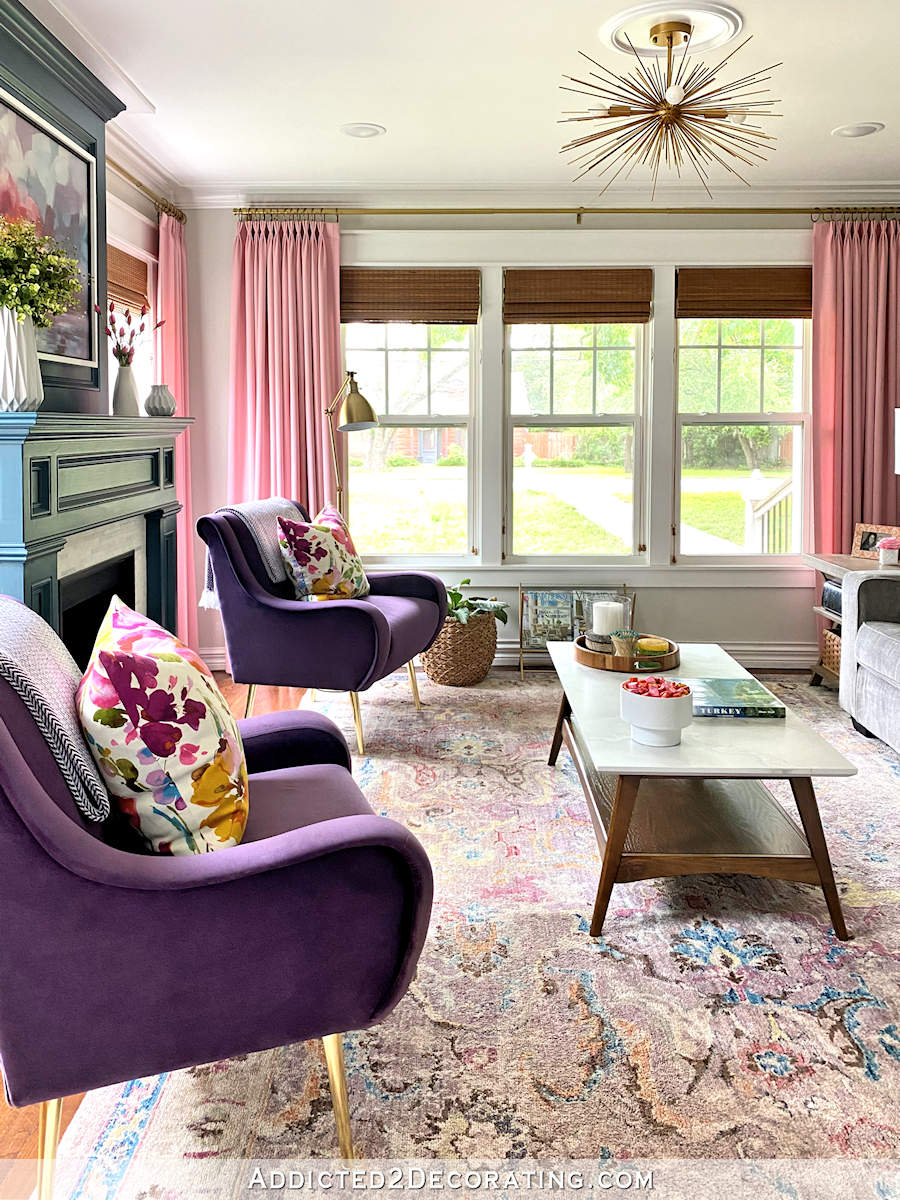
The funny thing is that I tried this furniture arrangement a couple of times through the years, and never could make it work in my mind because I kept trying to keep the areas on both ends of the sofa open for easy access from the “entryway” to the seating area, which meant that I couldn’t use an end table on either side of the sofa.
Once I got past the need for both sides to be open and clear, and I put a large side table and lamp on the window end of the sofa (leaving only one end open to access the seating area from the “entryway”), the whole arrangement felt so much better to me. It seems counterintuitive, but separating those areas more and having only one end of the sofa open for entering the seating area somehow made the living room feel larger.
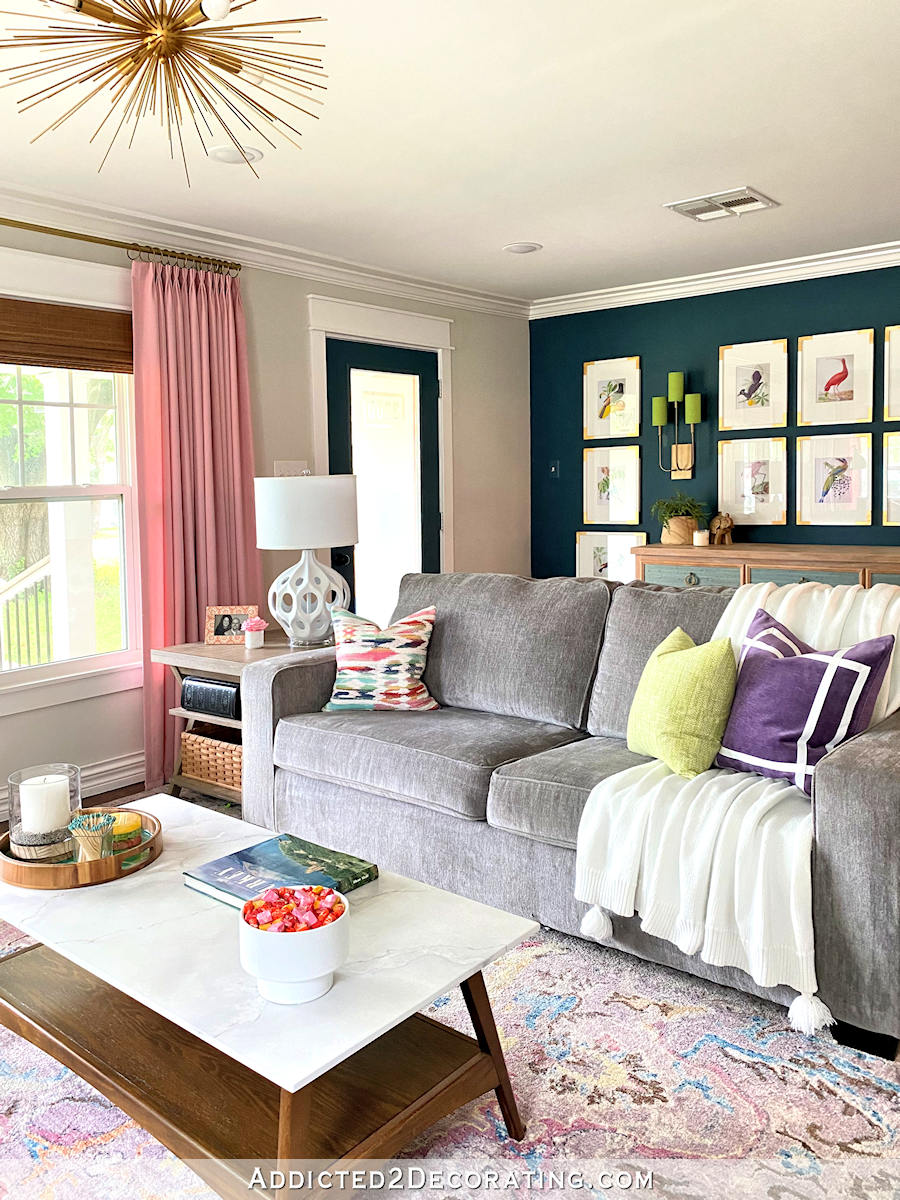
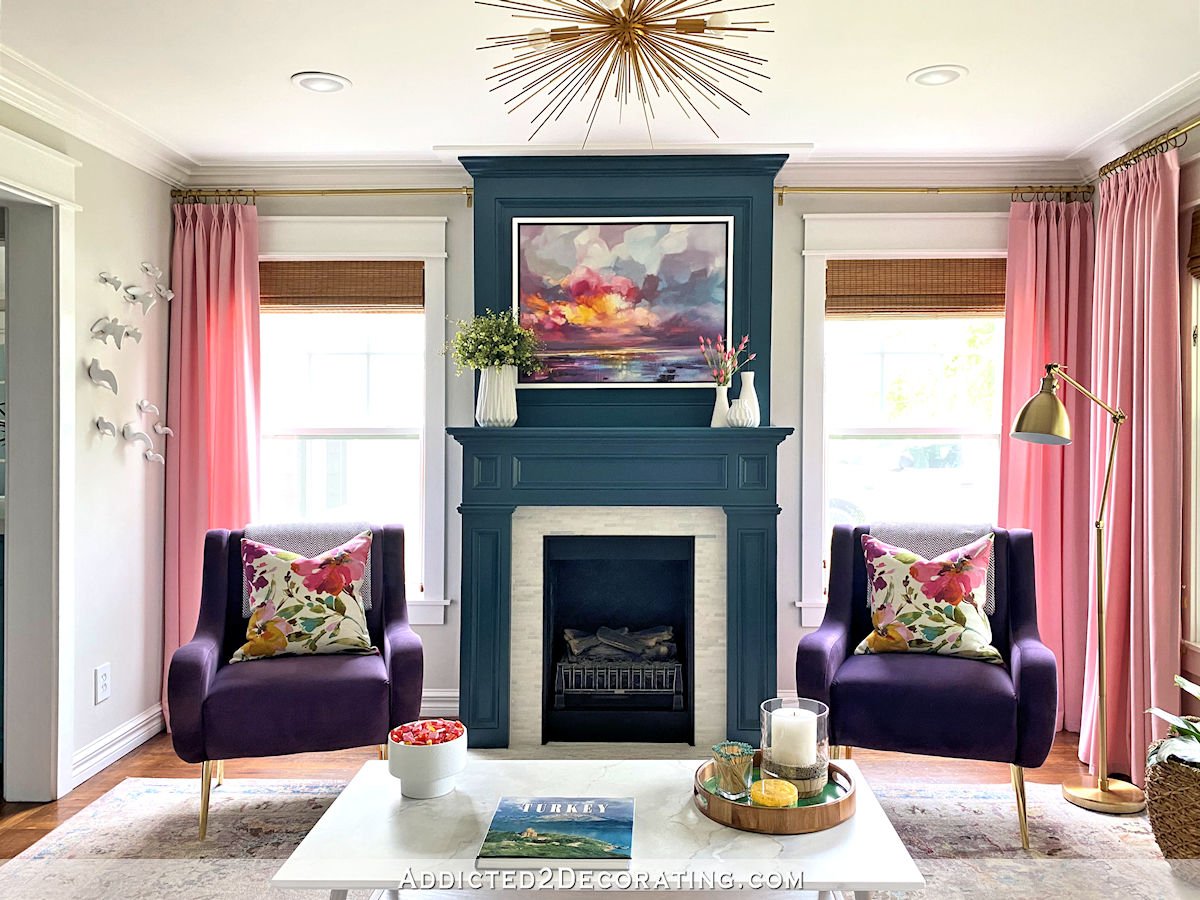
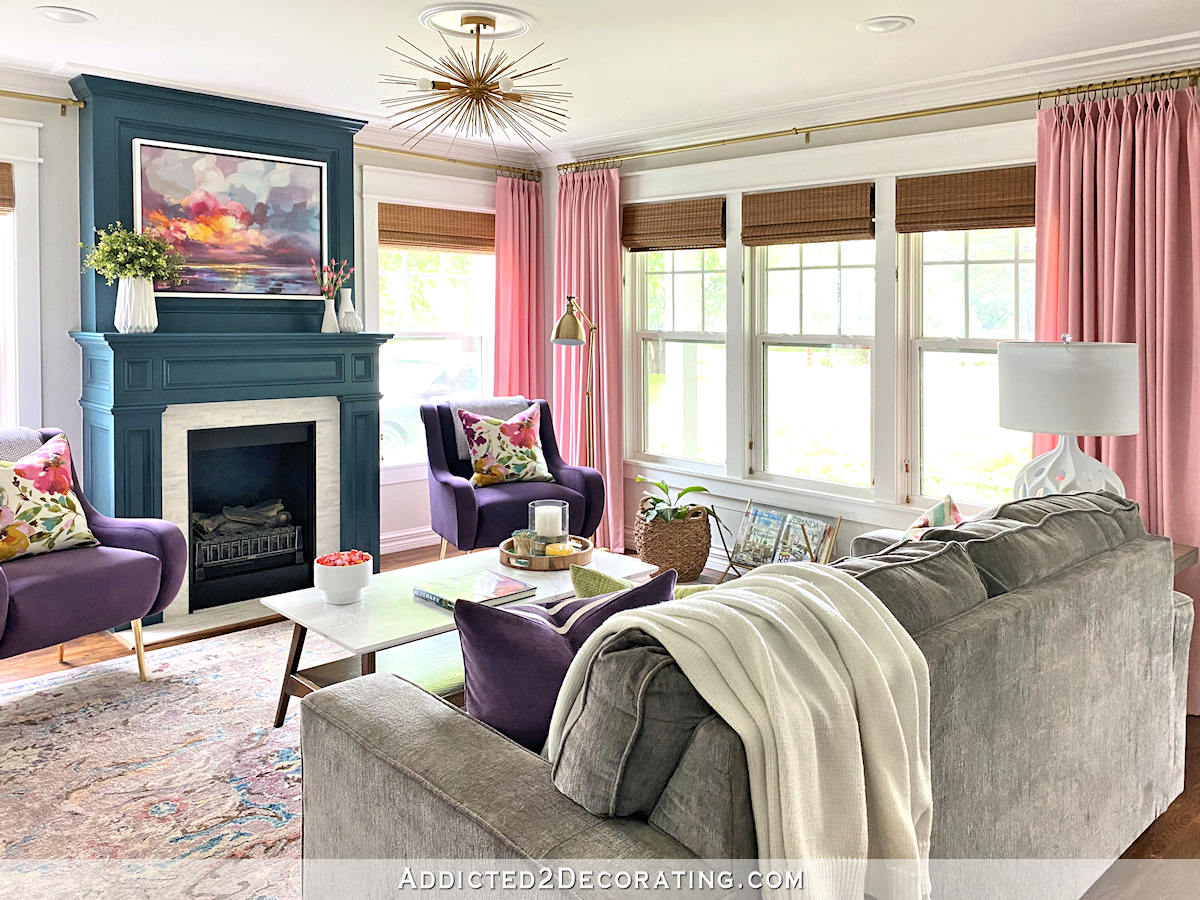
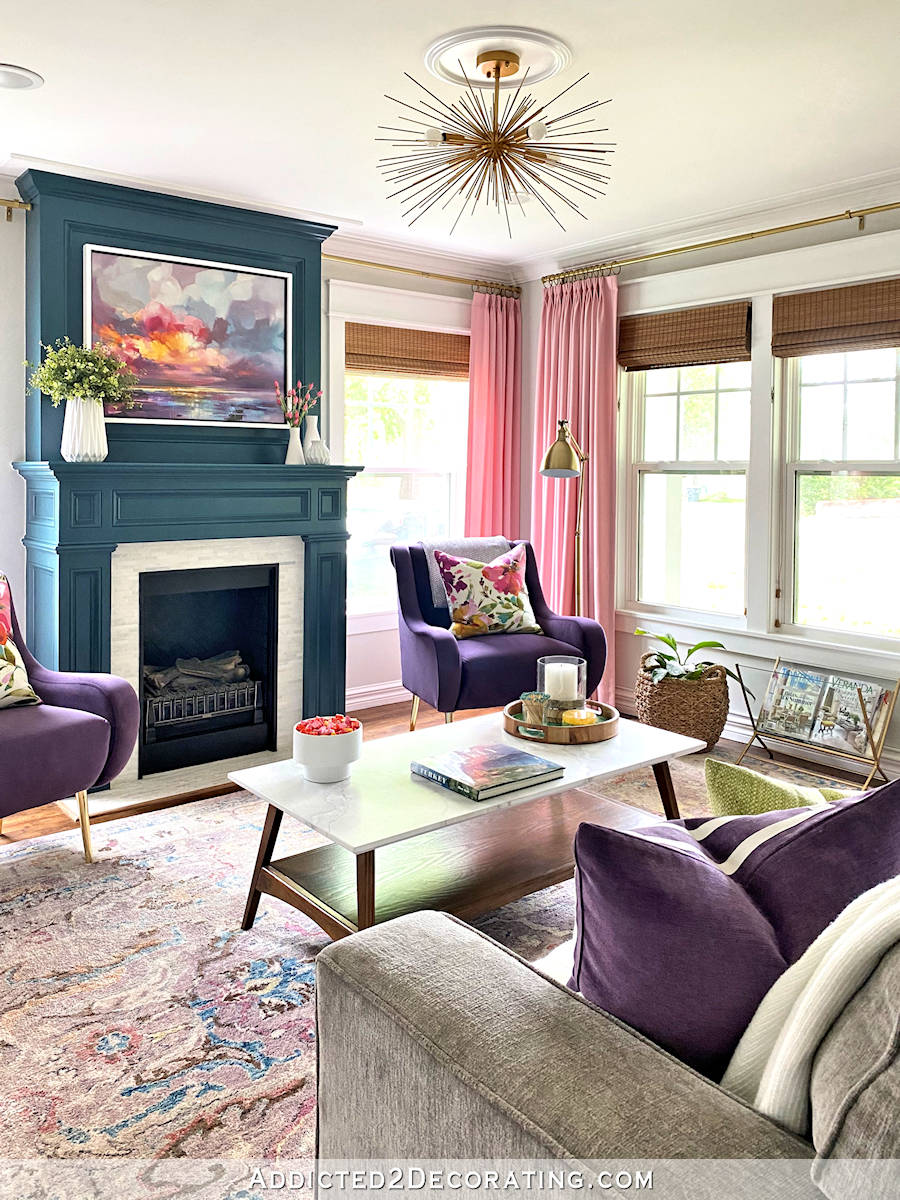
All of the color in this room makes me smile. One of the biggest challenges I had was finding a way to inject all of the color that I love without making the room feel too jarring and overwhelming as the first room seen when someone enters the house. But once I found the beautiful purple rug that has loads of other colors in it without being too overwhelming, that set the tone and gave me a jumping off point for the rest of the room.
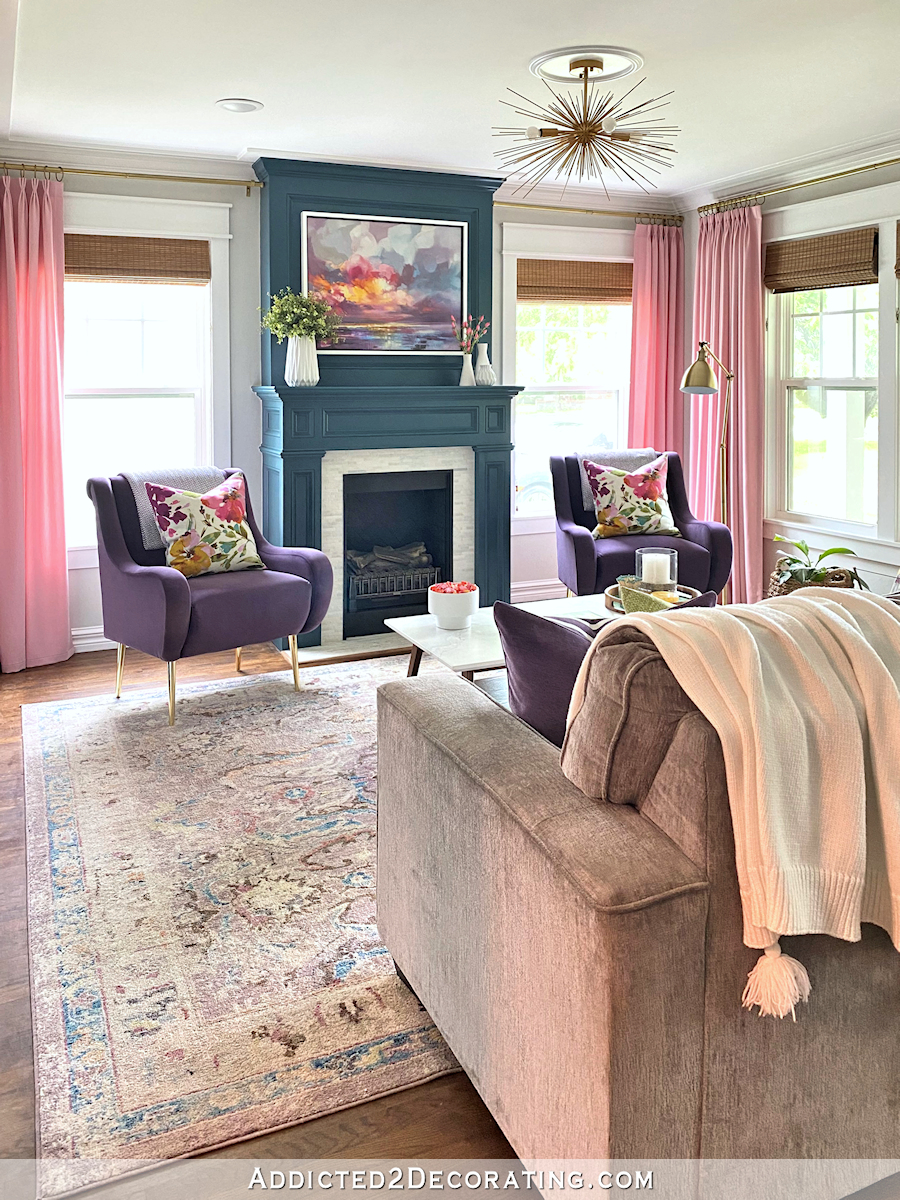
And then when I found the artwork above the fireplace, it seemed like it was custom painted specifically for my room. I couldn’t believe how it brought all of the colors together so beautifully.
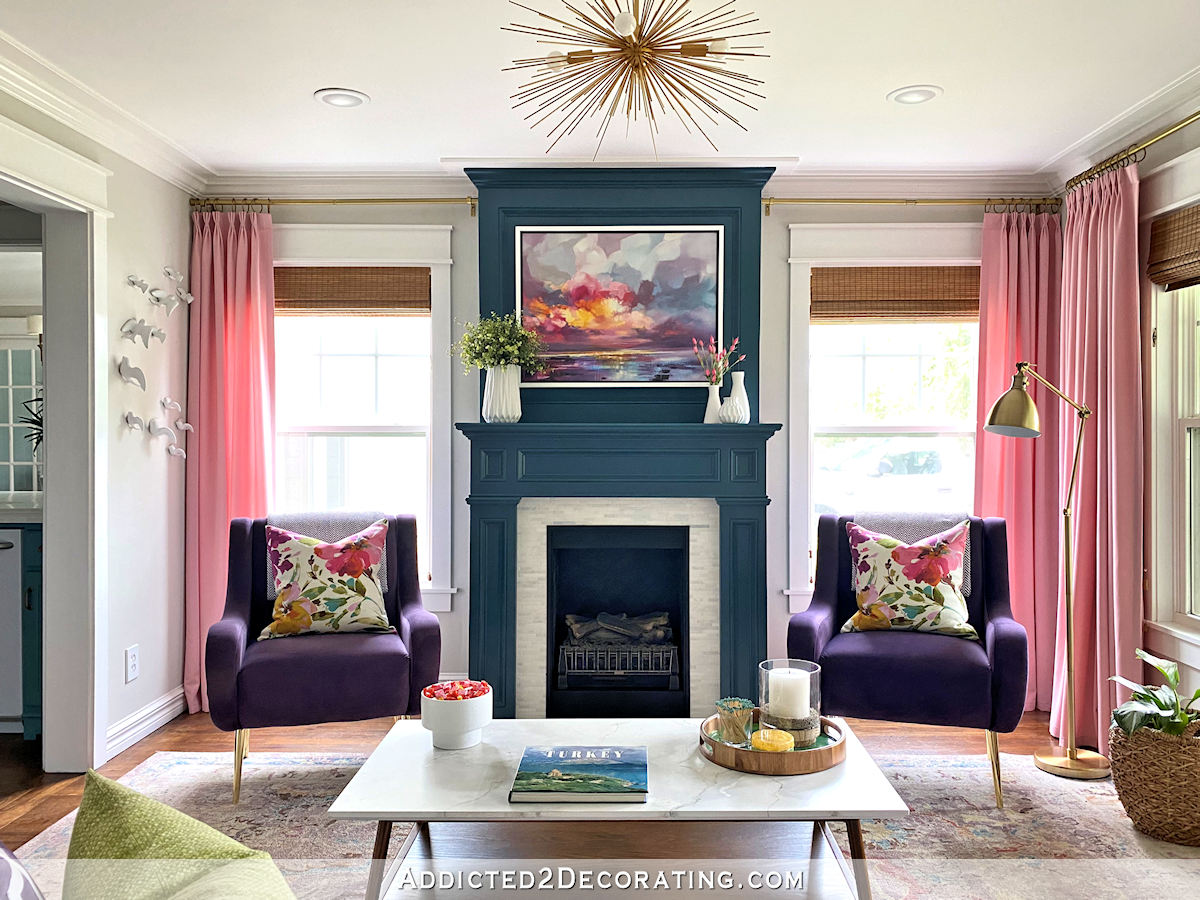
The original piece of artwork that I made specifically to go above the fireplace found a new home on the wall to the left of the cased opening that leads to the kitchen. I actually like it much more in that spot than I did above the fireplace, so that worked out perfectly.

Now that you’ve seen the “after” of the room, let’s go back and remember how this room looked originally, shall we?
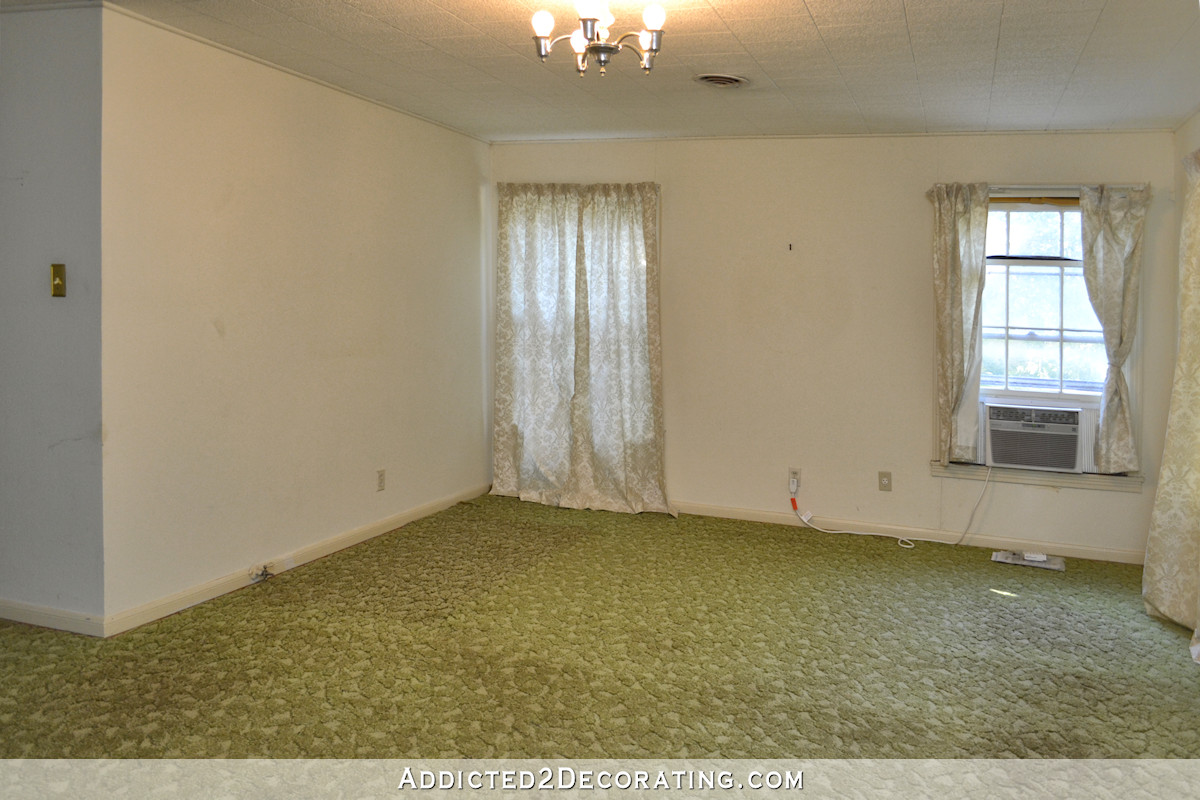
When Matt and I bought this house, I know so many people thought we were crazy. But I knew it had good bones, and could be turned into something quite beautiful. But I really did have to look past all of the original colors and aged finishes everywhere, because here’s what this area looked like 7,5 years ago.
And now that view from the front door looks like this…

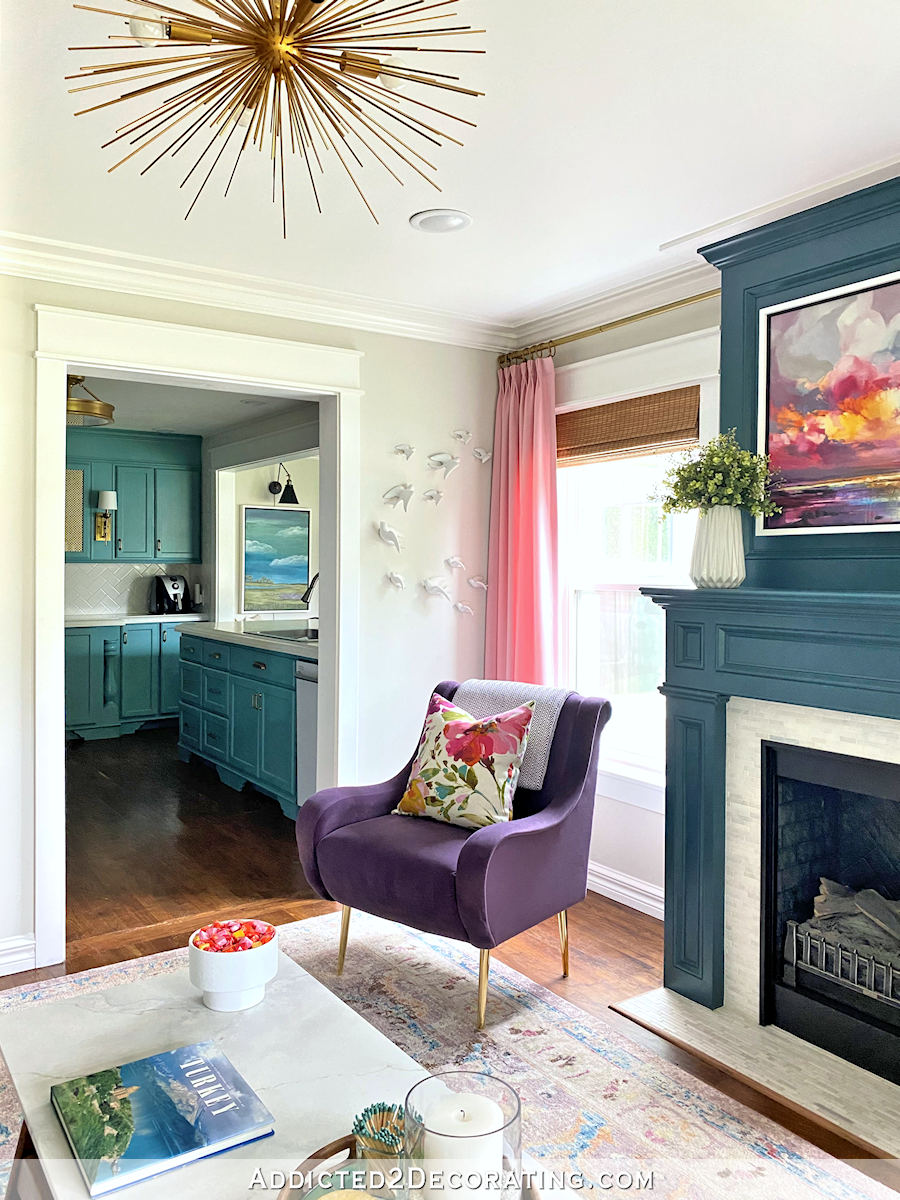
Originally, there was no opening into the kitchen on that left wall. The kitchen felt so small and closed in, especially because it doesn’t have any direct natural light into that room. I decided to open it up to the living room (and all of the natural light in the living room), and it was one of the best decisions I made in this house.
And, of course, there are so many other improvements I made — removal of the polystyrene ceiling tiles, all new drywall, new windows, removal of the carpet to expose the original hardwood flooring (which I refinished). And from the very beginning, I envisioned a fireplace between the two side windows. I also built that myself from scratch. It’s an electric fireplace and not a real fire, but I really just wanted it for the architectural interest and not for warmth.
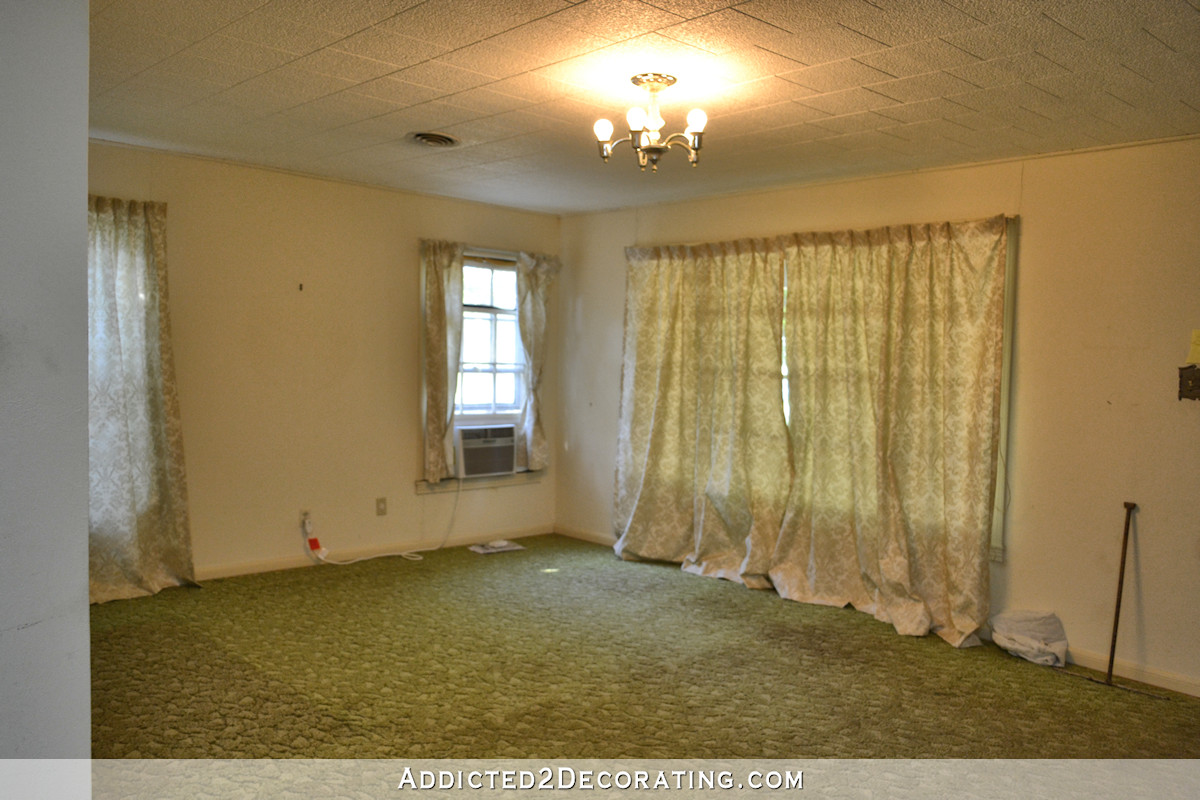
Here’s a view of the original front wall with all of the windows.
And here’s that view now…
And finally, here’s what the fireplace wall looked like originally…

And here’s what that view looks like now…
If only I had gone from that original “before” room directly to this current living room, I could have saved myself so much frustration. And money! But for so long, I just couldn’t find my footing with this room.
I think part of that was me trying to figure out my own style and giving myself permission to actually decorate like I wanted to rather than trying to fill some mold that I thought I needed to fit into being a new homeowner and a blogger in a sea of “country farmhouse” bloggers back then. I knew from the condo days that I loved lots of color, but back then, I always felt a little insecure about that. With seemingly everyone else decorating in neutrals, I felt like when we went from the condo to the house, I had some obligation to decorating in a more “grown up” manner.
The very unnatural decision to try to be something I wasn’t and fit a mold I didn’t feel comfortable in is what led to such results as this in the beginning…

There’s nothing horrible about that, but looking back on those pictures, it’s hard to imagine that I was actually decorating that room for me. It seems like I was decorating for someone else altogether.
Combine that problem (i.e., not being true to myself and my own style) with the fact that I was still trying to put lipstick on a pig back then (polystyrene ceiling tiles, old drywall, old windows, window unit air conditioner), and the result was something that I knew was going to be temporary. It was an improvement from the original, but not something I could live with for the long haul.
After several more attempts, and several more starts and stops, I’m just so relieved that I finally found the right direction that really resonated with me.
It’s been very rainy and overcast here lately, so I’m not sure when I’ll be able to photograph the finished music room to show you (that room doesn’t have any direct sunlight either). And then I have a few more finishing touches to do in our new breakfast room-turned-sitting room. But as soon as I you those finished rooms, I plan to take a whole bunch of wide angle photos to show you how all of these rooms flow together. I know simply looking at a floor plan doesn’t quite give you the whole picture of how a house feels as you walk through it.
But for now, I did take a couple of pictures that give you a peek into other areas. So here, you can see the feel for the layout of the living room together with the kitchen, the breakfast room (the painting with the light over it is in the breakfast room), and the pantry (just to the right of the picture with the light over it, which you can see two pictures down).
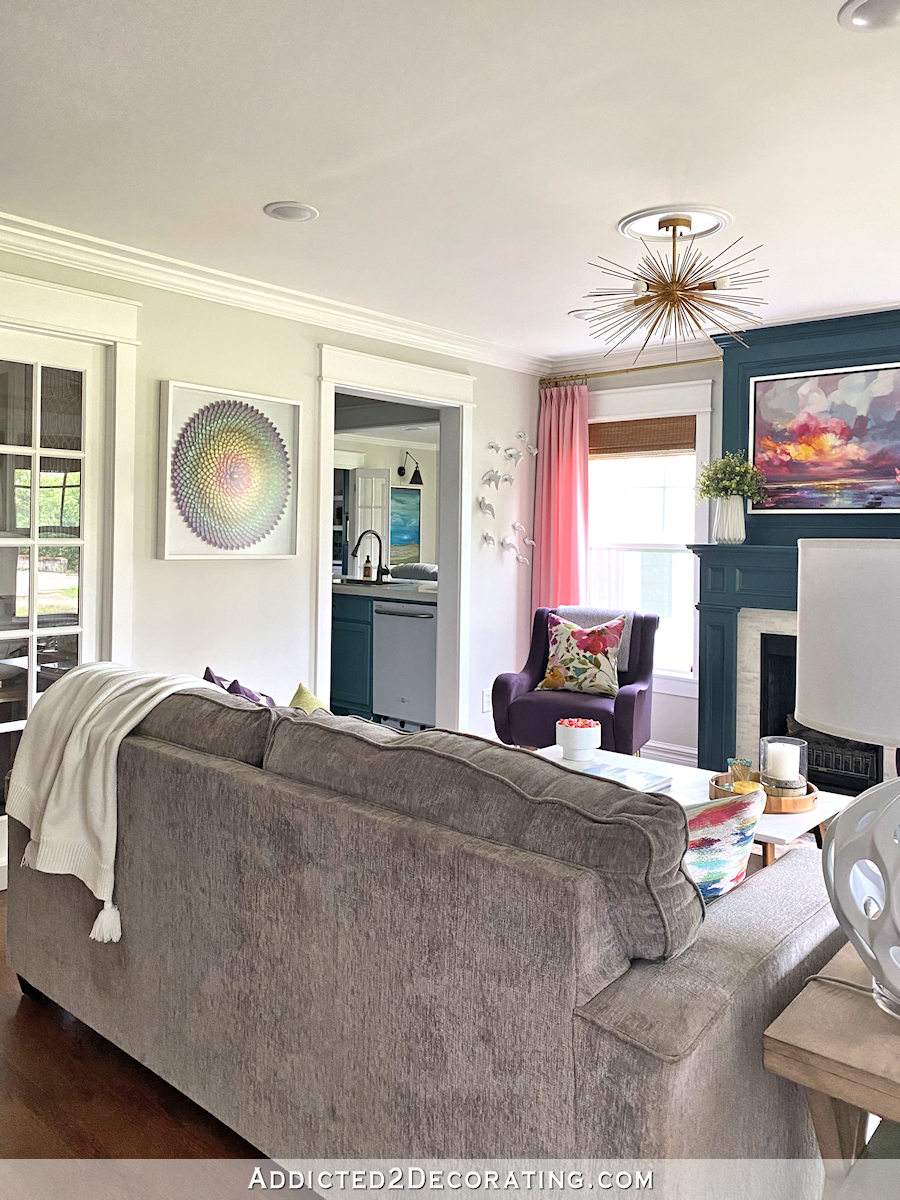
And then here’s the view while standing inside the music room (the music room is straight ahead when you step through the front door). To take this picture, I’m standing in the cased opening between the music room and the hallway (which I showed you at the beginning of this week).

But I’ll try to get many more pictures (including wide angle) of how the rooms fit together next week. Hopefully we’ll actually have some sunshine by then!
But for now, here are a few more pictures of my finished living room…

So that’s it! It’s done, and it only took 7.5 years. 😀
Here are the paint colors that I used in the room…


And all (or most) of the sources for items in the room can be found here…
If you’re looking for any of the DIY projects that went into this room (or any of the previous attempts, like that upholstered ottoman in the dark teal version of the room, or the DIY Roman shades), you can find those here…
Source link