How to create a signature for PDF documents on a Mac

[ad_1]
Even before the COVID-19 pandemic closed most offices, more and more official papers were being turned into PDF documents. (PDF stands for Portable Document Format; it is a standard created by Adobe in the early 1990s that allows paper documents to be turned into exact digital copies.) These days, hard copy paperwork is fast becoming the exception rather than the rule. However, even digital documents have to be signed. You can do it the long way — print those documents out, sign them, and then scan them back into your computer — or you can create a digital signature and place it directly on the PDF.
If you’re using a Mac, the process is refreshingly easy — just use the built-in Preview app to create and save your digital signature. (If you’re using a Windows PC, unfortunately, it’s not quite as simple.) After that, when you open a PDF using Preview, it will be a simple matter of dropping the signature into the document.
To create your signature, you first have to have a PDF ready:
- Open a PDF document using your Mac’s built-in Preview app. (If you don’t have a PDF document handy, you can create one with your favorite word processor and save it as a PDF file.)
- Open the Markup tool, either by clicking on the “pen in a circle” symbol on the top right of the Preview window or by selecting View > Show Markup Toolbar
- Click on the Signature icon (it’s the one that looks like a signature on a line)
:no_upscale()/cdn.vox-cdn.com/uploads/chorus_asset/file/22357983/Screen_Shot_2021_03_09_at_3.00.02_PM.png)
Now, you can create your signature. As you can see from the three buttons on top of the window, you have a choice of three methods:
- Select Trackpad. Click on the “Click Here to Begin” button in the center of the screen, sign your name on the trackpad, hit any key, and then click on “Done.”
- Write your name on a piece of white paper, select Camera, and hold the paper up to the camera (and on the line that appears across the screen) until you see the signature appear on the screen. (Two notes: first, the signature will appear reversed as you hold it up, but the digitized version will be correct. Also, if there are any other markings on the paper or if the paper doesn’t fill the screen, you are likely to get other markings recorded besides the signature, so you may need to try it a couple of times to get it right.)
:no_upscale()/cdn.vox-cdn.com/uploads/chorus_asset/file/22357988/Screen_Shot_2021_03_09_at_4.26.12_PM.png)
:no_upscale()/cdn.vox-cdn.com/uploads/chorus_asset/file/22357992/Screen_Shot_2021_03_09_at_4.29.48_PM.png)
- Select iPhone. If you have an iPhone associated with the Mac, your phone will almost immediately pop up a field on which you can write your signature; your signature will be mirrored on your Mac.
:no_upscale()/cdn.vox-cdn.com/uploads/chorus_asset/file/22358000/mysig.jpeg)
:no_upscale()/cdn.vox-cdn.com/uploads/chorus_asset/file/22358019/Screen_Shot_2021_03_09_at_4.34.17_PM.png)
With any of these methods, if you need to try again, just hit the “Clear” button on the lower left of the window to get rid of the unwanted signature. Once you’re happy with it, click on “Done.”
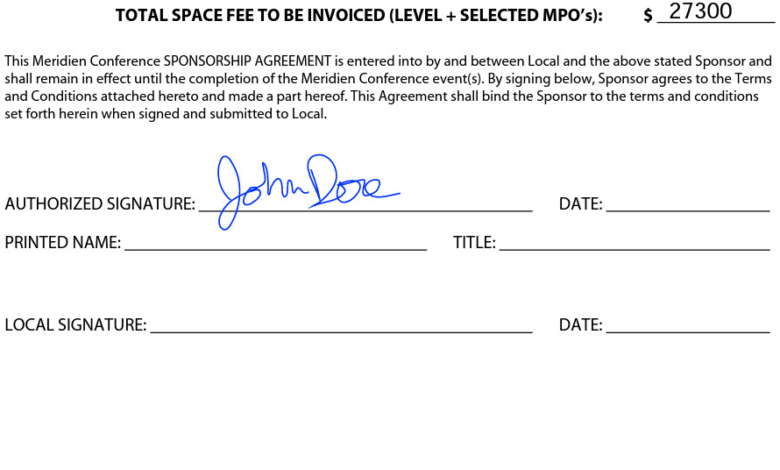
Now, whenever you want to add your signature to a document in Preview, just click on the Signature icon and click on your signature. It will appear in a box on your document which you can then use to adjust the size and location.
:no_upscale()/cdn.vox-cdn.com/uploads/chorus_asset/file/22358020/Screen_Shot_2021_03_09_at_4.42.33_PM.png)
:no_upscale()/cdn.vox-cdn.com/uploads/chorus_asset/file/22358021/Screen_Shot_2021_03_09_at_4.46.48_PM.png)
And if you want a second signature, just create it in the same way. After that, when you click the Signature icon, you’ll see both signatures and can select the one you want to use. Don’t need one of the signatures anymore? Hover over the signature until you see a small “x” next to it, and click on that to delete it.
[ad_2]
Source link


