It’s Easy to Upgrade Your Steam Deck’s SSD. Here’s How to Add More Storage

[ad_1]
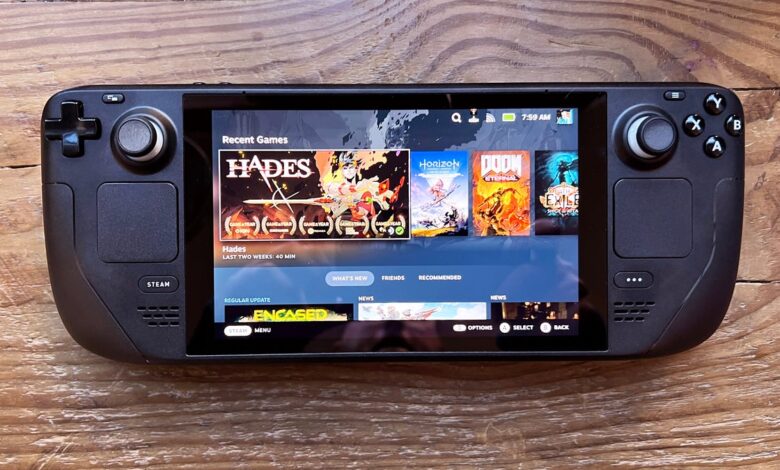
The Steam Deck is a handheld gaming device that’s become a popular way to play PC games on the go. There are three versions of the Steam Deck, with the main difference being the storage space: 64GB, 256GB and 512GB (which cost from $400 to $650). But no matter which model you pick, you’re going to eventually want more storage for more games.
When it was first announced, Valve said the Steam Deck was going to be easy to upgrade. And sure enough, it is. There are multiple ways to upgrade the storage space on a Steam Deck. Sure, you can add a microSD card to the Steam Deck’s card slot, but if you want a more permanent boost, you can do that with a new M.2 SSD, similar to what’s used in the PS5. Thanks to the dropping prices of these drives, upgrading a 64GB or 256GB to 1TB is about the same price as buying a 512GB version.
Valve’s Steam Deck wasn’t the first portable gaming gaming device, but it is the first to incorporate a PC-like environment with its different versions and its ease to upgrade. Storage is an especially important feature to allow for upgrading as the sizes of games keep increasing.
To upgrade, you have to take it apart. But don’t be scared — it’s easier than it sounds. We’ll walk you through the steps of upgrading the storage of the Steam Deck and transferring files.
What you need
There are two tools used for opening a Steam Deck: a Phillips-head screwdriver #0 and an opening or prying tool. For a quick data transfer in lieu of starting from scratch with a new drive and having to redownload everything, a USB-C enclosure for the SSD is very useful. The SSD used for this upgrade was the Corsair MP600 Mini 1TB.
1. Preparing the SSD
Take the MP600 and install it into the USB enclosure. Once installed, the SSD needs to be initialized, which can be done via Windows by right-clicking on the Start button and selecting Disk Management. Plug the USB enclosure into the PC and notice the message about the drive needing to be initialized. Select the GPT option to set up a partition for the drive.
2. Transferring Steam Deck Files
After the SSD has been initialized, plug it into the Steam Deck. This is the time to delete any games you have on the Deck for the sake of taking less time to transfer files. They can be redownloaded once the storage has been upgraded.
On the Steam Deck, go into Desktop mode and click on System > Konsole. Once the Konsole window shows up, type “passwd” to set up a password as you’ll be asked for it a bit later. Keep the password simple for this step. Once a password has been set up, type the command “sudo lsblk” and enter your password when prompted.
This will list the Steam Deck drives and you need to take note of the main drive, which is typically listed as “nvme0n1,” and the USB drive that shows up as “sda.” As a way to double-check the drive names, look at the storage size listed. It should match up to the internal drive’s storage and the SSD in the USB enclosure.
Then type the following command into the Konsole window:
sudo dd if=/dev/nvme0n1 of=/dev/sda oflag=sync bs=128M status=progress
A message will come up showing that the data transfer has begun, and then it’s just a matter of waiting for it to complete, which can take about a half hour depending on the size of the internal storage.
3. Opening up the Steam Deck
Once the files have been transferred, take the Steam Deck to below 25% battery life to avoid a dangerous accident if the battery is punctured. Then make sure the device is completely off and not just in sleep mode. Start on the back and remove the eight screws. The four corner screws will be longer than the four in the center of the back. Make sure to keep the screws secured.
What the inside of a Steam Deck looks like.
After taking out the screws, use the prying tool to open up the Deck. Start prying at the left and right triggers where there’s more space to insert the tool. Work your way around the Steam Deck until the back comes completely off.
4. Removing the board shield
The first thing you’ll notice with the Steam Deck open is the metallic board shield. To remove it, pull back the foil to reveal a hidden screw. Once the screw has been removed, the board will flip up. At the bottom right is a black ribbon that connects the battery to the board. Gently remove this ribbon from its slot.
What under the metal board shield.
5. Switching out SSDs
At the bottom of the exposed Steam Deck board is the SSD covered with its ESD shielding. Remove the screw holding down the SSD and slide it out from its port. Remove the ESD shielding and place it on the new SSD. Then place that SSD into the port and replace the screw.
Time to switch the SSDs.
6. Closing up the Steam Deck
From here, it’s all about working backward. Reattach the battery ribbon, close up the board shield and replace the screw holding it down. Snap back the Steam Deck case together and put all the screws back in.
Once the Steam Deck is securely put back together, power it up and verify the new storage space in the options. And that’s it.
If the Steam Deck doesn’t power up, double-check that the better ribbon is completely in. If the Steam Deck fails to boot up, open it back open and make sure the SSD is secure in its port.
[ad_2]
Source link


