Modified IKEA Sektion Cabinet Installation For Office (Studio) Use (Installation Without Sektion Legs Or Suspension Rail)
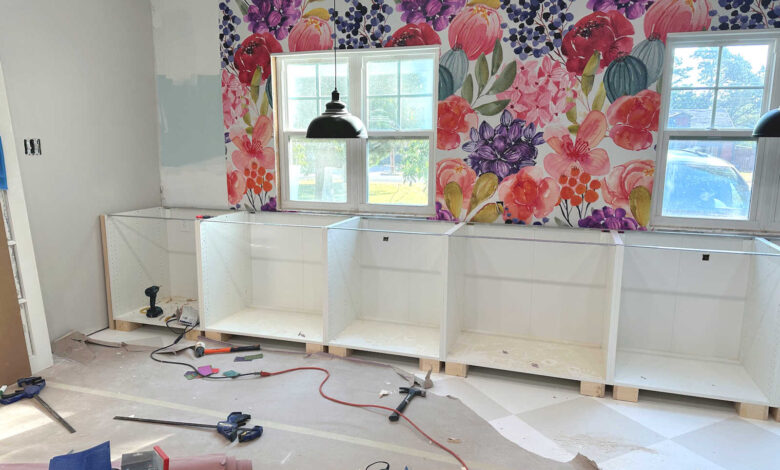
I had a choice between installing the new studio bathroom wallpaper or installing the studio cabinets this weekend, and I decided to install so the studio cabinets. So if you showed up here today hoping to see the wallpaper installed, I’m so sorry! You’ll have to wait a bit longer. But seeing the IKEA Sektion cabinets finally installed on the long wall of the studio is pretty exciting!
This wasn’t exactly a straightforward installation of IKEA Sektion cabinets. These cabinets are made to be used in a kitchen, and standard kitchen cabinet height is 36 inches. So these cabinet boxes are 30 inches high, and once you add the legs that IKEA sells for them, and then add a standard thickness countertop, the finished counteretop will be right at 36 inches high.
Well, I didn’t have 36 inches of height to work with since I’m using these in my studio on a wall with two windows which were installed at the perfect height to allow for a standard desk-height countertop, which is 30 inches high.
Since I’m not really using this as a desktop, I don’t mind the finished countertop being a little higher than 30 inches, so it just needed to be somewhere between 30 inches high and around 34 inches high.
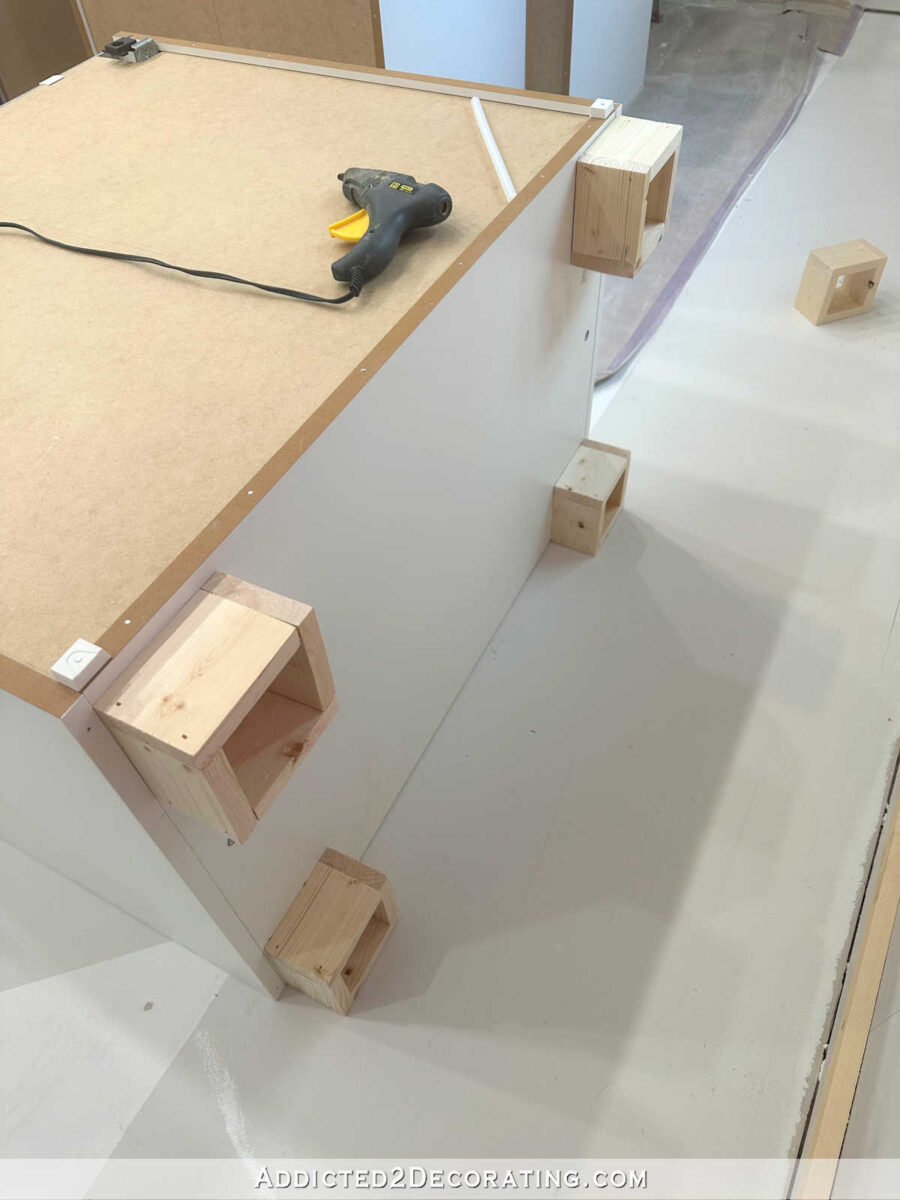
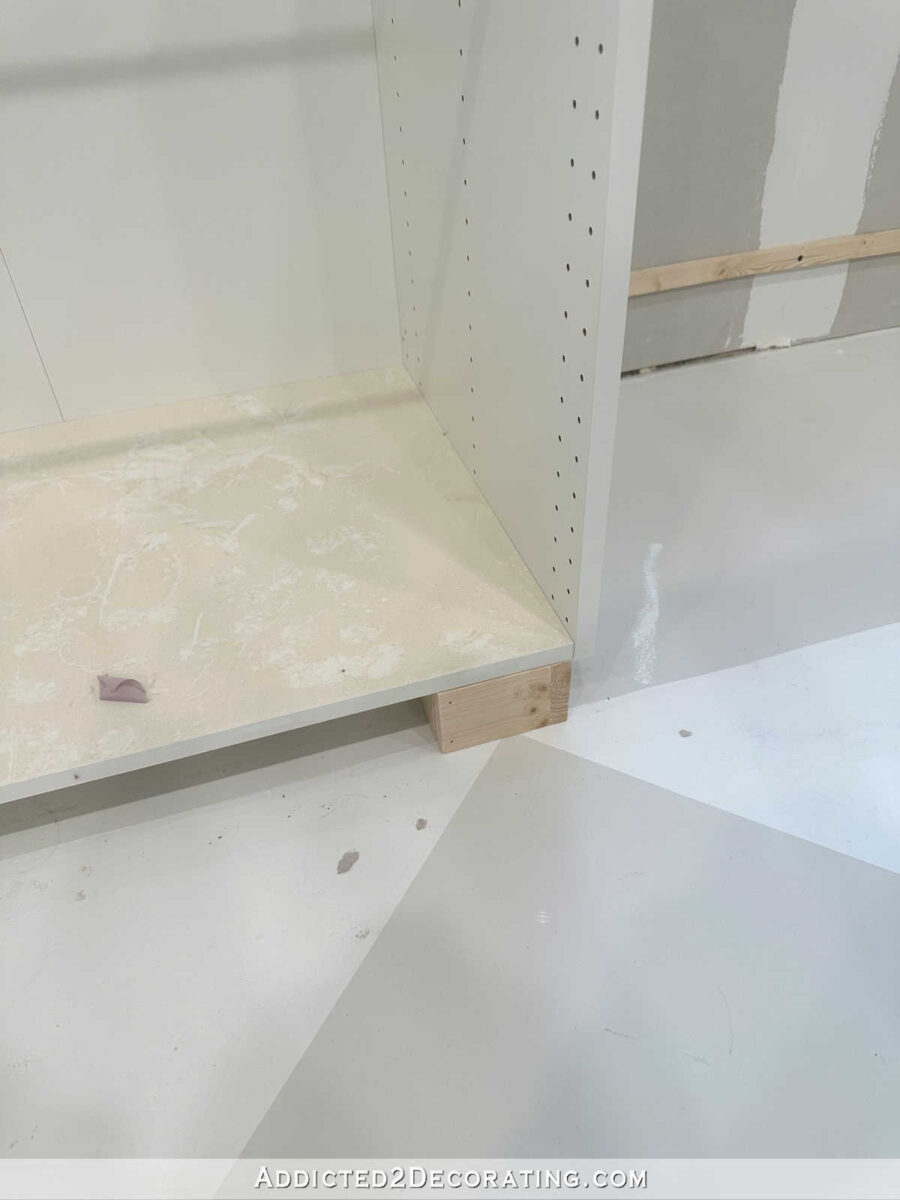
That means that the IKEA legs wouldn’t work for my purposes. The minimum height for the IKEA legs is 3.5 inches, and the highest I could use is 3 inches. So I ended up making my own very rough feet out of 1×4 lumber that I ripped down to 3 inches, and then cut into 4-inch-long pieces. I made each foot out of four pieces, glued and nailed together using 16-gauge 1.5-inch nails in my nail gun.
I wasn’t concerned with them being pretty since they won’t show on the finished cabinets once all of the trim is installed. I just needed all of the feet to be a consistent 3 inches high.
Once I had all of the feet made, I placed my cabinet boxes on the floor front down, and then attached the feet using hot glue. I know a lot of people don’t trust hot glue because they’ve only ever used those dinky little hot glue guns that you buy at the craft store. But when I talk about hot glue, I’m talking about an actual hot glue gun that you guy in the tool department of Home Depot or Lowe’s that puts out a very thick bead of glue.
When attaching the front feet, I made sure the front of each foot was flush with the front of the cabinet since I don’t plan on having a toe kick on these cabinets. If I had wanted a toe kick, I would have moved those front feet back four inches.
Once I had those attached, I placed the cabinet right side up, and it looked like this…
When I ordered my cabinets, I wasn’t really sure exactly how I was going to install them (I was still deciding on how I wanted my finished cabinets to look), so I didn’t order the suspension rails that are generally used to install the Sektion cabinets. Ordering them separately at a later date would have cost $120 just for shipping. So I decided to skip the suspension rail and just attach the cabinets to the wall without the suspension rails.
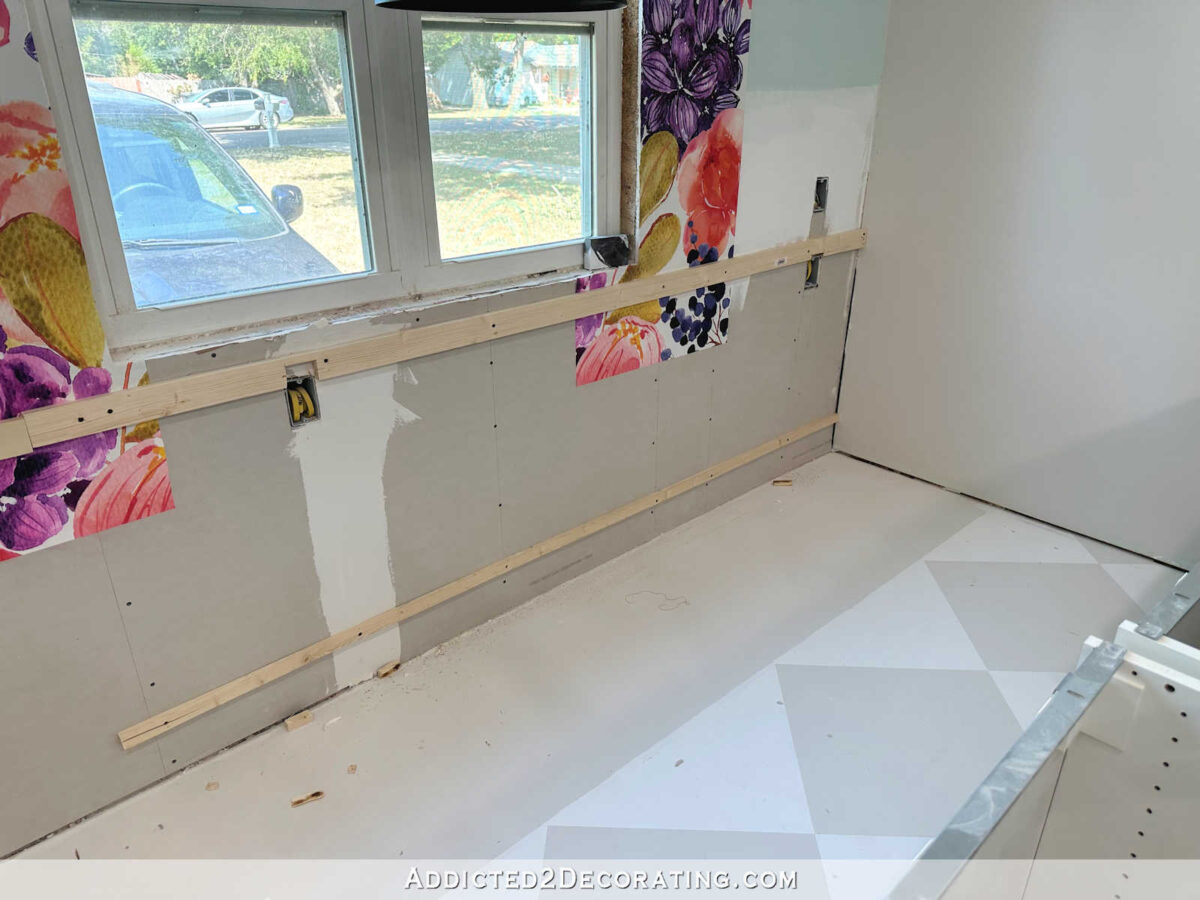
The problem is that the studs in the wall weren’t directly lined up with the brackets that are used to screw the cabinets to the wall. So before trying to attach the cabinets to the wall, I screwed some boards horizontally to the wall, screwed into the studs. That way I could install the cabinets anywhere along the wall and have them screwed securely into these boards.
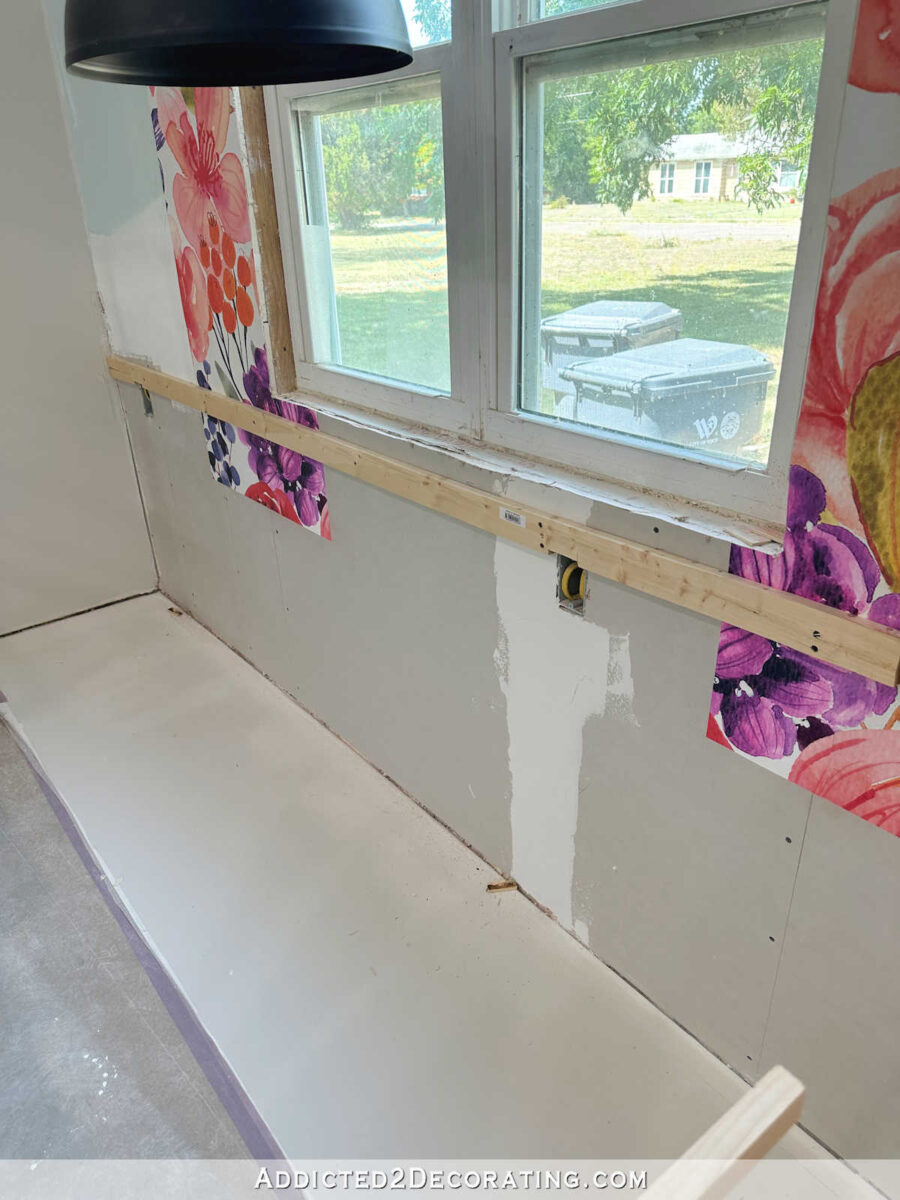
I also ripped a small strip of lumber to place close to the bottom of the wall so that the bottom of the cabinet would be plumb with the top.
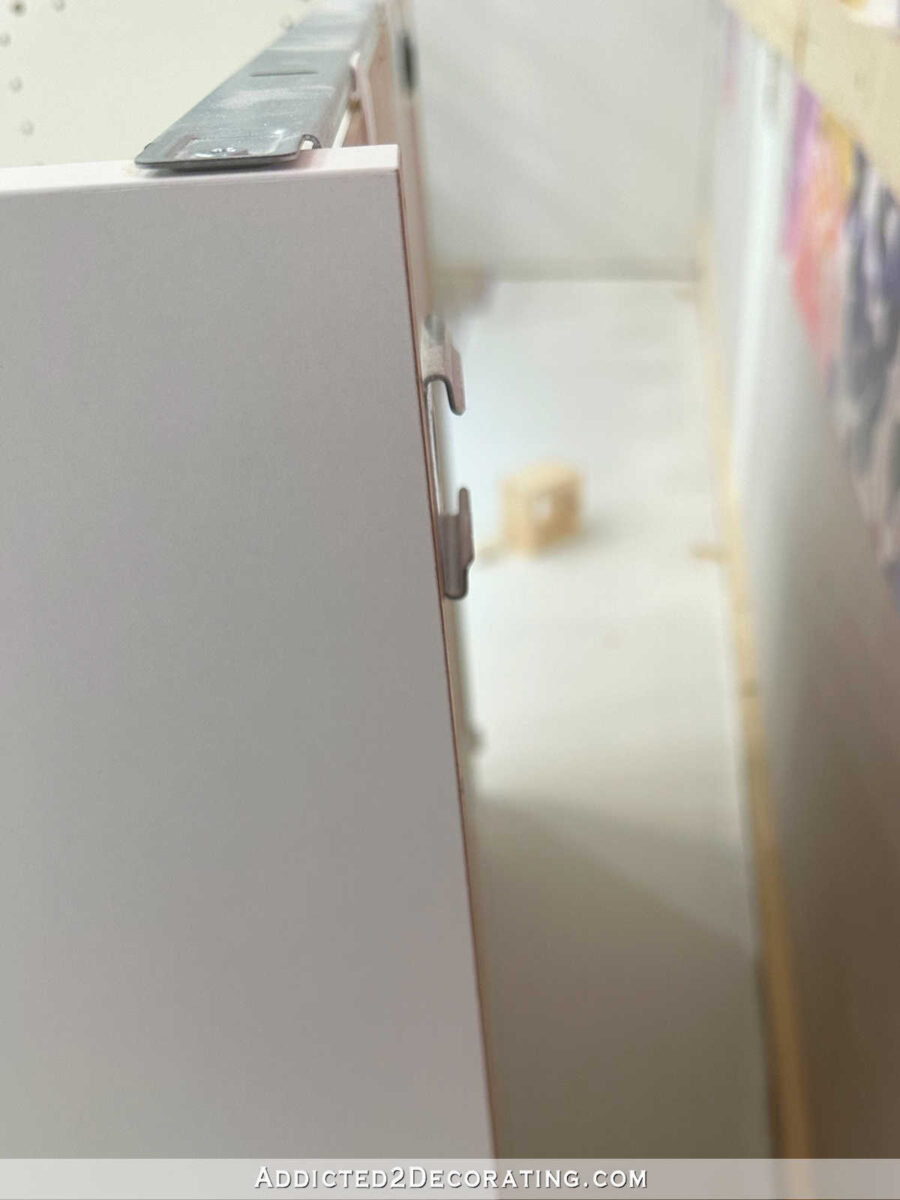
Before screwing the cabinets to the wall, I had to make one small modification. These brackets that come with the Sektion cabinets are adjustable. If you’re going to use them with the IKEA suspension rails, you install them using the screw holes closer to the front of the cabinet so that they protrude out the back of the cabinet slightly. These literally attach over the suspension rail and work similarly to a French cleat.
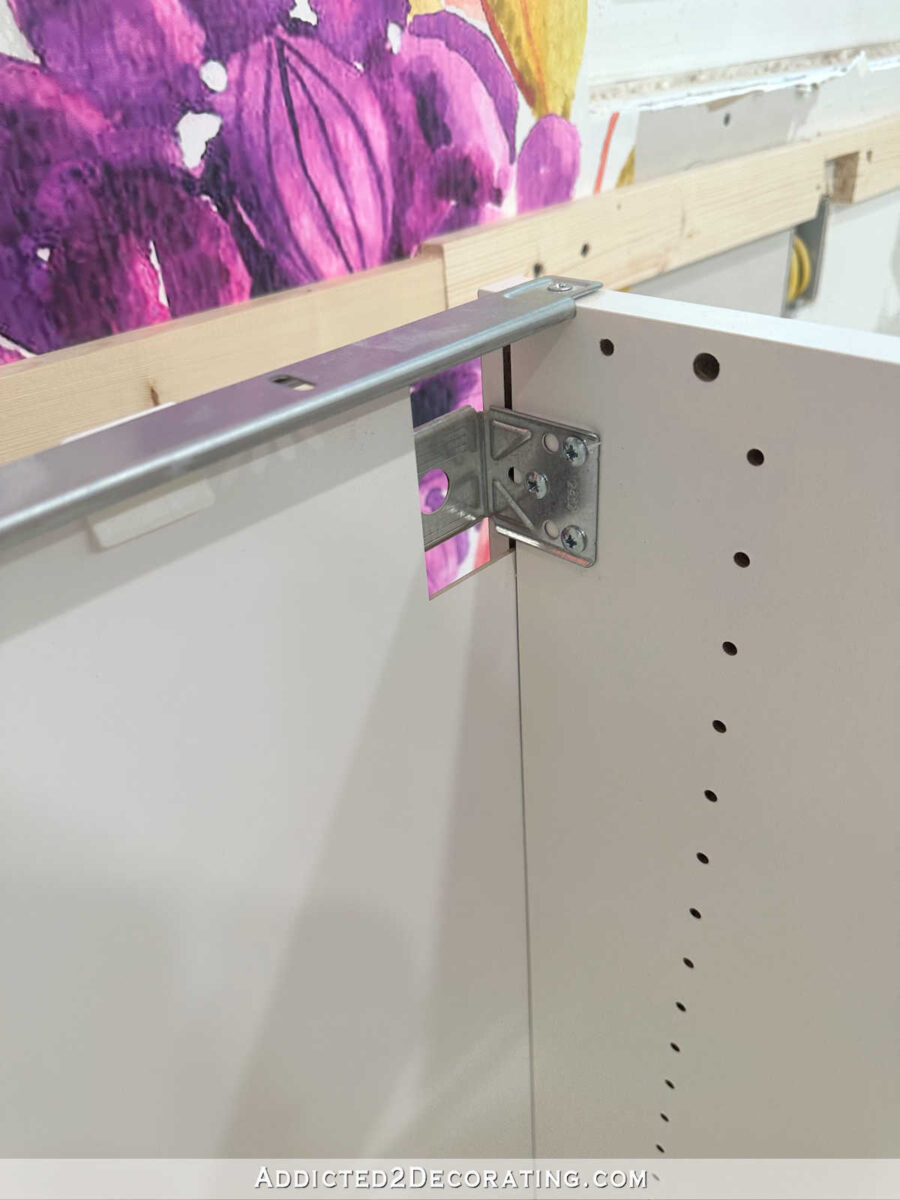
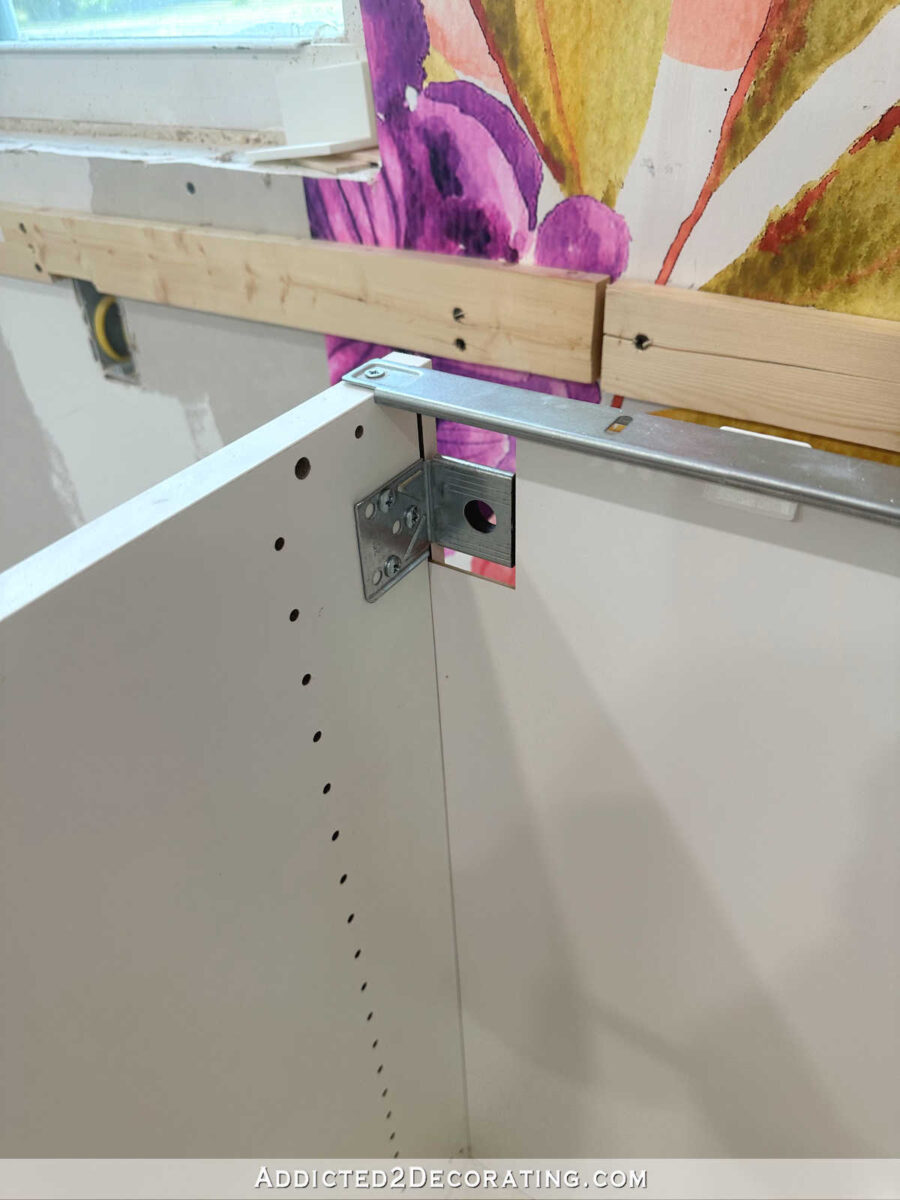
But if you’re not using the suspension rails, and you’re just screwing the cabinet directly to the wall, you use the back holes, which brings the bracket forward and makes the back of the bracket flush with the back of the cabinet.
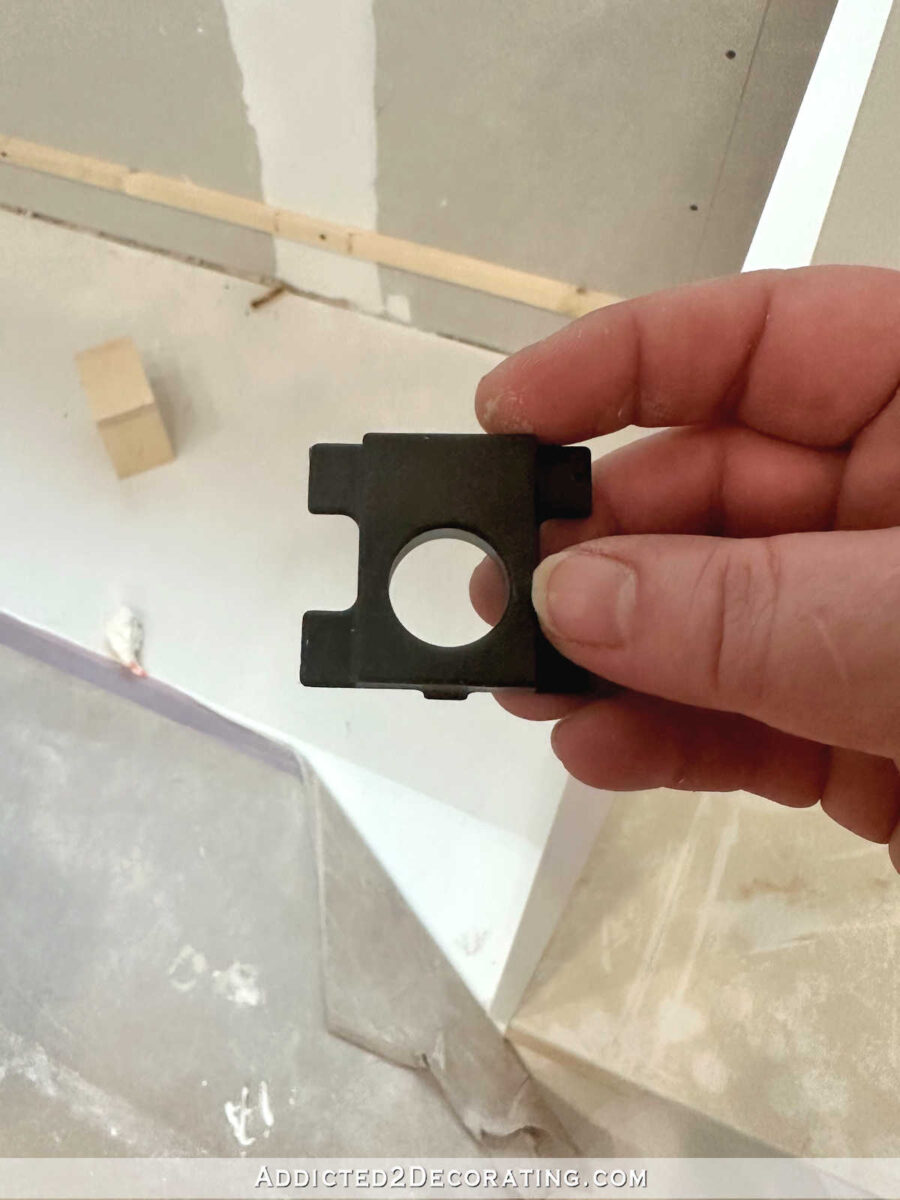
And then these little black filler pieces insert into the bracket on the backside.
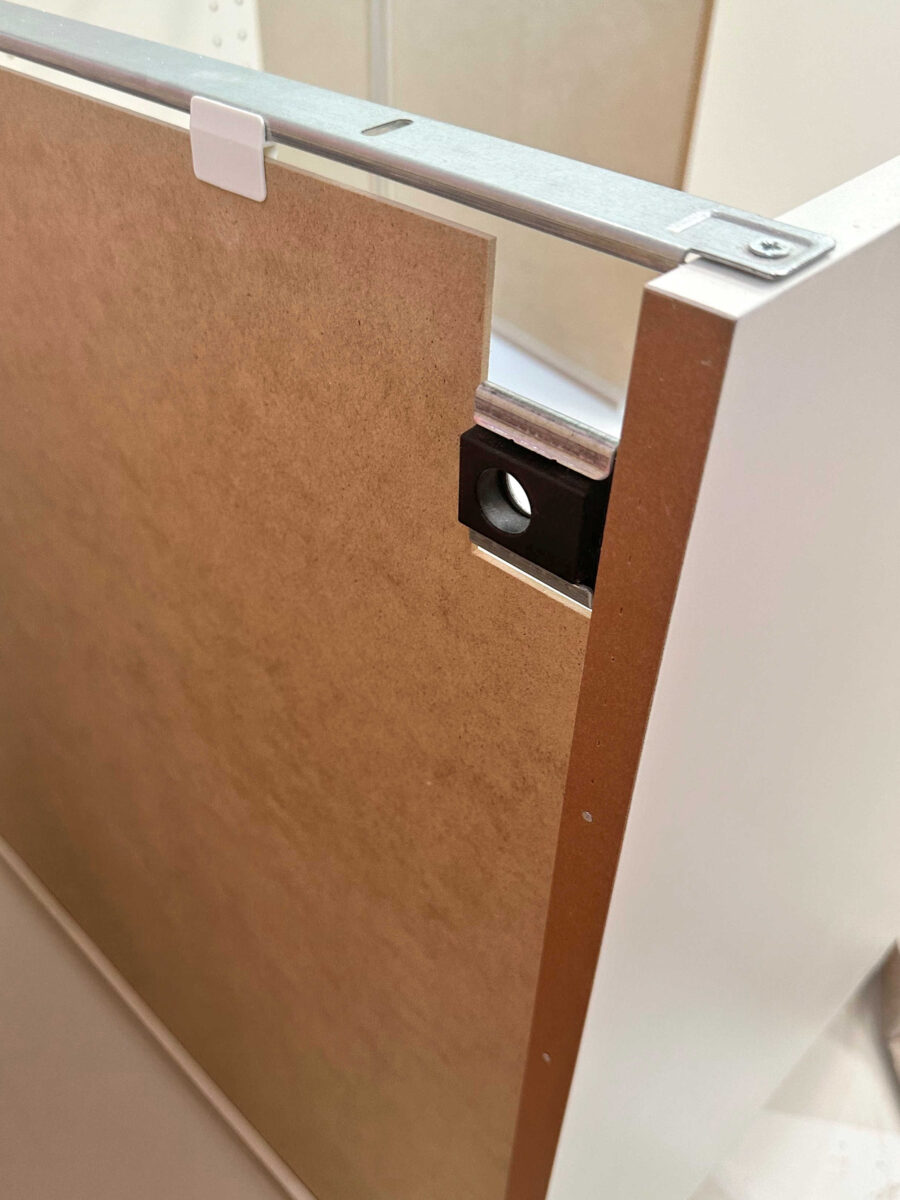
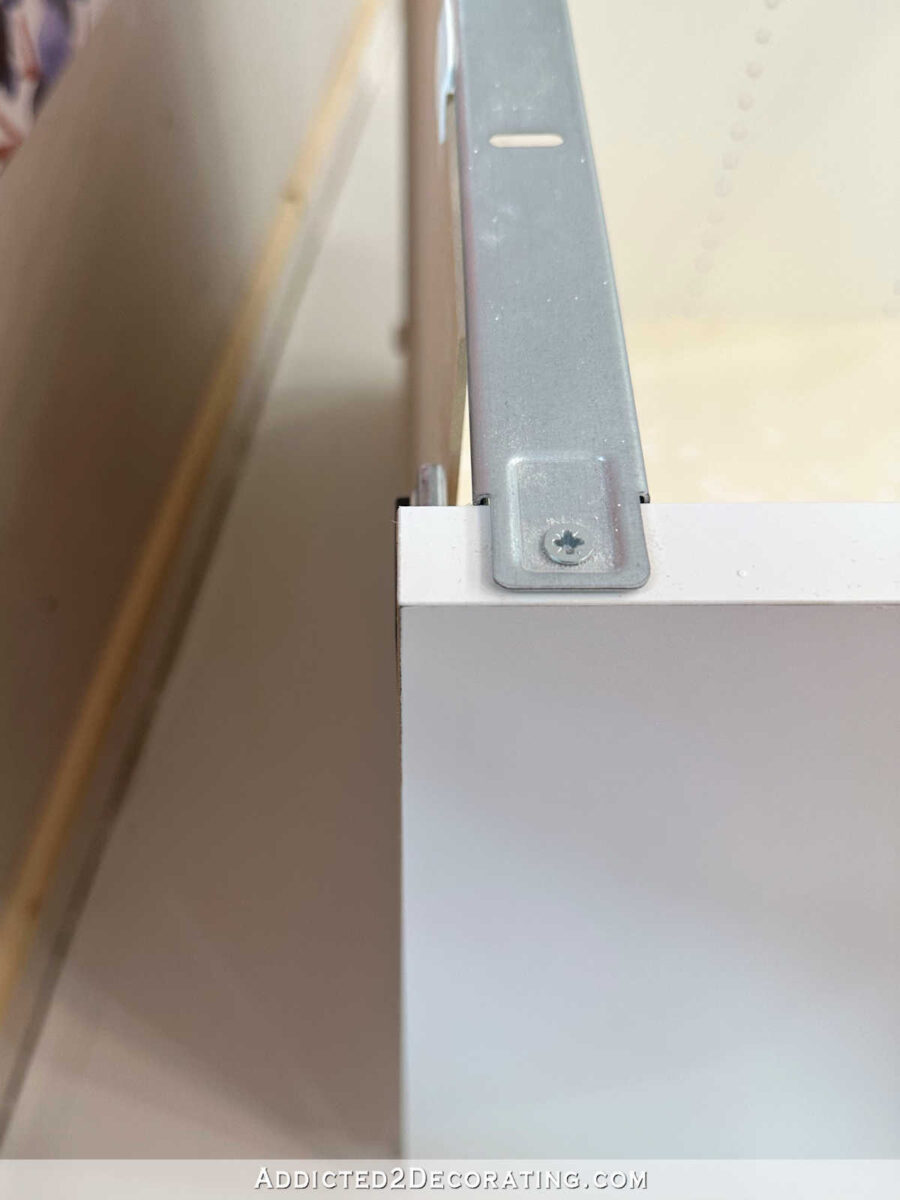
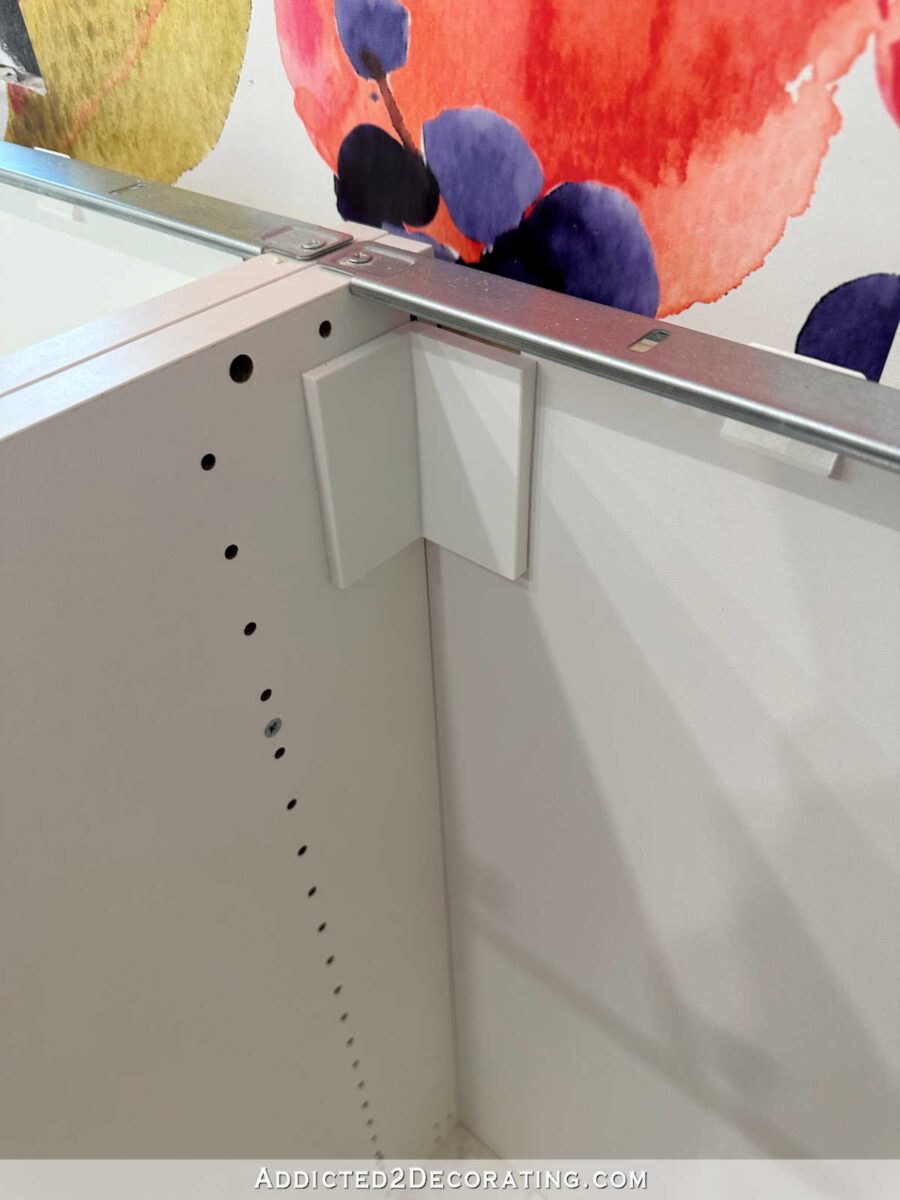
Here’s a side view showing what the bracket looks like when it’s installed to be used with the suspension rail. The metal bracket just hooks over the top of the suspension rail, which is why it needs to be set back further and not be flush with the back of the cabinet.
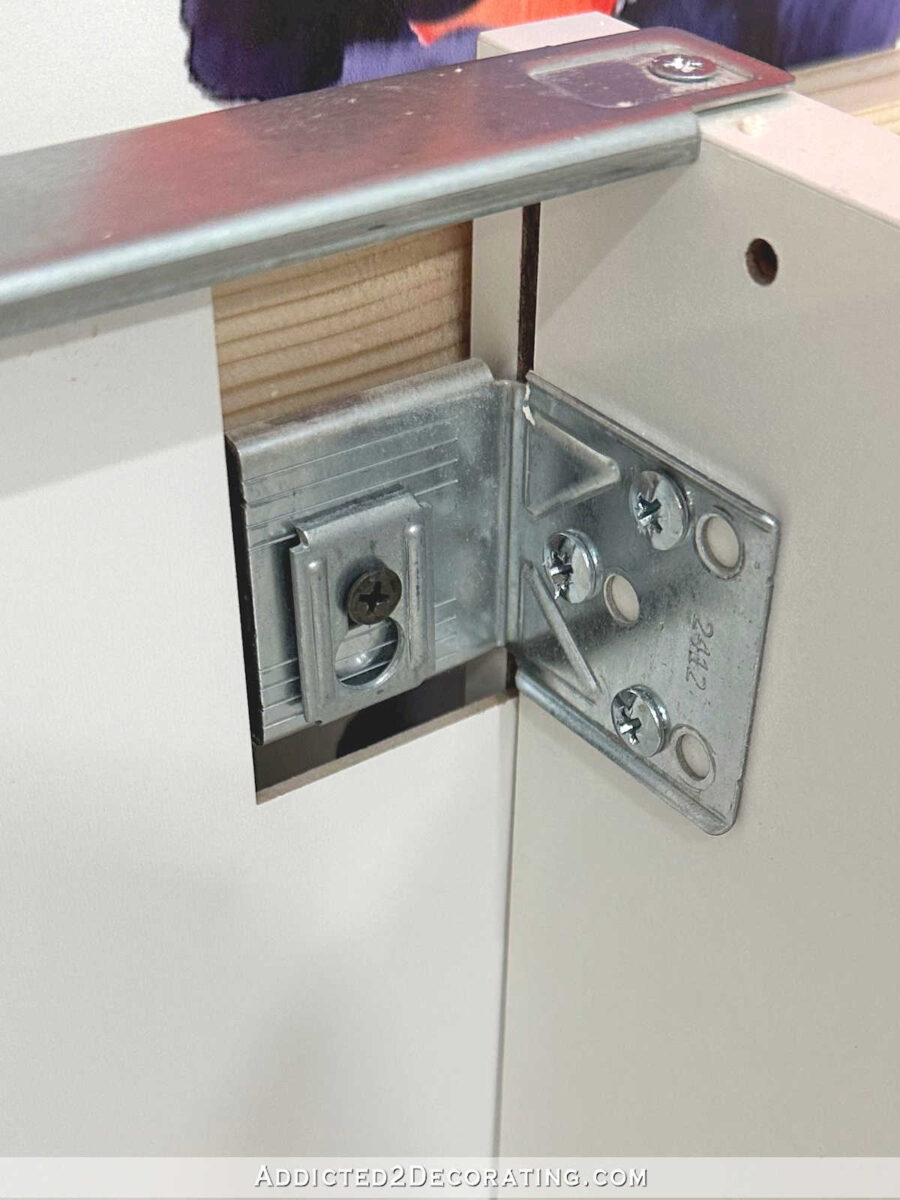
But here’s the side view when the bracket is installed for the cabinet to be screwed directly to the wall. Once the black plastic piece is inserted, it’s flush with the back of the cabinet so that the cabinet will sit right against the wall (or in my case, right against the wood strips that I attached to the wall).
Once I had all of the brackets adjusted, I placed the first cabinet in its place, and then put screws through the middle of these big holes in the brackets and into the wood.

And then I placed these little metal pieces (which come with the cabinets) over the screws. I didn’t tighten the screws just yet. I wanted until I had all of the cabinets in place before going back and tightening these screws.
And here’s a side view of the first cabinet installed…

With that first center cabinet installed, then I worked out from there. I moved the next cabinet into place, clamped it to the first cabinet, predrilled four holes, and screwed it to the first cabinet using the screws provided with the Sektion cabinets. And then I screwed it to the furring strip (but didn’t tighten the screws completely), and moved on to the next cabinet.

The process wasn’t difficult at all. With an extra set of hands, it would have been a very quick process. Working by myself definitely slowed things down, but it was very manageable.
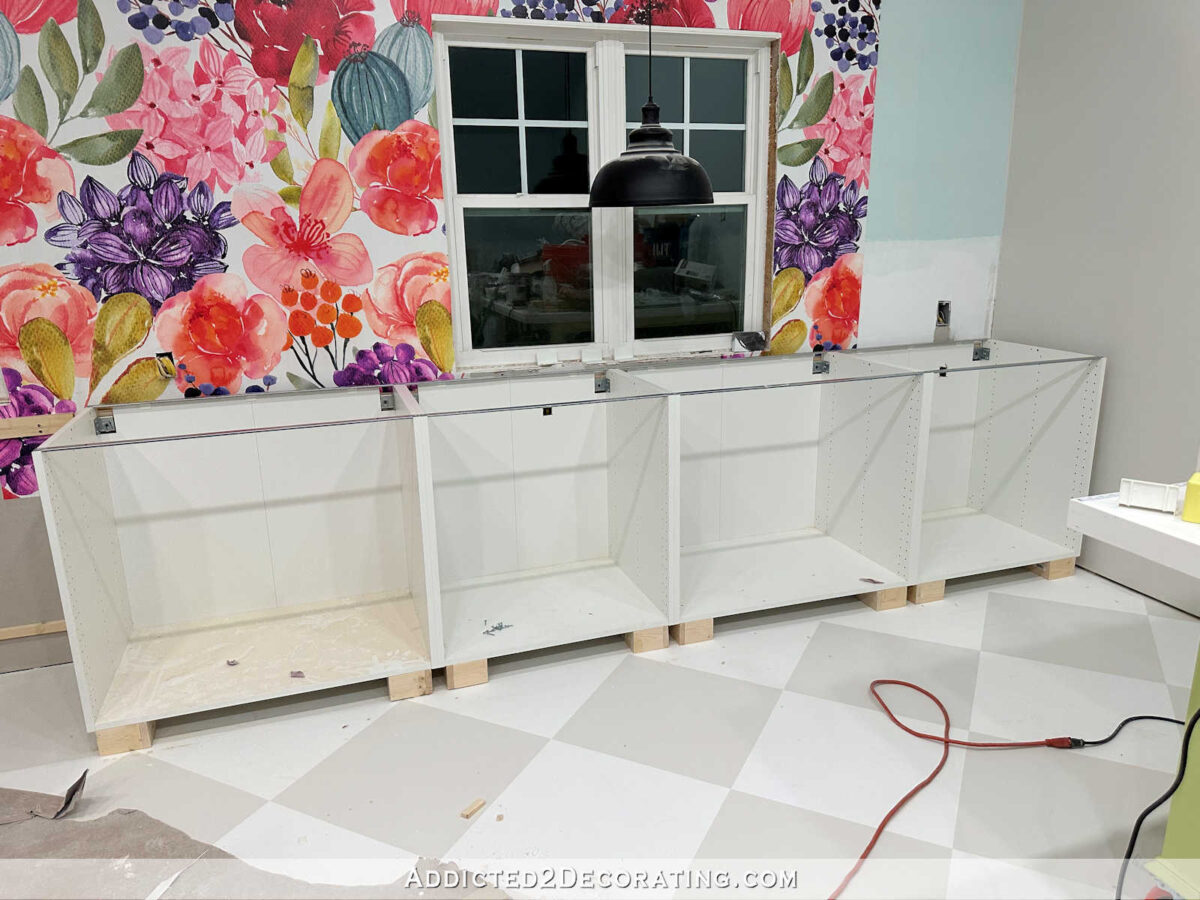
Once I got all of the cabinets screwed to each other and screwed to the wall, I started in the middle and tightened all of the wall screws.

Once those screws were secure, I covered the brackets with the plastic covers that come with the Sektion cabinets.
The last thing I needed to do to prepare for trim installation was to fill in the spaces at each end. I used 2″ x 2″ pieces to the proper height, and using my trusty hot glue gun once again, I attached those to the sides of the end cabinets, making sure that the front of the board was flush with the front of the cabinet frame. The way, when I attach the 5/8-inch-thick trim board to the front of this spacer board, the trim board will be flush with the fronts of the cabinet doors.

So this is as far as I got this weekend. Next up, I’ll be trimming out these lower cabinets, and then installing the countertop.

My goal is to have the countertop finished and the two upper cabinets put together by Wednesday night so that some strong men in our Wednesday night group can left those upper cabinets and put them into place for me. 😀

I’m so excited about the progress! I’ve been dreaming about this room, and specifically this wall, for so long, and I’m so anxious to see it finished!

Addicted 2 Decorating is where I share my DIY and decorating journey as I remodel and decorate the 1948 fixer upper that my husband, Matt, and I bought in 2013. Matt has M.S. and is unable to do physical work, so I do the majority of the work on the house by myself. You can learn more about me here.
Source link