Y’all, this was a huge job, but the painted checkerboard floor in the studio is finally finished. This project would have been so much easier if I could have moved every single thing out of the room and painted the entire floor at the same time. But because I had such large items like my two huge work tables that had to stay in the room while I was painting the floor, that meant that I could only do half of the floor at a time.
And then I got off track with my idea of doing a painted “rug” design on the back entry floor, which (in my opinion) ended up looking terrible. So I had to sand the back entry floor to remove all of the paint ridges and start over.
Because I only sanded enough to remove the ridges from the painters tape, and my goal wasn’t to remove every bit of paint from the floor, I didn’t have to start at the very beginning with primer. I could skip that step and start with painting the entire floor gray, and then taping off the white squares and painting those. (You can see the entire process for painting a checkerboard floor here.)
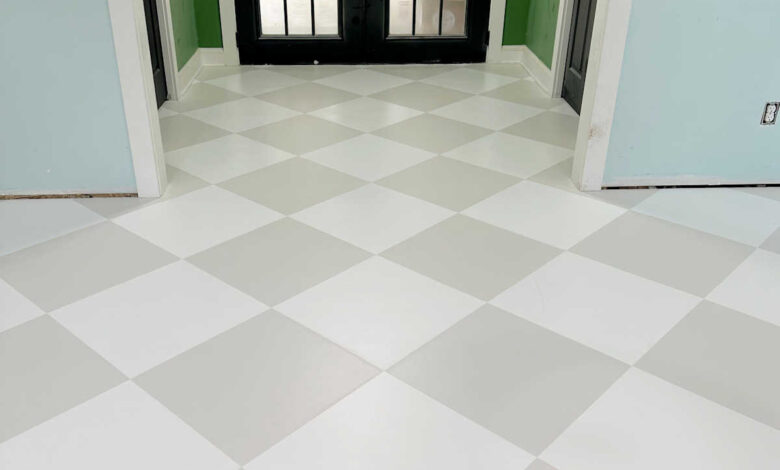
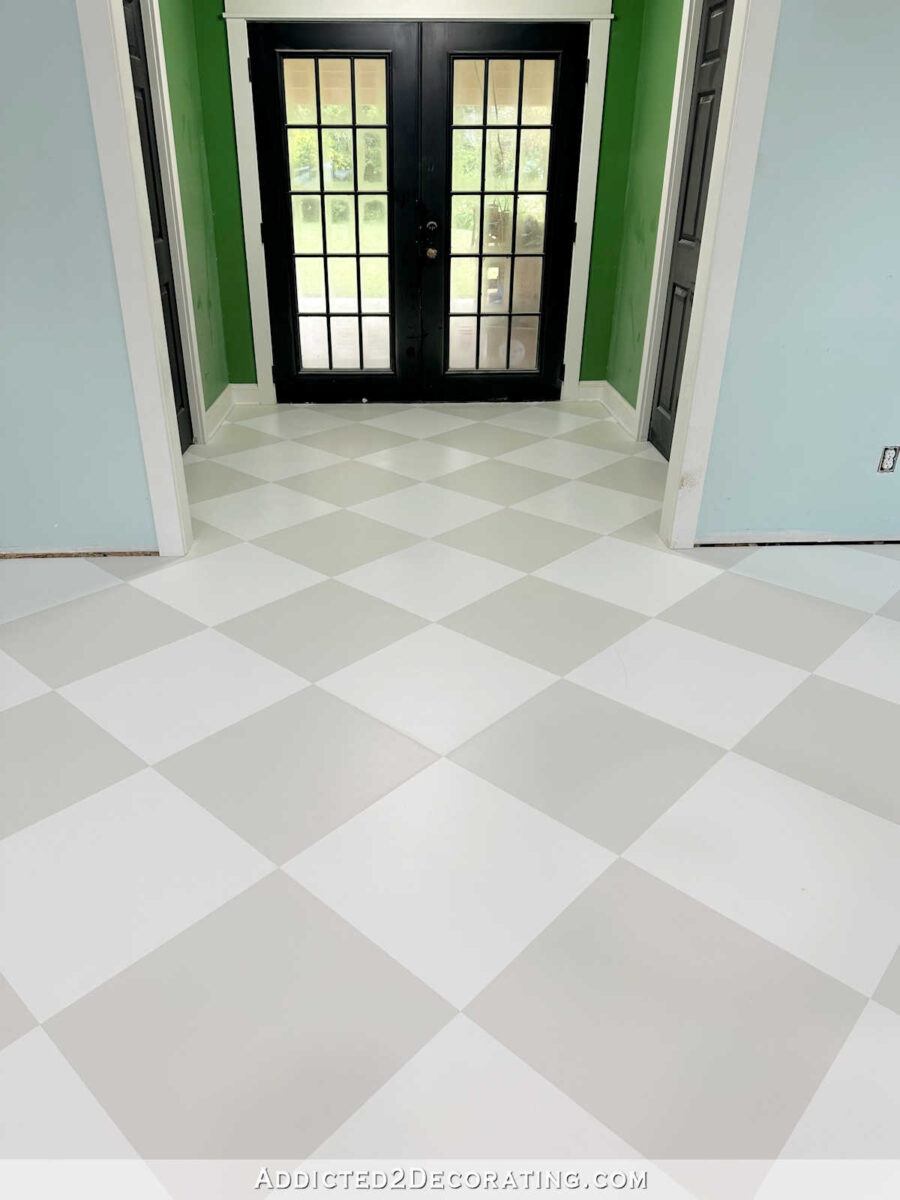
So the back entry floor was actually a relatively quick and easy redo. And now that I can see it finished, I think it was definitely the right decision to carry the checkerboard design all the way through to the back doors. Here’s how it turned out.
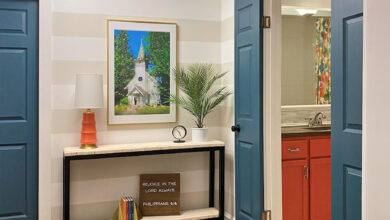
Don’t you think so, too? I like that there’s nothing breaking up the flow of the design into the back area. I think it makes the room look larger and more cohesive. Of course, getting rid of that green on the back entry walls will also go a long way towards bringing these two areas together.

And I have to admit that I was both shocked and excited about how near-perfectly centered the design ended up coming out on the floor. I was expecting the design to be a little off center, but it turned out to be almost perfectly centered on the back doors and with the side walls and doors.
I can’t even tell you how excited I am to be done with this floor! It’s a little dusty, and everything in the room needs to be cleaned, but after some vacuuming and cleaning up, I’ll be ready to move on to repainting the walls. I’ve decided to use the same blue on the studio walls instead of white. But I’m going to have the color mixed at 50% so that it will be much lighter than what it is now. The more I thought about it, the more I just can’t see myself liking white walls. I’ve tried that before, and it didn’t work out.
So I’ll keep the ceiling the exact blue that it is now and the walls will be the same color mixed at 50%. I’ve also selected a color for the bathroom vanity, and I’ve bought the paint. That might actually be my next project since I just finished a big project, and painting a vanity will give me the almost-immediate satisfaction of a project that can be finished in a couple of hours. Either way, I’m just so relieved to be finished with the floor!

Addicted 2 Decorating is where I share my DIY and decorating journey as I remodel and decorate the 1948 fixer upper that my husband, Matt, and I bought in 2013. Matt has M.S. and is unable to do physical work, so I do the majority of the work on the house by myself. You can learn more about me here.
Source link