Orchid Care: How To Grow Healthy Plants Indoors
[ad_1]
Orchids make the most beautiful houseplants, possessing long-blooming exotic flowers and an elegant form. They have a reputation for being prima donnas, but nothing could be further from the truth. Follow the basic rules of indoor orchid care, and you will enjoy growing healthy, happy houseplants for years to come.
The Golden Rule Of Orchid Care
There is one golden rule that encompasses all aspects of orchid care. It is to always replicate the plants’ natural growing conditions as closely as possible. In this guide, we delve into what this means for your orchid.
Orchid Quick Facts
Botanical name: Orchidaceae
Height: 6-36 inches, depending on variety
Spread: 4-15 inches, depending on variety
Sun exposure: Partial shade
Soil requirements: Well-draining potting medium
When to plant: Year-round indoors
Wild orchids grow in warm regions of Asia and Central and South America.
They are either terrestrial orchids, with roots in the ground, or epiphytes – air plants attached to trees that get water from the air. Many epiphyte orchids have aerial orchid roots.
Recreating these growing conditions means providing appropriate light exposure, irrigation, temperature, planting medium, and fertilizer.
There are also procedures to encourage rebloom once an orchid has ceased flowering.
(Image credit: Alamy)
Which Type Of Orchid?
The orchid group of houseplants is vast and varied – there are over 25,000 species in existence in an array of different orchid colors.
Orchids all look different since each one has evolved to appeal to their particular pollinator. But they share the same distinct flower characteristics: an inner group of three petals, including the protruding lower lip petal – or labellum – and three outer sepals. Sometimes the petals and sepals are fused together.
Despite the huge number of species in the wild, the types of orchids available to purchase as houseplants are limited to those adaptable to growing indoors. Popular varieties include:
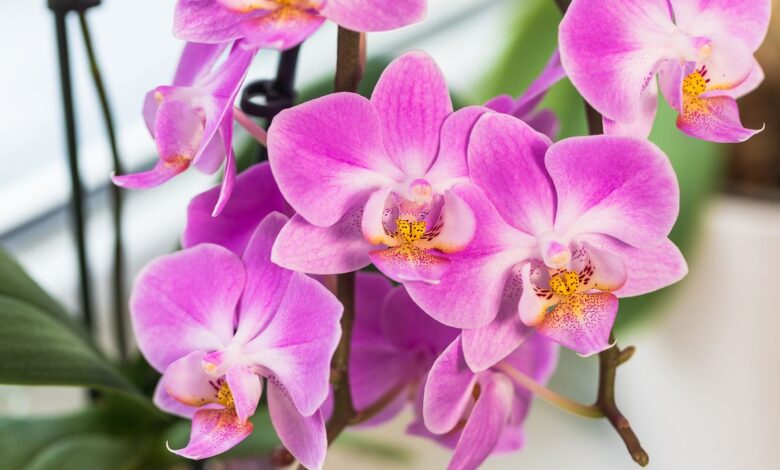
- Phalaenopsis orchid – Also known as the moth orchid, this is the most commonly available variety. It is also the easiest orchid to grow indoors. Plants have broad leaves and long-lasting flowers on arching stems.
- Dendrobium orchid – There are many varieties of this popular orchid species, which grows showy flowers that bloom for several weeks. Each stem can have as many as 50 blooms.
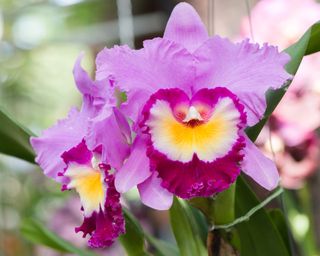
- Cattleya orchid – This “queen of the orchids” is also known as the corsage orchid. It produces some of the brightest, most uniquely formed flowers in the orchid world.
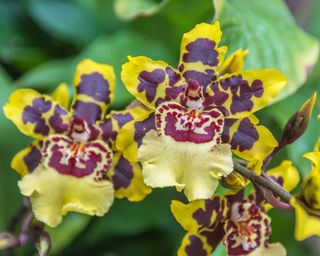
- Oncidium orchid – Also known as the dancing lady orchid, oncidium is a quick-growing orchid featuring a mass of fluttering blooms on each spike.
- Paphiopedilum orchid – This easy-care orchid with long-lasting blooms is often called the slipper orchid due to the unusual shape of its flowers.
Once you have learned how to care for orchids indoors, you can try growing them in the garden. North America boasts over 250 native orchids.
Most will prefer a warmer, more humid climate, but those in cooler USDA zones can try growing lady slipper orchids or hardy Chinese ground orchids.
(Image credit: Alamy)
Orchid Light Requirements
Do orchids need sunlight? Yes – but each variety has its own light requirements. When you buy an orchid, this is the first thing to check so it can be positioned in a spot where it can thrive.
All orchids need light if they are to produce flowers. Inadequate light is the most common culprit when orchids fail to bloom.
However, too much light on low-light orchids, such as Phalaenopsis or Paphiopedilum, can lead to sunburned orchid leaves. These species require bright but filtered light, ideally from an east or west-facing window.
High-light orchids, such as Cattleya and some Dendrobiums, require more direct light, and can usually be positioned closer to the glass in a west or south-facing window.
Medium-light orchids, such as Oncidium and some Dendrobiums, require a middle ground. They may be positioned close to the glass in a west-facing window, or a more filtered spot near a south-facing window.
Trial and error is an important part of orchid care, and will enable you to work out the right level of light exposure. If an orchid has very dark green leaves, it needs more light, while light leaves with yellow coloration are likely the result of too much light.
(Image credit: Shutterstock)
Ideal Orchid Temperature
Meeting an orchid’s temperature requirements is the hardest aspect for home growers to control. When learning how to take care of orchids, it’s best to choose a species compatible with your location and the room you want to position it.
Orchids are not all alike when it comes to preferred temperatures. They can be grouped as warm, intermediate, and cool-growing orchids.
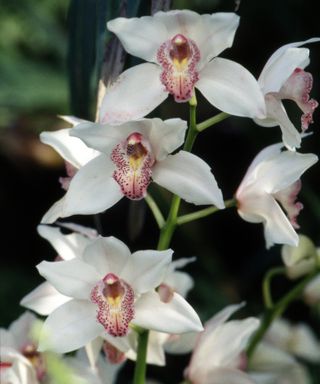
Cool-growing orchids, such as Cymbidium and Dendrobium, need daytime temperatures of 60 to 70°F (15 to 21°C) and nighttime temperatures of at least 50°F (10°C).
Intermediate-growing orchids, such as Cattleya, Oncidium, and Paphiopedilum, require daytime temperatures of 65 to 75°F (18 to 24°C) and nighttime temperatures of at least 55°F (12°C).
Warm-growing orchids, such as Phalaenopsis and Vanda, prefer temperatures of 70 to 85°F (21 to 29°C) in the daytime, and a minimum of 60°F (15°C) at night and in winter.
A drop in temperature of 10 to 15°F between day and night is needed if plants are to flower. Orchids also require seasonal variation to mimic their natural growing conditions, with cooler winters and warmer summers.
Most orchids will survive a short period of extreme heat in the summer, although it will place stress on the plant. Relocate your orchid to a cooler spot until the temperature drops.
(Image credit: Future Content Hub)
Watering Orchids Indoors
When learning how to water orchids, the biggest mistake growers make is overwatering. Orchids are not thirsty plants, and generally like their growing medium to dry out between waterings.
On average, orchids need water every week during the growing season. Once the orchid stops blooming, you can cut back on water, since the plant is resting. If you have an orchid with a small pot, you may need to water twice a week when the plant is actively growing.
Before watering, first test to see if the potting medium is dry. To do this, push your finger an inch (2.5cm) deep to feel for moisture.
Another check you can perform is to look for condensation on the inside of the plastic container. If moisture is visible, then hold off.
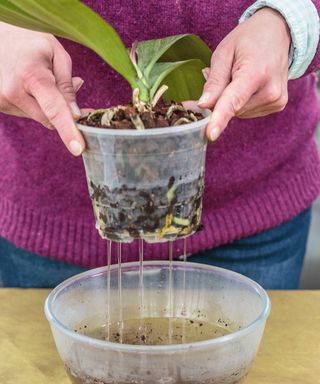
When watering your orchid, do it deeply, so that water leaks out from the pot’s bottom drainage holes.
Most orchids will tolerate tap water, but ideally use filtered water or rainwater. This should be tepid, as cold water can shock the plant.
Allow the water to fully drain before returning the orchid to its outer pot, as the roots dislike sitting in water.
Orchids thrive in a humid environment. You can increase humidity for houseplants by misting them or sitting pots on a tray filled with gravel and a little water. Another option is to make an orchid terrarium, which will promote humidity.
While their dislike of soggy roots makes it sound unlikely, growing orchids in water can provide a solution that allows the plants to stay hydrated without rotting.
Rather than being constantly submerged, roots are usually soaked for two days and then allowed to dry out for five days.
Some growers leave plants constantly in water, but not all orchids will respond well to this.
(Image credit: Alamy)
Fertilizing Orchids
Orchid fertilizing is a vital aspect of orchid care and encourages plants to bloom.
Apply fertilizer when the plant is actively growing and flowering, but not in excess.
Use a water-soluble fertilizer specifically formulated for orchids. If your orchid is planted in bark, use a fertilizer with a higher nitrogen ratio, such as 30-10-10 or 15-5-5. Other orchids do well with evenly balanced formula fertilizer ratios, such as 20-20-20. Apply according to the label’s instructions.
Fertilize orchids weekly or bi-weekly while they are producing new growth. Decrease the feedings to monthly or bi-monthly intervals once they mature.
After flowering, stop fertilizing until new leaves start growing.
(Image credit: Getty Images)
Repotting Orchids
If your orchids suddenly stop blooming but have all the suitable growing conditions, repotting may be necessary. On average, you will need to report orchids every other year.
Knowing how to repot an orchid the right way will prevent root rot issues and make room for the plant’s expanding root system.
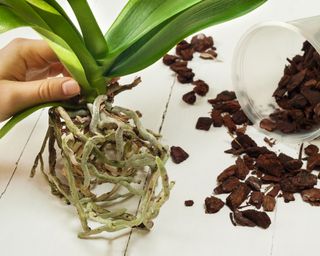
- Remove the orchid from the old pot and get the potting medium away from the roots.
- Soak the roots, then cut off dead, soft, or hollow roots using sterile scissors or hand pruners.
- You may be able to reuse the orchid container, but if you can’t squeeze the root mass back in, go up one pot size.
- Hold the orchid in the container and add coarse soilless potting medium, using a pencil or chopstick to get it between the roots.
- When done, water the newly potted plant thoroughly.
Best Orchid Potting Medium
If orchid roots sit in moisture for long periods, they will rot and the plant will die. This means they should not be planted in soil.
Instead, use a soilless orchid potting medium with good aeration and drainage, or purchase a special “orchid mix”.
Several types of growing media can be used with orchid plants: redwood or fir bark, sphagnum peat moss, sponge rock, cork, coconut husk, charcoal, sand, or soilless potting mix.
A basic mix to promote good orchid care might consist of coarse perlite, fir bark, and sphagnum moss. Adding charcoal is also an option.
Generally, the grade of bark you add to the mix depends on the type of orchid you are growing. For instance, Phalaenopsis orchids are usually grown in coarse bark, Cattleyas in medium bark, and young orchid plants are best grown in fine bark.
Alternatively, mount the orchid plant to a chunk of bark or cork to let it grow as an epiphyte.
(Image credit: Getty Images)
Pruning Orchids
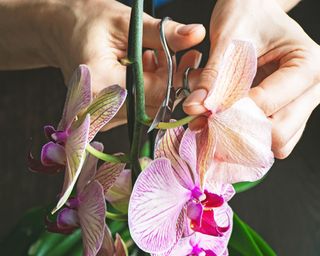
Removing old stems and dead flowers will make way for new growth. When determining how to prune orchids, check the variety as different orchids need a different approach.
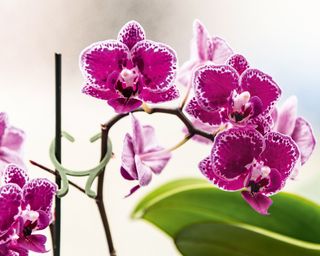
Some species, such as Phalaenopsis orchids, will thrive when both the spent flowers and stem are removed. Trim the stem about an inch (2.5cm) away from the main stalk, and cut back any parts of the main stalk that are yellow or brown.
Other species, including Dendrobium orchids, need the flowers to be removed but not the stem, as they will reflower on the same stem.
(Image credit: Alamy)
How To Make Orchids Rebloom
Understanding your plant’s blooming cycle is key to knowing how to get an orchid to rebloom. Some naturally bloom throughout the year, others only once. However, you can usually encourage more flowers indoors.
Lack of light and incorrect temperature are the main factors preventing orchids from reblooming. So, check that your orchid variety is compatible with its location.
It’s usually worth moving an orchid to a brighter spot to see if more light encourages a new flower spike.
Seasonal temperature variation can play a part too, so orchids after flowering care may involve moving the orchid to a cooler location.
Next, check your watering and fertilizing routine. While orchids don’t like to sit in water, if you err too much on the side of caution, you won’t get any new flowers. Make sure you are watering regularly, and fertilizing in growth periods.
(Image credit: Getty Images)
Propagating Orchids
While not an essential part of orchid plant care, learning how to propagate orchids will keep you in permanent supply of these exotic beauties, and enable you to give them as gifts.
Growing orchids from seed is one possibility. However, it is difficult to get seeds to germinate, and it may be several years before you will get any flowers.
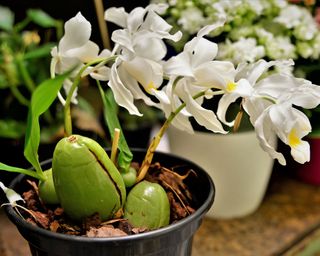
A pseudobulb orchid is a much easier option. Pseudobulbs are pod-like structures that grow directly below the leaves and have the potential to grow into a new plant.
Pseudobulb propagation is best performed early in the spring before new bulbs appear. When repotting the orchid, locate the main underground stem. This should have a number of pods along its length.
You need to slice the stem into pieces, each with two or three pseudobulbs, and the first bulb in each strand starting to bud. These can then be planted into new pots into a suitable orchid planting medium.
Planting an orchid keiki is the other viable option for propagating orchids. Orchid keikis are offshoots from the mother plant. They grow from buds on the cane, usually the upper portion.
Keikis can be easily grown into new plants. Leave them in place until they have sprouted new leaves and shoots around 2 inches (5cm) long. When root growth begins, remove the keiki and pot it up using orchid planting mix.
(Image credit: Getty Images)
Common Orchid Problems
When orchid problems occur, they are usually linked to a failure in the plant’s care. However, sometimes they are a sign of orchid diseases.
If you spot any common orchid leaf problems, or issues with the stem, roots, or flowers, use them to diagnose the problem.
If left unchecked, these common orchid problems could result in root rot or orchid crown rot, which are serious issues that could result in plant death.
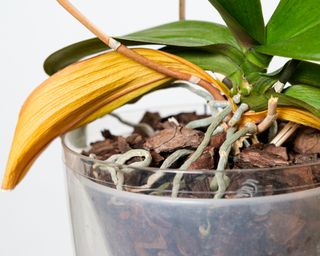
- An orchid leaf turning yellow could be a sign of an orchid receiving too much light, low temperatures, or overwatering.
- An orchid stem turning yellow may be a result of too much light, overwatering, disease, or lack of fertilizing.
- An orchid stem turning brown may be a result of sunburn – or it may just be time to trim it back.
- If orchid leaves are droopy, then incorrect watering is the most likely issue.
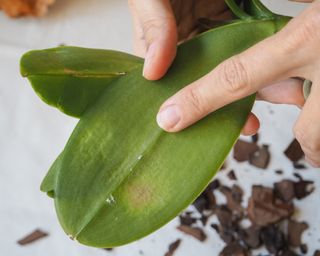
- Black spots on orchid leaves are a symptom of black rot. This is a serious issue that needs urgent treatment. You will need to cut away any diseased tissue and apply a fungicide such as cinnamon.
- Wrinkled orchid leaves are a sign of underwatering.
- Orchid leaves turning brown may be a sign of incorrect watering, sunburn, disease, or pests.
- White spots on orchid leaves may be caused by overwatering, fungal infections or pests.
- Orchid leaves curling may be caused by inconsistent light levels.
- Orchid leaves falling off may be due to improper watering, lack of fertilization, pests, or disease.
- Sticky orchid leaves aren’t necessarily a problem, but can sometimes be caused by pests.
- Orchid flowers falling off is usually due to stress caused by changes in temperature, or improper watering or fertilizing.
As far as orchid diseases go, you may see leaf spots, petal blight, bacterial soft rot and many different viruses.
(Image credit: Getty Images)
Orchid Pests
Orchids don’t commonly suffer from pest problems, but it does sometimes happen.
To manage orchid pests you need to first identify which critter is causing the problem. They fall into two categories: sap-sucking and chewing insects. The latter include caterpillars and slugs, which rarely present an issue for indoor orchid care.
Sap-sucking insects remove plant sap, which hinders the orchid’s ability to fuel itself. These insects include aphids, scale, mealybugs, thrips, whiteflies, and spider mites.
Pests can usually be washed off or treated with insecticidal soap.
Inspect plants daily, as the sooner you tackle the problem, the better the outcome for the orchid.
[ad_2]
Source link


