Y’all, the day is finally here! After a year-and-a-half of working on this master bathroom, it’s finally done, and I have a load of photos to show you. I will be writing a follow-up post later this week that will include the total cost, sources, etc. But for now, I just wanted to get to the pictures. We’ve all been waiting way too long for this!
This is definitely a room remodel. After all, we took a room, tore it down to the studs, floor joists, and ceiling joists, and completely rebuilt it.
But it’s a bit misleading to call it a master bathroom remodel. That implies that we took a master bathroom and completely redid it. What we actually did is take the former master bedroom and turn it into a new, large master bathroom.
Because we completely changed the function of the room, and because we turned it into a very large wheelchair-accessible master bathroom, this was not a cheap remodel, even with me doing half of the work myself. My family helped me with the demolition of the room, and then my contractor took over and his guys did all of the basic, foundational work to turn the room into a bathroom. His guys did all of the work up to and including moving a wall, building new walls, plumbing rough-in, drywall, and concrete board on the bathroom floor and shower walls.
Once their part was done, I took over and did all of the finishes — installing tile (bathroom floor and the whole shower), hanging the wallpaper mural, doing the Venetian plaster wall finish, installing all of the trim, building the vanities and two storage cabinets, making a bubble chandelier, etc.
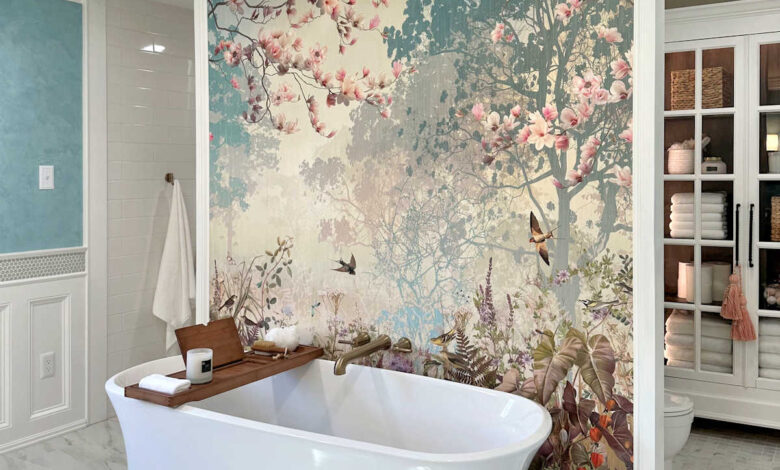
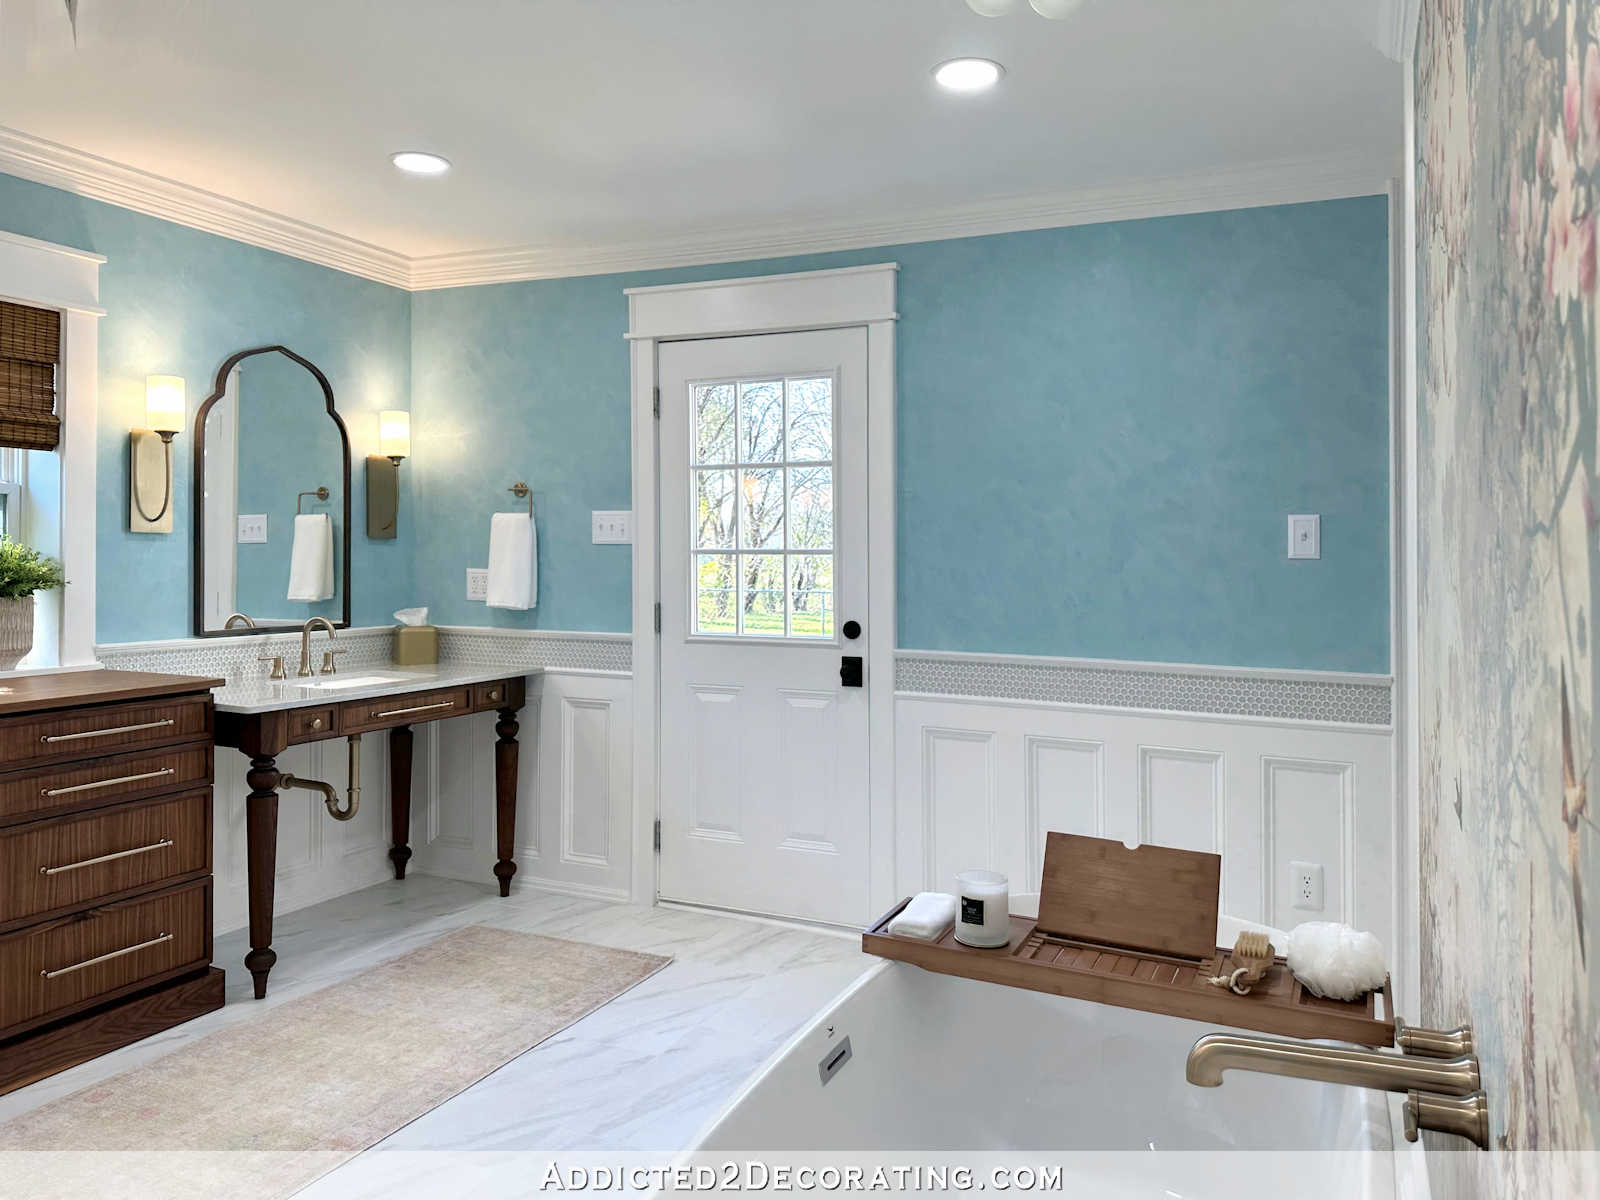
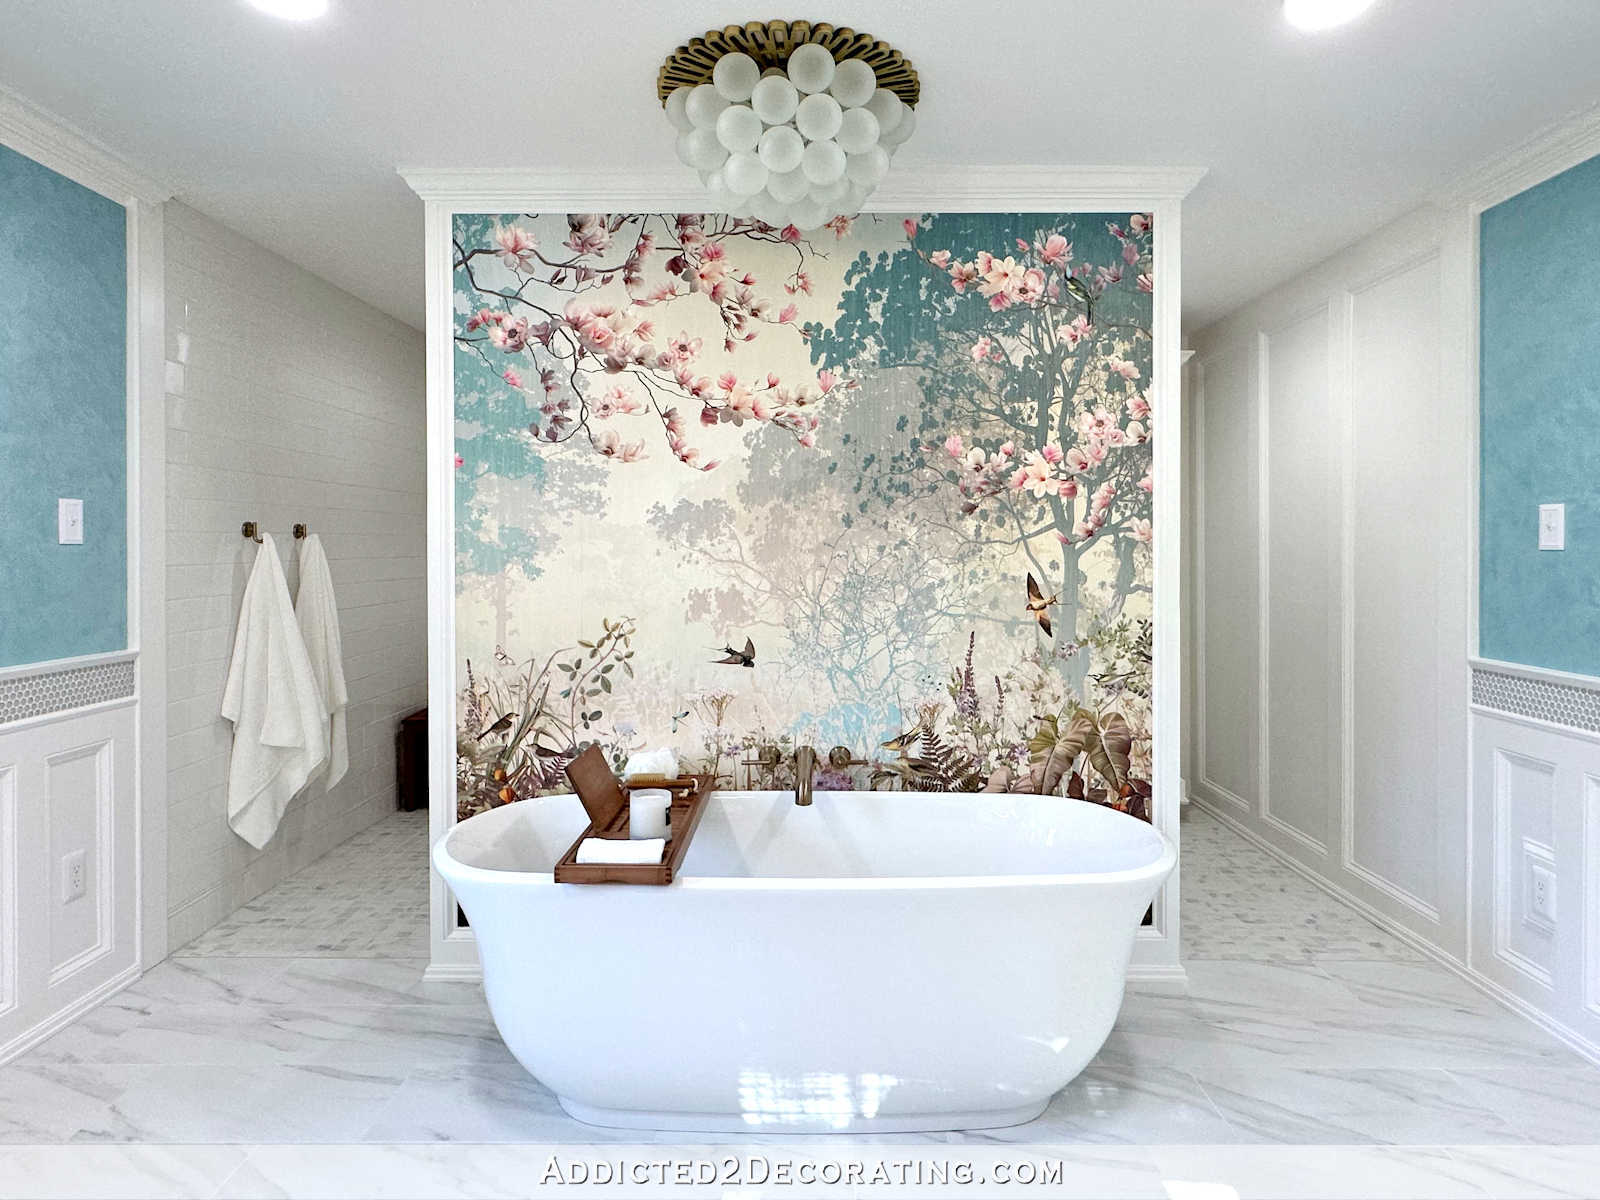
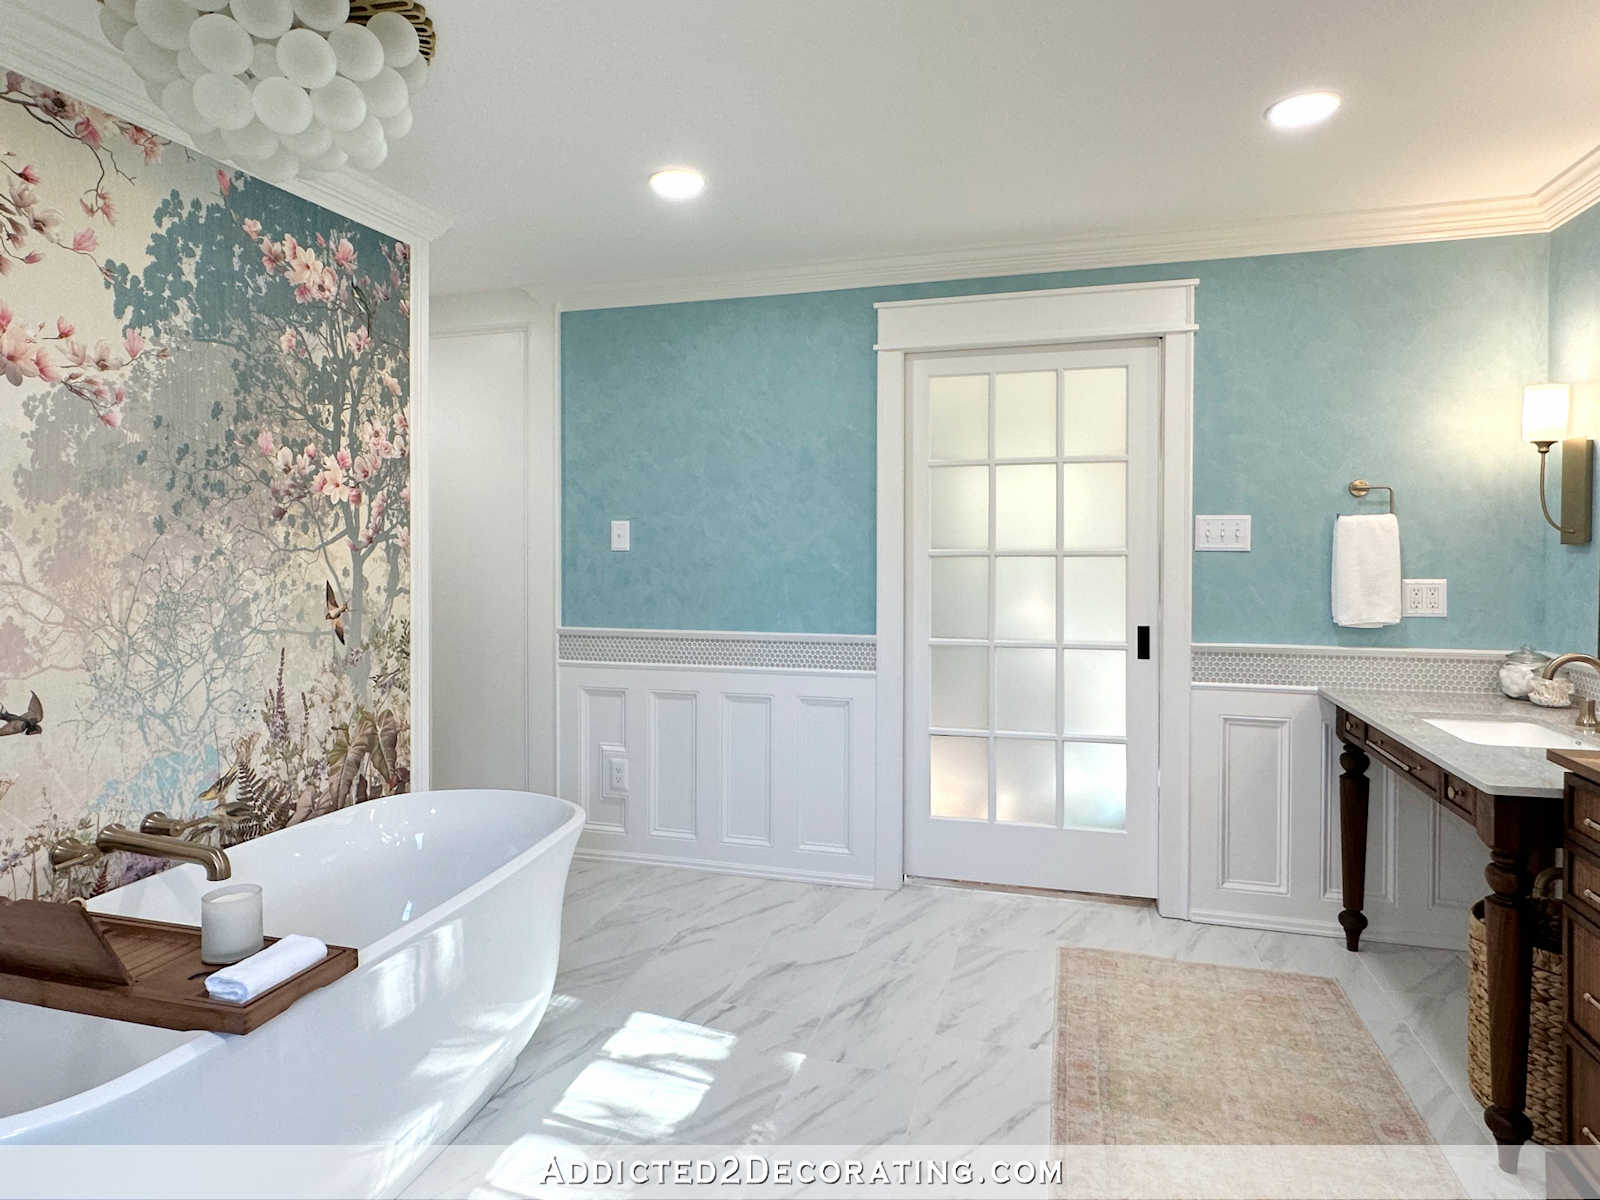
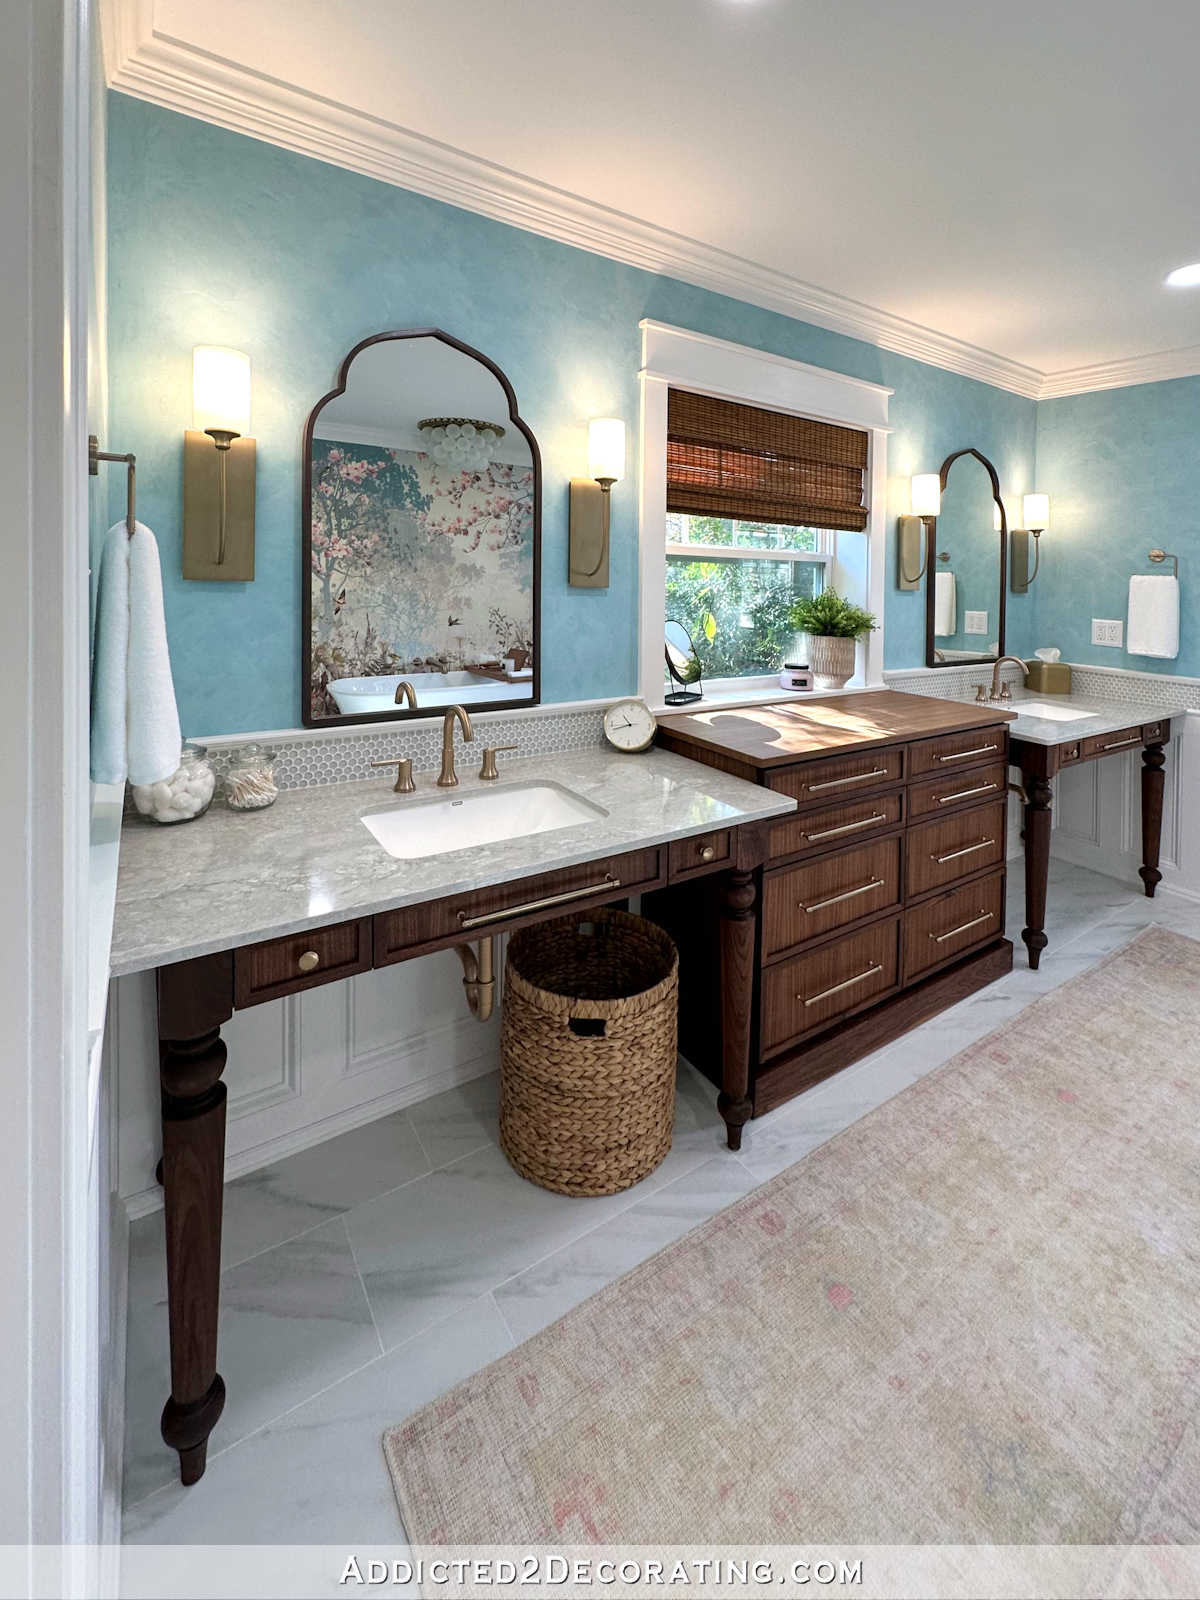
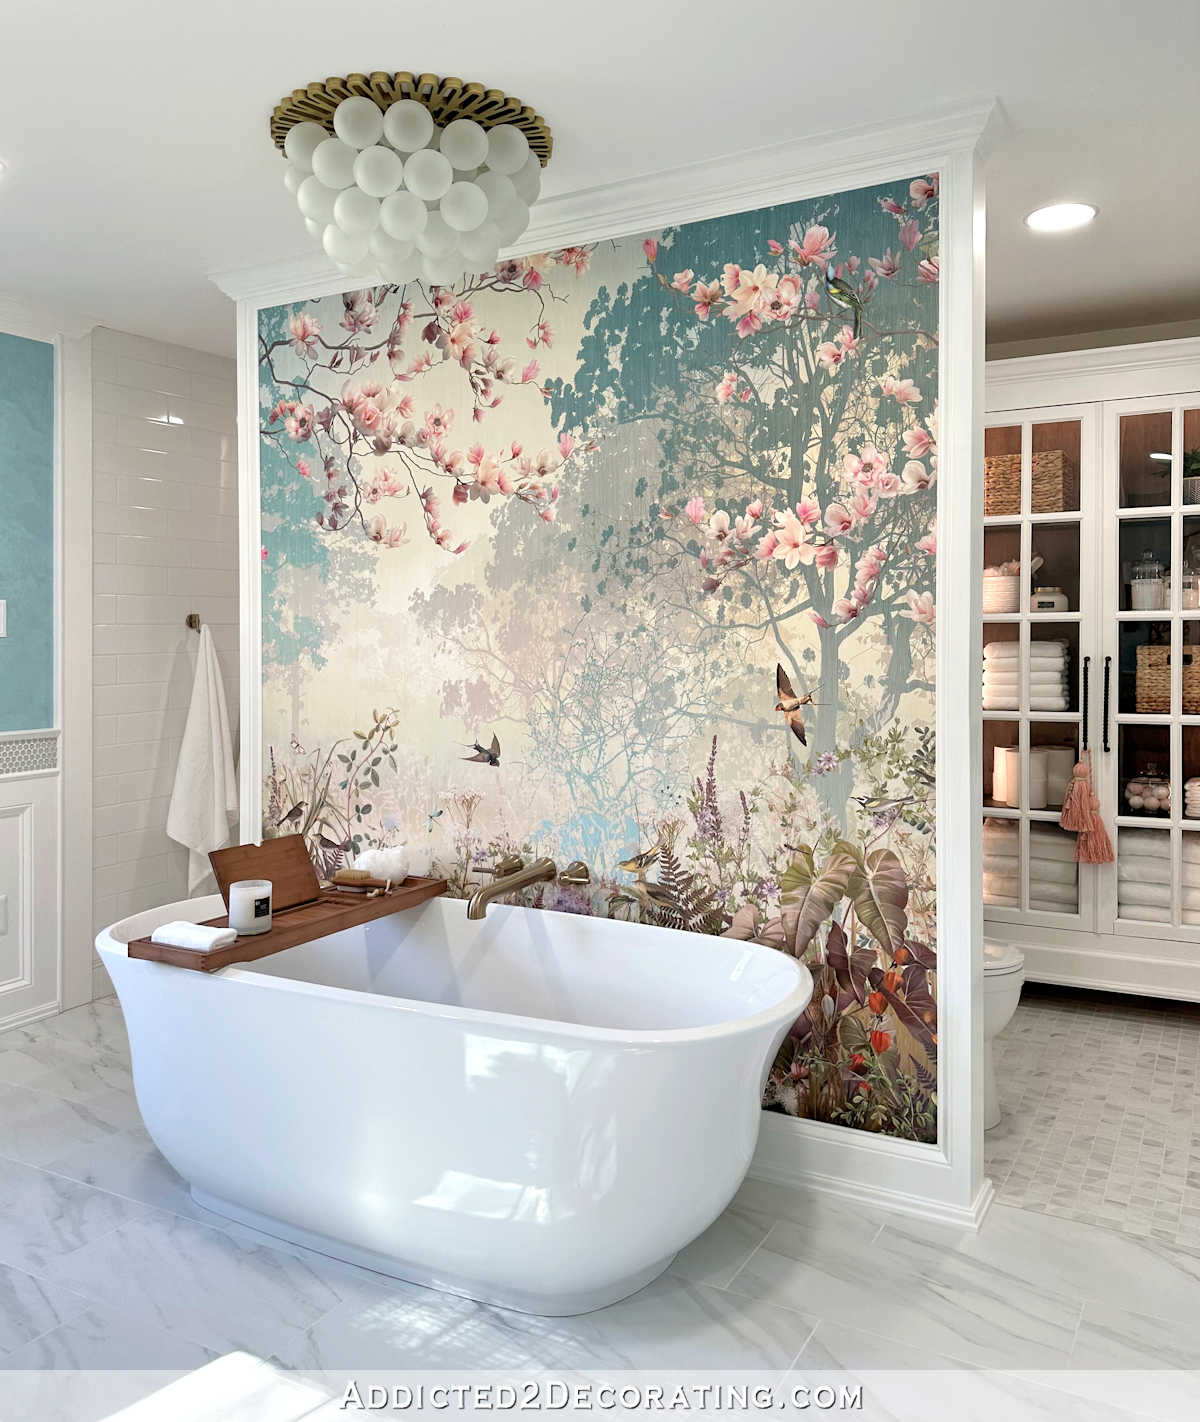
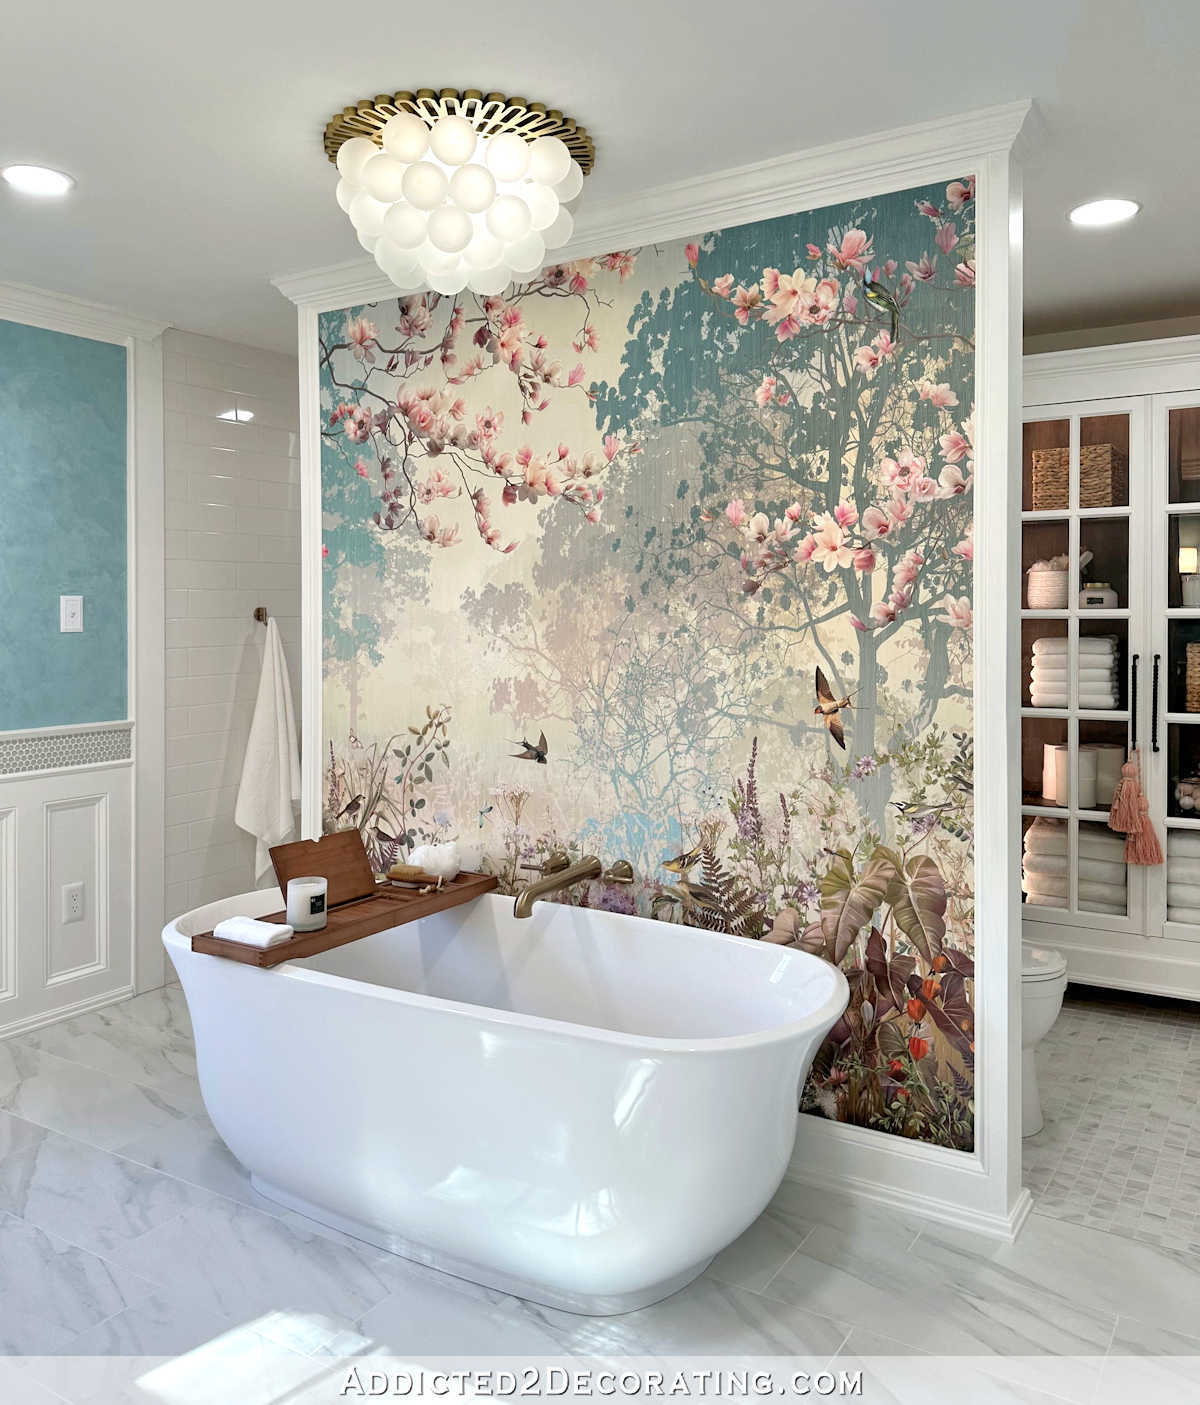
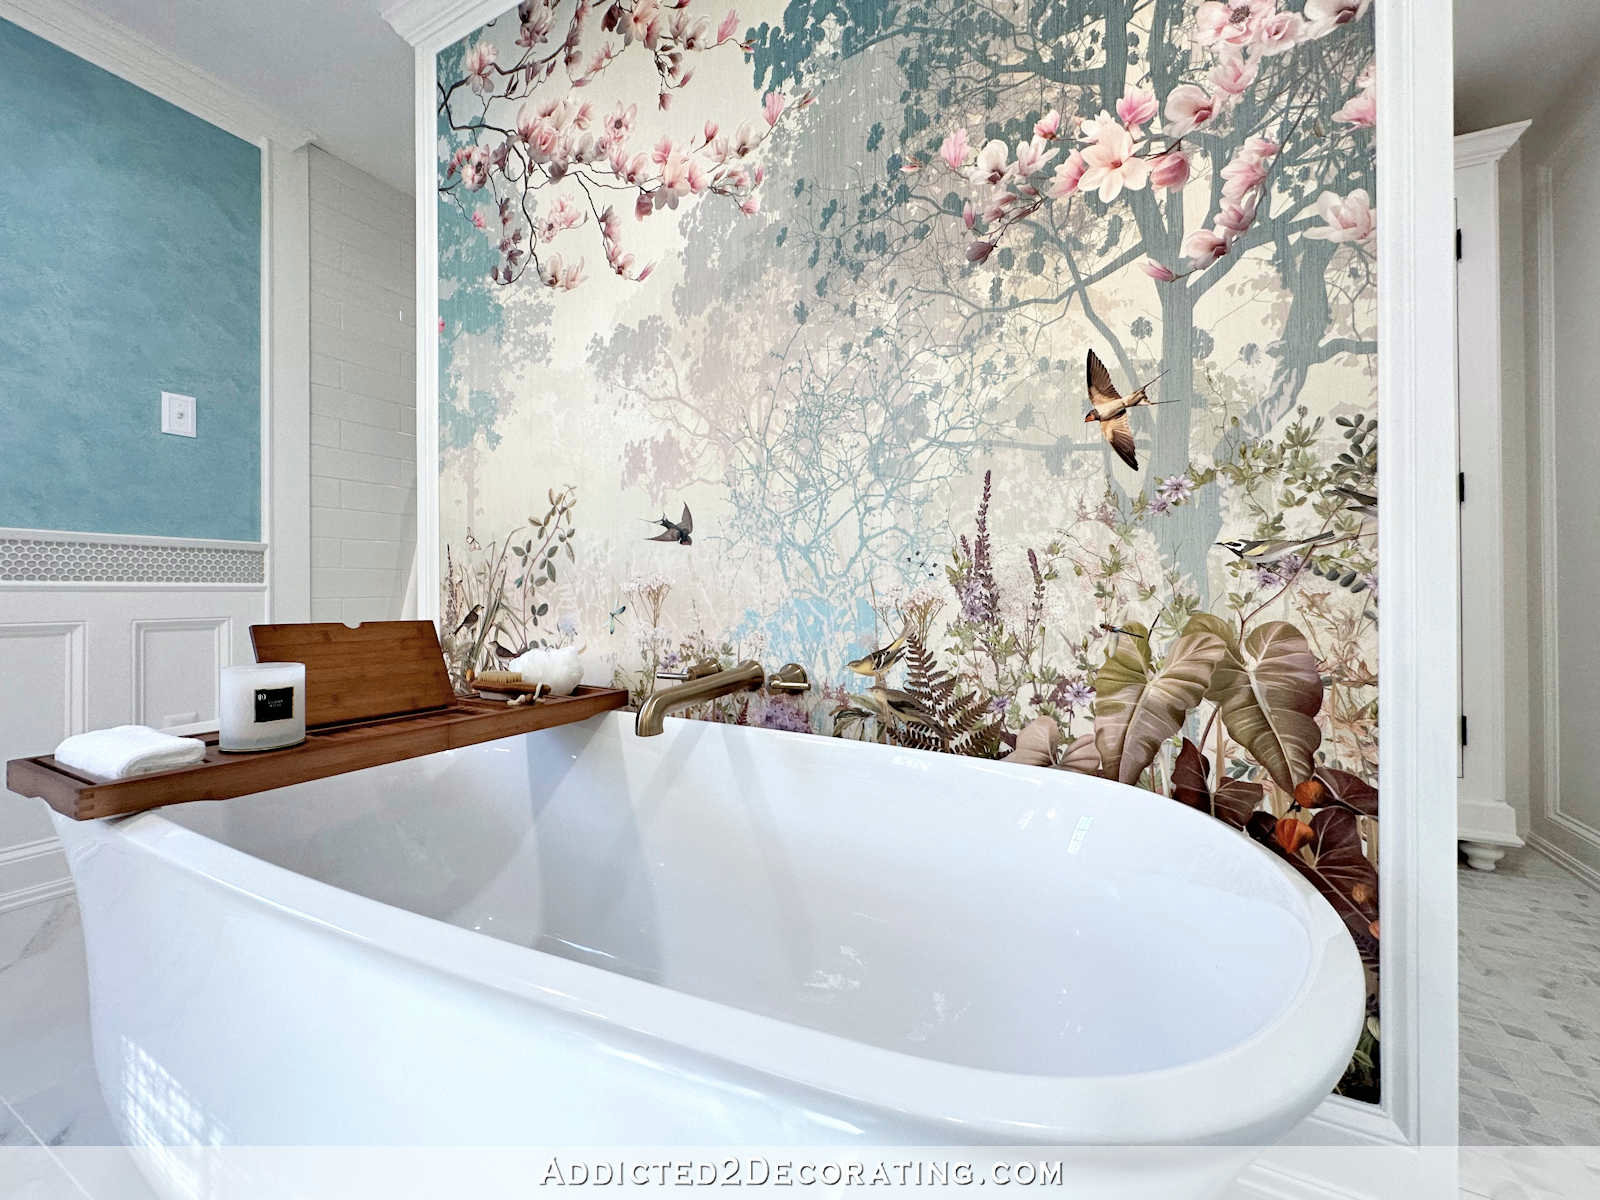
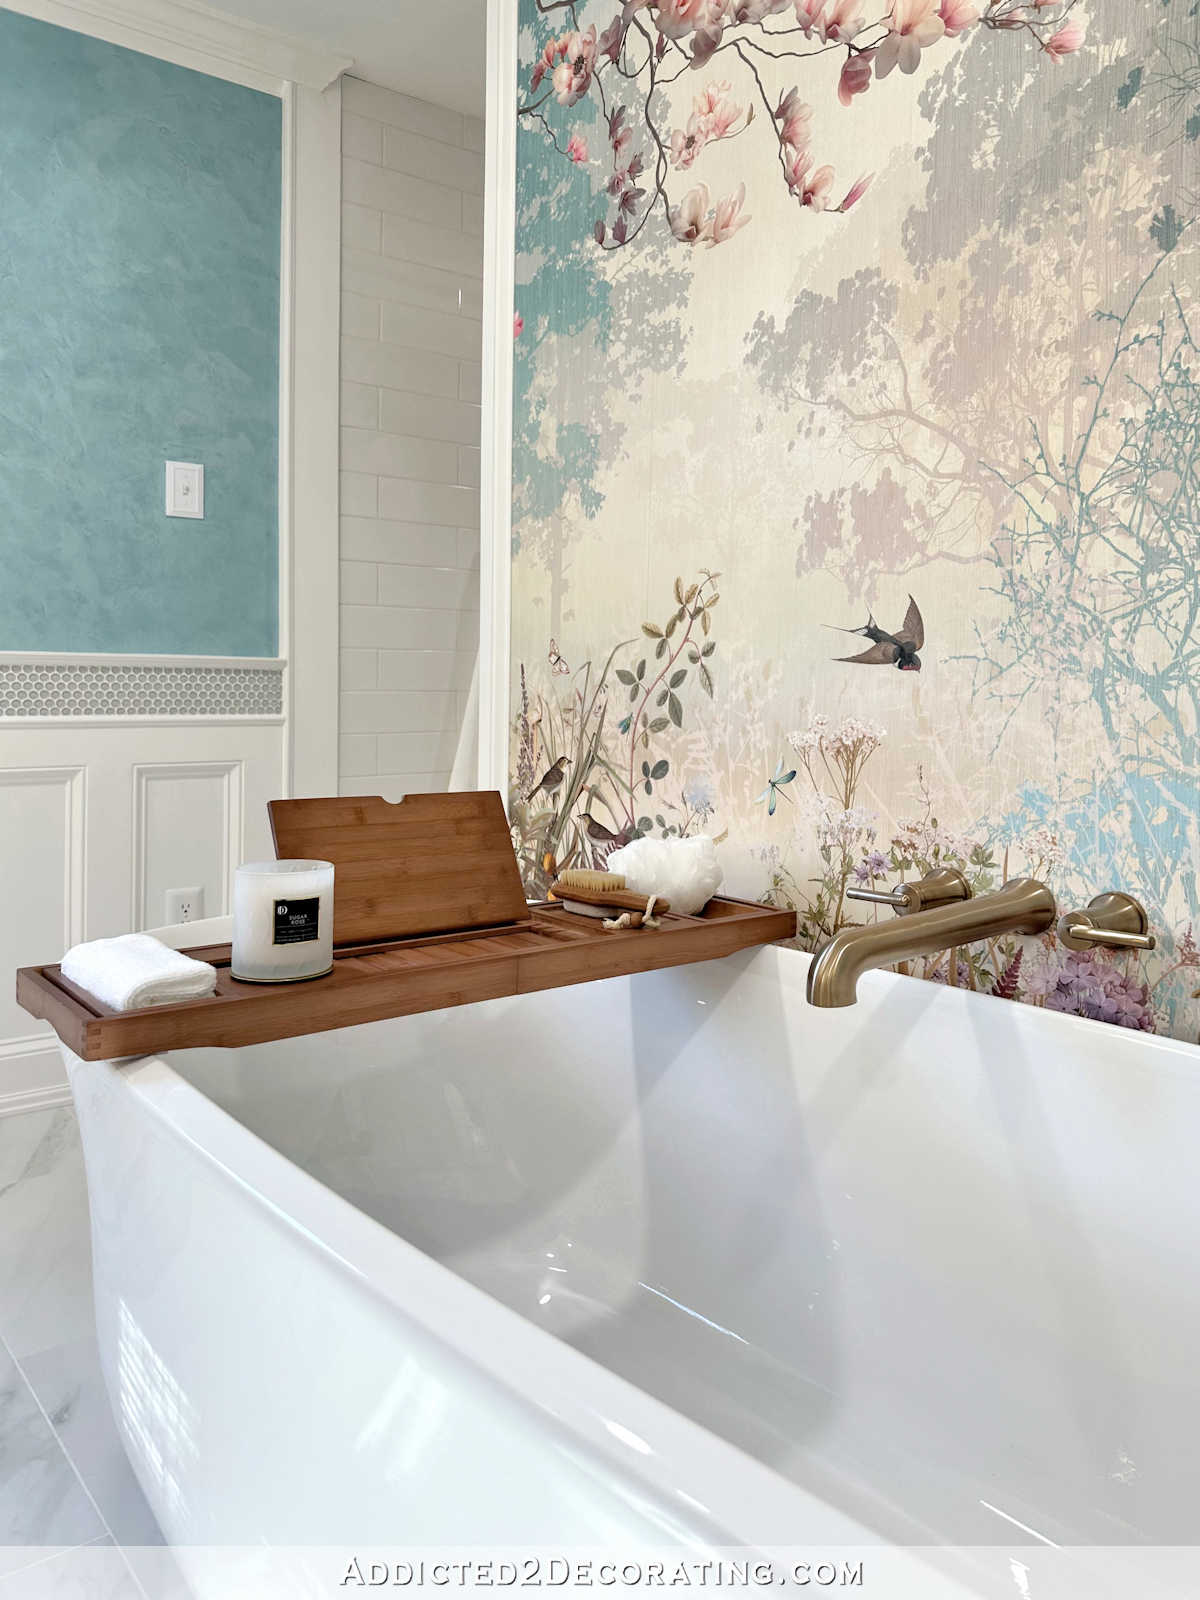
So after all of that, let me show you how it turned out. First up is my favorite thing about the bathroom — the mural wall with the bathtub. To the left of the mural wall is the shower, and to the right of the mural wall is the water closet (toilet room).

And then with me standing in the bathtub and looking the opposite direction, this is the view (taken with a wide angle lens to get the whole view)…
Now we can back up a bit, and I’ll show you some before and after views.
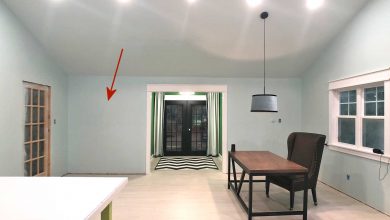
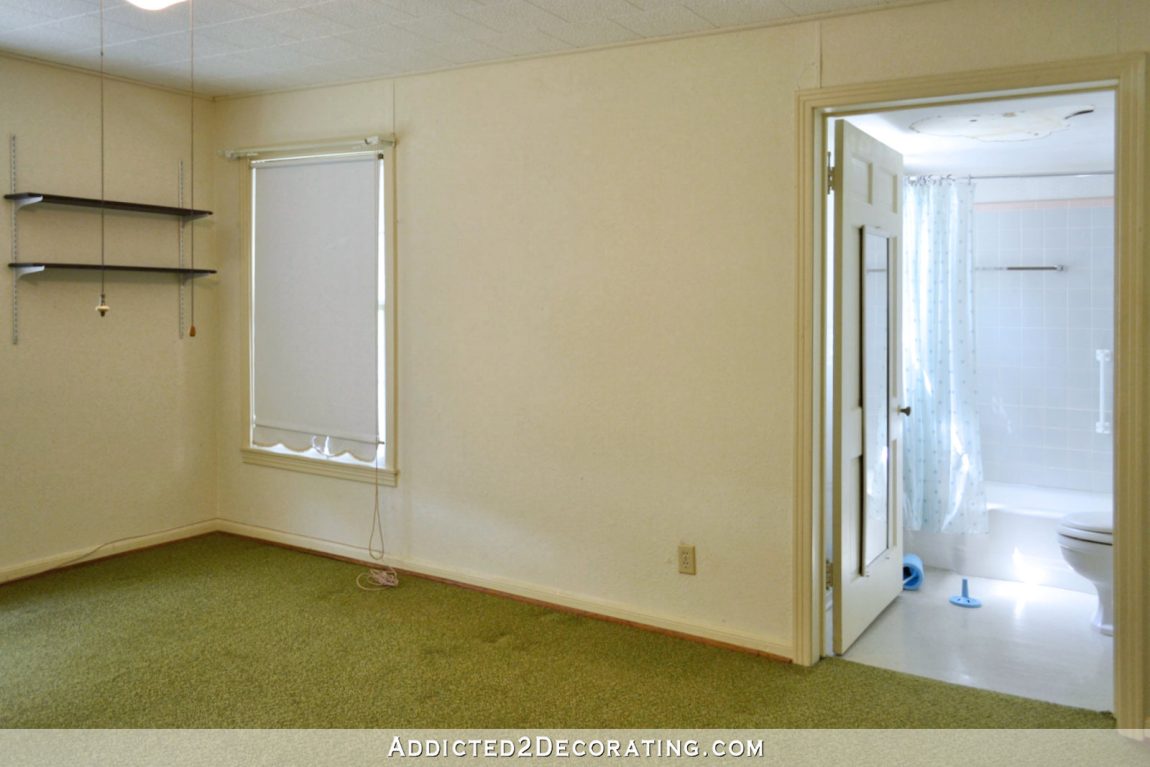
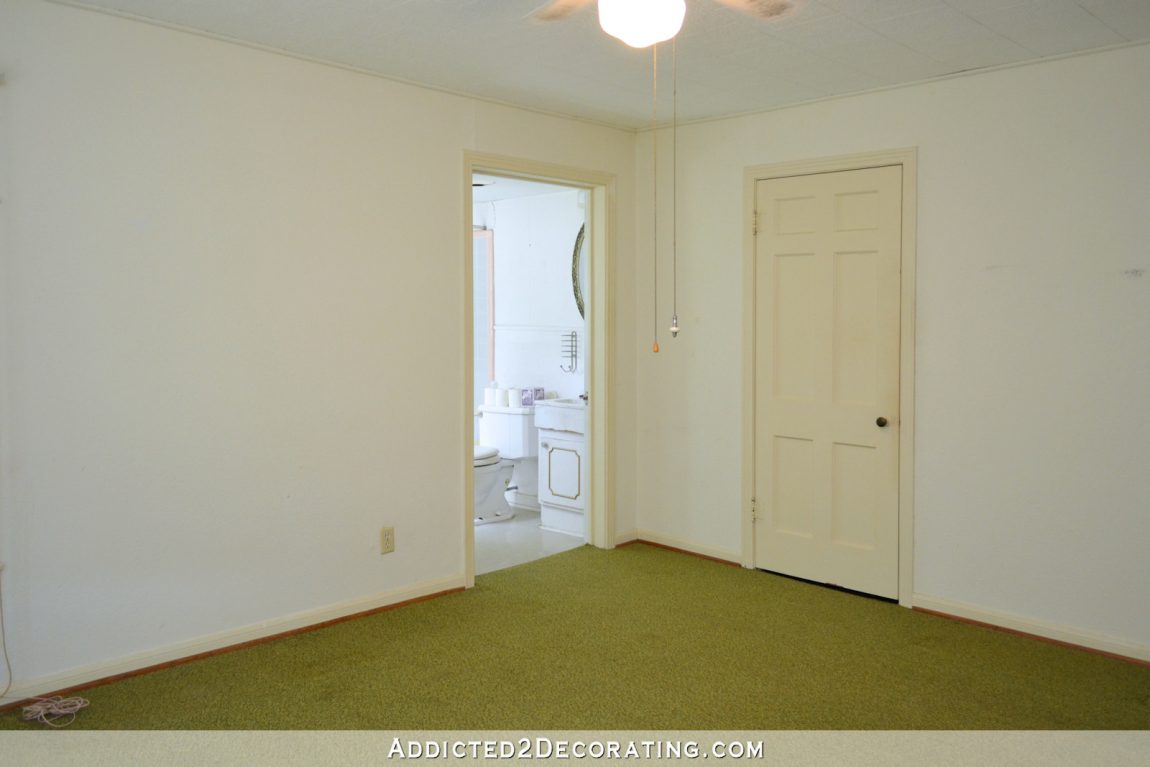
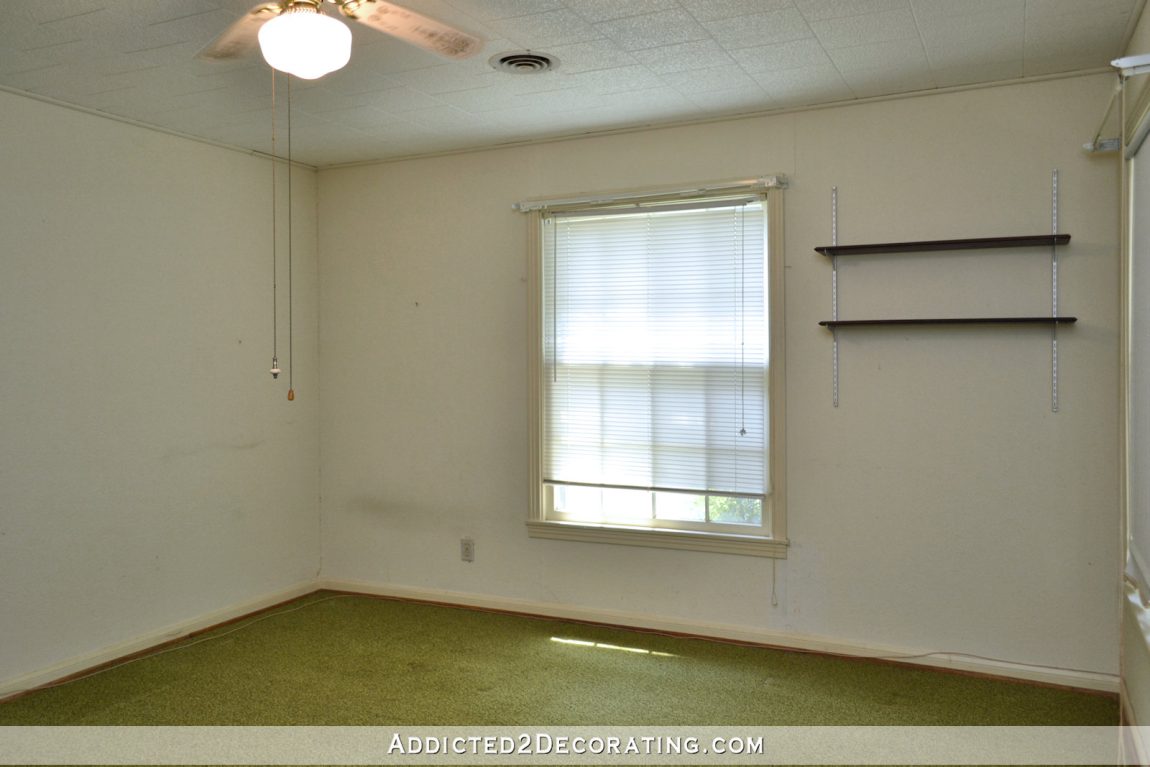
This is what the room used to look like when standing in the bedroom doorway and looking towards the back right corner and right side of the room. You can see the very tiny original master bathroom there. 😀 I’d say we got quite the upgrade.
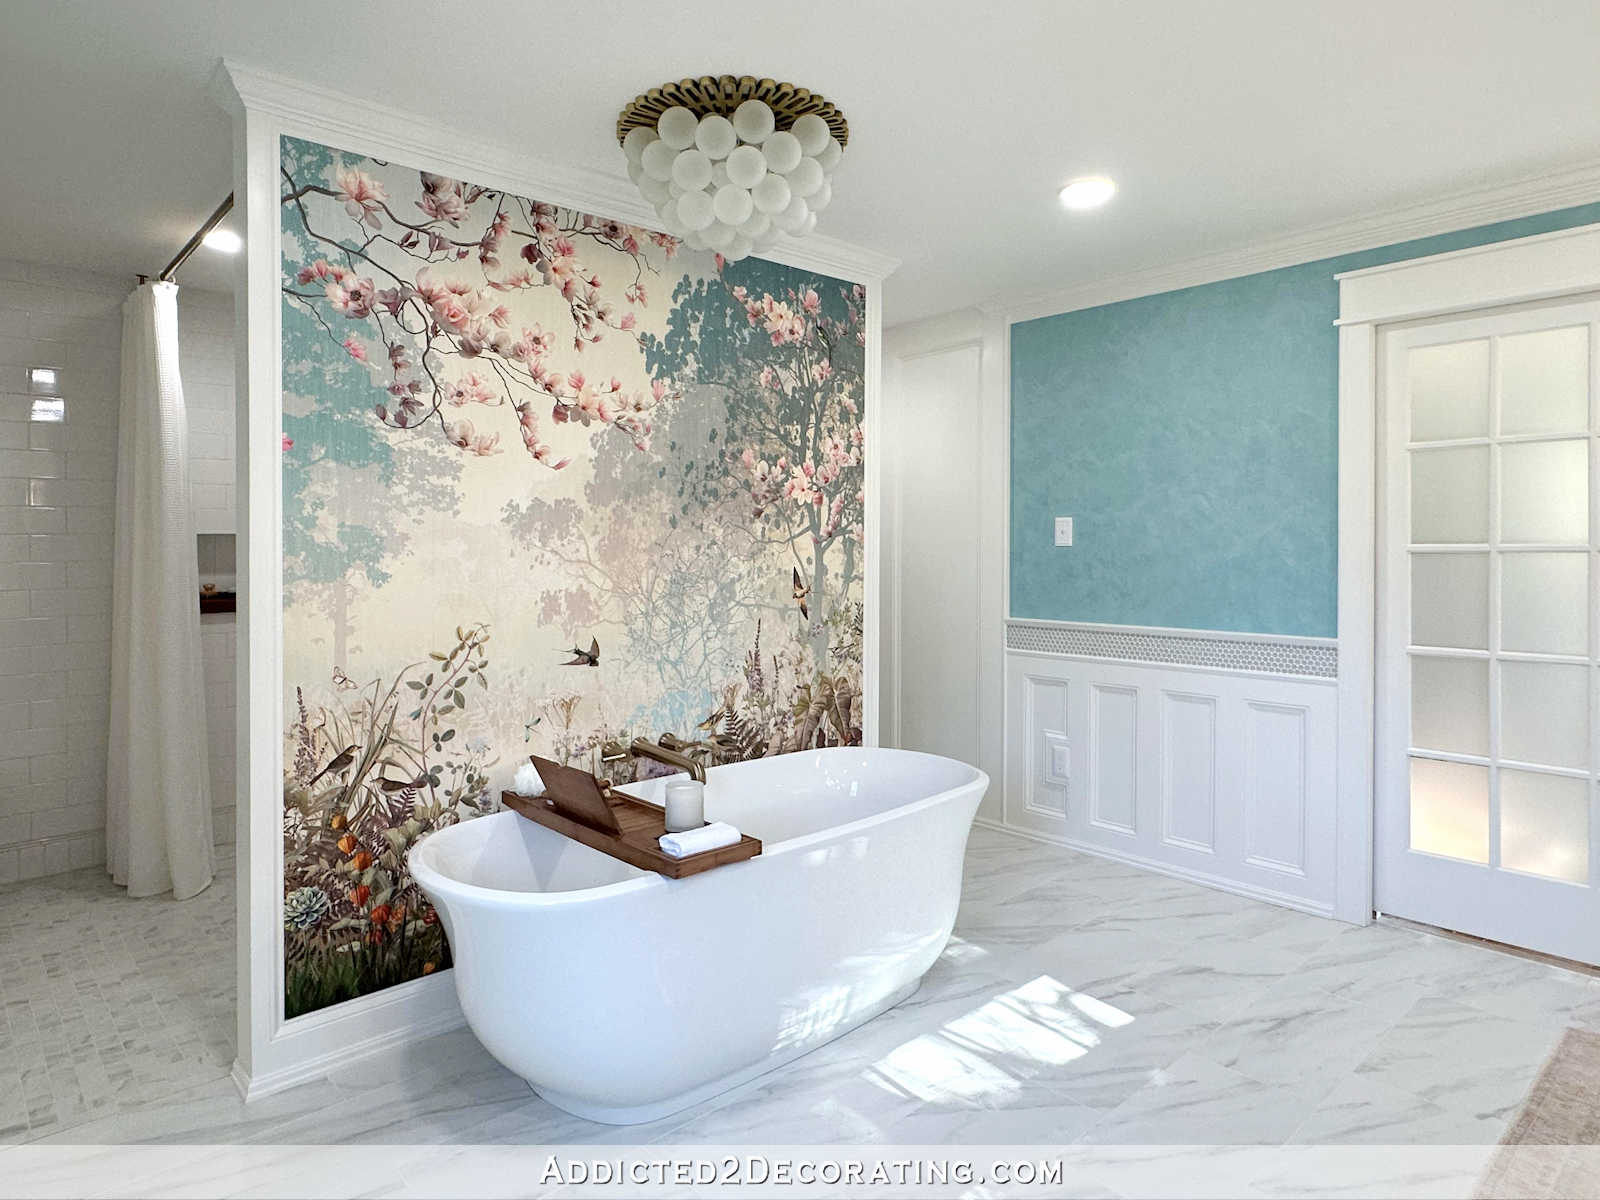
Today, if I stand in that same place and take a picture in that same direction, most of what I’m going to see is the water closet, with the short wall of the water closet directly in front of me. It’s not much to see. 😀
So I have to step outside of the water closet for you to get a good idea of what that same view looks like today…
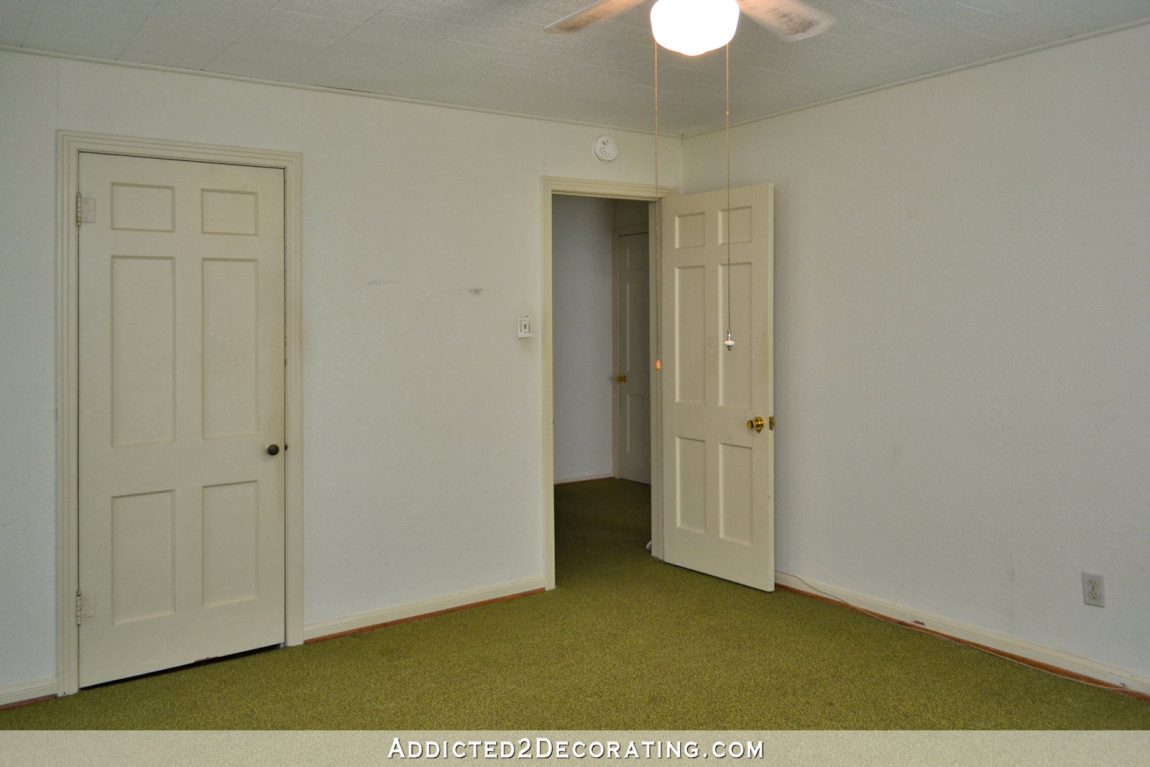
This next view of the original master bedroom is looking towards the original tiny master bathroom. Behind the closed door was the rather small walk-in closet.
And that same view today looks like this.
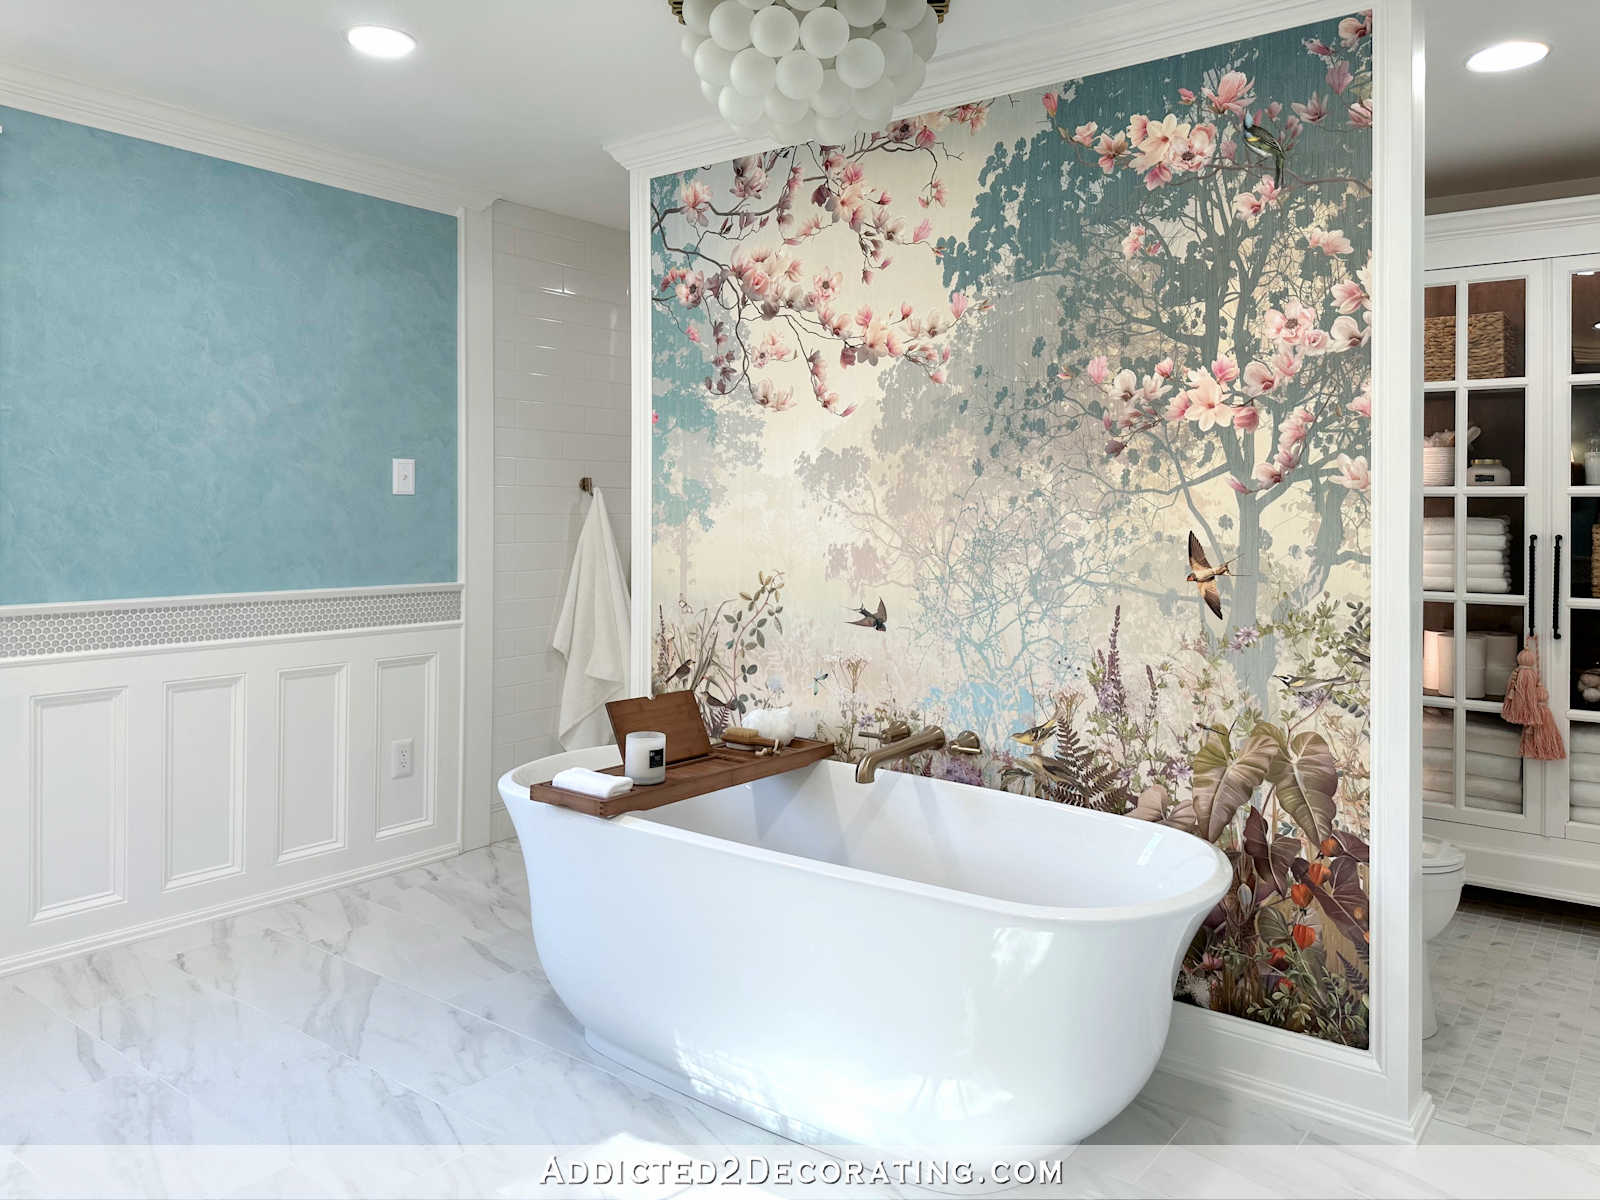
The funny thing is that the original master bathroom is still there behind the wall of the shower, but there’s no access to it at all. It’s completely walled off. (Don’t worry, there’s no electricity or water going to that room anymore, so no fear of leaks or burst pipes that we can’t get to.) That room, along with the huge sunroom, will be torn down prior to us building the addition onto the back of the house.
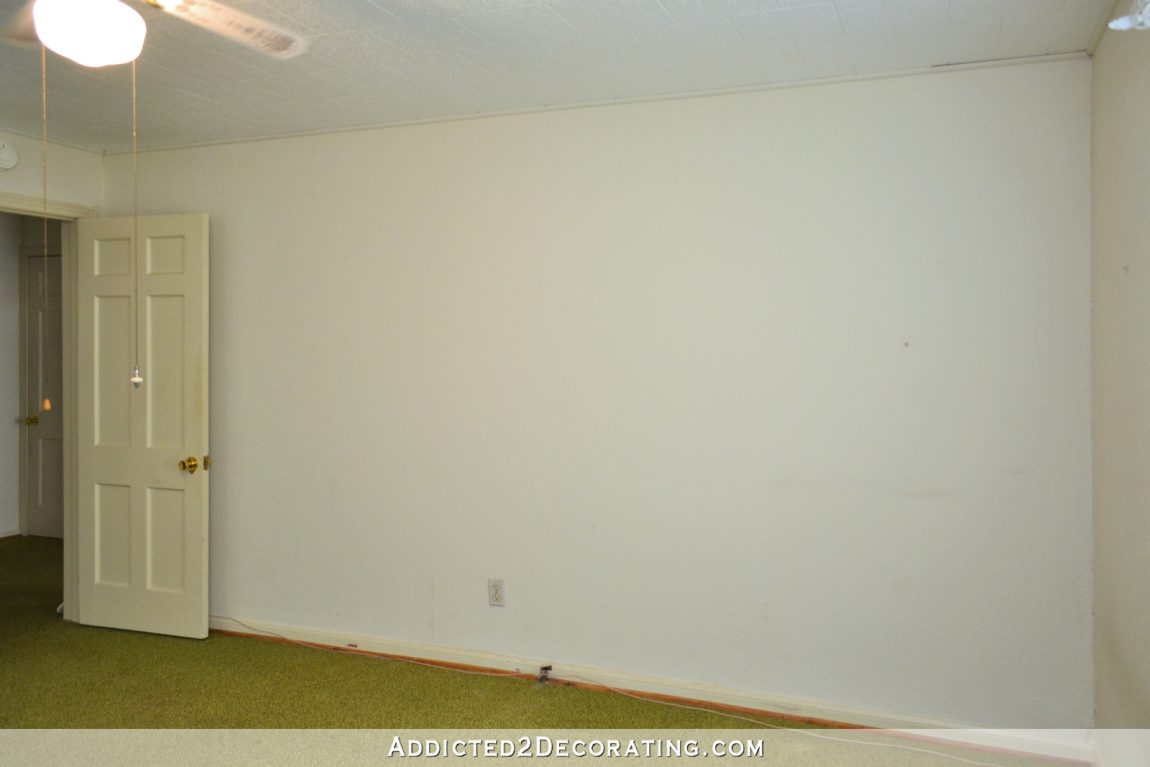
This next photo is looking back towards the wall that had the walk-in closet on the left, and the bedroom doorway that led to the hallway on the right…
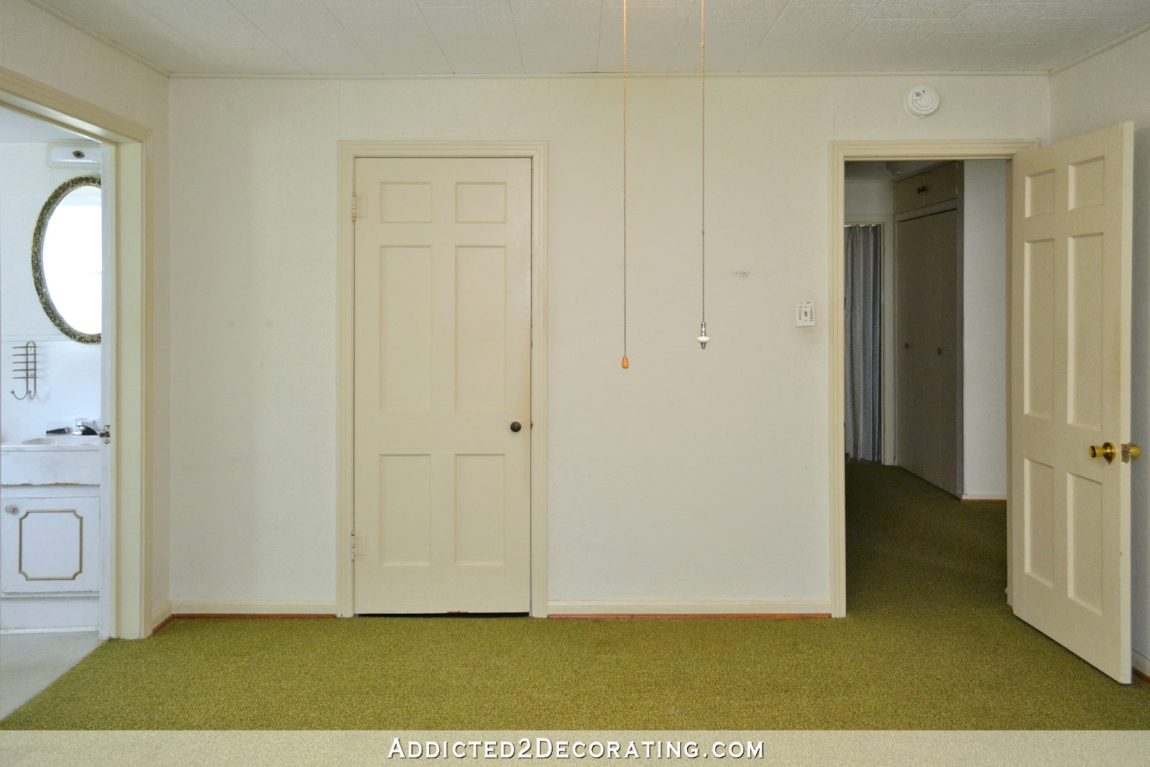
The closet was completely removed, the right half of the wall was moved back about four feet (our hallway is much smaller today), and the doorway into this room was closed up. That view now looks like this…
Here’s a bit of an angled view towards the original bedroom doorway.
With the closet removed, the doorway closed up, and the half of that original wall that had the bedroom doorway moved back and squared up with the back wall of the closet, that gave us plenty of room for the large curbless shower on the left, and the water closet on the right.
For now, the only interior entrance into the bathroom is through the door that you see in the photo above. That doorway leads to our home gym. But after our addition is built, which will include a new master bedroom, that will be our main access to the bathroom. For now, things are a little unconventional. 😀
You can see here that this wall of the bedroom was used to be a solid wall.
But now that wall has the only interior entrance into the bathroom.
But even after we build our addition, and have normal access into the bathroom through the master bedroom, I think we’re still going to keep this doorway. It just makes good sense in my mind to have direct access from the home gym into the bathroom.
And this is the final before and after. This is what the window wall used to look like…
And here’s what that wall looks like now. You can see the exterior door on the right below.

It’s a bit unconventional to have an exterior door in a master bathroom, but we have to live with it for now. That will eventually be an interior pocket door identical to the one on the left wall in the picture above.
So those are all of the before and after pictures, but I have plenty more pictures to show you!
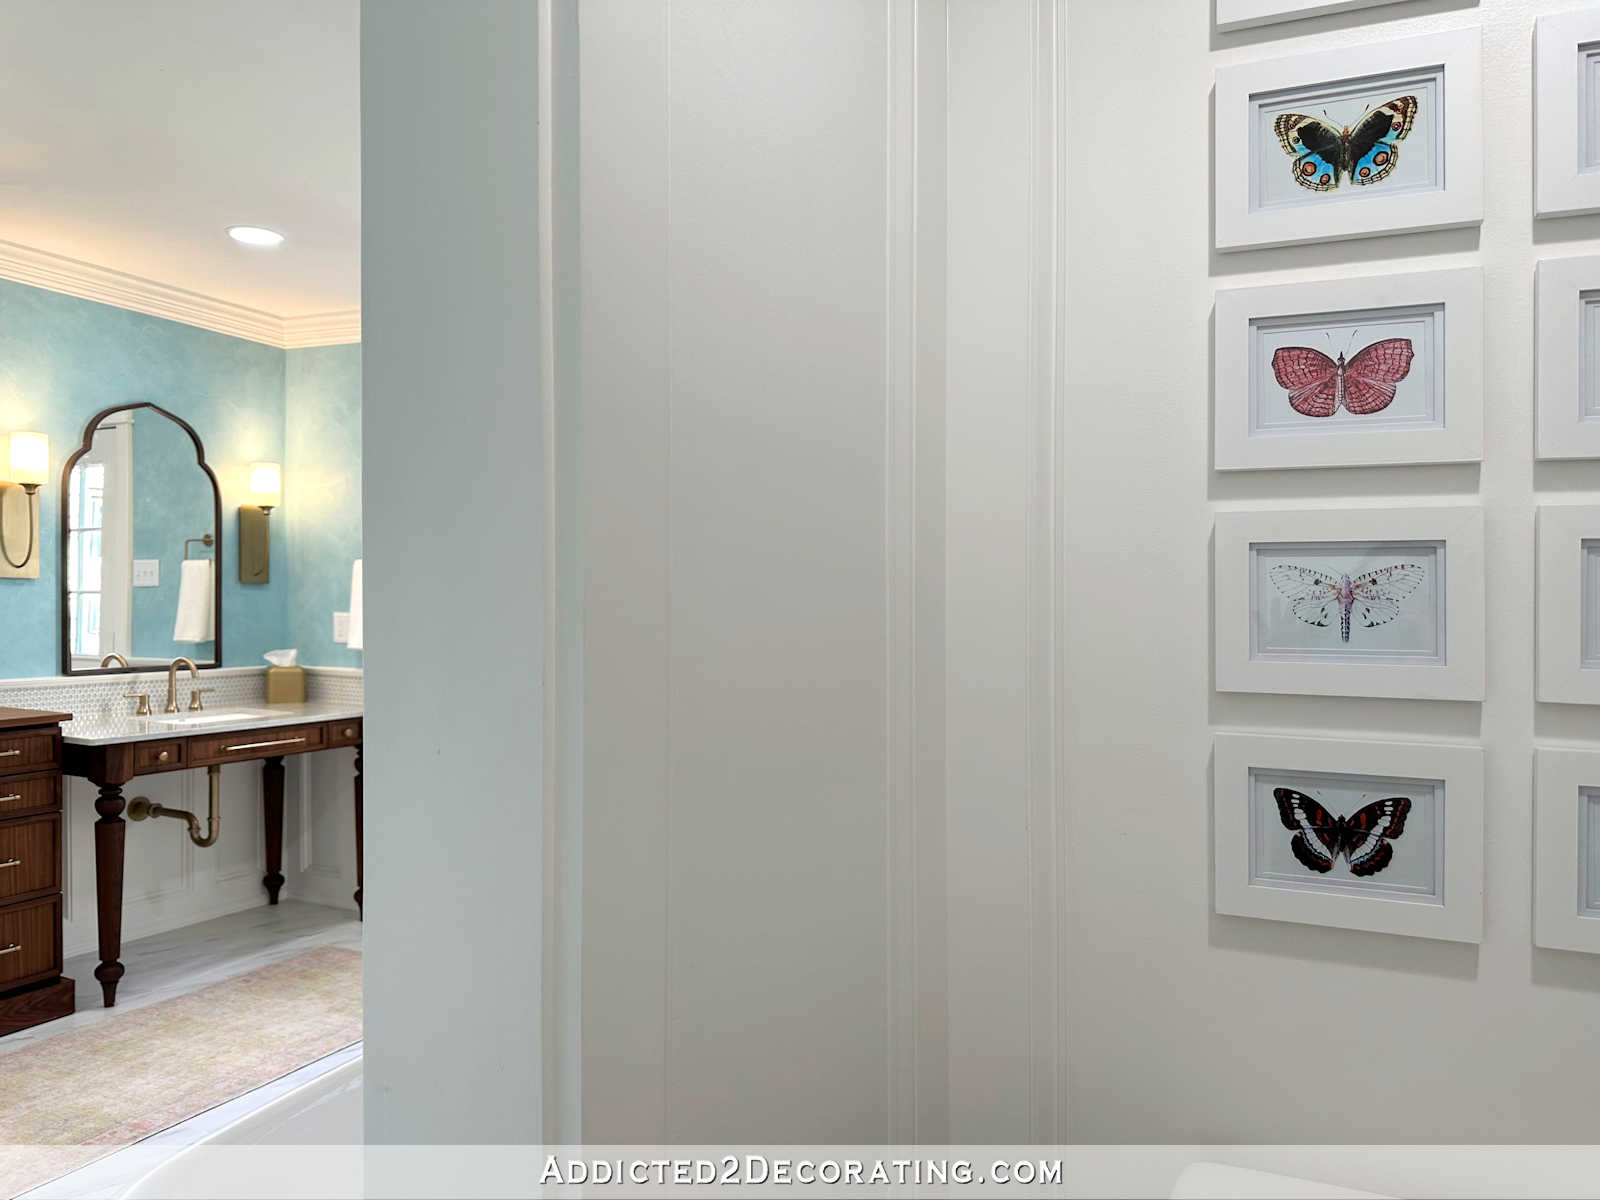
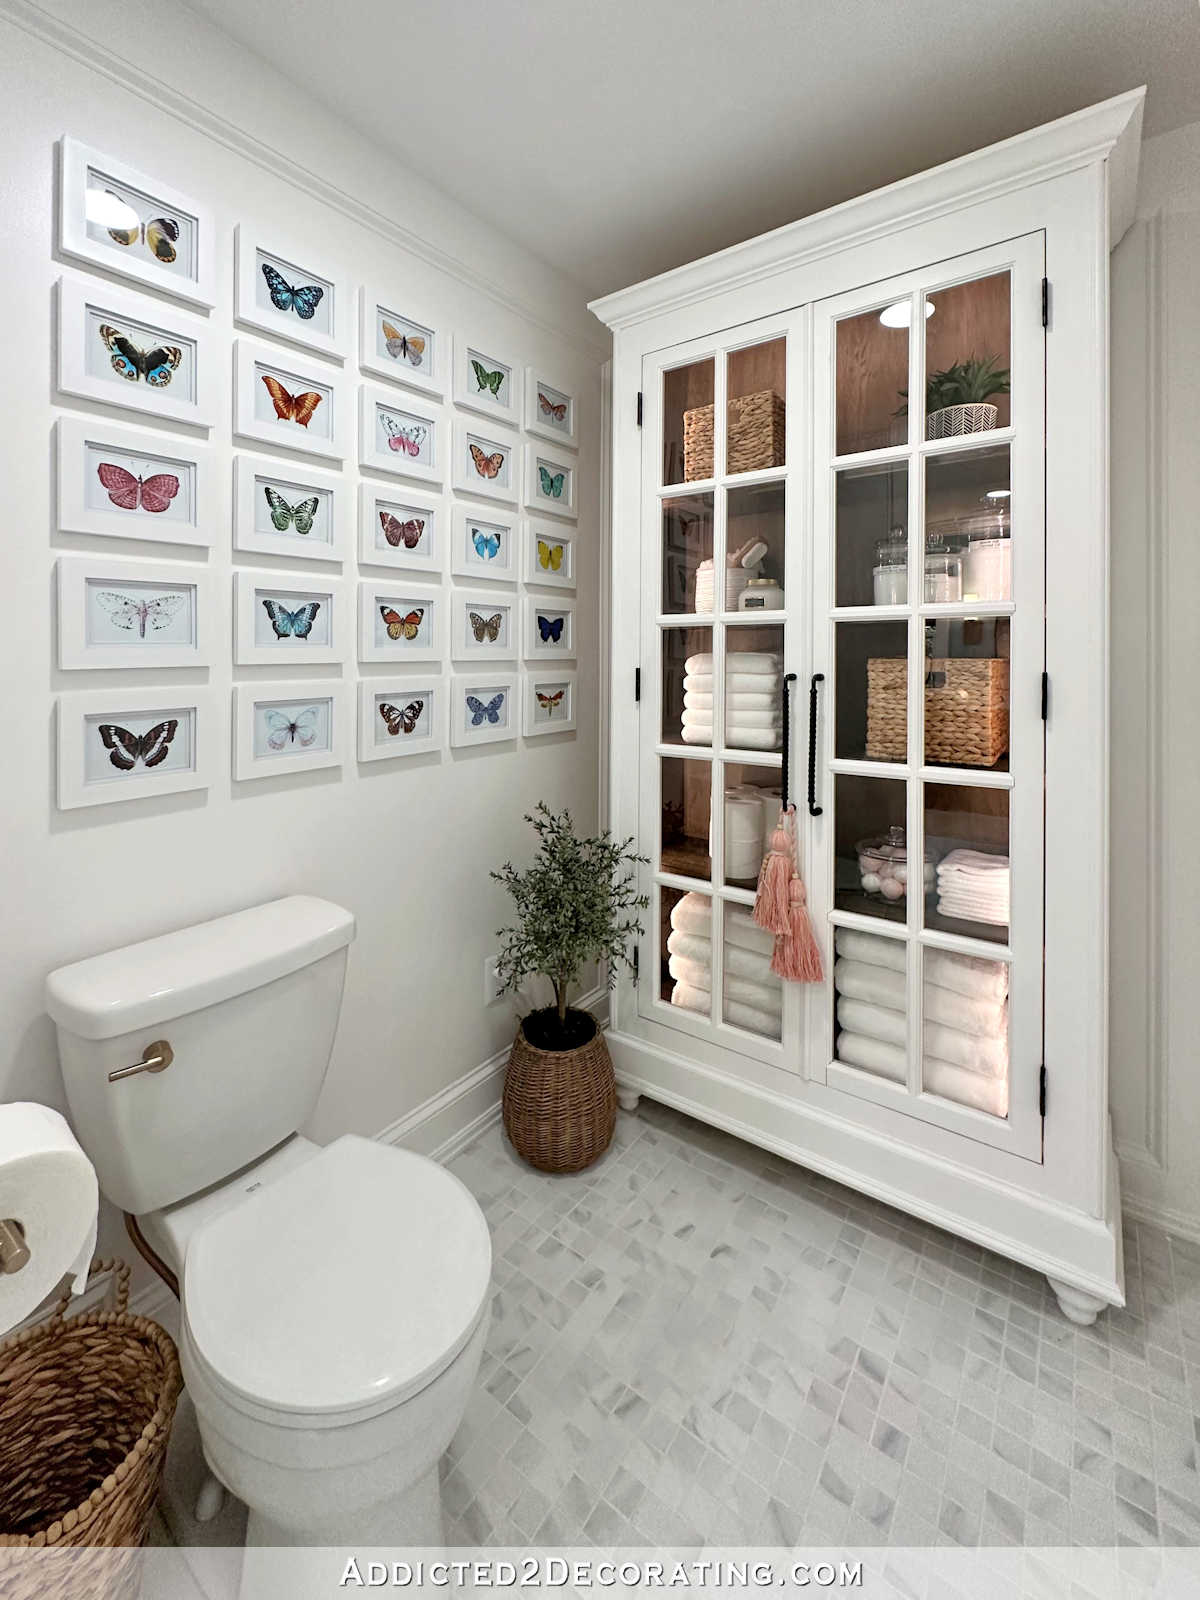
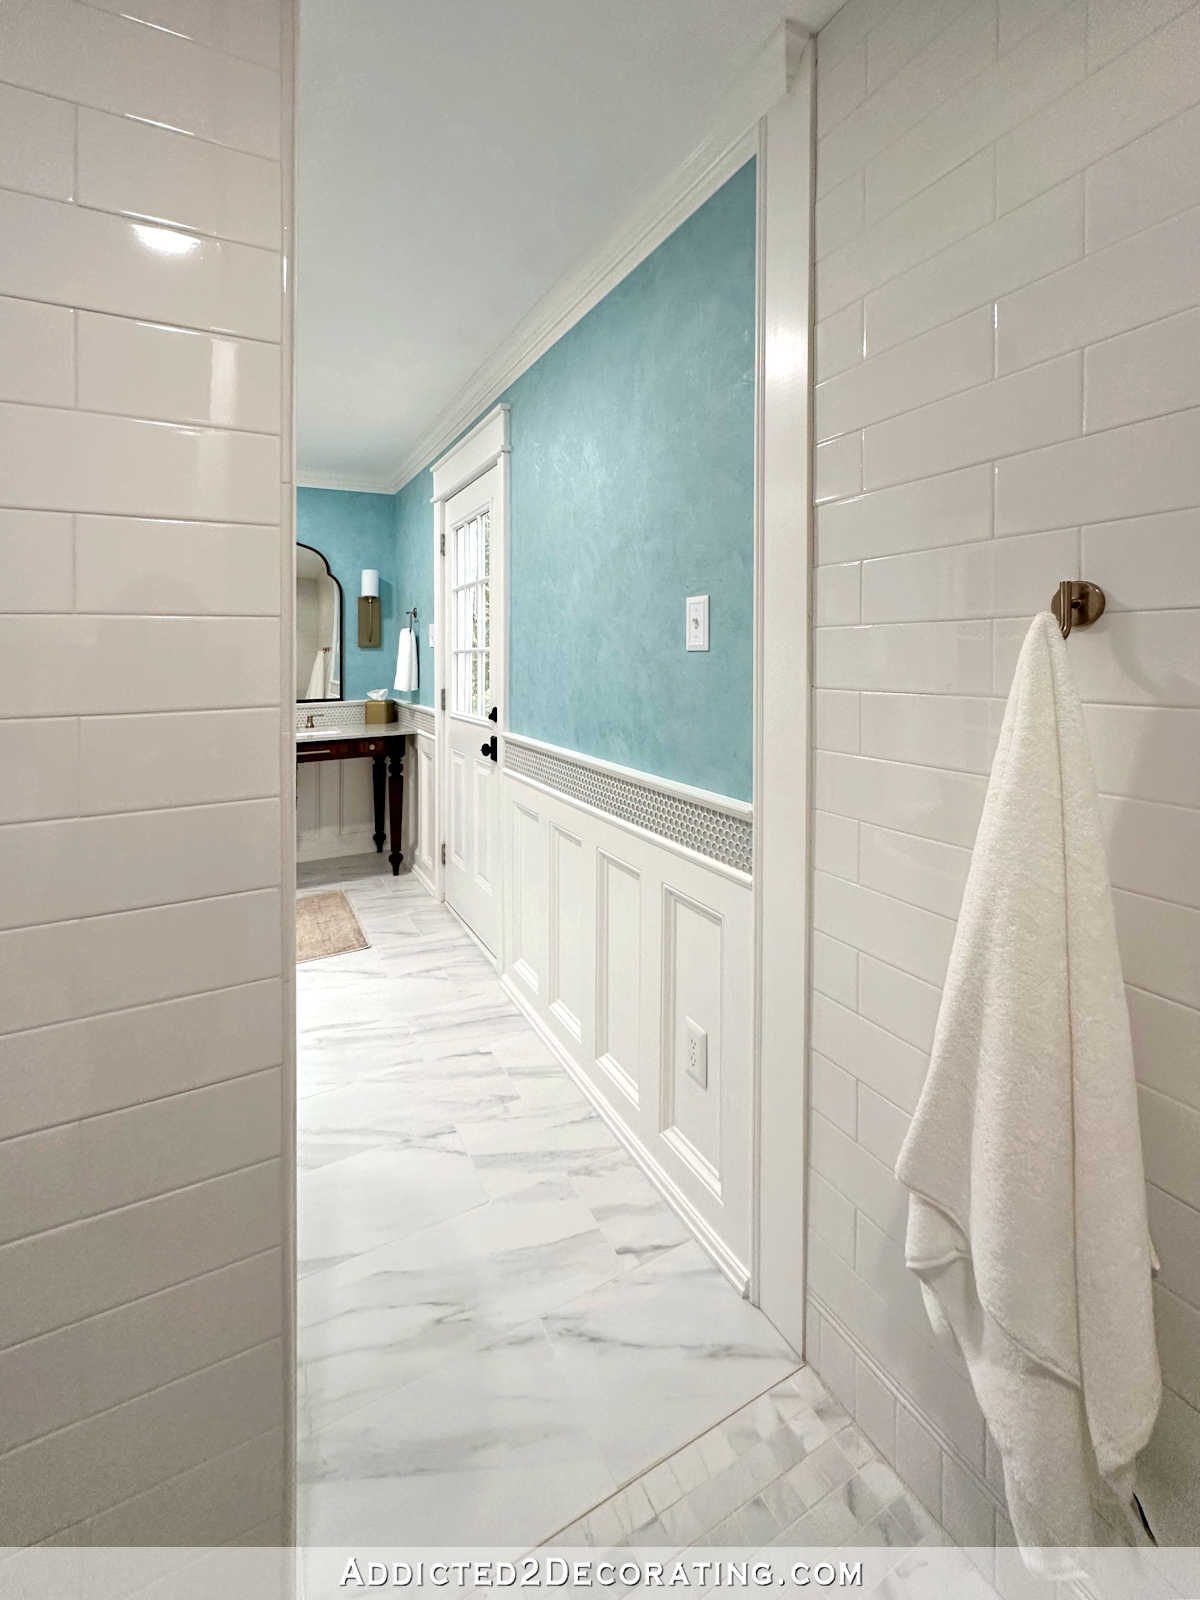
Let’s start with the water closet. I just love this room that’s tucked behind the mural wall. Since our shower is so large to accommodate Matt’s wheelchair, that made our water closet a bit larger than most standard water closets. And that gave me plenty of room to get creative.
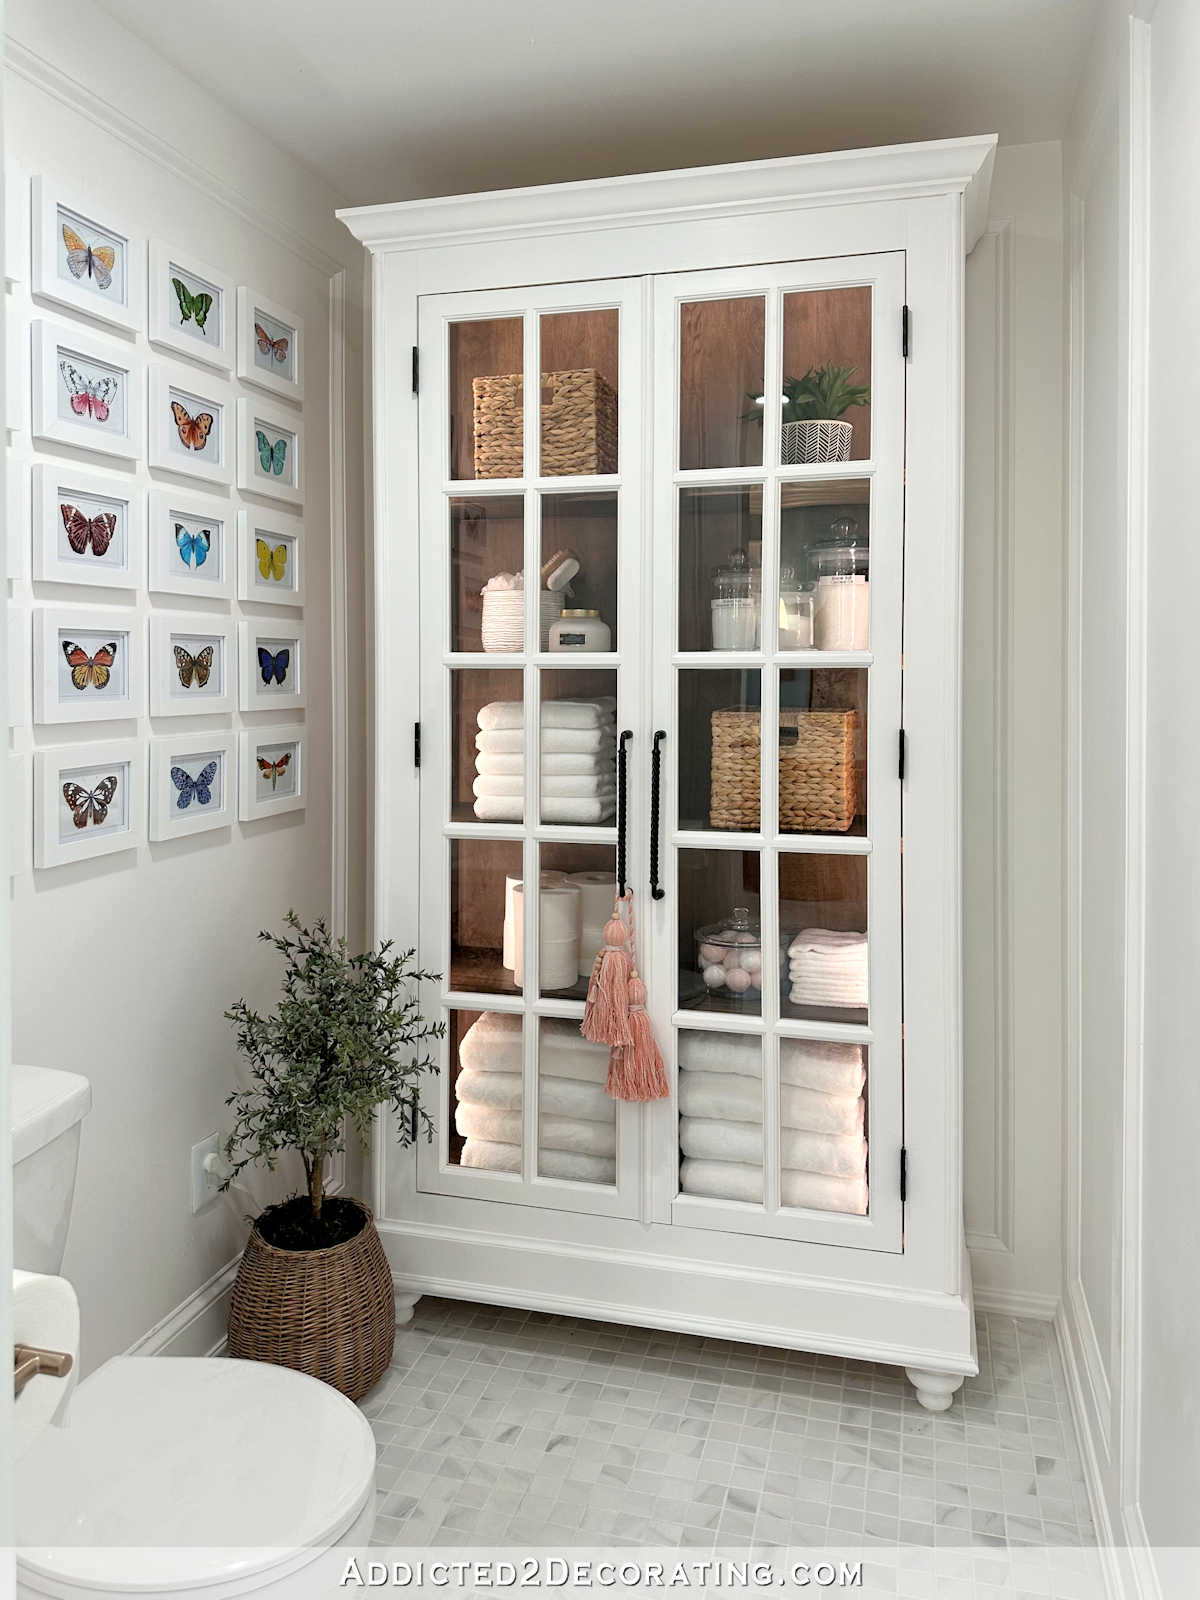
To take up some of the room, make the area feel less cavernous, and to add some practical storage to the room, I built this cabinet using leftover French doors that I had taken off of our walk-in pantry.
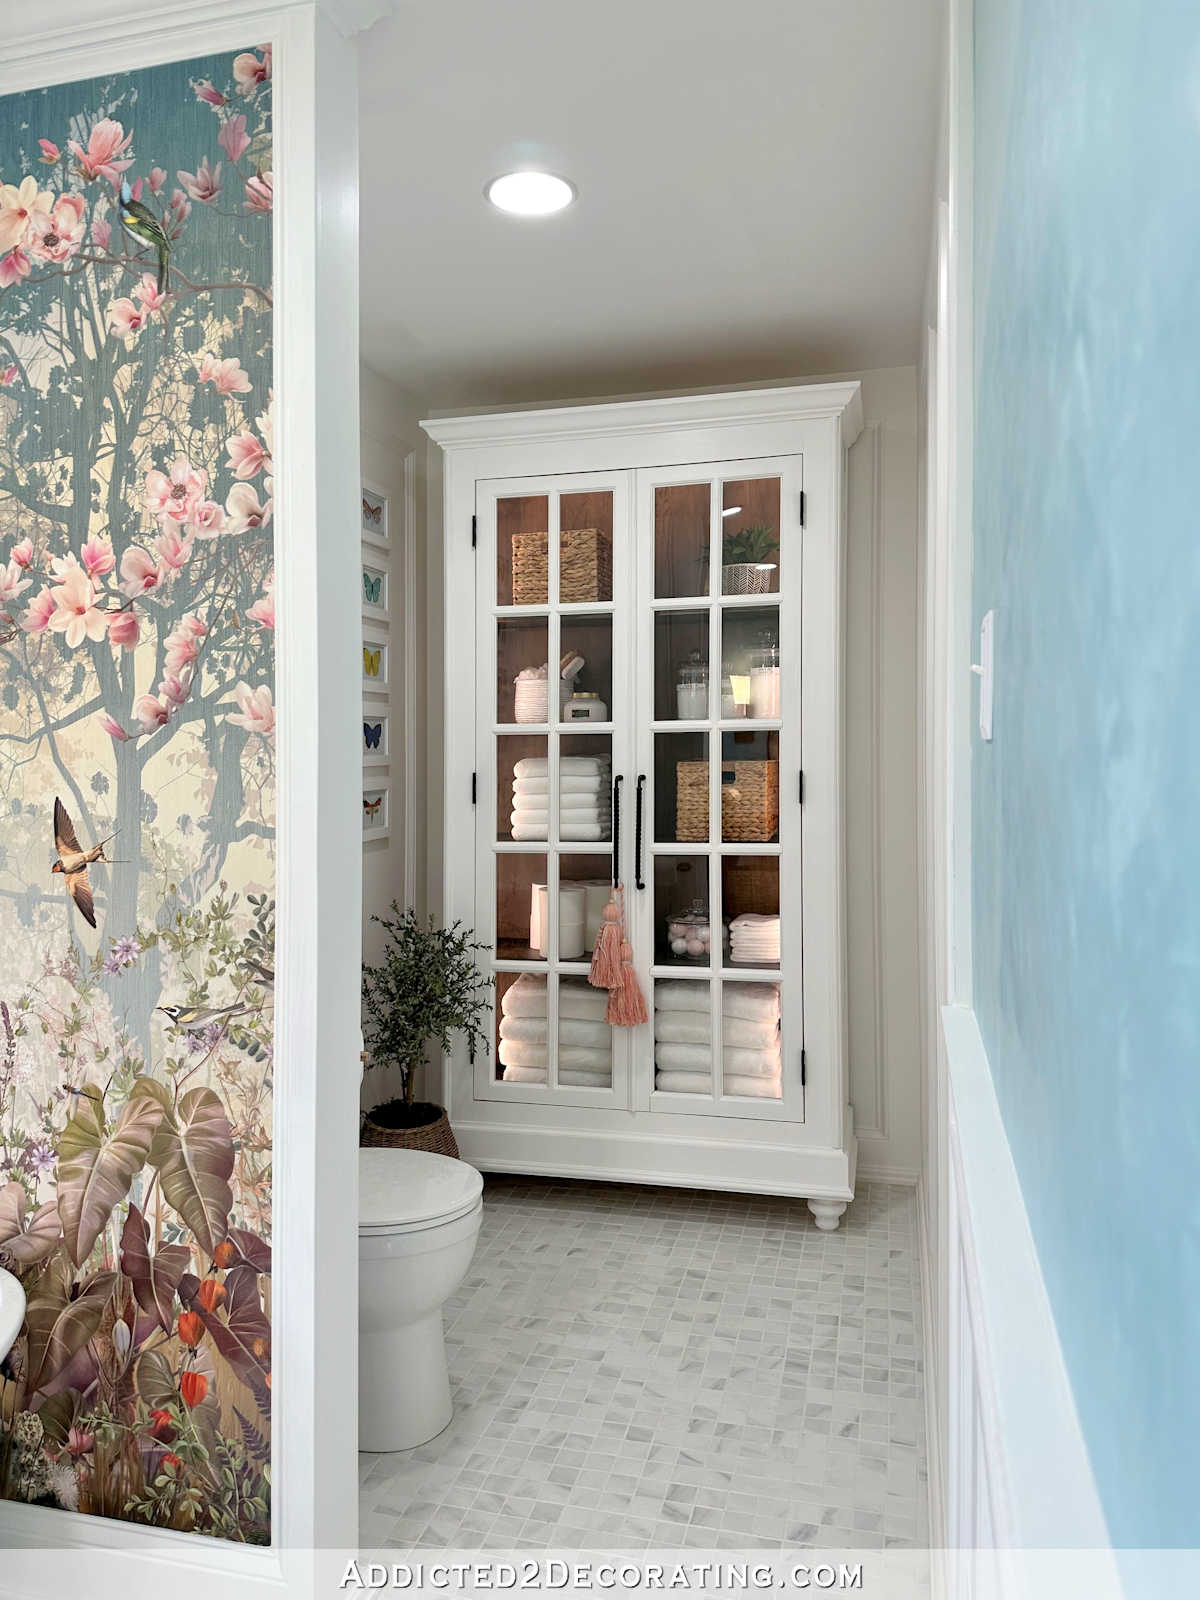
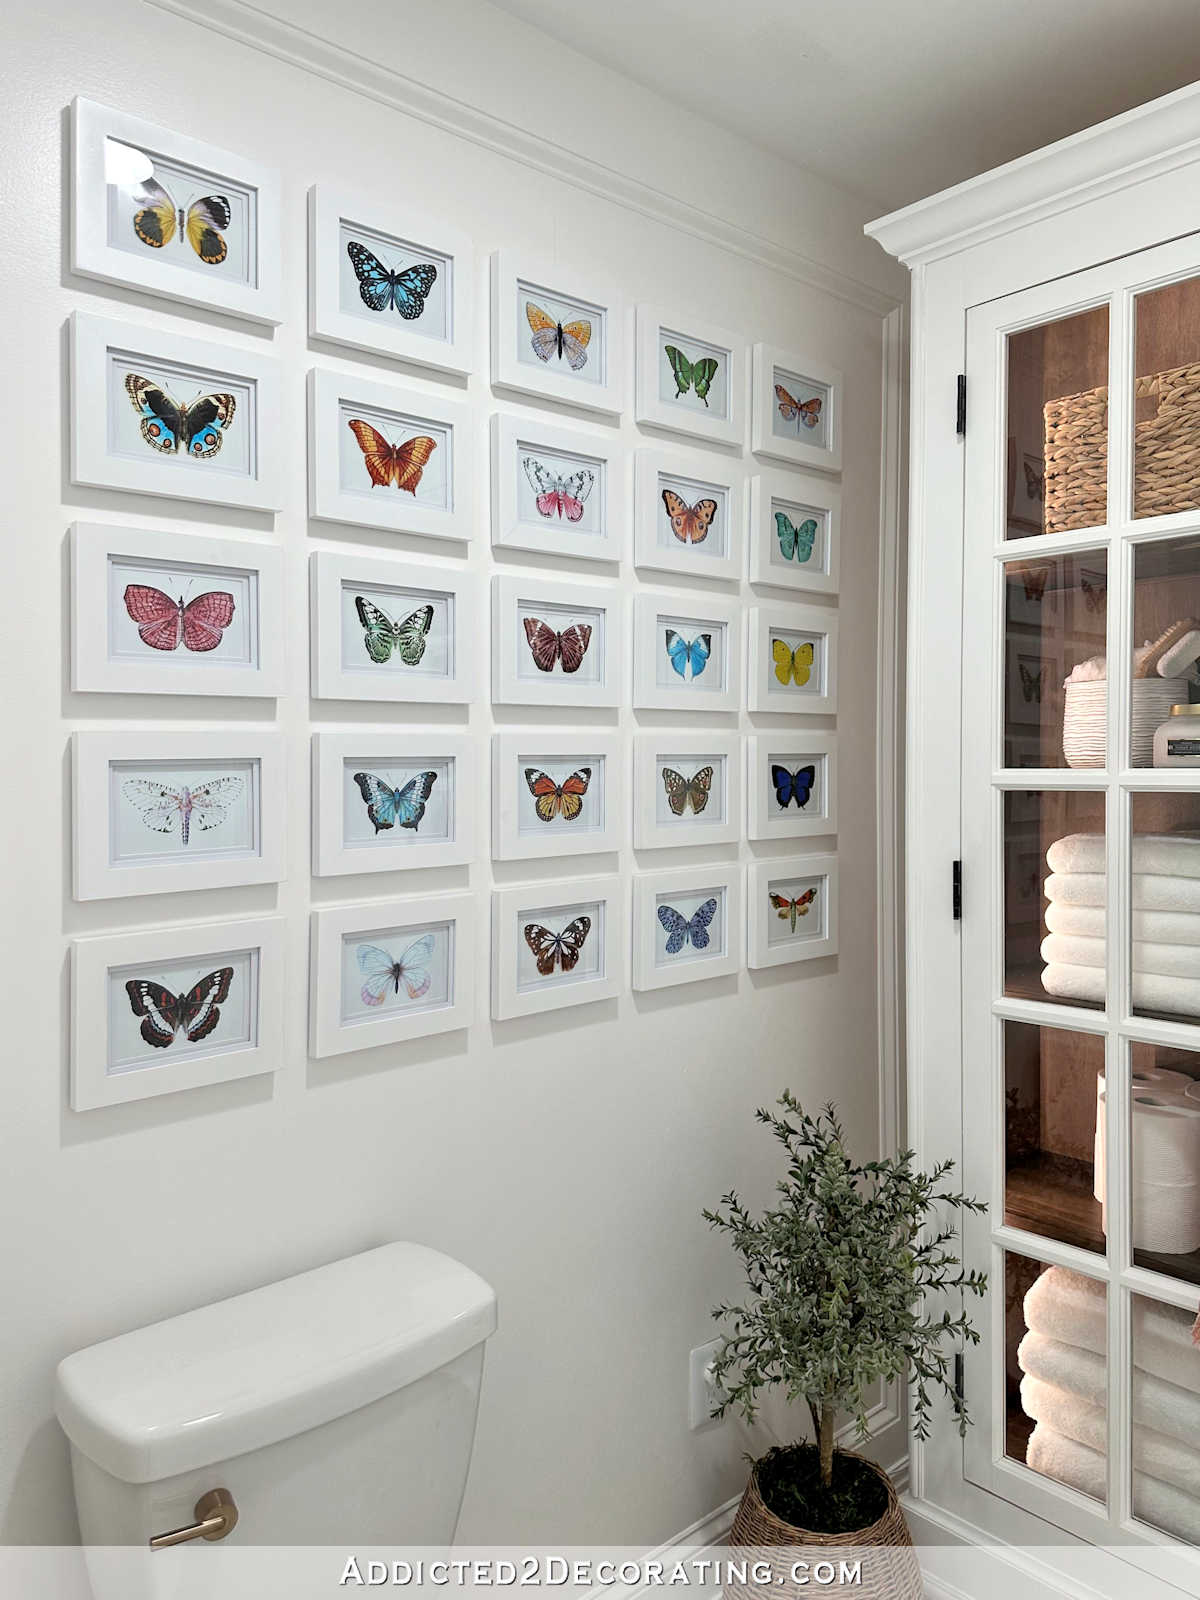
On the wall to the left, I added a gallery wall of colorful butterflies and moths.
This space is larger than most standard water closets, but it’s still very small, so I used my wide angle lens to try to get the whole view of the cabinet and the butterfly wall. Wide angle lenses always distort things a bit, but at least you can see everything in one photo.
But here’s a non-wide-angle, non-distorted view of the butterfly gallery wall…
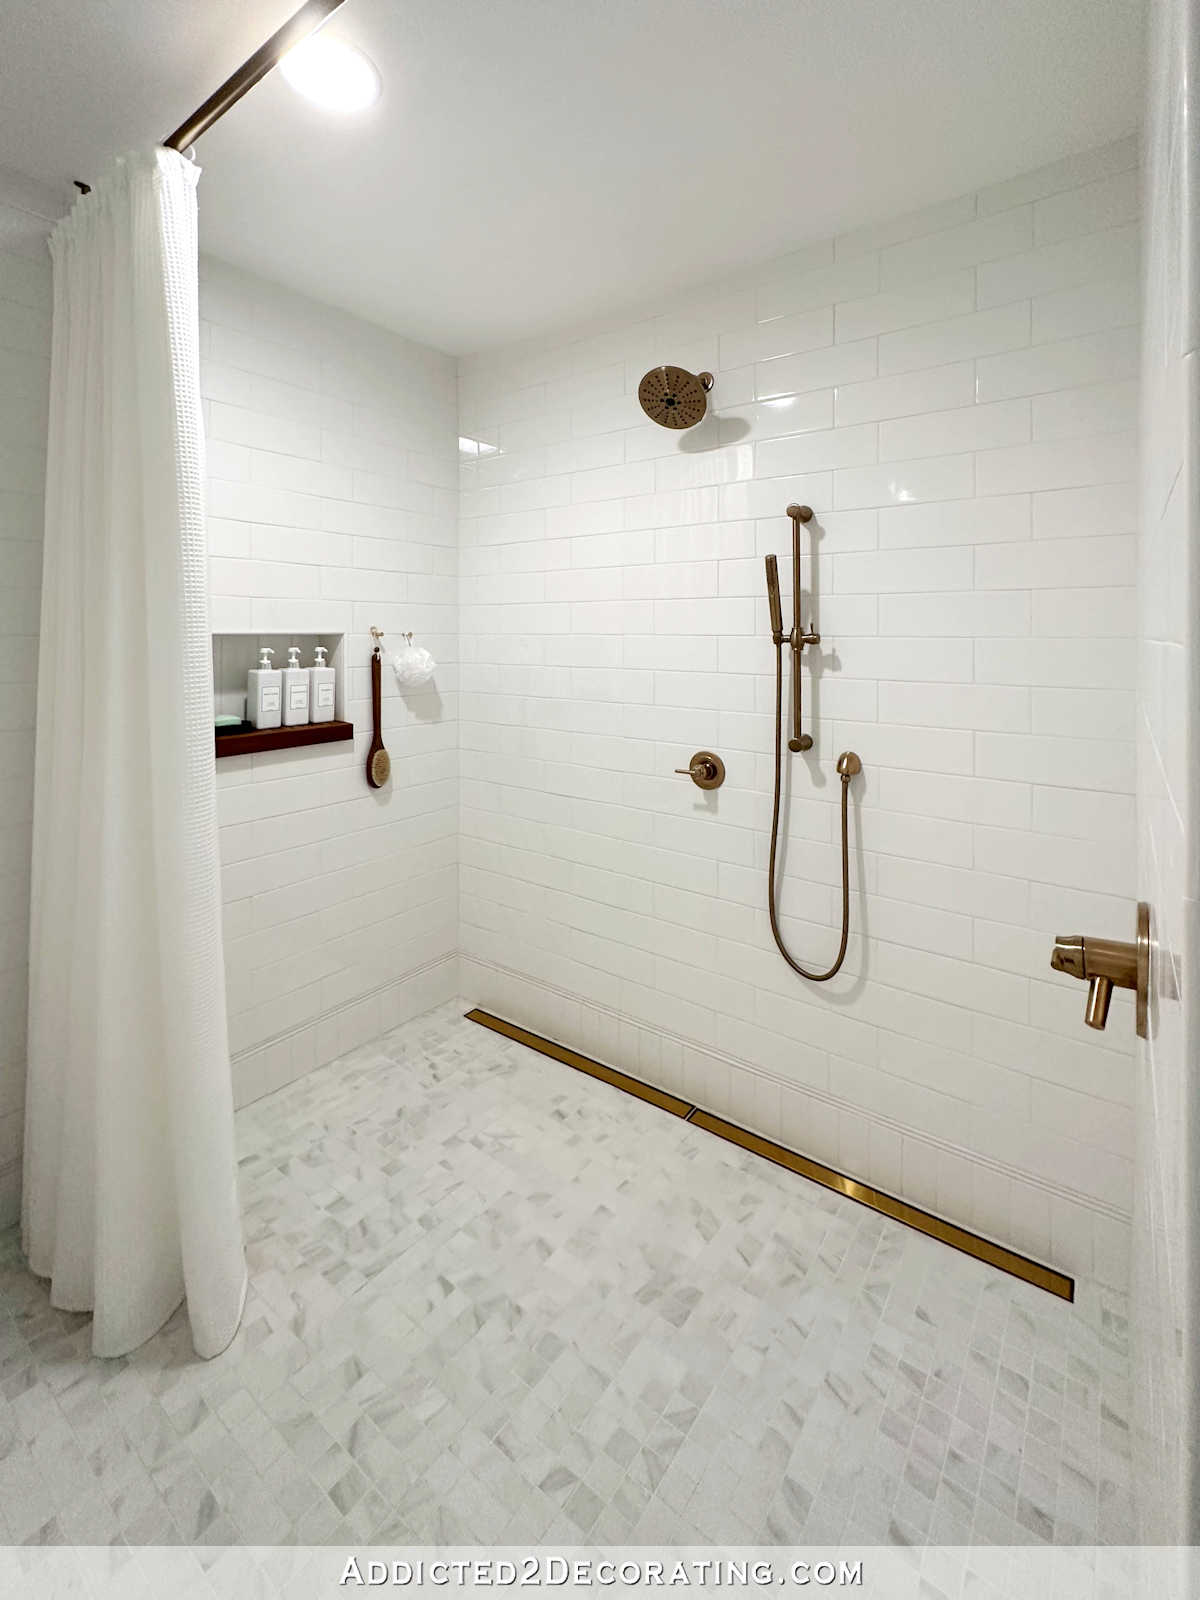
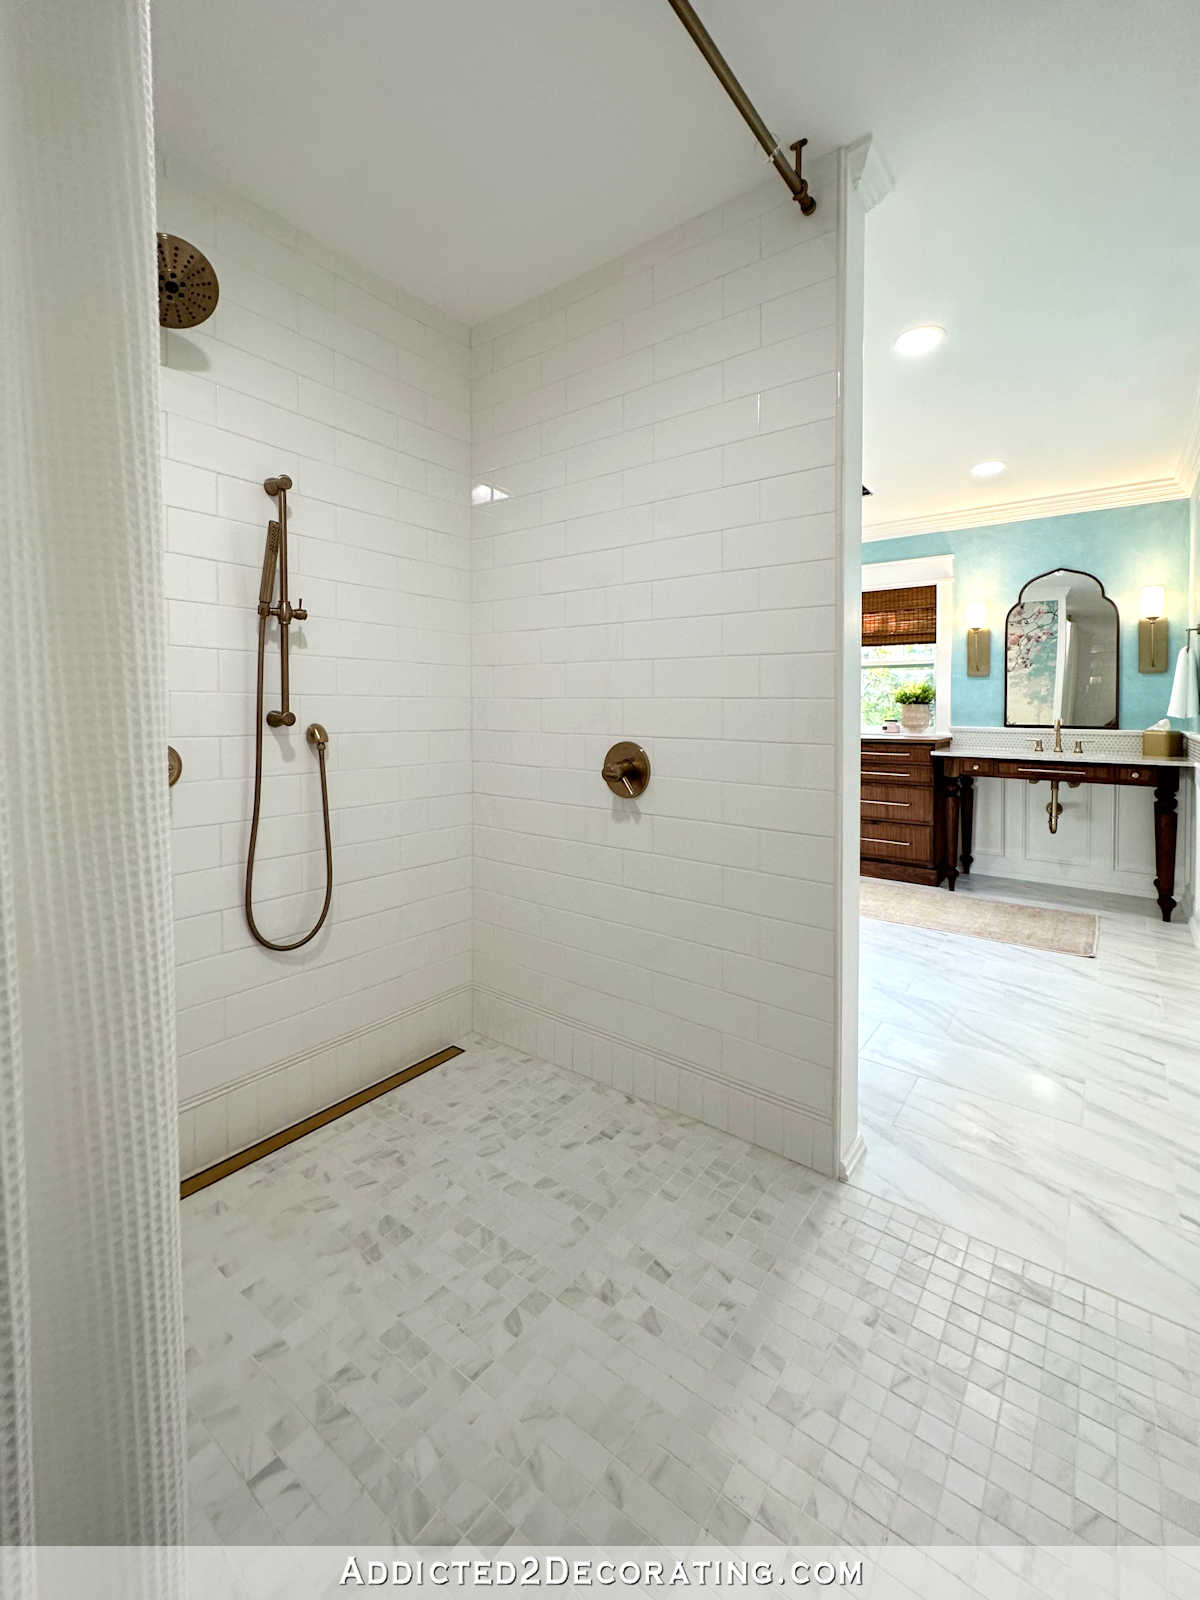
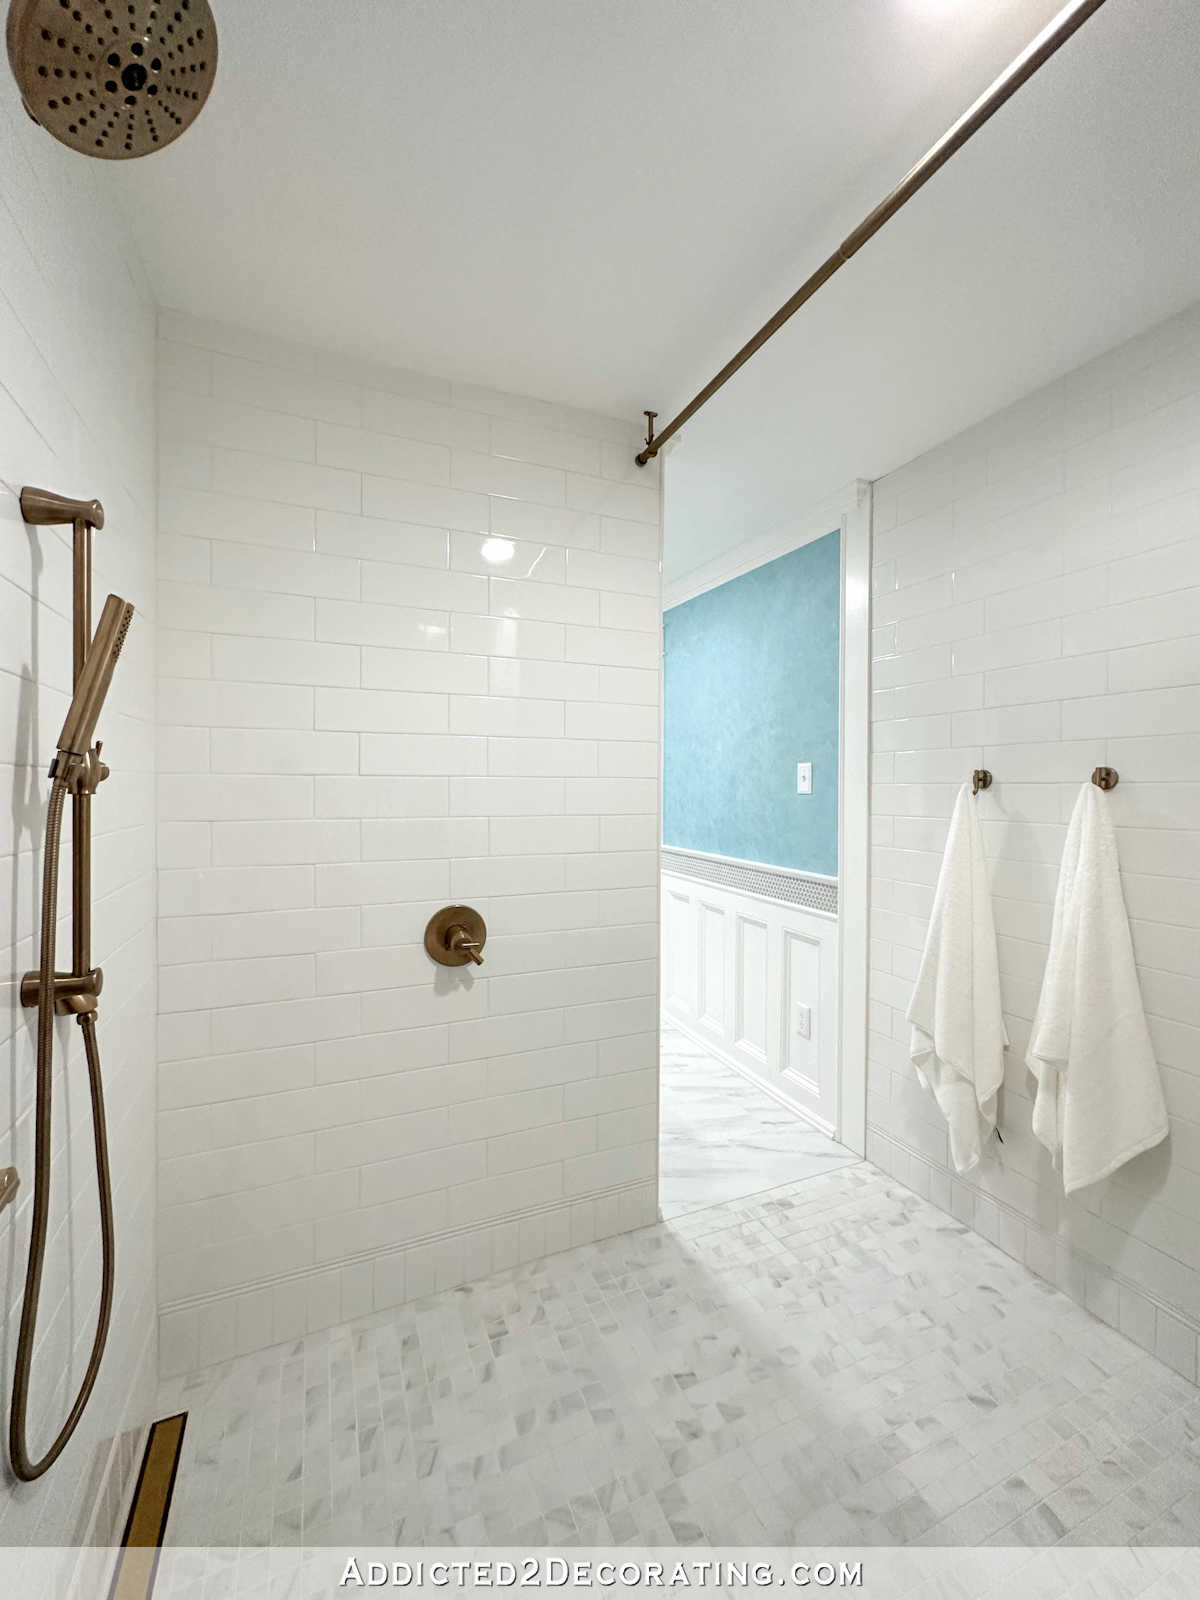
On the other side of the butterfly gallery wall is the large curbless shower. Since Matt (my husband who has M.S.) uses a wheelchair, it was imperative that we have a large shower where he could have plenty of room to move around, and it absolutely had to be curbless for easy accessibility.
This shower is an absolute dream. It measures about 7′ x 7.5′, and this shower alone is about the size of our entire hallway bathroom.
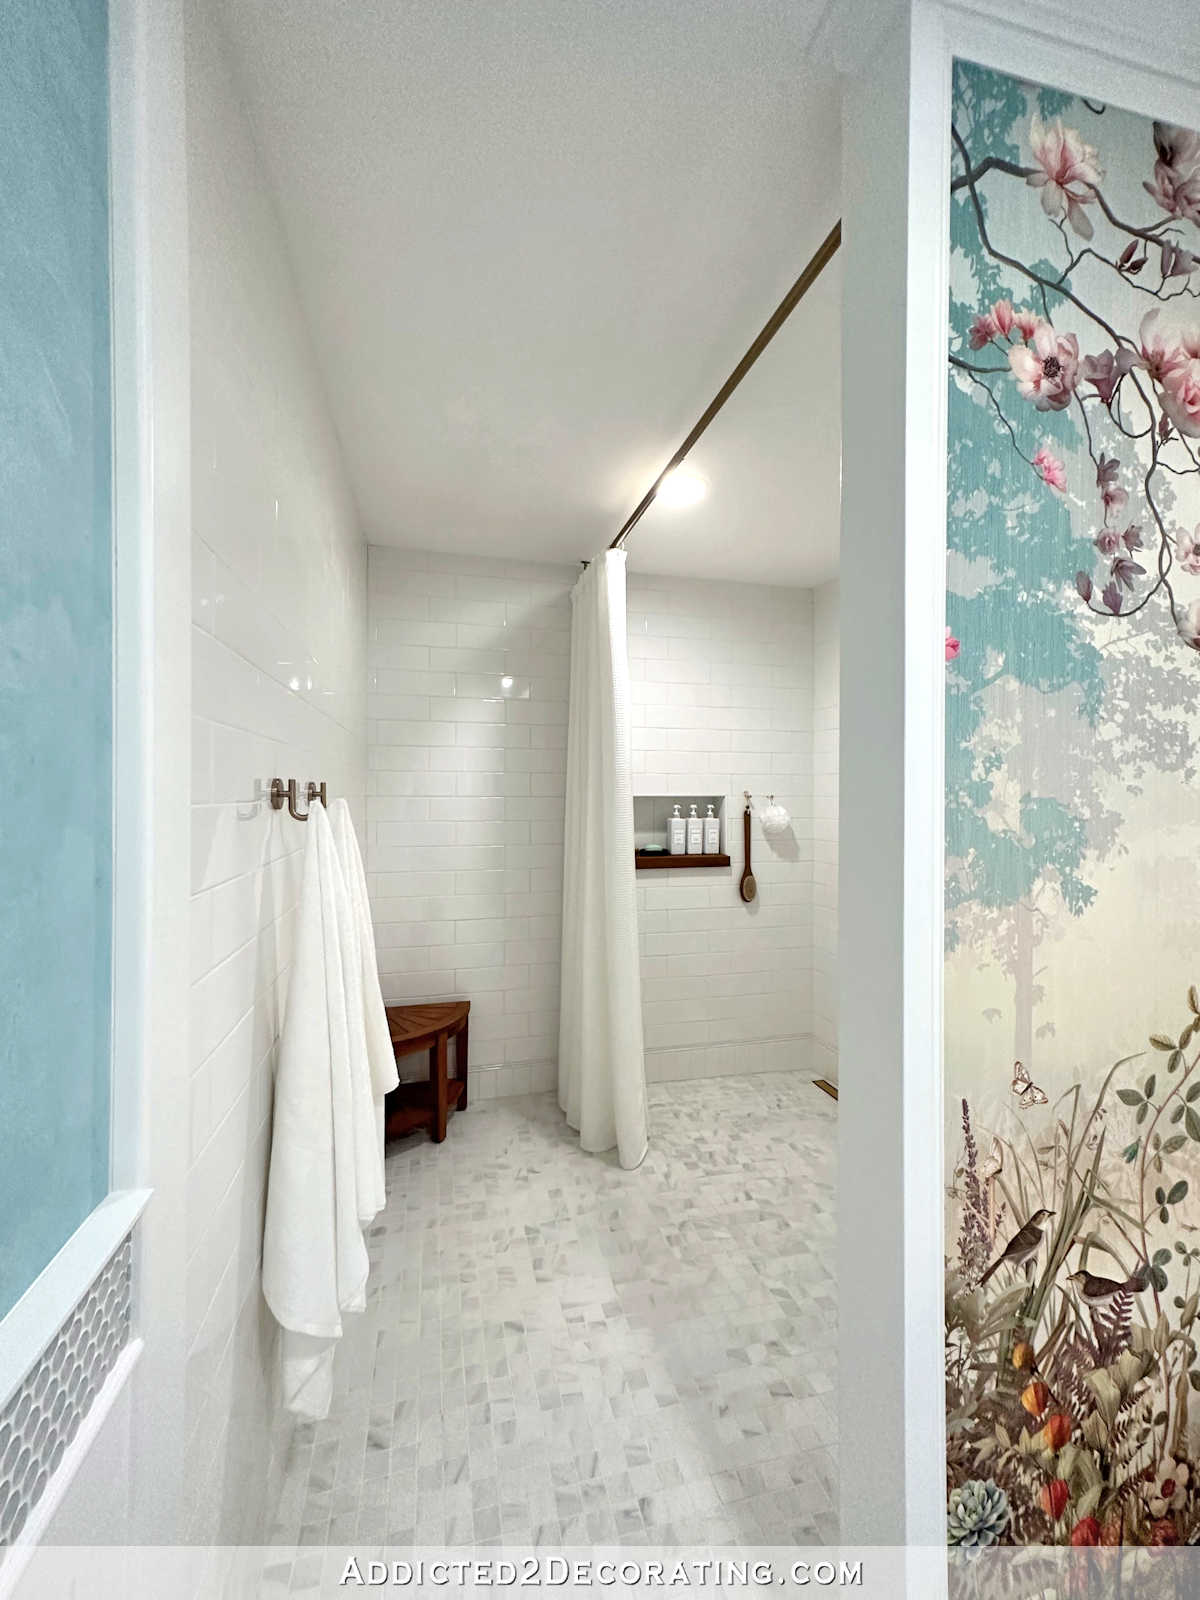
I didn’t want anything obstructing his movement, so I didn’t want any kind of glass door or anything like that. But I did decide to add a shower curtain to separate the large shower into two areas — a wet area and a drying off area. Plus, the shower curtain keeps the warm air in. I actually love the softness and the spa-like feel that the shower curtain adds to the otherwise cold-looking shower area.
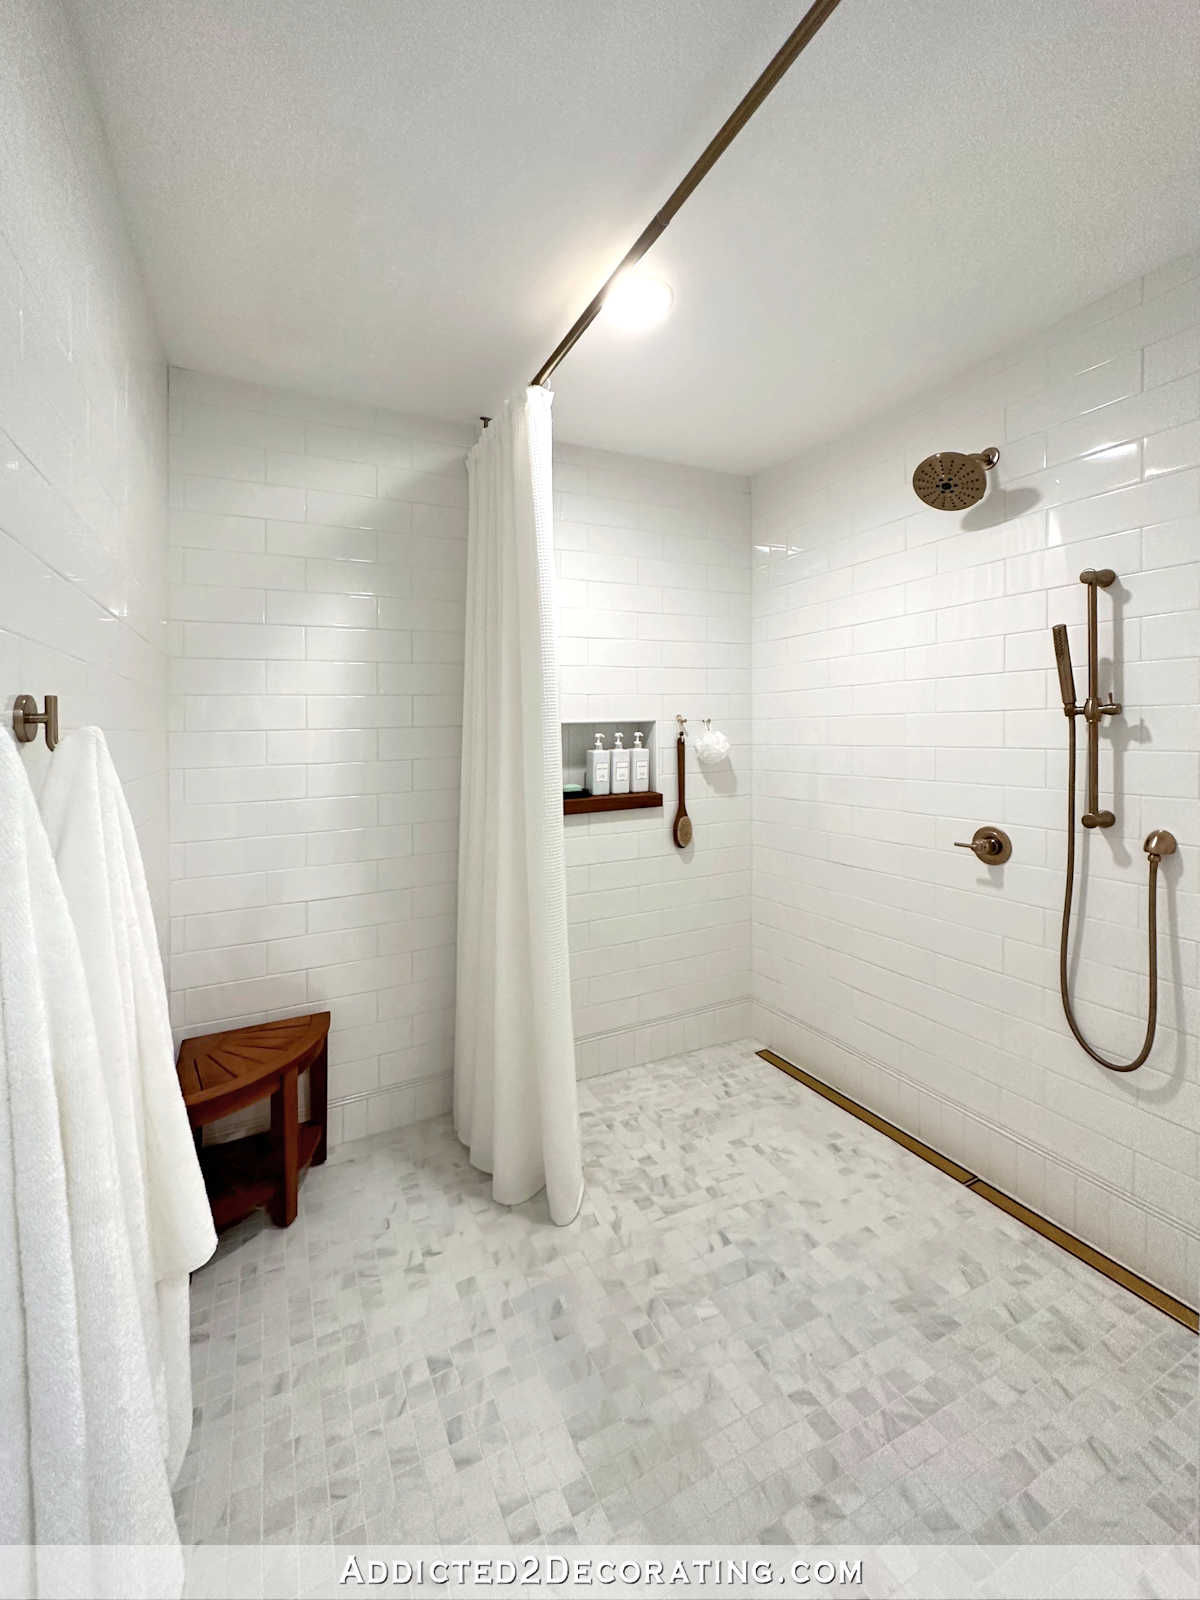
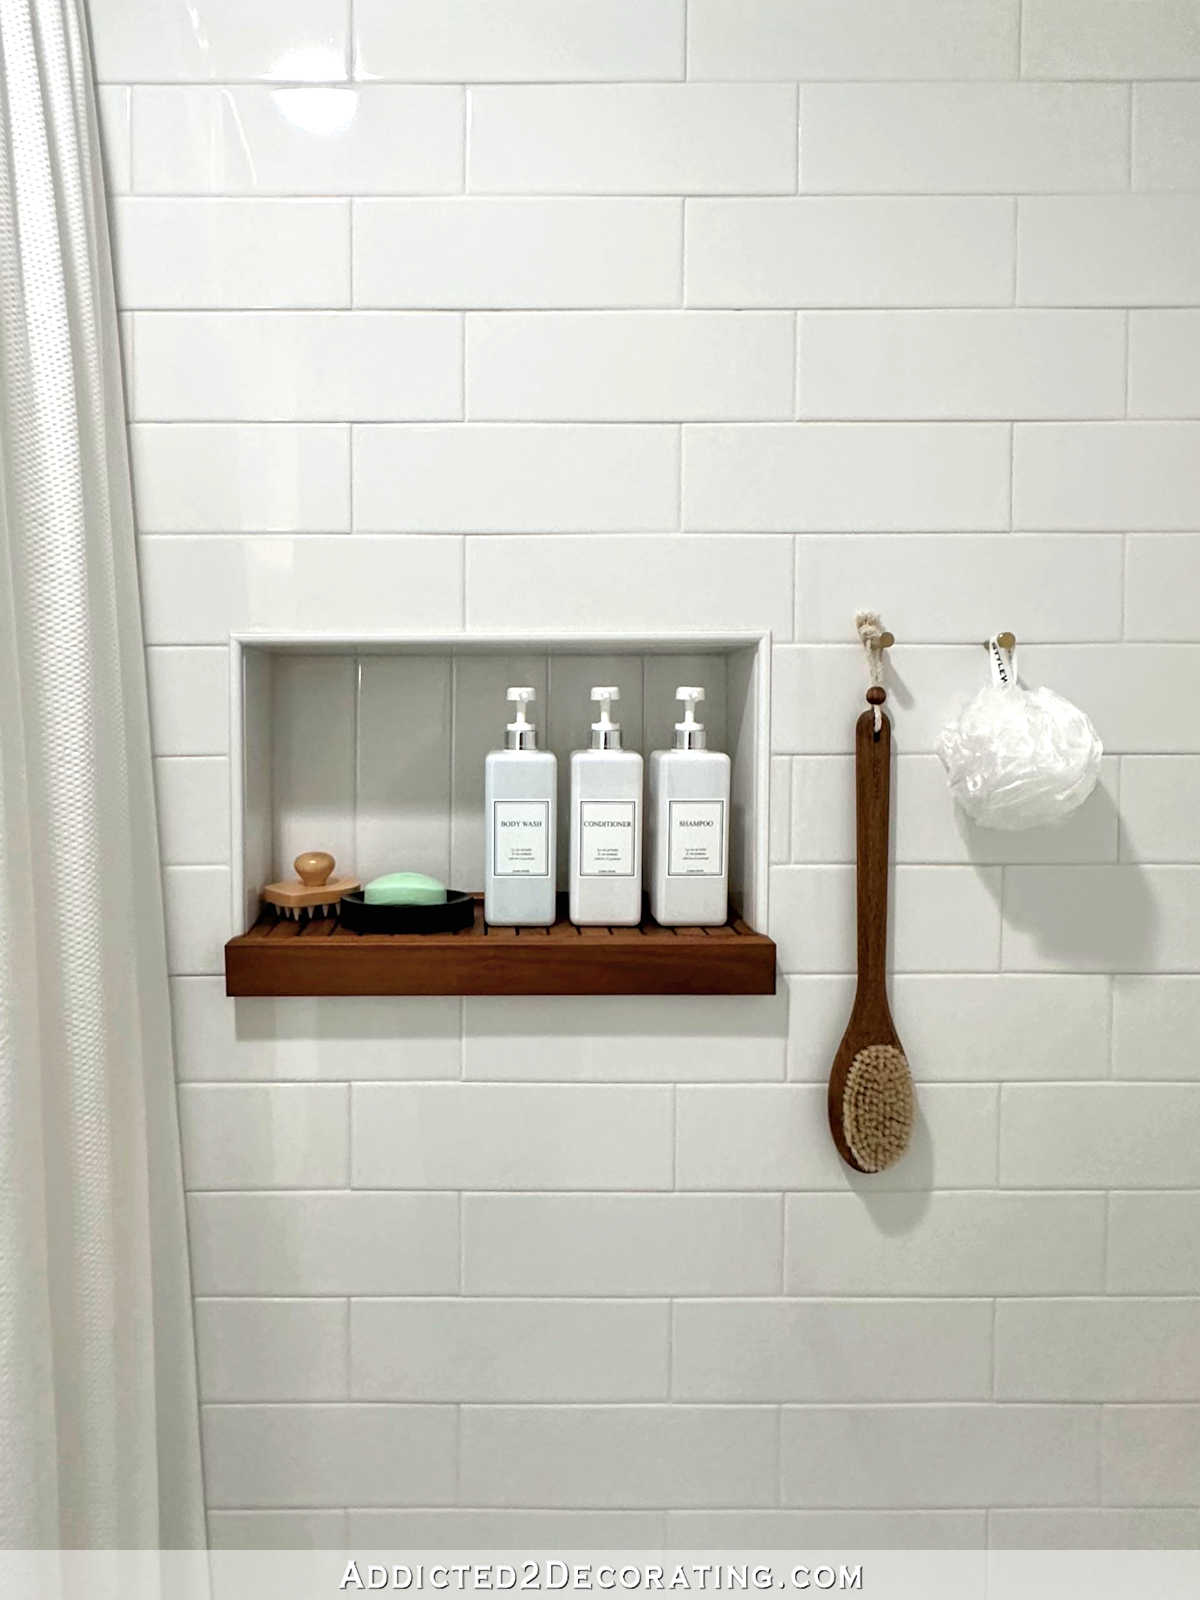
The shower is very wide, so there are two 36-inch linear drains on the floor to span almost the entire width. And to add more warmth to the shower, I made a little teak wood shelf for the shower niche to match the teak shower stool in the corner.
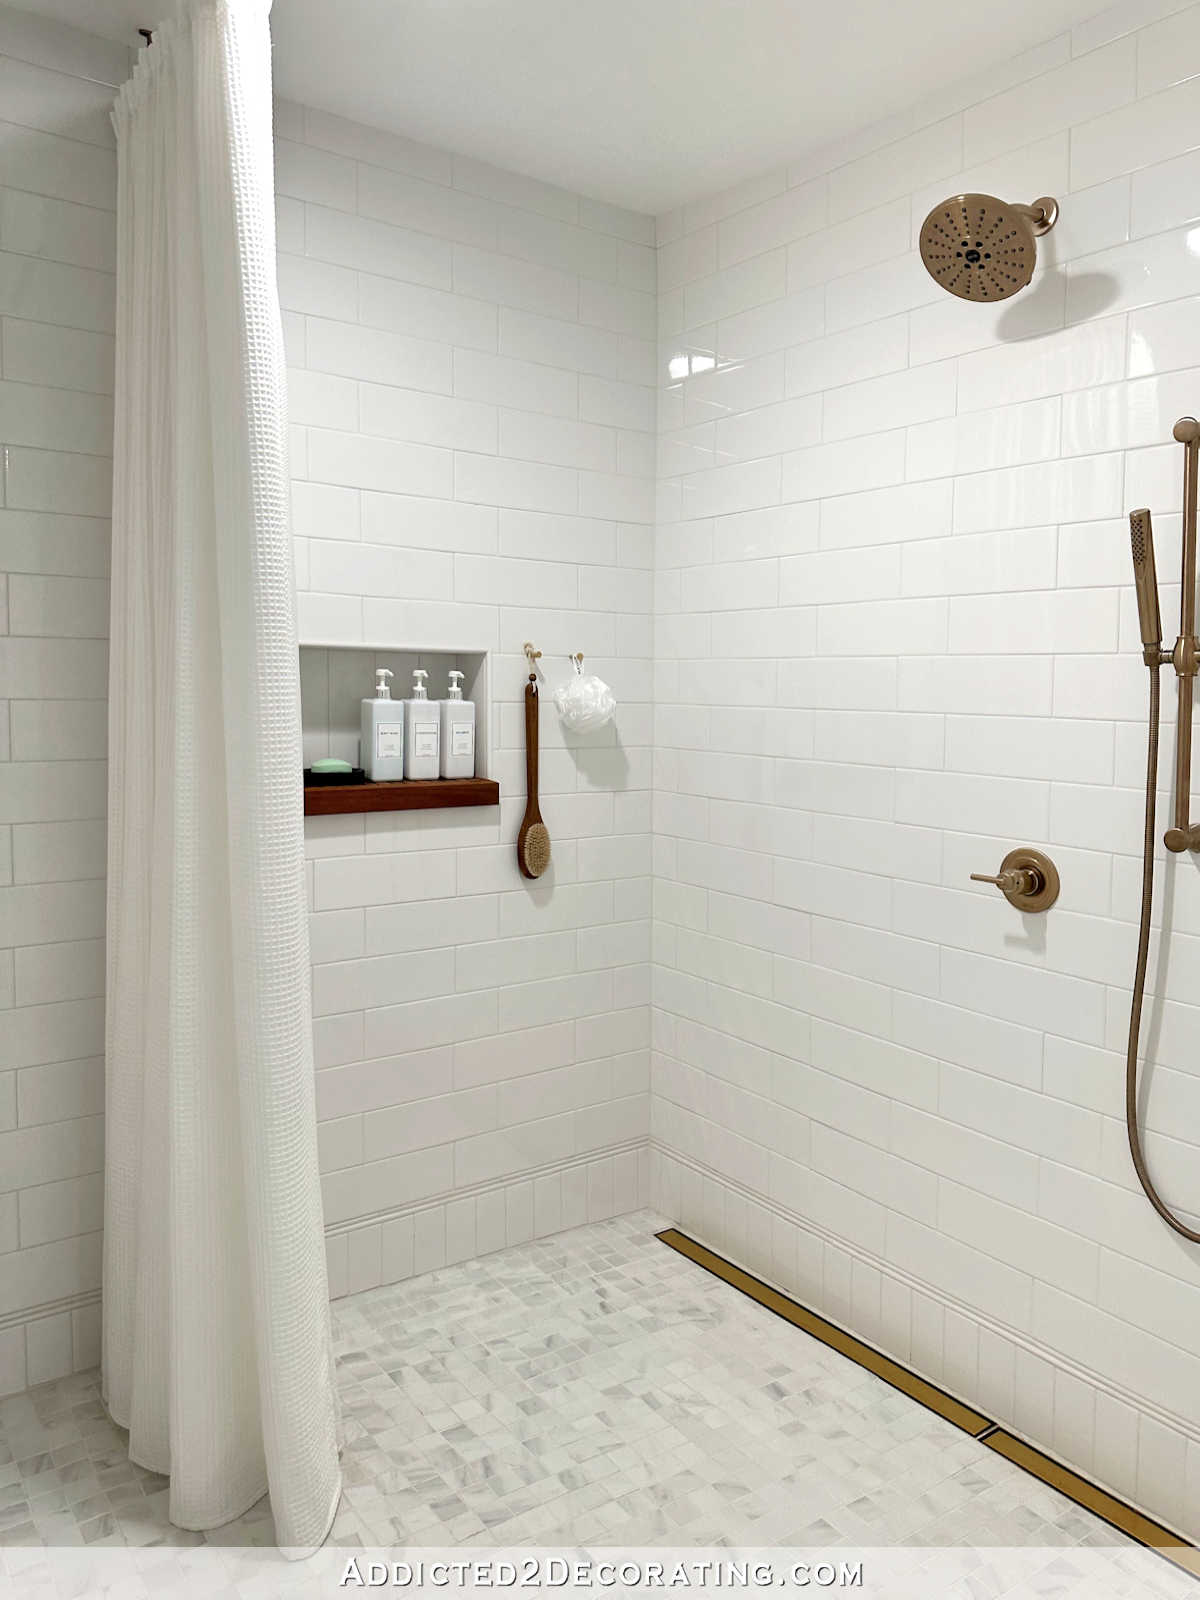
Here are a few more pictures of the shower, without commentary…
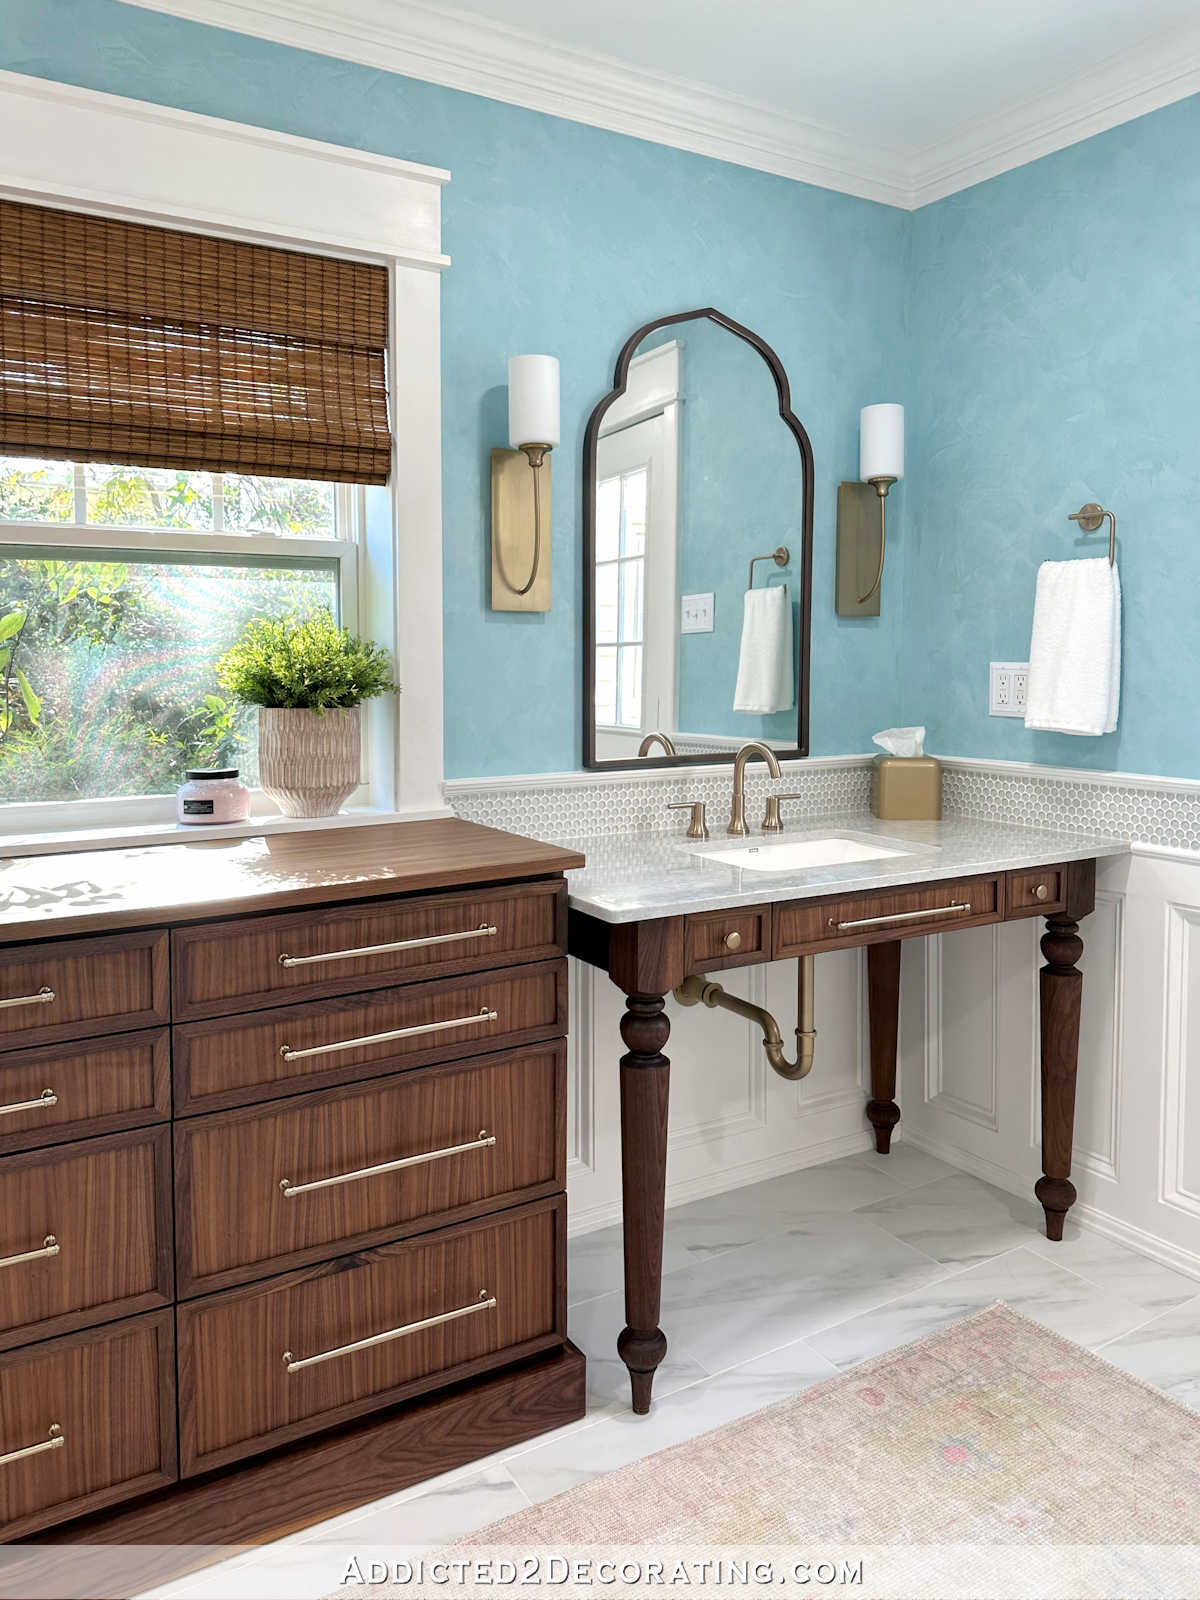
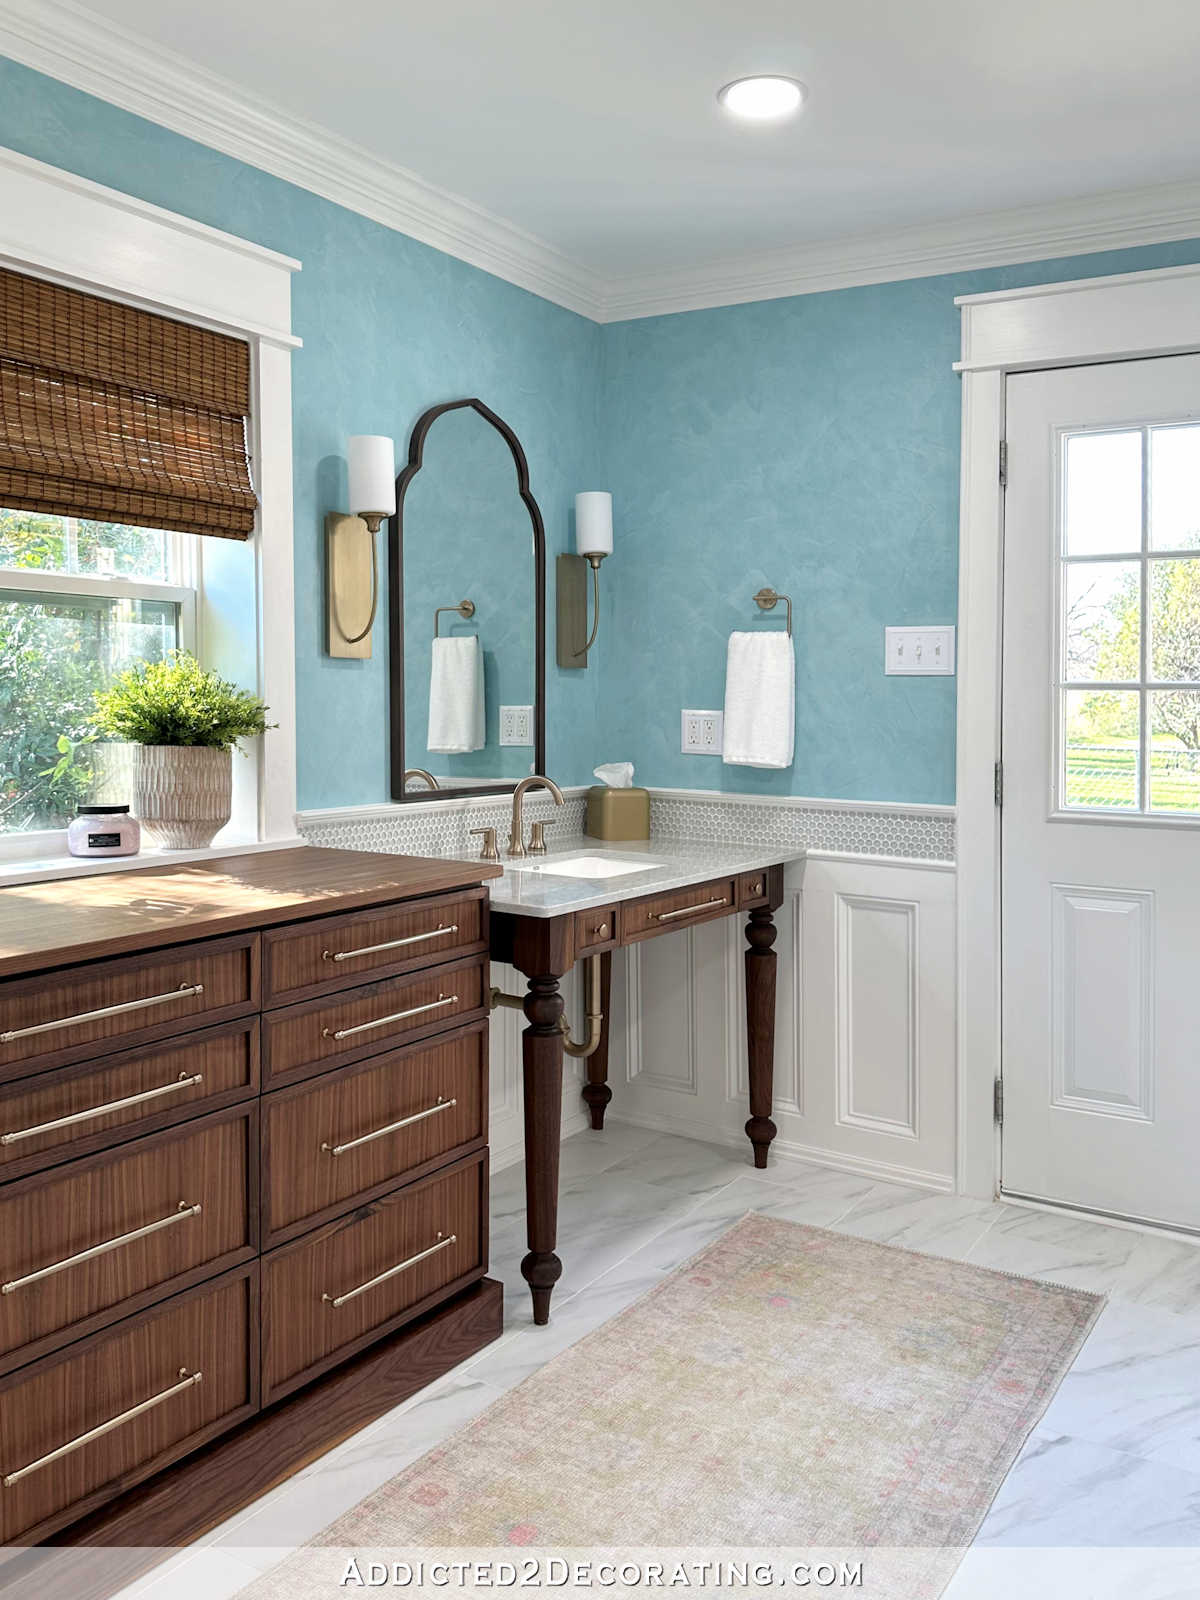
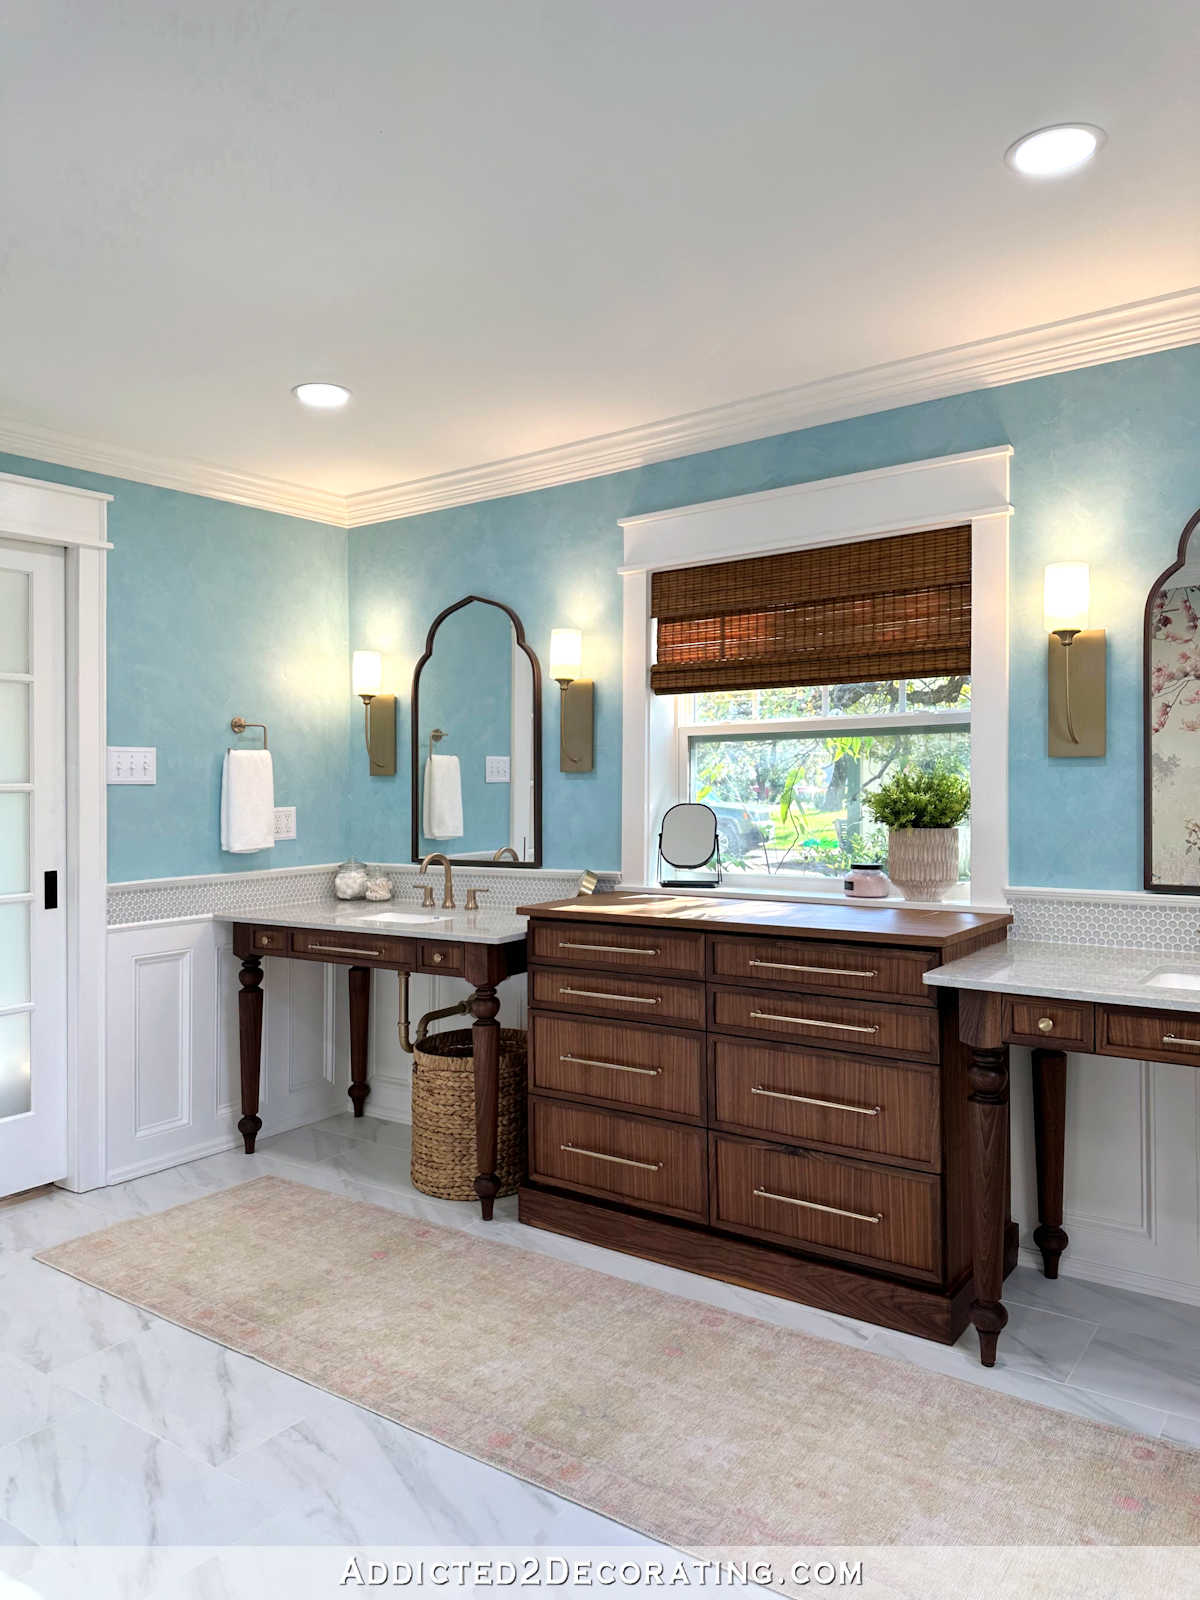
Okay, enough about the shower. 🙂 The main part of the bathroom is much more fun to look at than the shower, so let’s get a few more looks at these areas. But first, let me show you the drawing that I did back in April of this year…
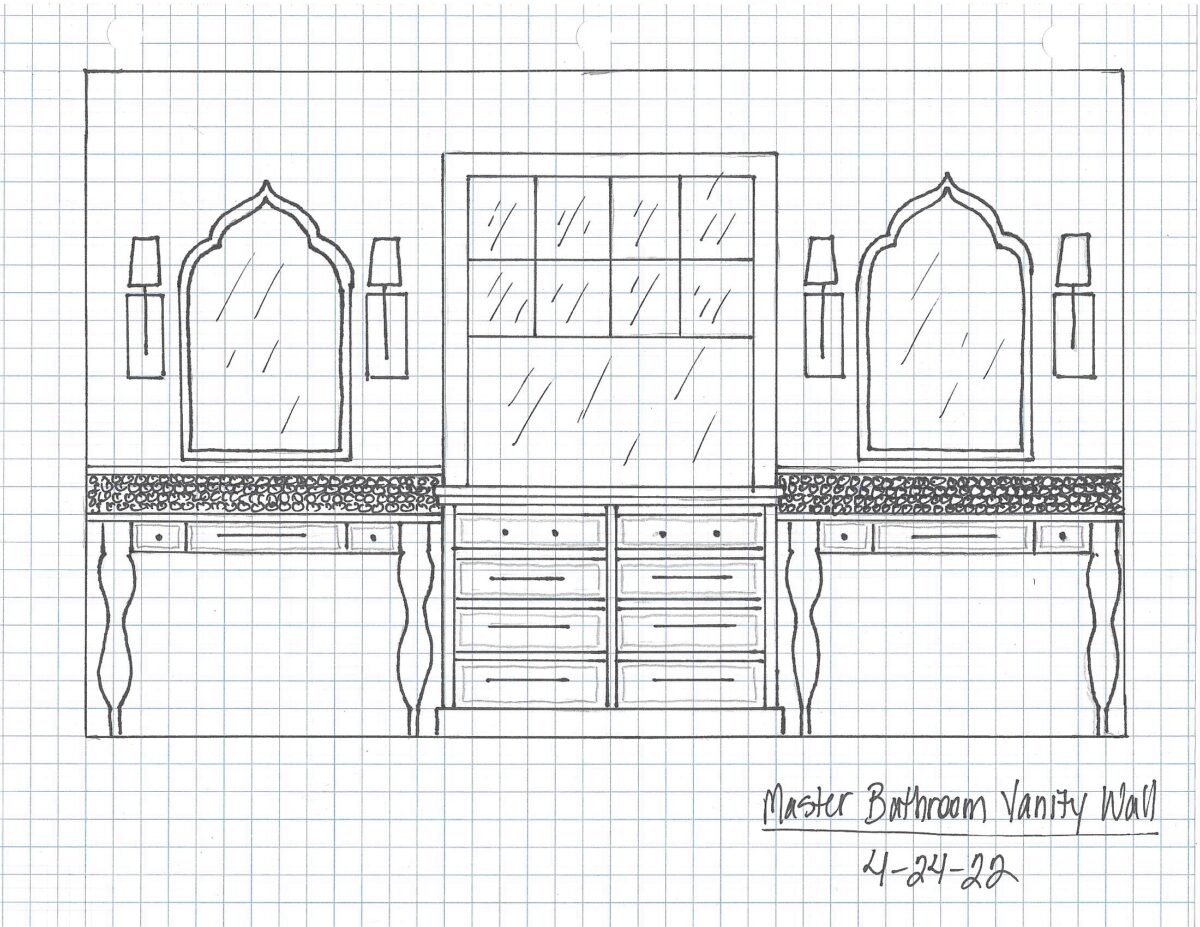
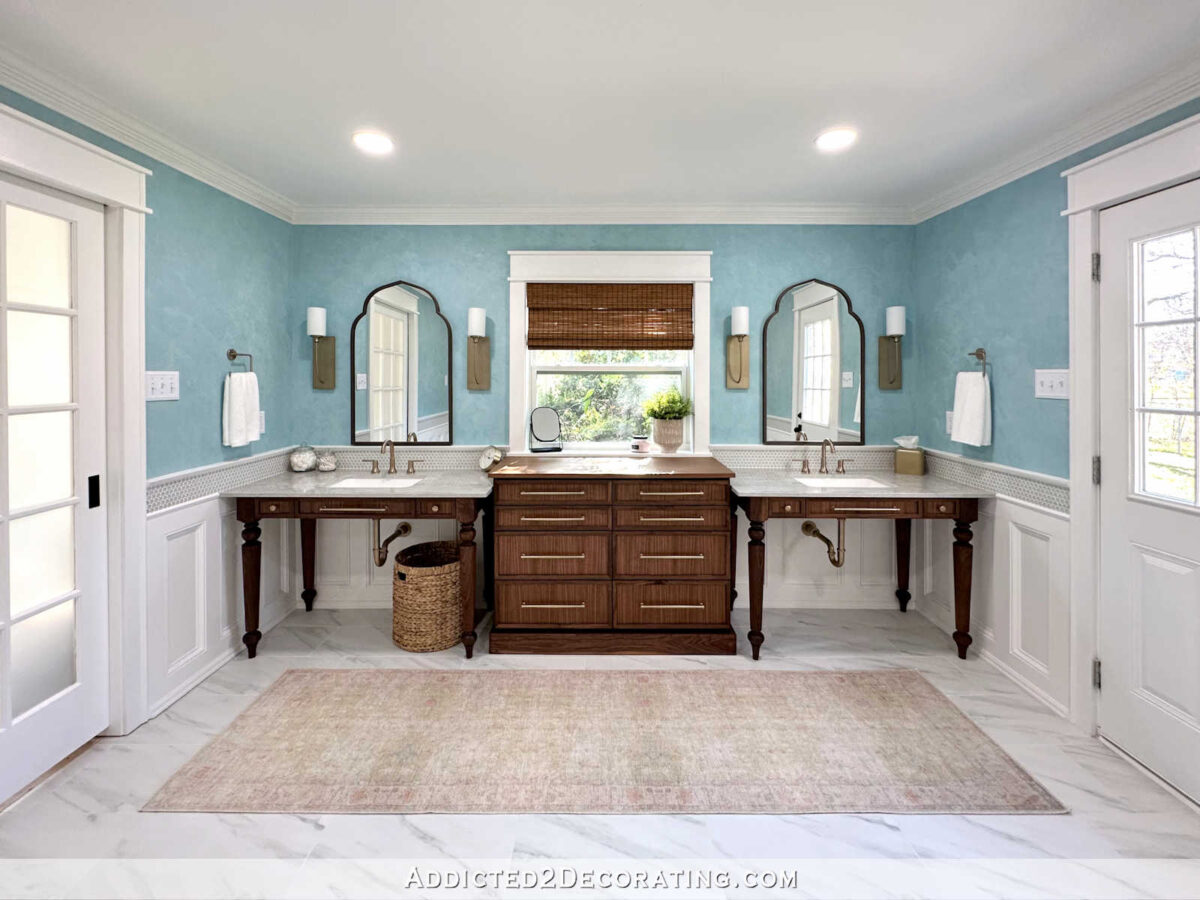
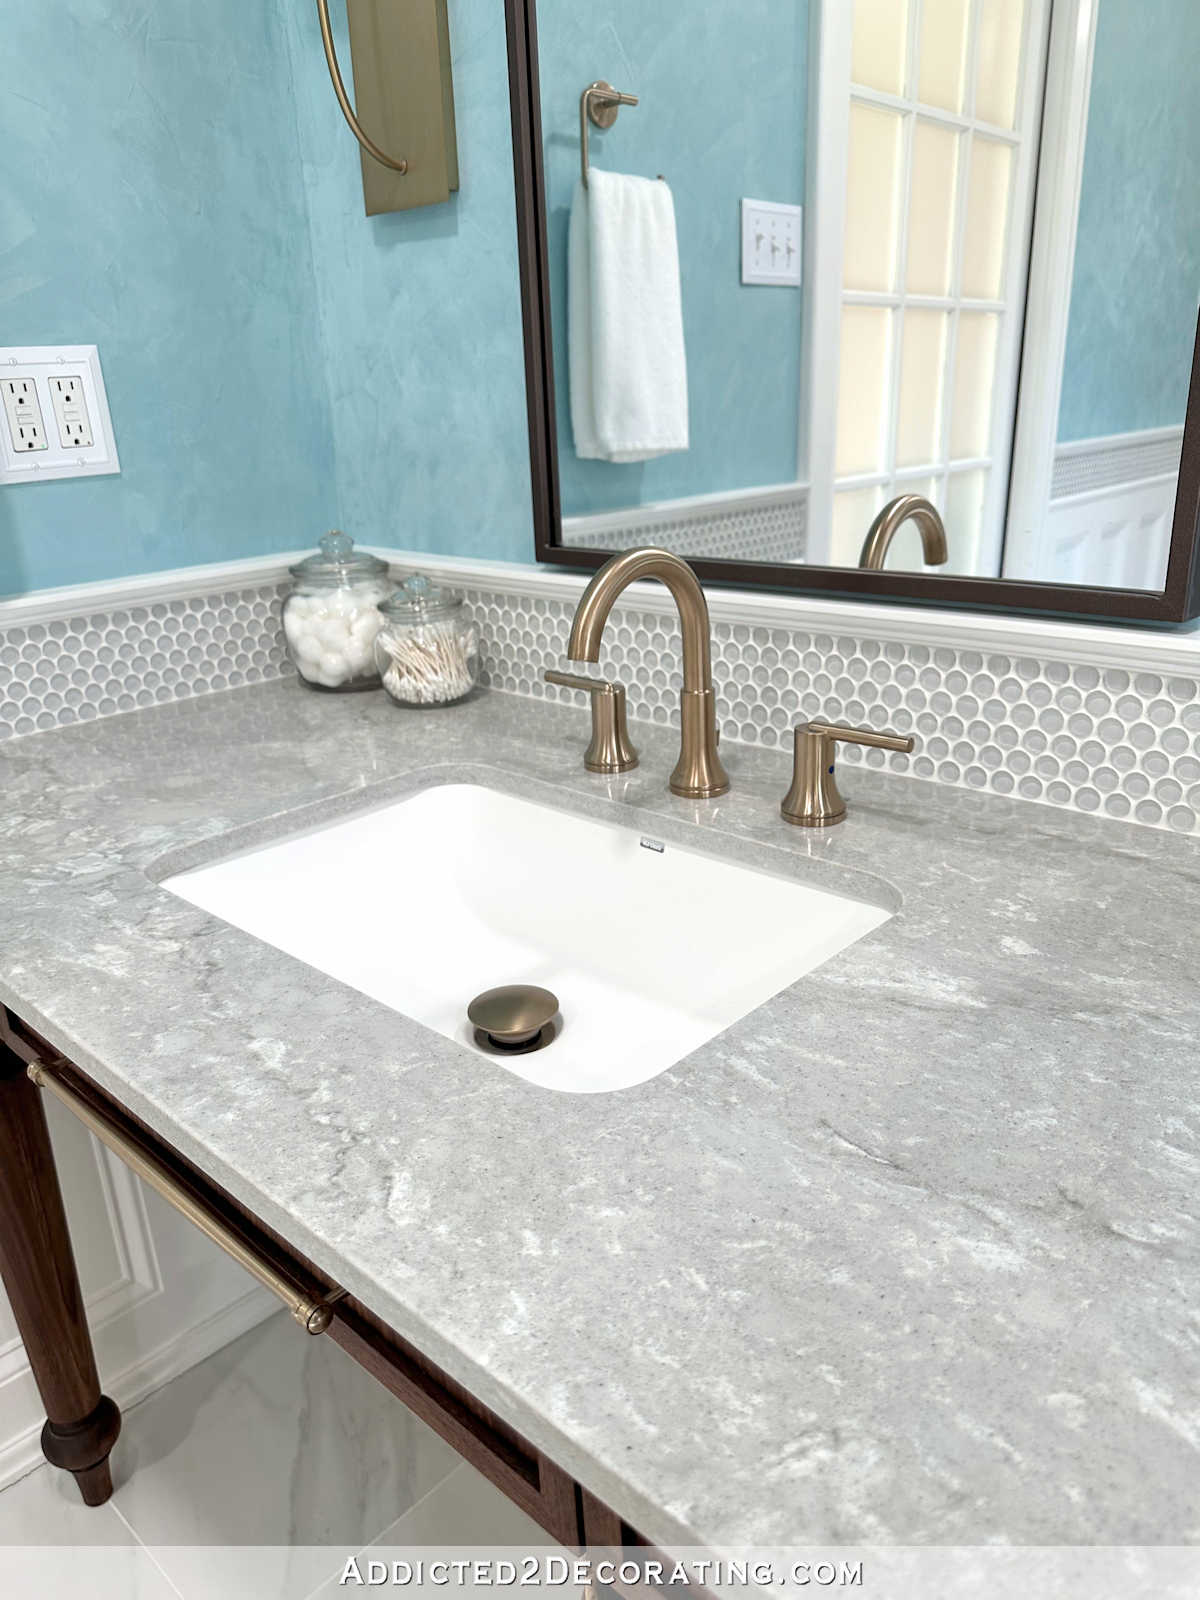
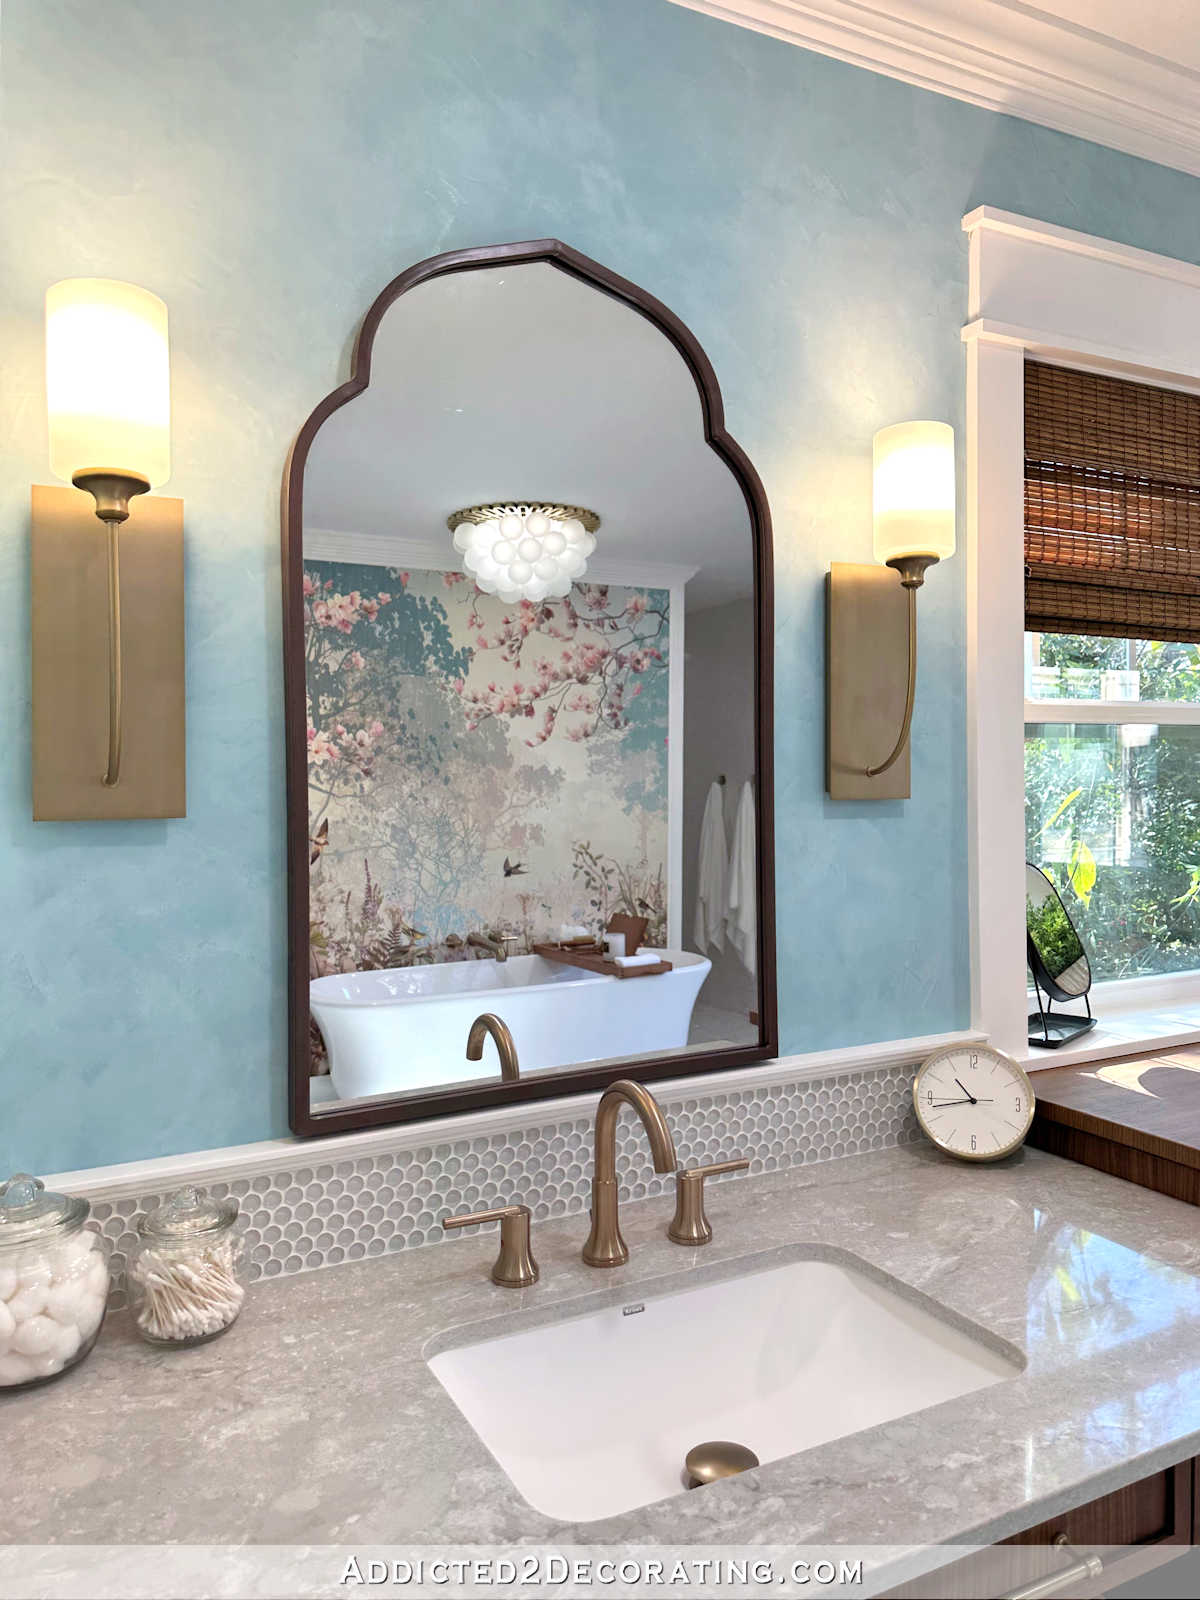
And here’s the final vanity wall…
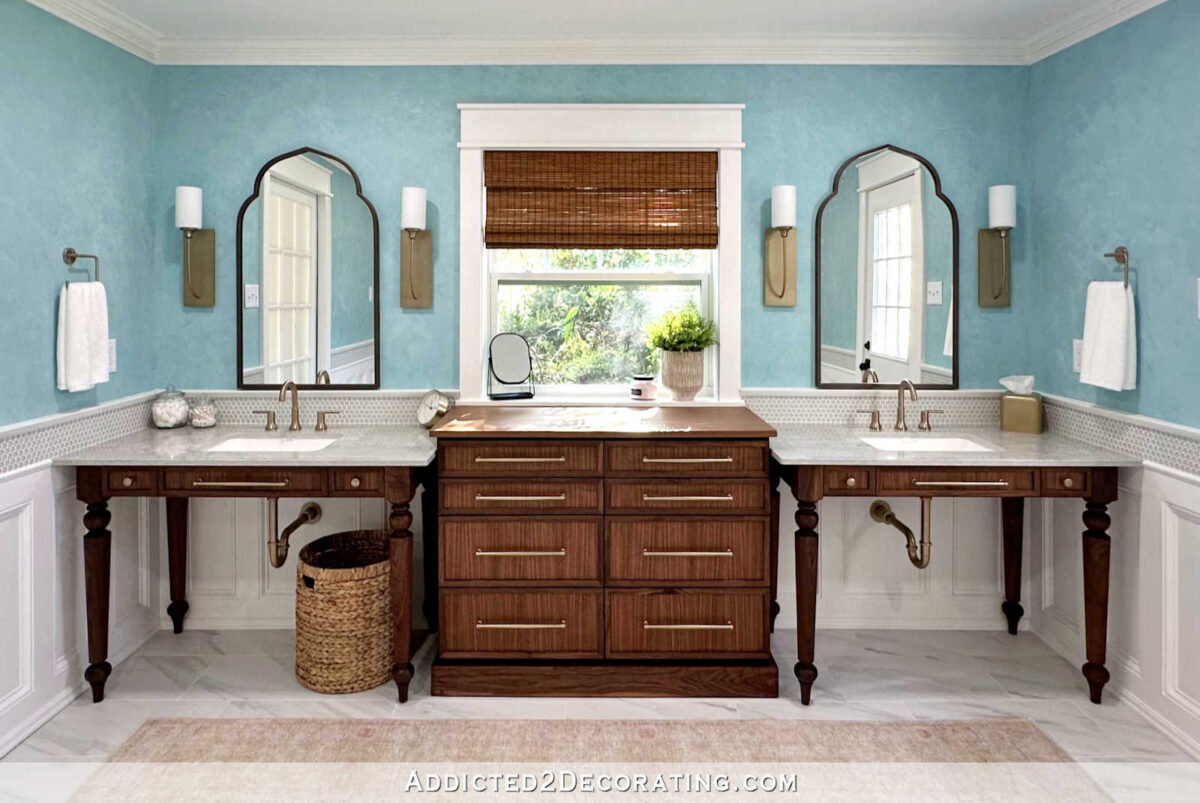
I love it when a plan comes together! 😀
I had a heck of a time coming up with a plan that I was pleased with for this wall. I’m a person who needs symmetry, so the vanities needed to match. But since Matt is in a wheelchair, they also needed to be wheelchair accessible.
After looking and looking at wheelchair accessible bathroom ideas, and not liking anything I was seeing, I finally decided to build some simple (and not so obviously “wheelchair accessible”) table-style vanities. Each one has two little drawers in it for things like toothbrush, toothpaste, and contact lens stuff. But obviously that wasn’t going to be enough storage in a master bathroom.
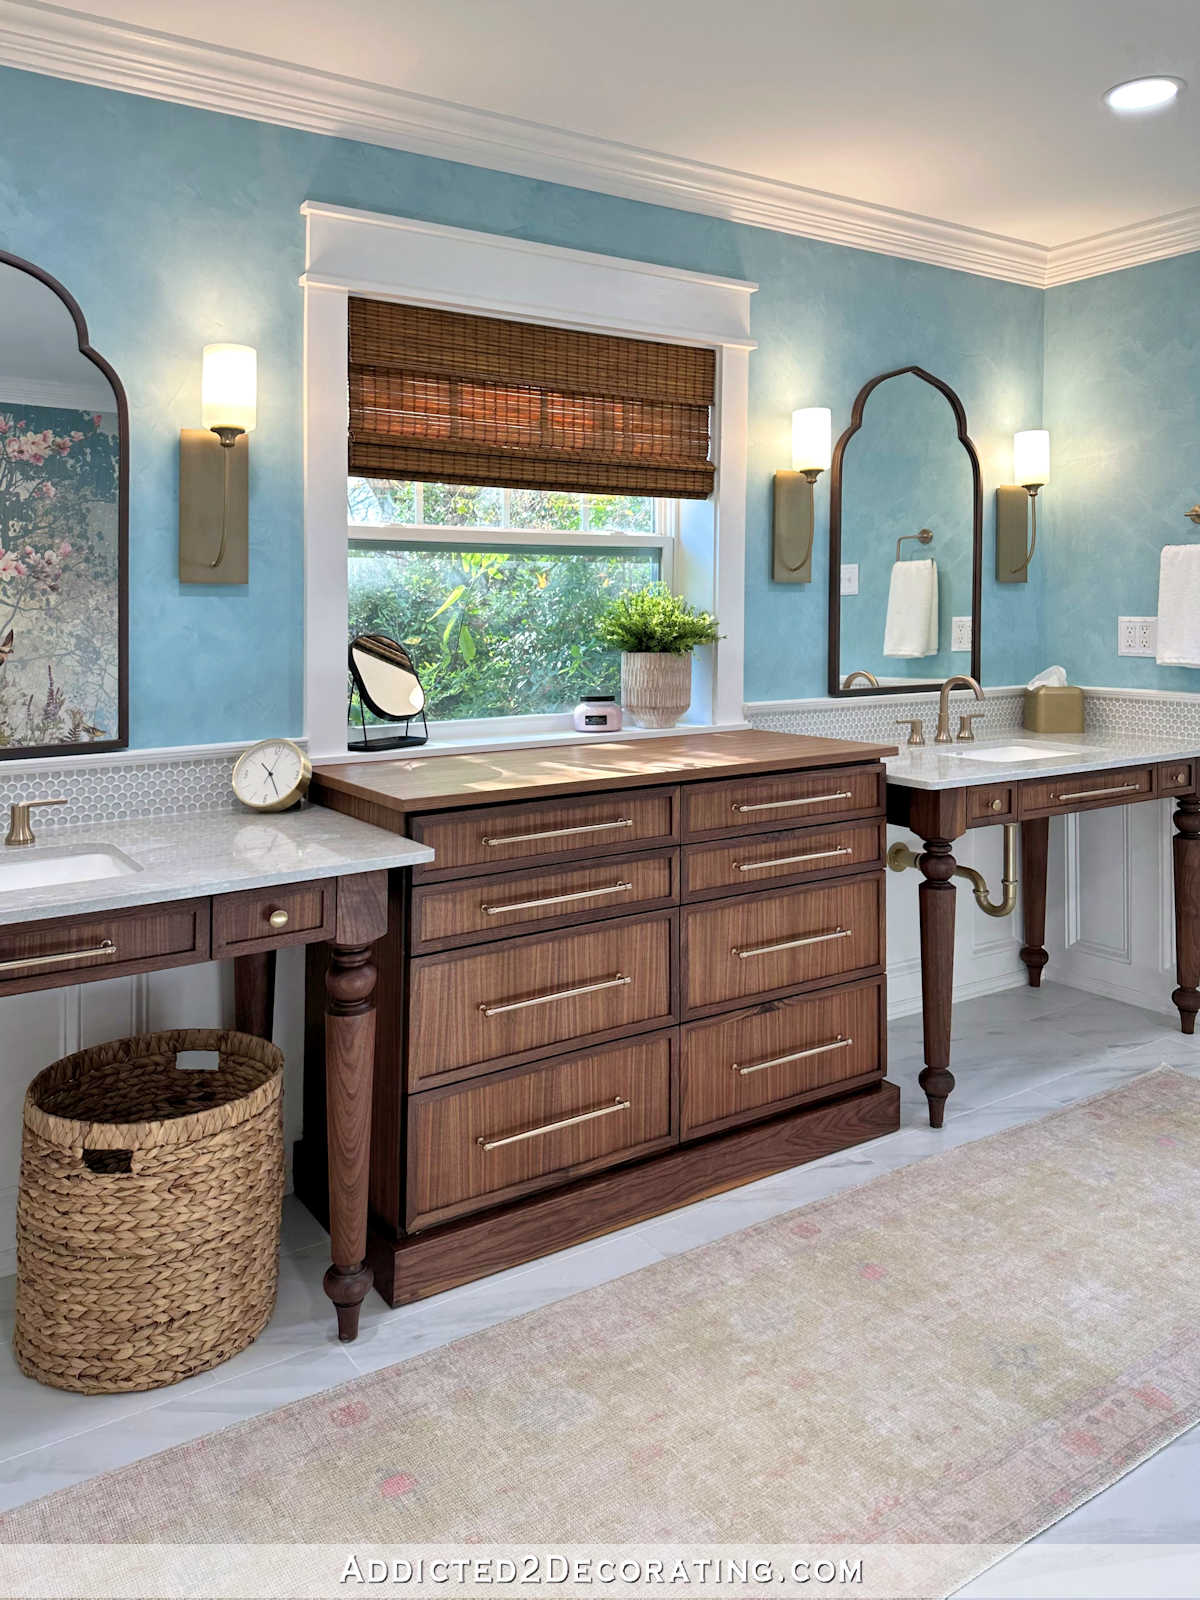
So for the bulk of our storage needs, I built a large dresser-style cabinet to go under the window.
This was my first time building with walnut, and it was a bit scary! Not only is walnut pricey, but I didn’t have my standard backups, like wood filler and caulk, that I generally have when building things that are going to be painted.
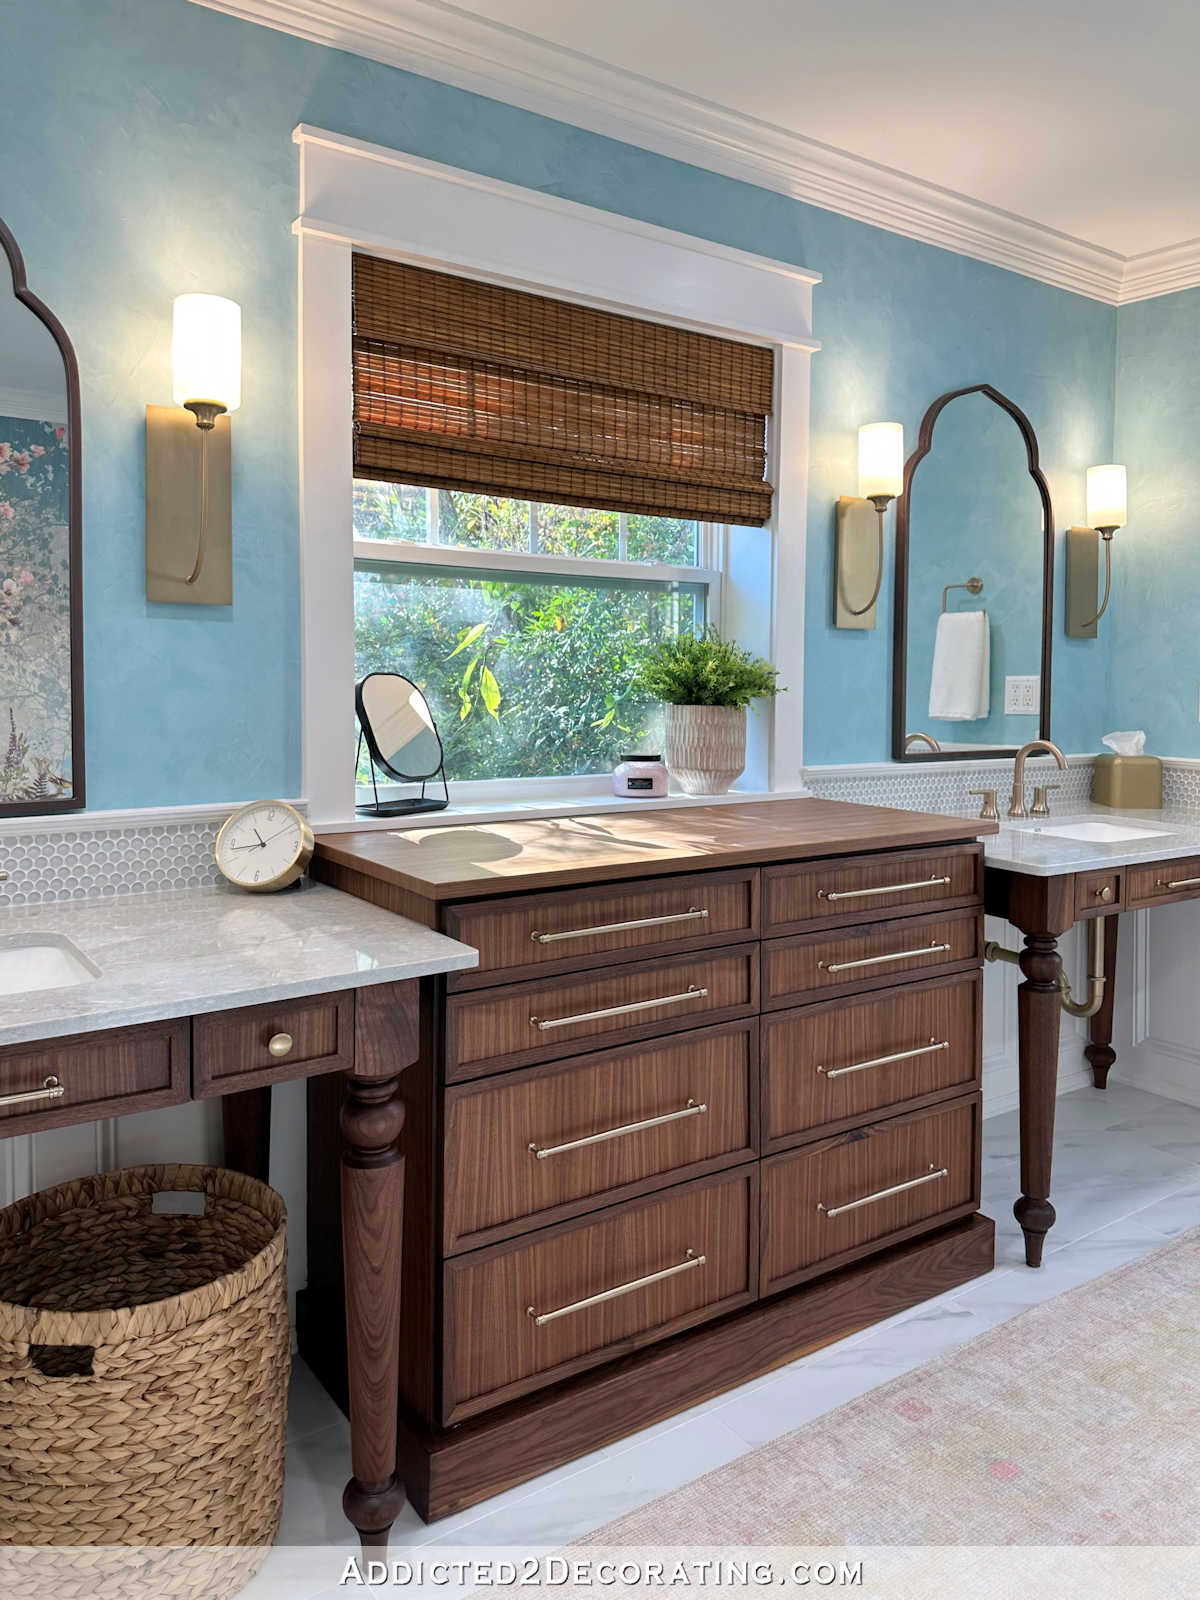
My one regret is that I used a piece of walnut that had a knot in it for the frame of the bottom right drawer. In hindsight, I wish I would have traded out that piece for one that didn’t have a swirly eye-catching knot in it, but hindsight is 20/20. It’s done, and I’ll live with it. But overall, I’m so pleased with how the vanities and storage cabinet turned out.
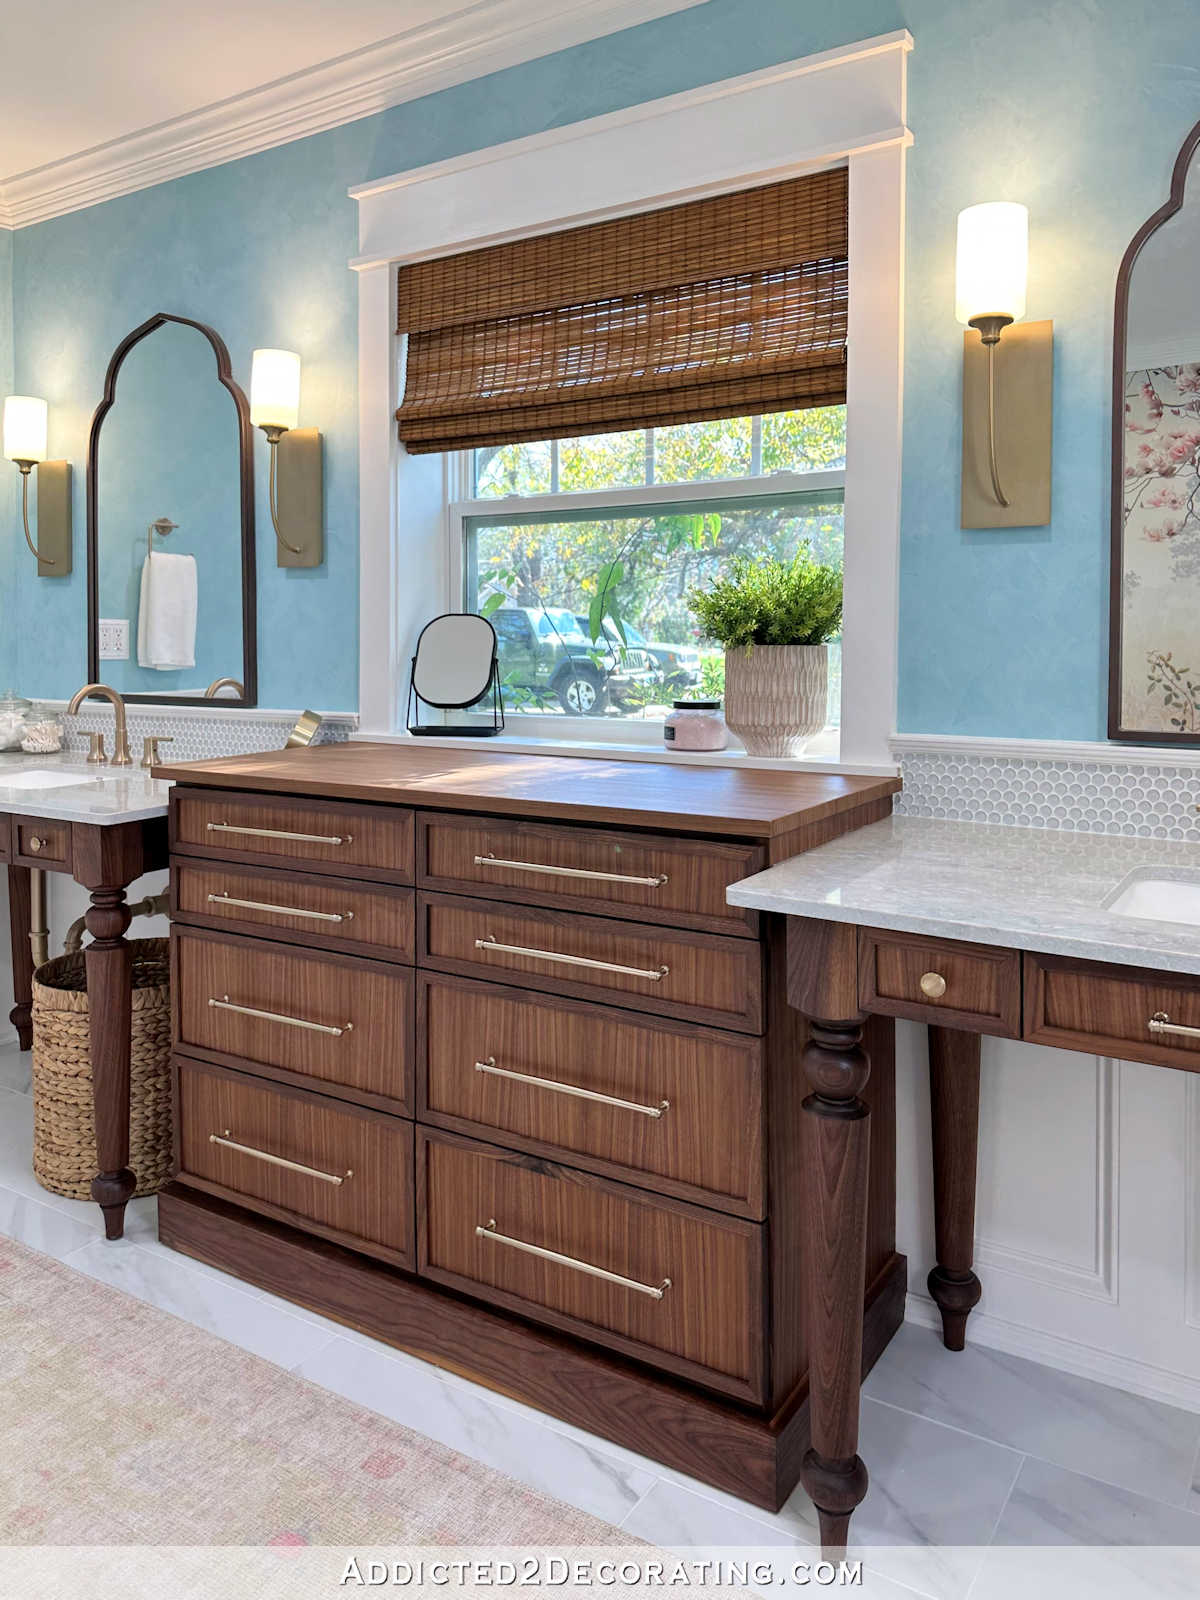
This is another wide angle lens pic, so it’s a bit distorted, but at least you can see the whole wall…
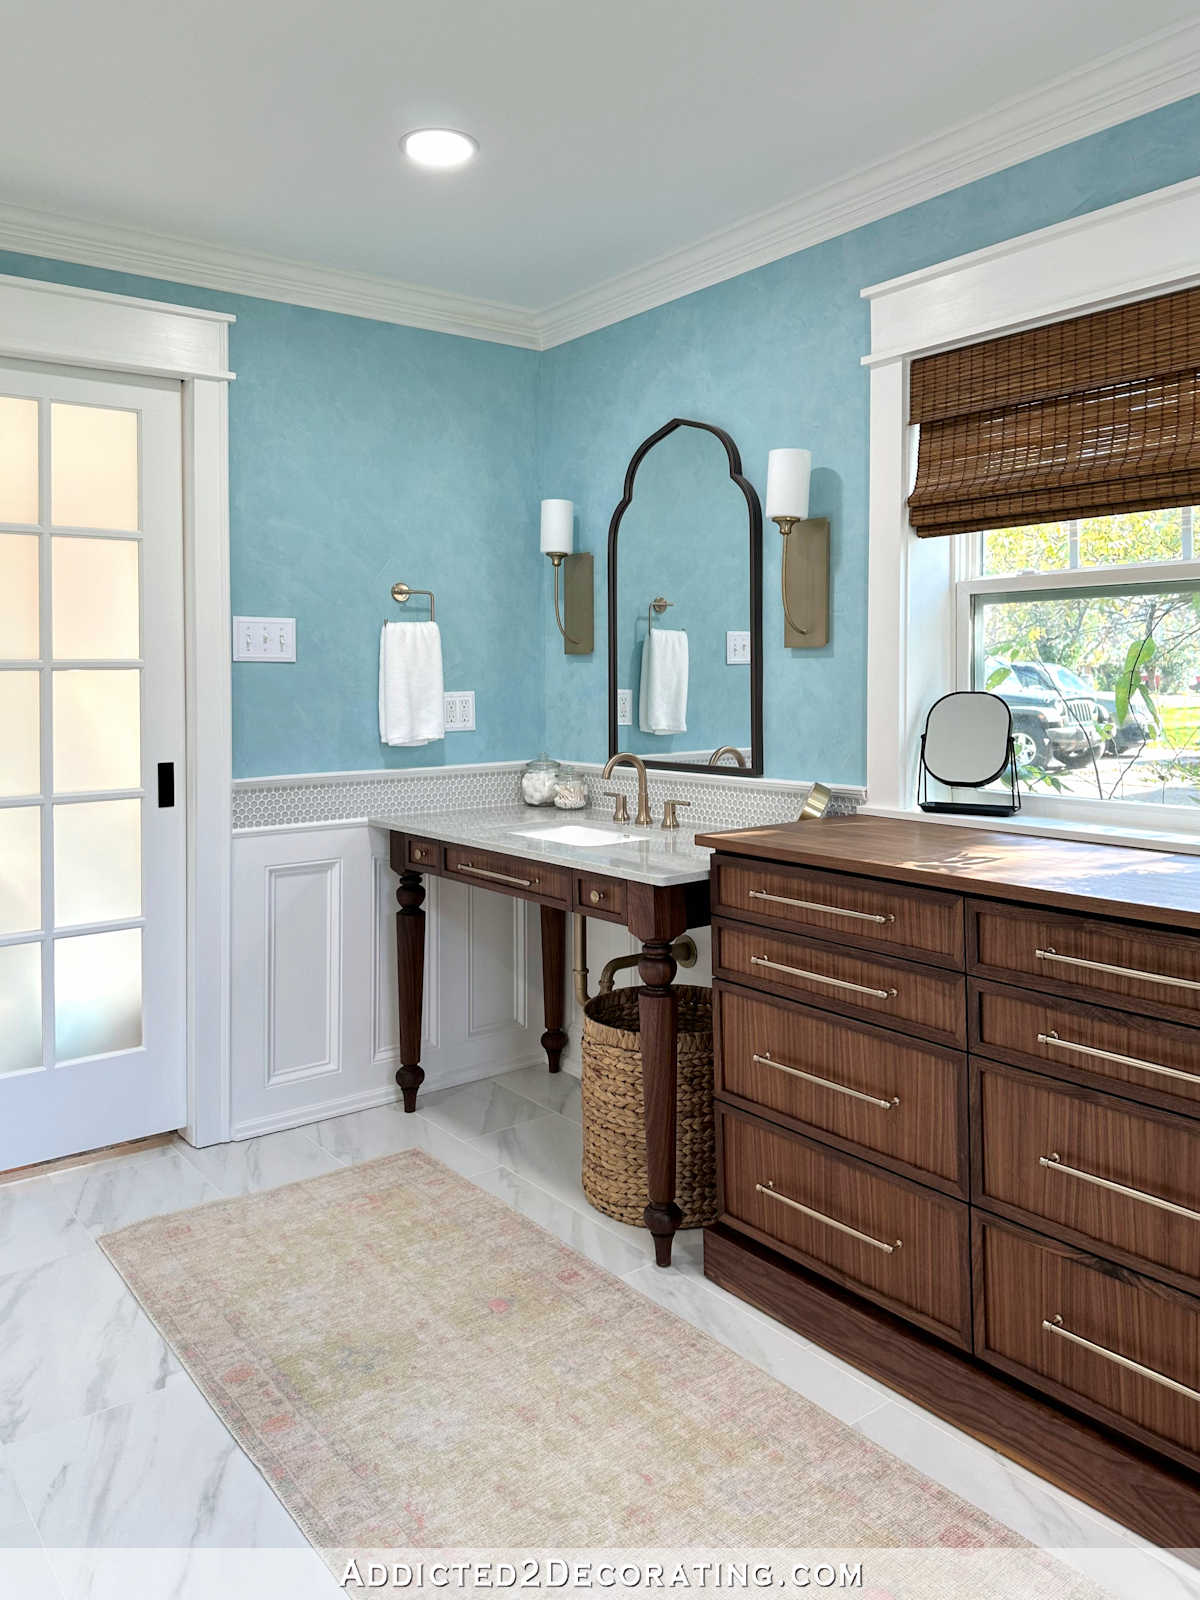
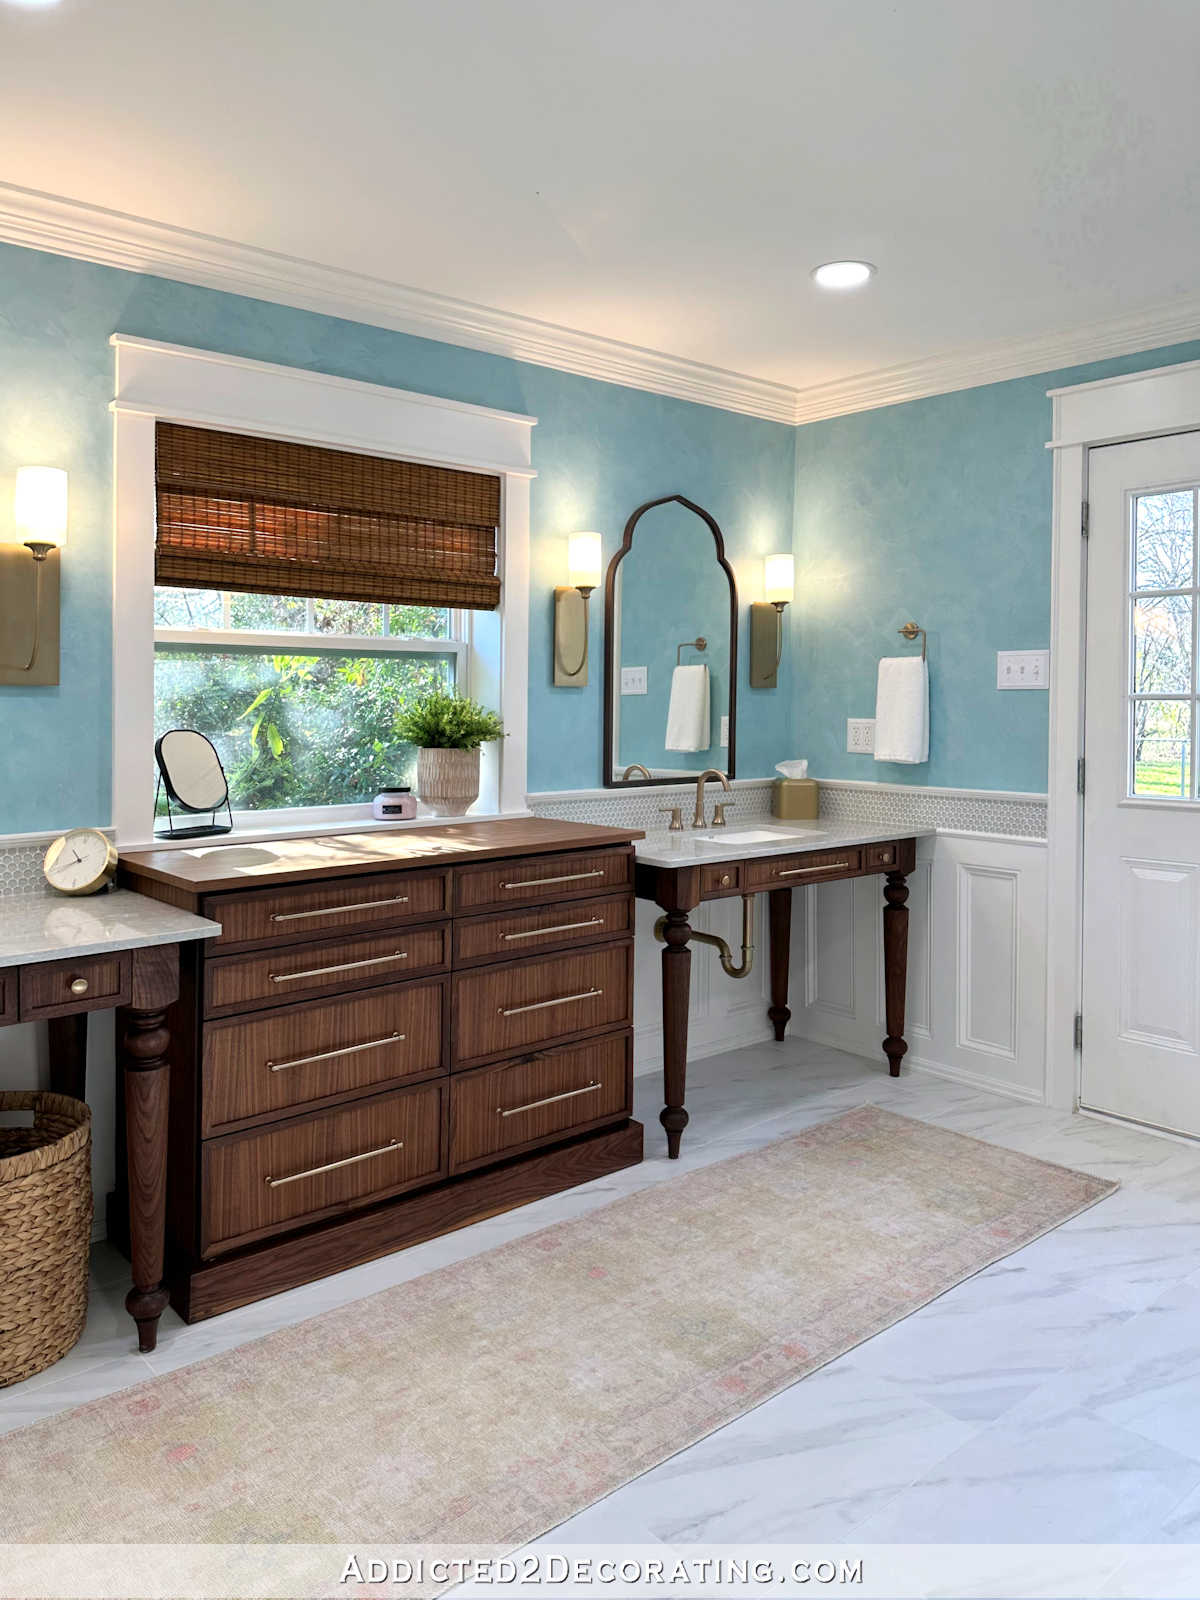
I can’t believe it’s finished. It’s actually finished! This room has consumed my thoughts, my creative energy, and a great deal of my time for 18 months now, and it’s finally done! We can actually start enjoying this room now.
And with that, I’ll leave you with a few more pictures presented without commentary…
Like I said, I’ll follow up with another post to share the cost (along with a cost breakdown of each thing) and sources. So if you’re interested in that info, it’s coming!

Addicted 2 Decorating is where I share my DIY and decorating journey as I remodel and decorate the 1948 fixer upper that my husband, Matt, and I bought in 2013. Matt has M.S. and is unable to do physical work, so I do the majority of the work on the house by myself. You can learn more about me here.
I hope you’ll join me on my DIY and decorating journey! If you want to follow my projects and progress, you can subscribe below and have each new post delivered to your email inbox. That way you’ll never miss a thing!
Source link