[ad_1]
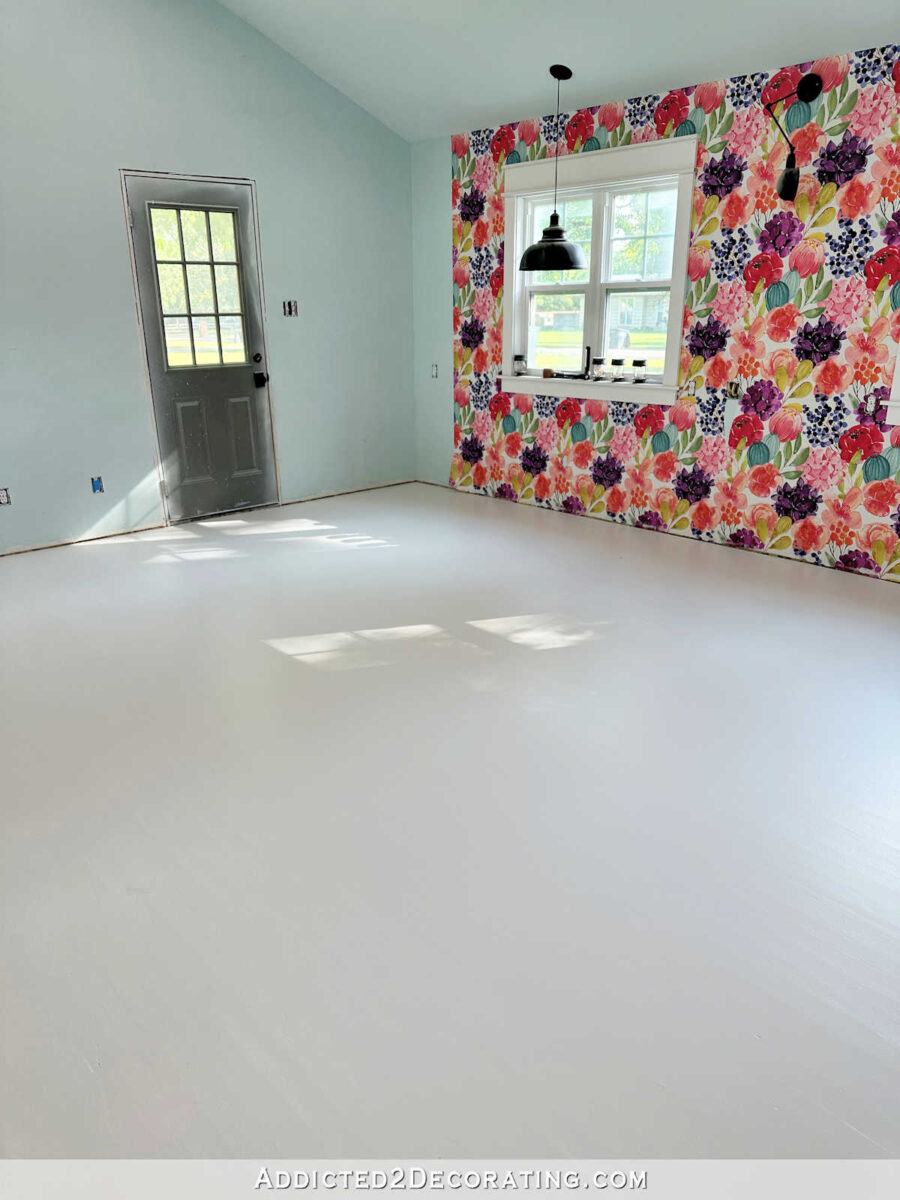
As of last night, I’m about halfway done with painting a checkerboard floor in the studio. Here’s how it looks so far…
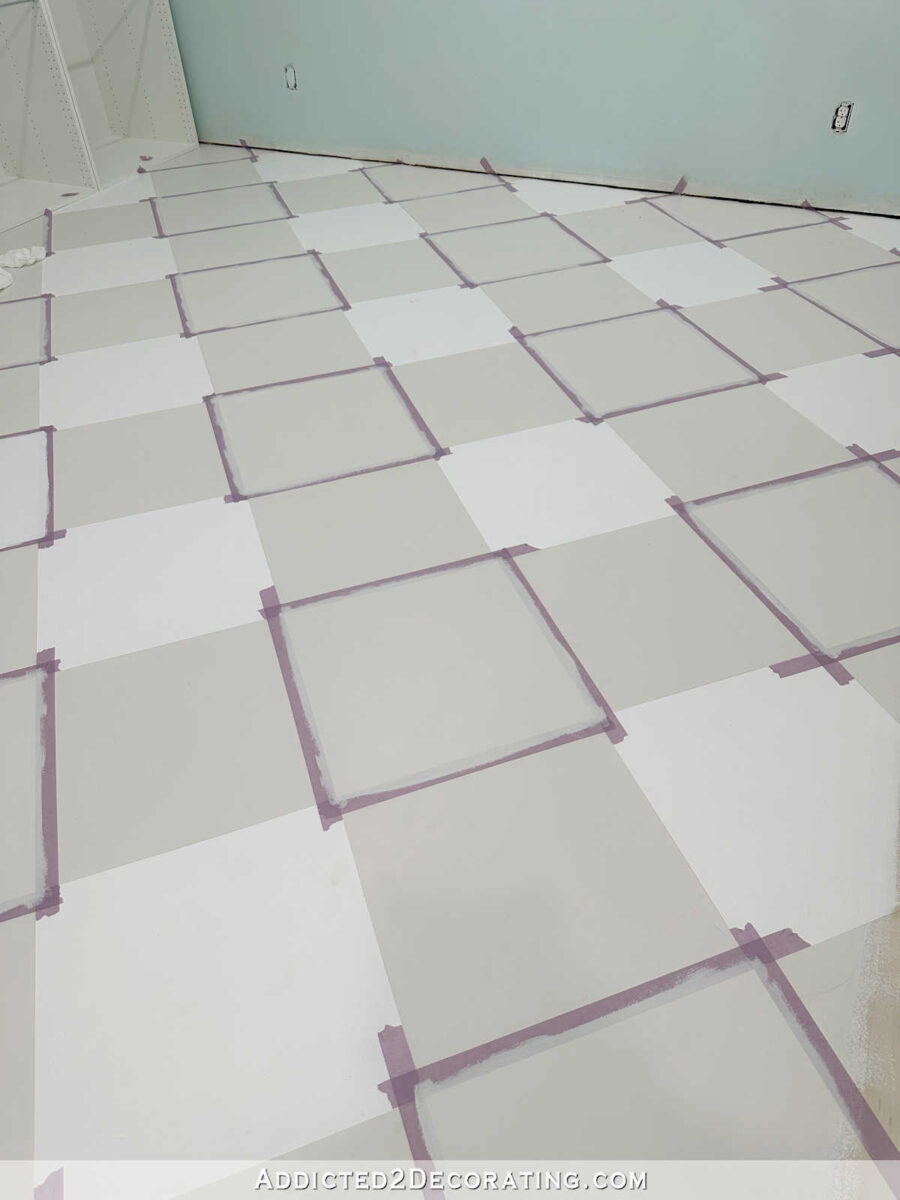
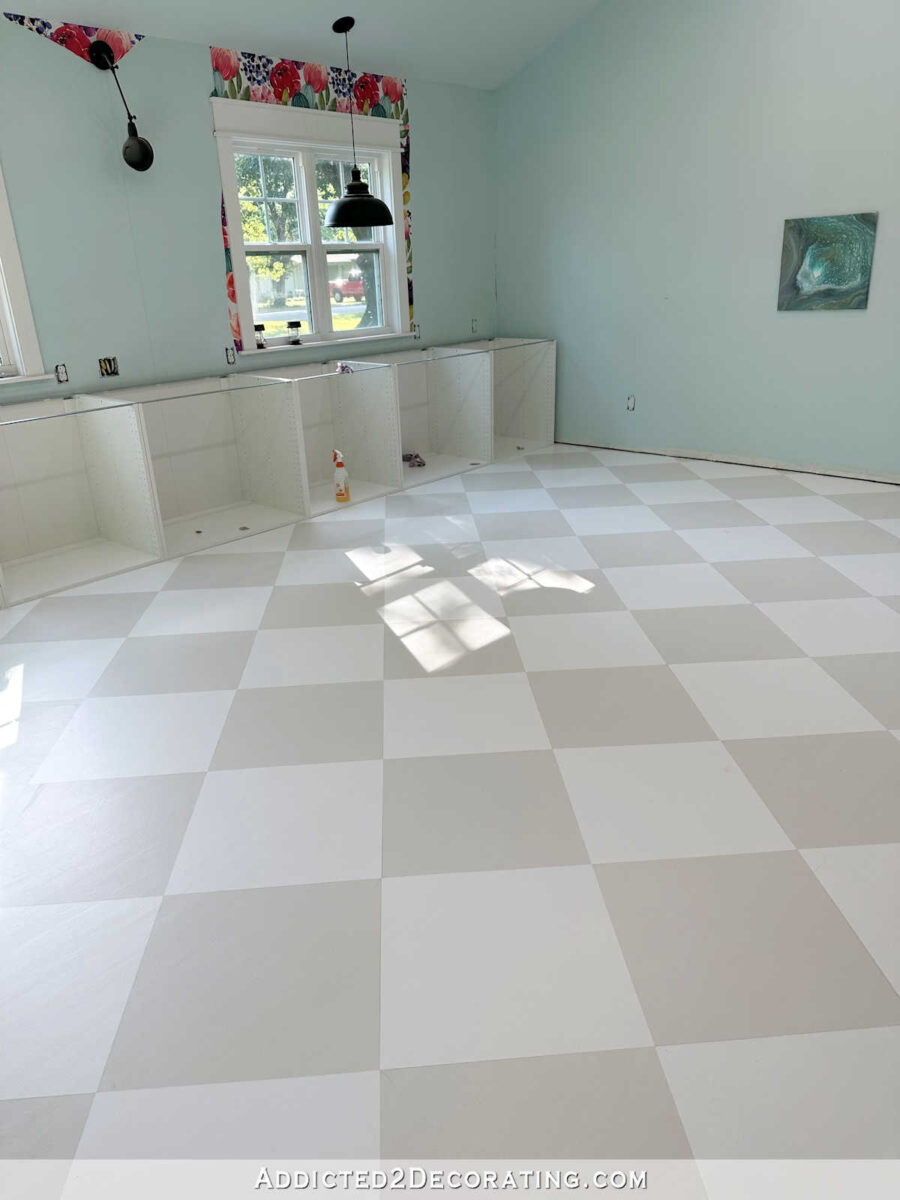
I’m really pleased with how it’s turning out so far. The main room, which is about 19.5′ x 21′, is about 2/3 finished. So now I have to put protective paper down on this finished area, move my big rolling work tables and other items to this side of the room, and then start on floors in the rest of this room, the back entry, the storage closet, and the bathroom.
The floor in this room is red oak hardwood flooring, and since this is a studio where I’ll be using paint, resin, alcohol inks, etc., I wanted a floor that could very easily be spot sanded and retouched when I drip things on the floor. Paint seemed like the obvious answer. So let me show you how I did it.
I started by sanding the floor to give the previous finish some “tooth”. Hopefully this will give the paint and primer more durability than it would have had I painted right over the slick water-based polyurethane floor without sanding first.
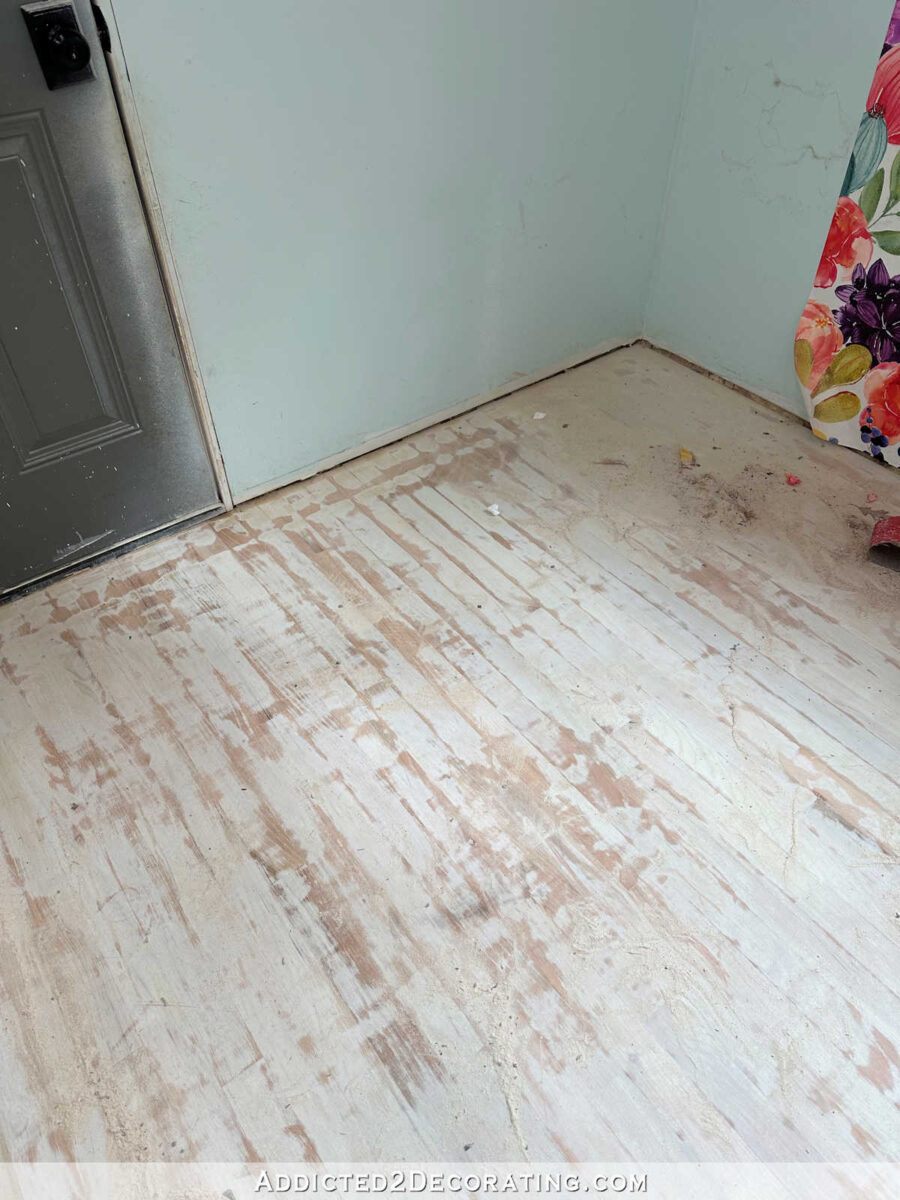
Some floors probably wouldn’t have to be sanded quite that much, but I was also trying to get rid of some water damage and other imperfections in the floor, so I did a little more sanding than was probably necessary (because I’m a perfectionist).
Then I gave the floor two coats of Zinsser B-I-N Shellac-Based Primer. This was only my second time using this product, but after getting used to the thin consistency, I was very pleased with how it performed the first time I used it (on my front porch ceiling), so I decided to stick with it on this project as well.
And then I gave the floor two coats of paint, which I rolled on using a 3/8-inch nap roller (these are the ones I use). And because the floor is a very large area, I used a standard roller than you would use to paint a wall. The paint I chose to use is Behr Porch and Patio Floor Paint in the low-luster finish. I started with the darker color, which is Benjamin Moore Classic Gray, which I had them color match in the Behr paint.
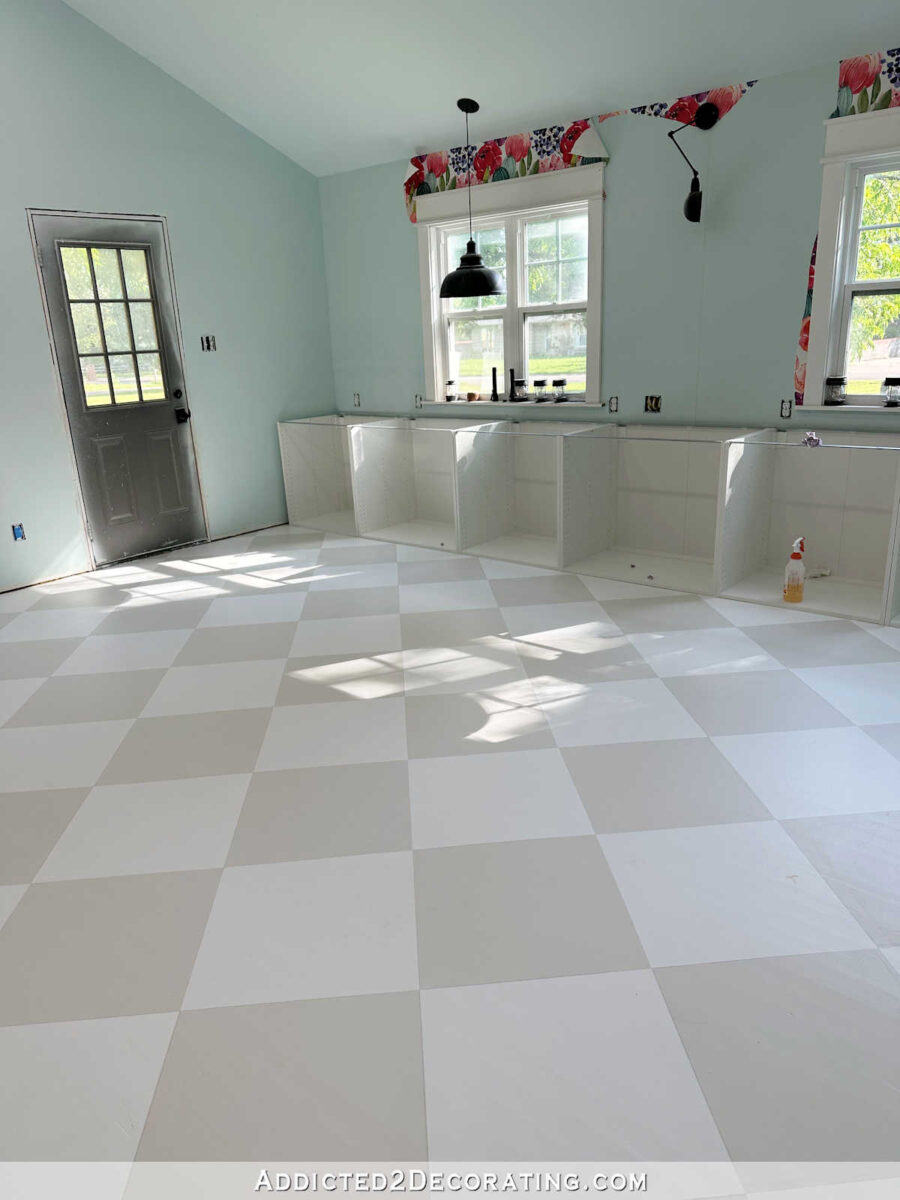
I let that dry for about 36 hours while I put my cabinets together and put them into place along the front wall of the studio. I wanted to put the cabinet in place first because the cabinets aren’t perfectly centered on the wall since the windows aren’t perfectly symmetrical on the wall. And I’d rather have the checkerboard floor design centered on the cabinets rather than being perfectly centered in the room and slightly off with the cabinets.
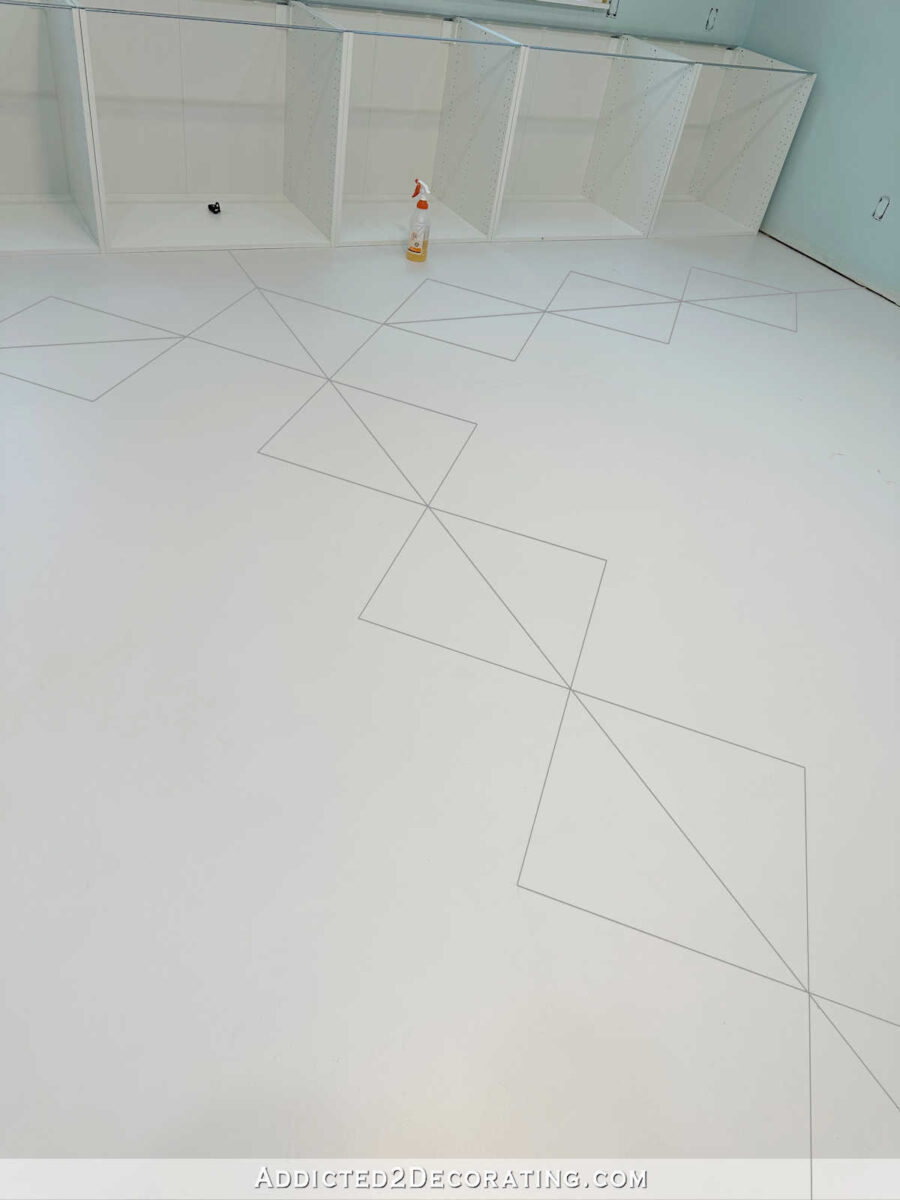
So once the cabinets were in place, I measured and marked the center of the middle cabinet using my tape measure and a pencil, and then continued marking the rest of the floor using that same measurement, using a straight edge (a framing square) until I had a line drawn perpendicular to the center point on the middle cabinet.
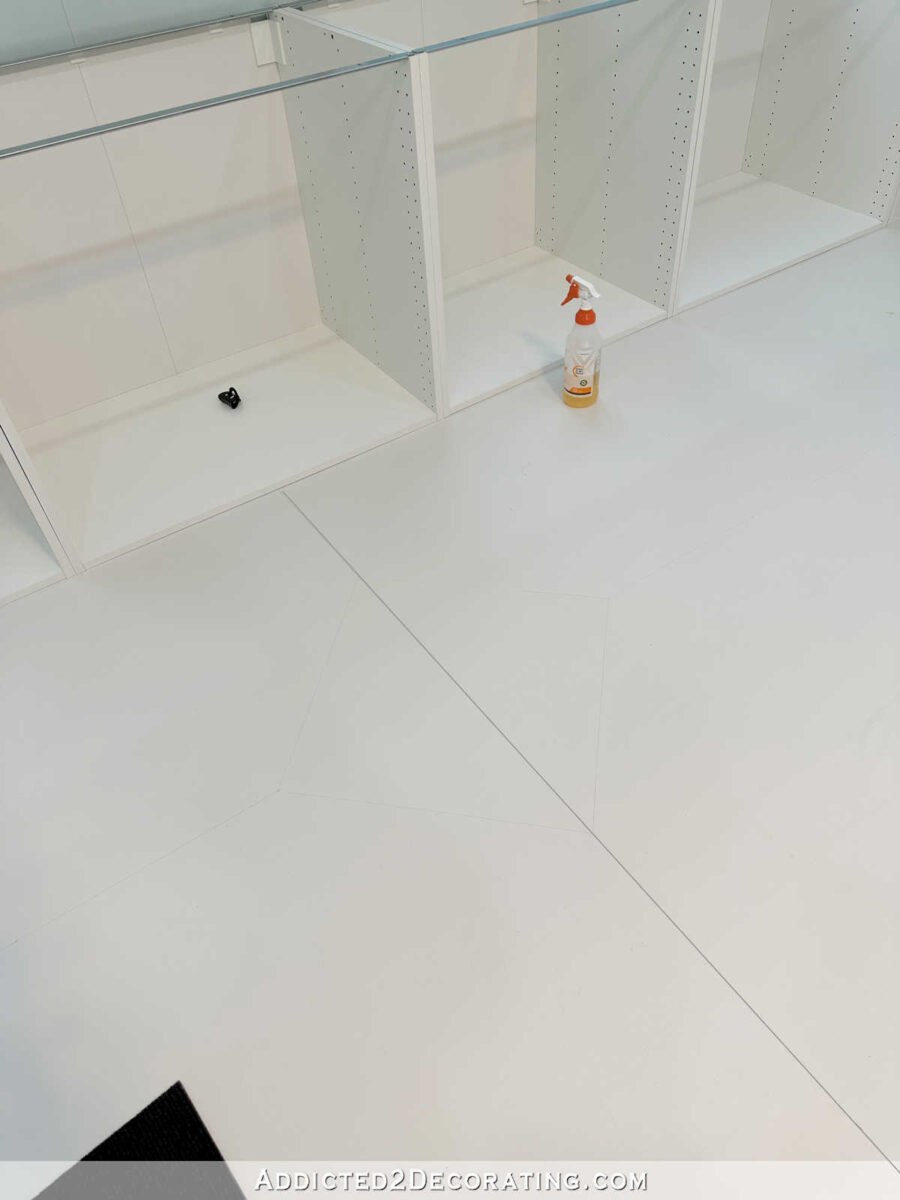
Next, I used my square pattern (I used a leftover FLOR carpet tile as my pattern, but you can cut a pattern out of cardboard, poster board, etc.), and lined up two points perfectly along that line close to the cabinets, and traced the square.
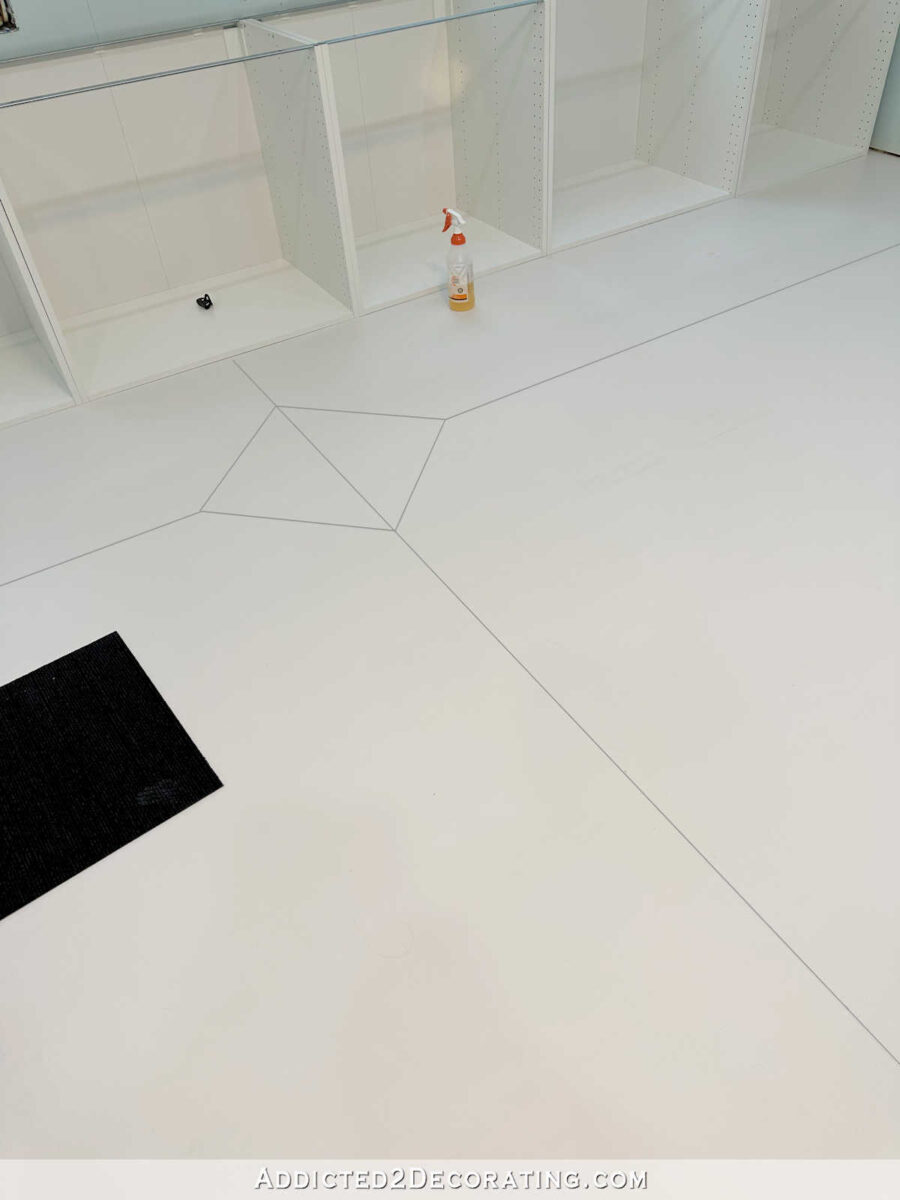
Then using the other two points on the square, I used those as my guide to measure and mark a line equidistant from the cabinets that ran parallel with the cabinets. Again, it was more important to me that the checkerboard design looked right with the cabinets rather than it being perfectly centered in the room. Rooms are almost never perfectly square, so if the design was slightly off in another area, it would be way less noticeable than it would be if the design was off with the cabinets on the main focal wall of the room.
Once I had that line drawn parallel with the front of the cabinets, I then used my square pattern (the carpet tile) to continue the pattern on that parallel line.
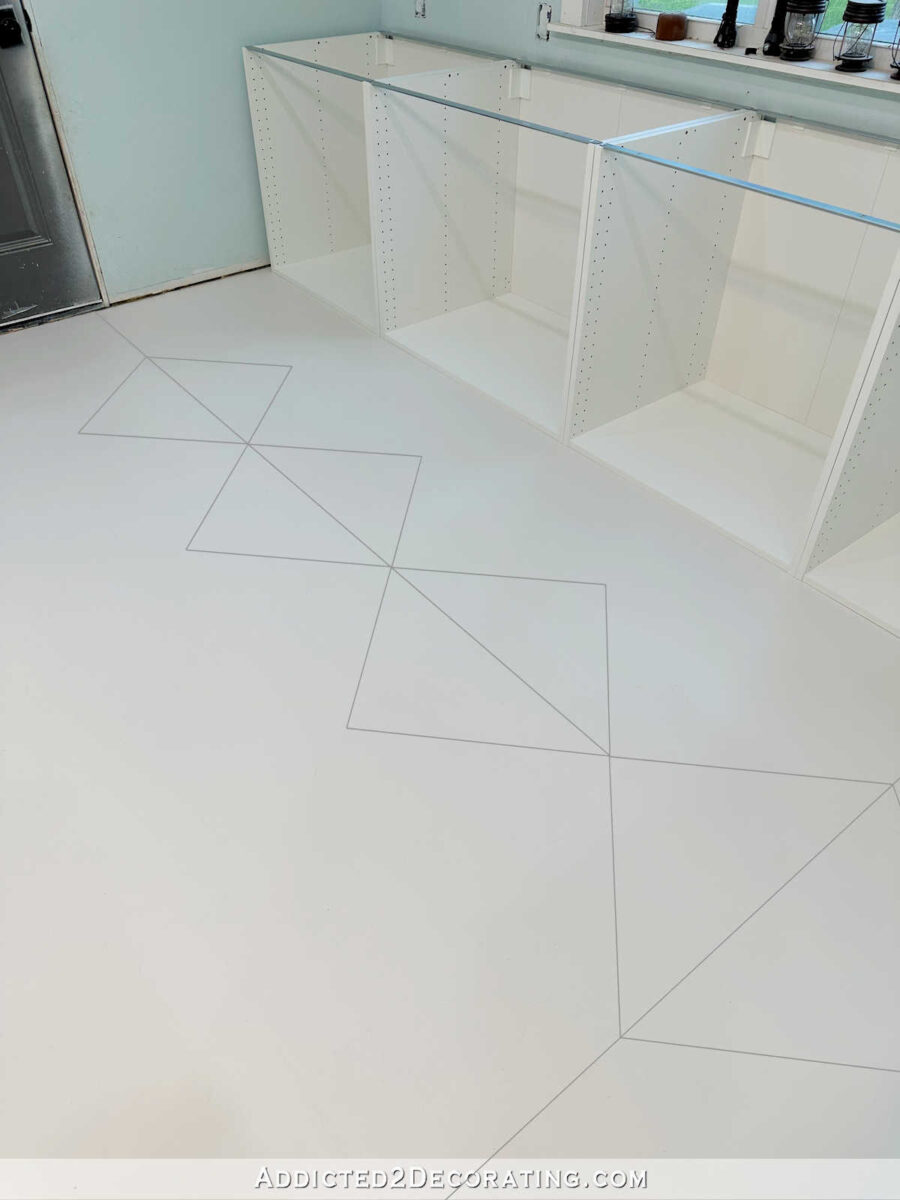
Once I had the squares traced on the center perpendicular line and the all across the parallel line, I went back and easily fill in the rest of the squares using my pattern.
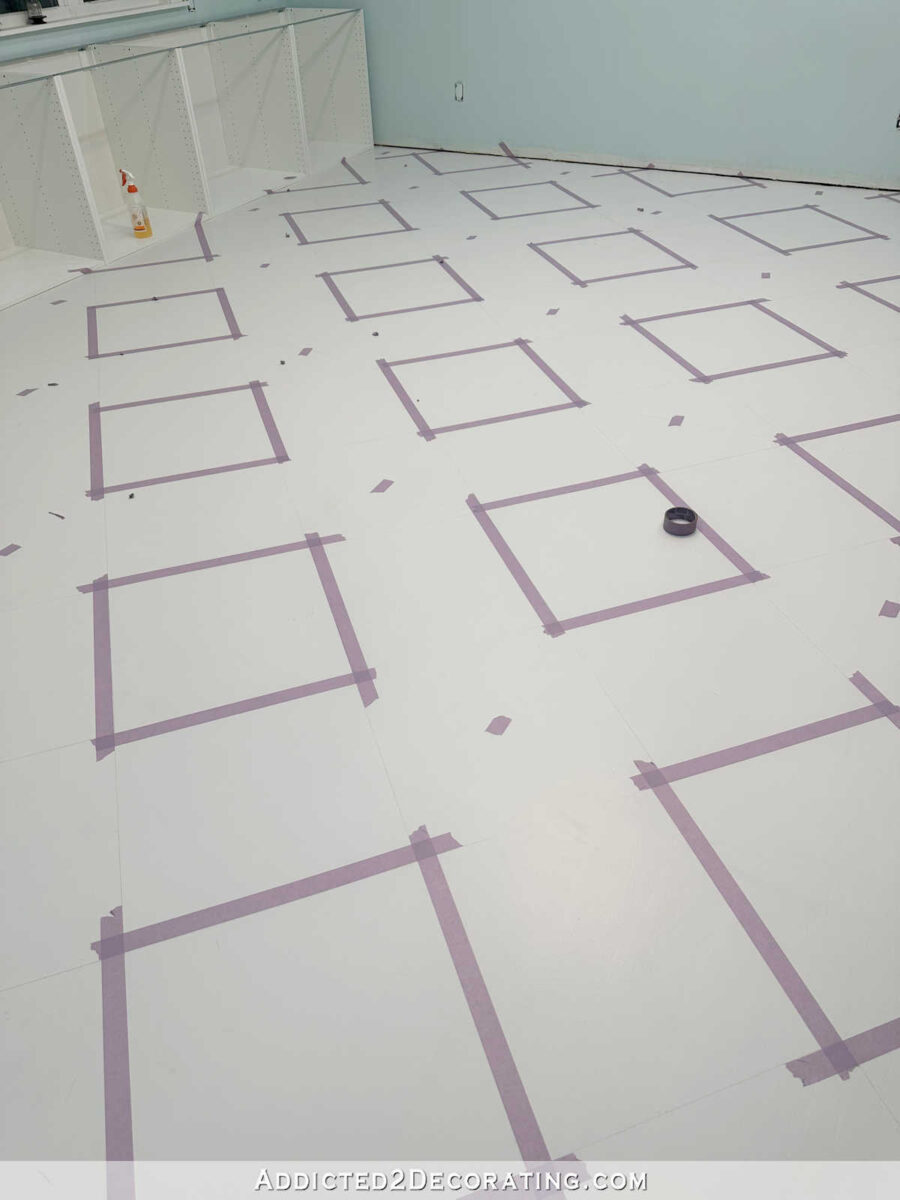
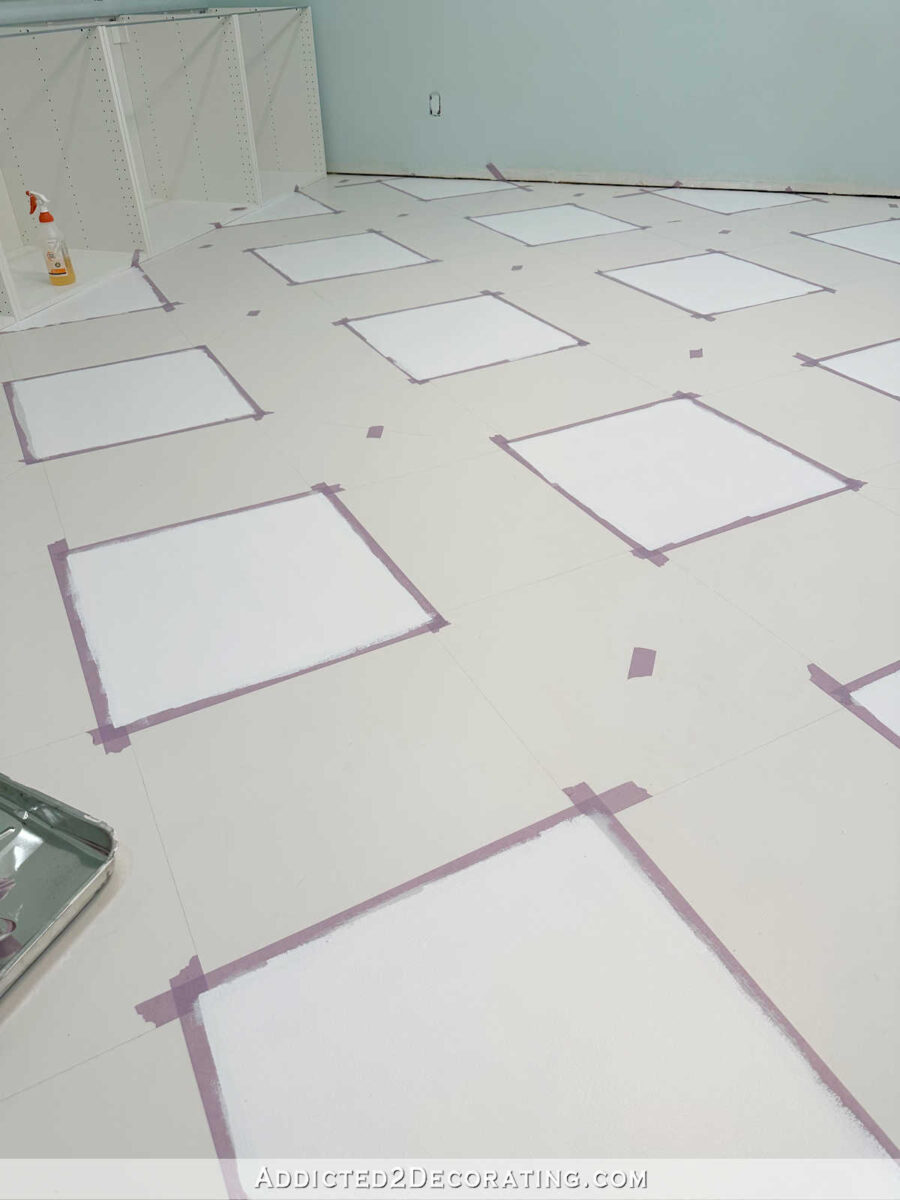
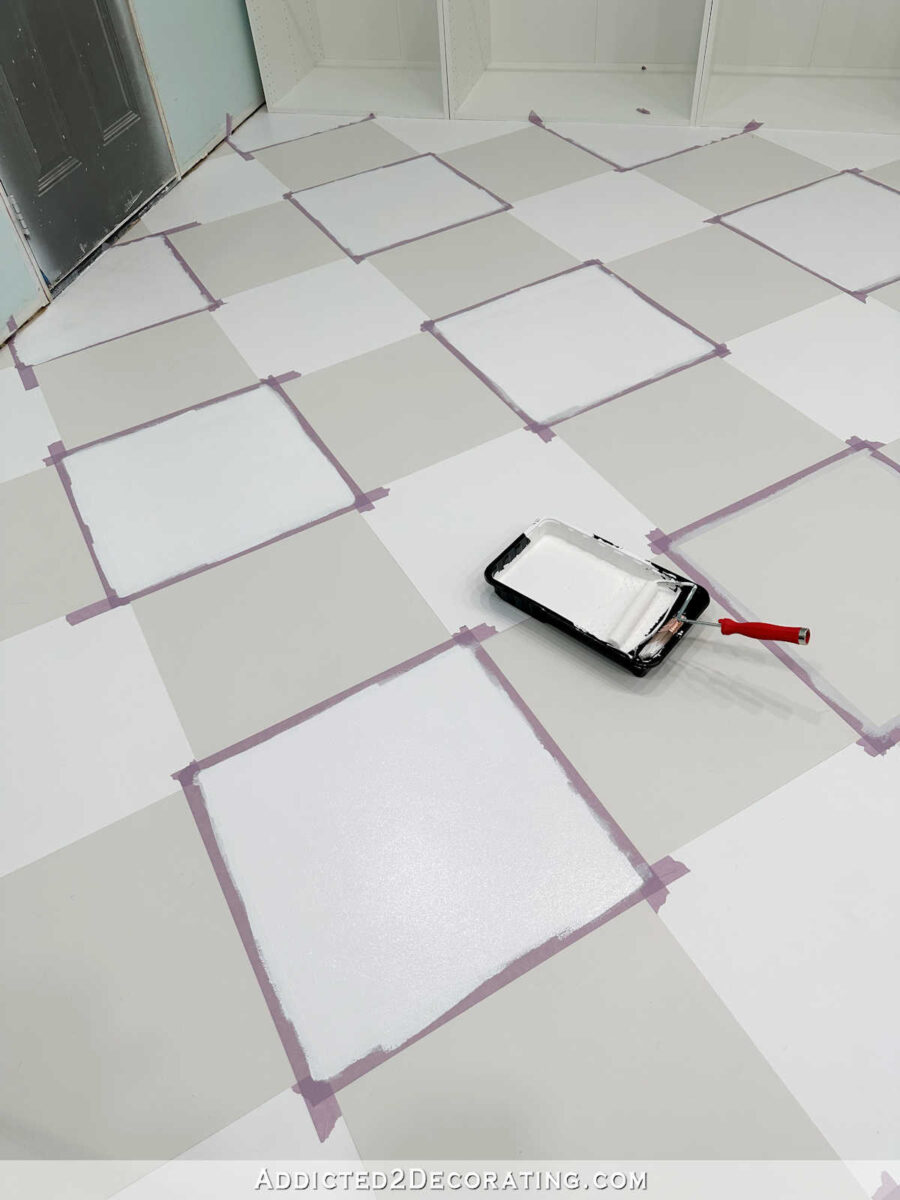
When I had all of the squares traced, I used painters tape to mark off all of the squares that would be painted my contrast color (Behr Polar Bear), and then I began taping off the squares to be painted. It’s not efficient to try to tape off every single square to paint them all at once. It’s much easier to tape off every other one and paint those, and then when those are dry, to go back and tape off the rest and paint those.

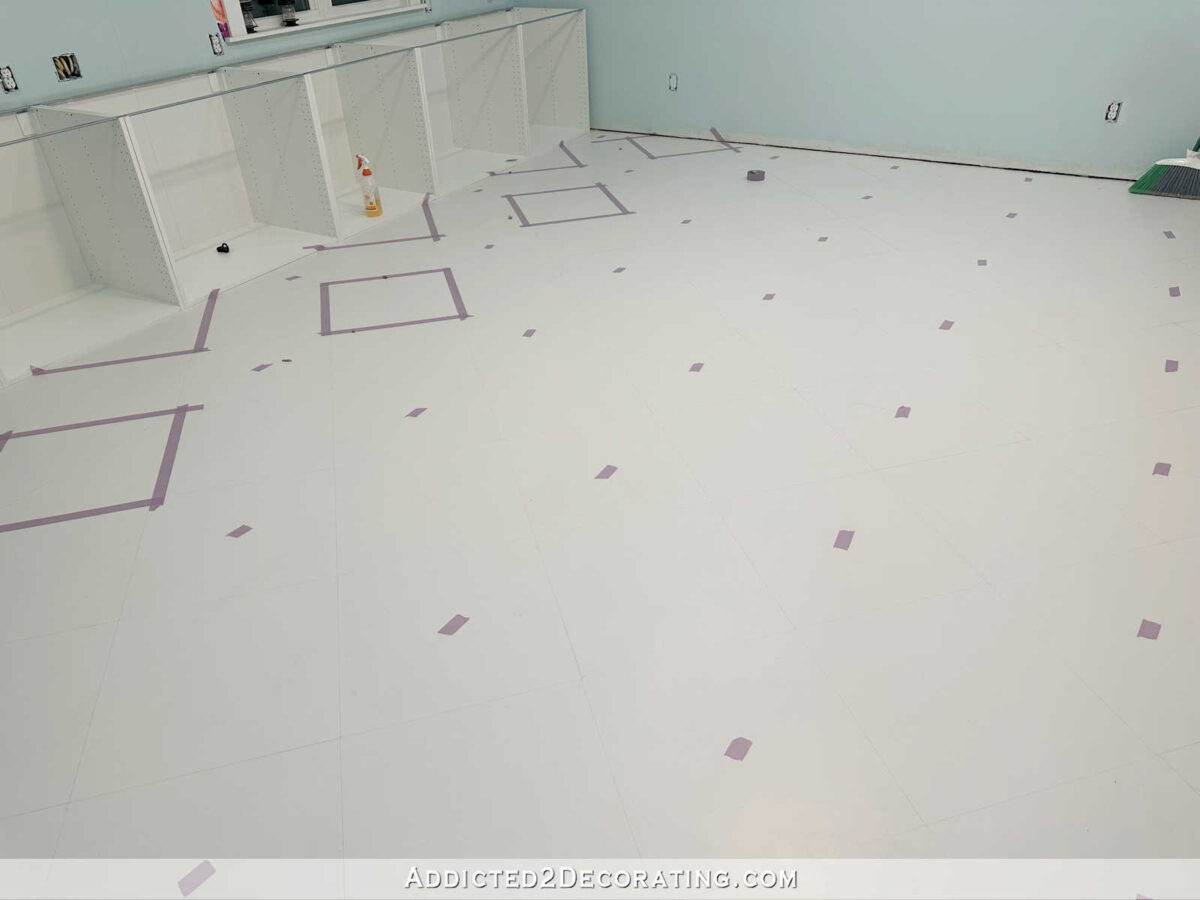
So once I had the first batch of contrast squares taped off and ready for paint, this is what the floor looked like. Note that I used painters tape specifically for delicate surfaces since the original coat of paint (the Classic Gray) was still pretty fresh.
Before I could paint, I first needed to get rid of any pencil marks. Pencil marks will bleed through paint, so it will save you a huge headache to get rid of them instead of trying to paint over them. And don’t ever try to erase them with a pencil eraser or even an art eraser. Those will just smudge the graphite on paint, and leave you will a mess. I always get rid of my pencil marks using a Magic Eraser. They work so fast and make easy work of removing pencil marks. And I didn’t just remove the pencil marks going through the middle of some of the squares, like the one you see here…
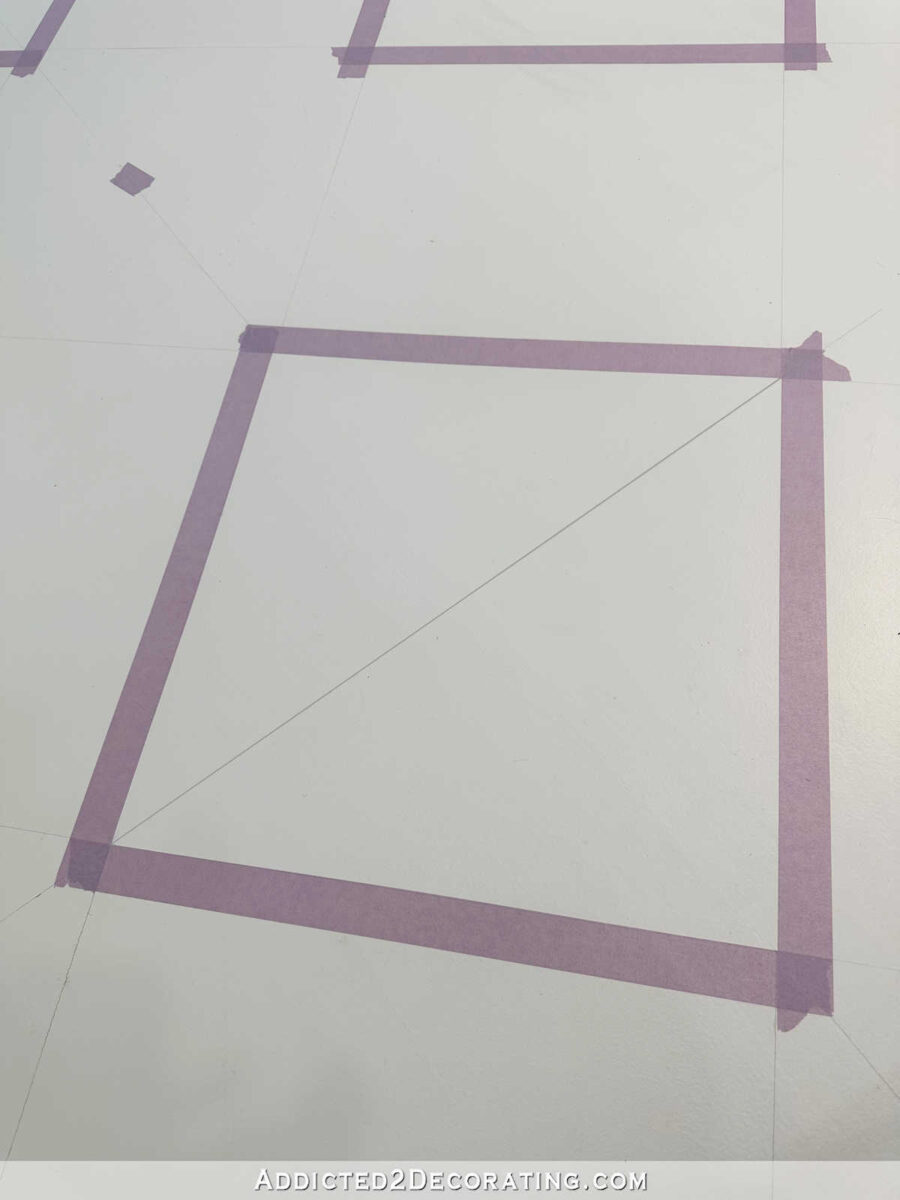
But I also removed the marks along the taped edges. That way I can get rid of pencil marks and burnish the tape so that it’s stuck really well to the floor all in one quick step. You can see how well the Magic Eraser removed the marks from the same square pictured above…
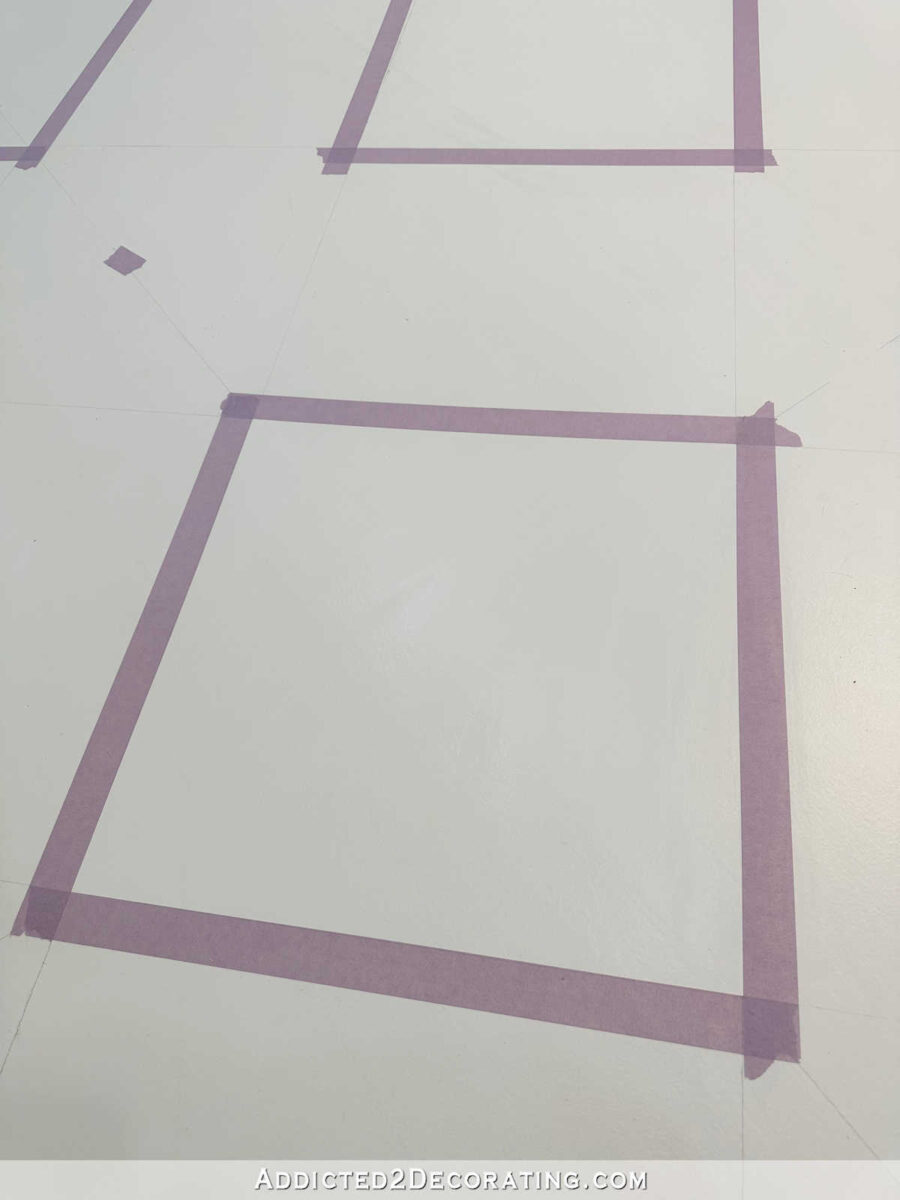
And then I did one more step before painting the squares. To ensure that the edges of the contrast squares would be very crisp with no bleed through, I used the original paint color (Classic Gray) and painted over the edges of the paint to seal them so that the Polar Bear couldn’t bleed under the tape.
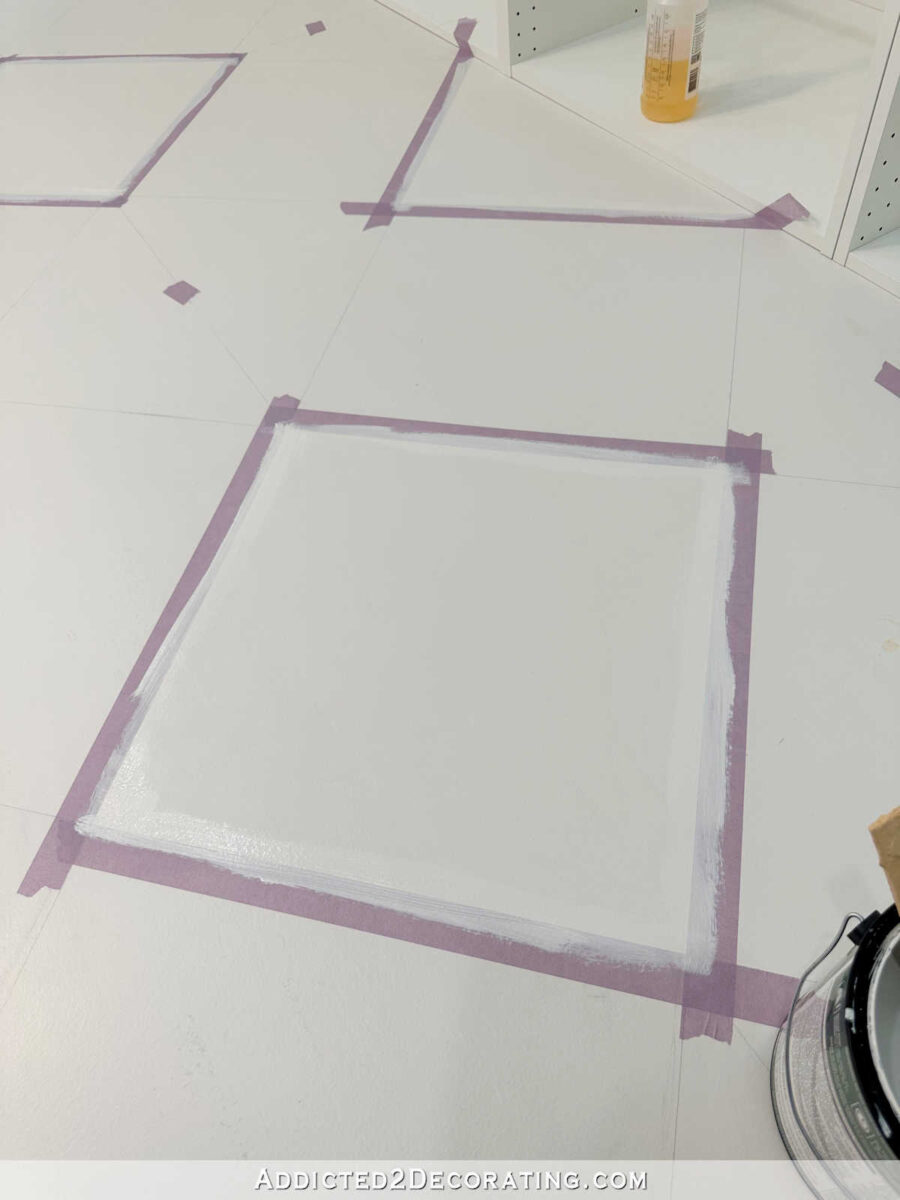
It didn’t take long at all for that to dry. In fact, by the time I finished the last square, the first squares were dry enough to paint. I painted the contrast squares using a 1/4-inch nap (labeled “for smooth surfaces) 6-inch roller.

This process went very quickly. I gave the squares a first coat of paint, and then let them dry for about 40 minutes.
Then I rolled on a second coat. Immediately after painting the second coat, and while the paint was still very wet, I removed the tape. You can see how perfectly crisp the edges are…

I let that first set of squares dry for about 24 hours, and then I taped off the rest of the contrast squares and repeated that same process — removing the pencil marks, sealing the edges of the tape with the first color…
Followed by two coats of the contrast color, and removing the tape while the second coat was still very wet.
And there it is! My new painted checkerboard floor in my studio. I know it’s a brand new painted floor, and it hasn’t even fully cured (I think full cure takes about 30 days), but I’ve already been very impressed with the durability of this paint.
Cooper has even been in here (my hyper 100-pound dog who won’t let me touch his feet, so I can’t clip his claws), and the floor held up perfectly to his craziness.
I don’t plan to do a clear coat on the floor because that would just complicate the touch-up process, and would defeat the entire purpose and my reasoning for having a painted floor in the first place. So that means that once I get the rest of the pencil marks off of side of the room (the pencil marks that were hiding under painters tape), I’ll be ready to put protective paper over this side of the room, get all of my stuff moved over to this side, and get started on the rest of the floor. It’s been a slow process, but at least I’m making progress!
[ad_2]
Source link