Towards the end of last year, I discovered my love of beads and making necklaces and earrings. As a result, I’ve wound up with way more necklaces than a reasonable person needs, but I like all of them and want to keep them (for now), so I needed to find a way to store them.
I had originally planned to use one or two of the shallow drawers in our storage cabinet between the vanities in our bathroom, but my necklace collection quickly outgrew those drawers.
Then I had the idea of using a dowel rod and building some sort of countertop jewelry organizer. But for the last six weeks, that plan hasn’t gone anywhere, so my necklaces were just sitting on top of the counter draped over the dowel like this…

And then each time I’d get ready to go somewhere, I’d rummage through them to find the perfect necklace for that day’s outfit, and eventually they ended up like this…

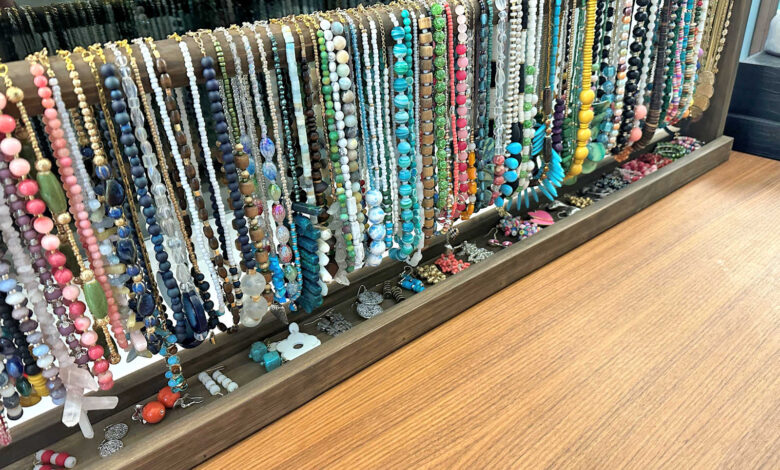
So yesterday, since it was still a bit too cold and windy outside for me to work on my studio cabinets, I decided to take that opportunity to get my necklace heap under control and build the dowel rod jewelry organizer that I had been envisioning in my mind. Here’s how it turned out…

It was kind of a mental hurdle for me to go from planning to store them in a drawer to having them on full display on the countertop. I wasn’t sure that I’d like seeing them out, but I have to admit, I love it! I love color, and loads of it, and these definitely add lots of color to that countertop. And while I didn’t plan it this way, I kind of love how it acts as a sort of privacy screen.
And at the bottom, there’s a tray where I can store my larger earrings that won’t fit neatly in the little organizer I have in the top drawer of the cabinet.
I hadn’t really planned for earring storage, so it was just a happy accident.
This was incredibly easy to make. I think I had it built and stained in about an hour. And because I use fast drying stain, it was only about three hours from the time I started to the time I had all of my necklaces and earrings organized on my new jewelry organizer. I love a quick gratification project like this!
So let me show you how I did it. I started with a piece of 1″ x 3″ lumber, cut to about 26 inches long. I marked the middle of the board, and then marked the center of the width of the board, and used a 1.25-inch hole saw to drill a hole in the board.

And then I took that board to my miter saw and cut straight down the middle of that hole.

That gave me two pieces with a notch at one end of each piece. Those notches would serve to hold the dowel rod that holds the necklaces.
I then cut those two pieces with the notched ends to 12 inches in length, and then cut another piece of the 1″ x 3″ lumber to about 46 inches long. Of course, you can adjust this length depending on how many necklaces and earrings you want it to hold. I have a lot of necklaces, so I made mine 46 inches wide.

Using my nail gun with 16-gauge 1.25-inch nails, I glued and nailed the 12-inch piece to the end of the long piece with the notched end up.

And then I repeated that with the other 12-inch piece on the other end.

With those three pieces attached, I placed them on their side, measured the entire width, and then cut two pieces of 1″ x 2″ lumber to that measurement.

And then using wood glue and the same nails as before, I attached the 1″ x 2″ piece along the bottom.

I used two nails going through the 1″ x 2″ piece into the edge of the side piece so in order to keep the side piece square.

Here’s a look at it with the piece standing upright. You can see how the two nails on each end going into the end pieces holds those end pieces square.

I repeated this on the other end, and then turned the piece over and repeated the process on the other side with the second 1″ x 2″ piece.
I forgot to take a picture, but the last step was to cut the 1.25-inch dowel rod to the length to rest on those notched out side pieces. I cut my dowel about two inches longer than the width of the base.
I used water-based stain in Dark Walnut to stain the entire thing.

It was a very fast-drying stain, so it didn’t take long to be ready to use.

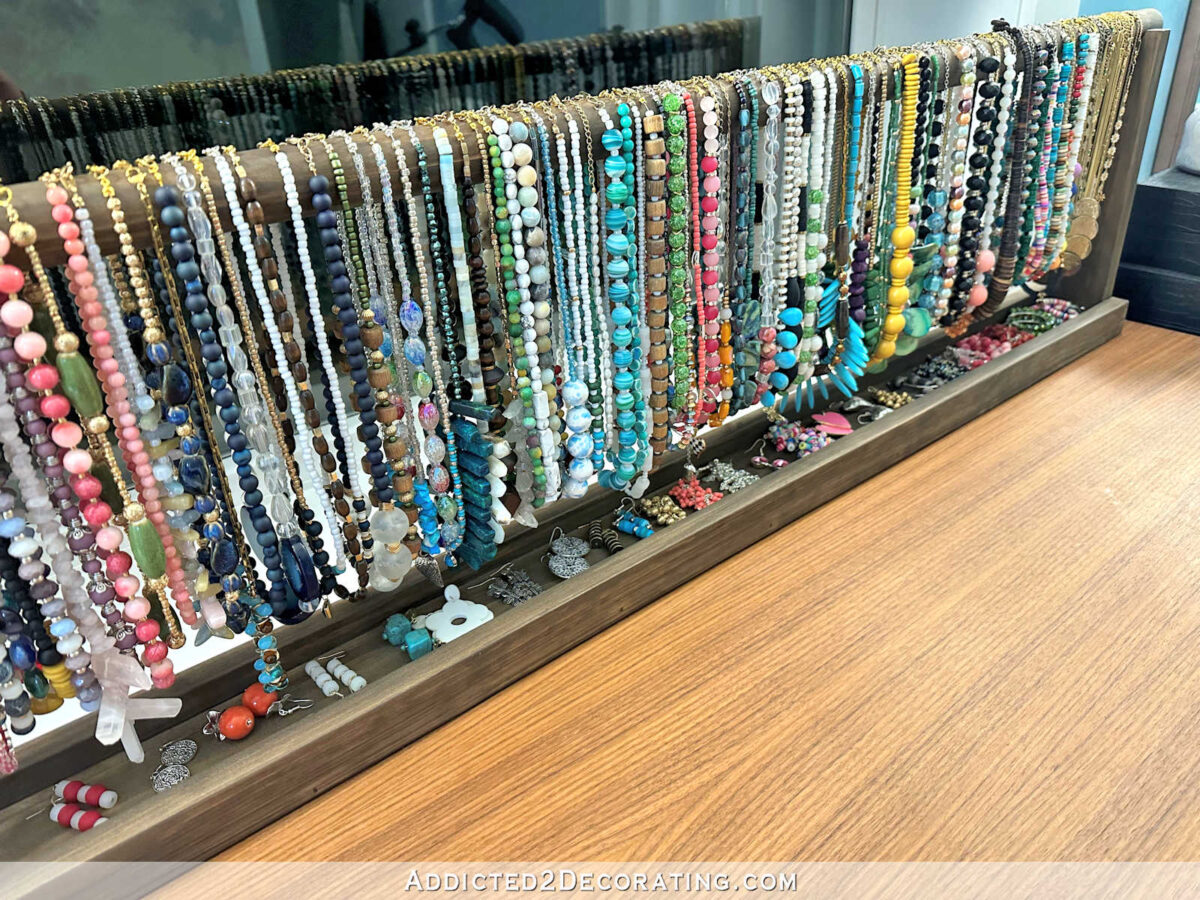
And here’s another look at it on the bathroom countertop.
I love the fact that I hadn’t even planned on this being an earring holder, but it worked out perfectly!
It really is such a simple design, but very functional for my purposes.

And I have to admit that I was absolutely tickled pink to walk into the bathroom this morning and see the gorgeous sunlight streaming through my new necklace “screen”. It’s like a little piece of colorful artwork.

But most of all, I’m so glad to have some organization to my necklaces now. Having them in a heap on the countertop obviously wasn’t working for me. Now I can see them, and find the one I want quickly and easily.


Addicted 2 Decorating is where I share my DIY and decorating journey as I remodel and decorate the 1948 fixer upper that my husband, Matt, and I bought in 2013. Matt has M.S. and is unable to do physical work, so I do the majority of the work on the house by myself. You can learn more about me here.
Source link