For a while now, I’ve been wanting to do a “home tour” where I show the pictures that I took of this house back in 2013 on the day we were handed the keys, and show you what those exact views look like today. I had intended for the entire tour to take place in one post, but as I started editing pictures and realized the sheer quantity of pictures involved in this endeavor, I realized that there’s no way I can put all of those pictures into one post. So it looks like the entire tour will take three posts.
Today, I’m focusing on the kitchen, breakfast room (which is currently being used as a temporary sitting room), and pantry areas. In Part 2, I’ll focus on the living room, entry, and music room. And then Part 3 will be the hallway, hallway bathroom, guest bedroom, home gym, and master bathroom. I won’t be showing the sunroom, my studio, or the front exterior of the house this go around.
So let’s get started!
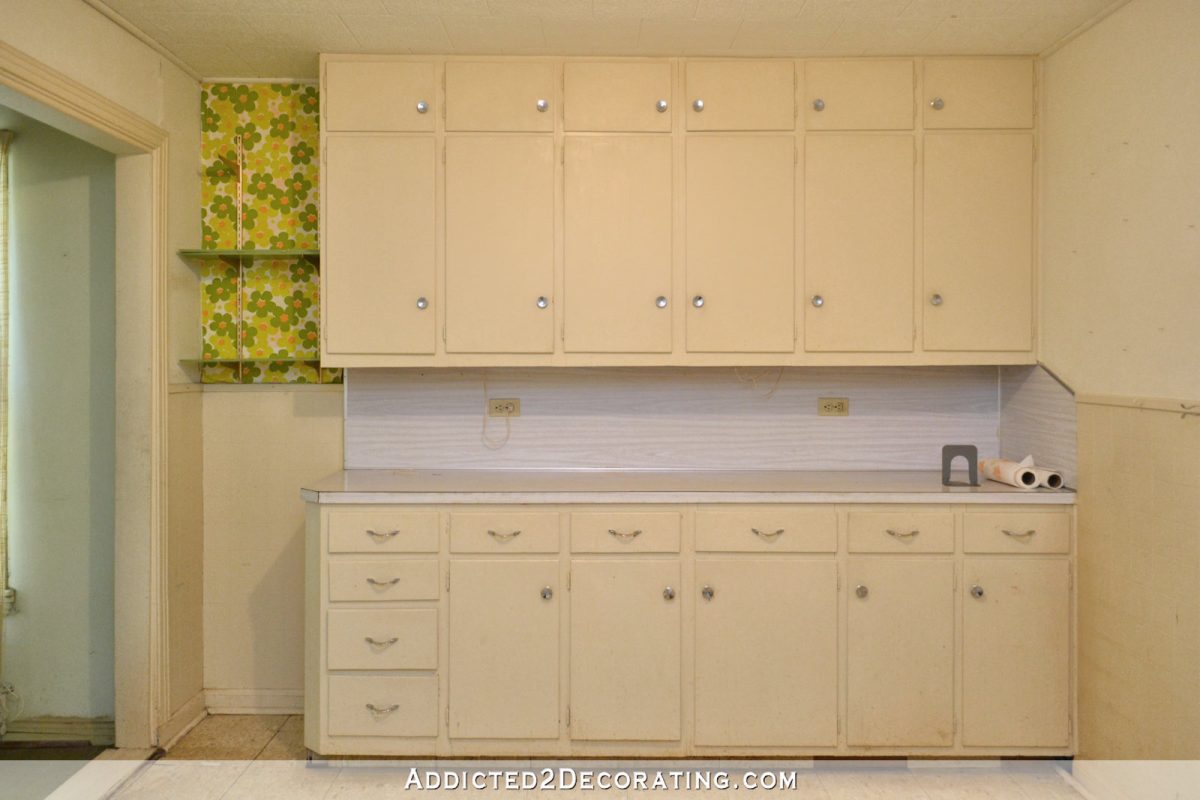
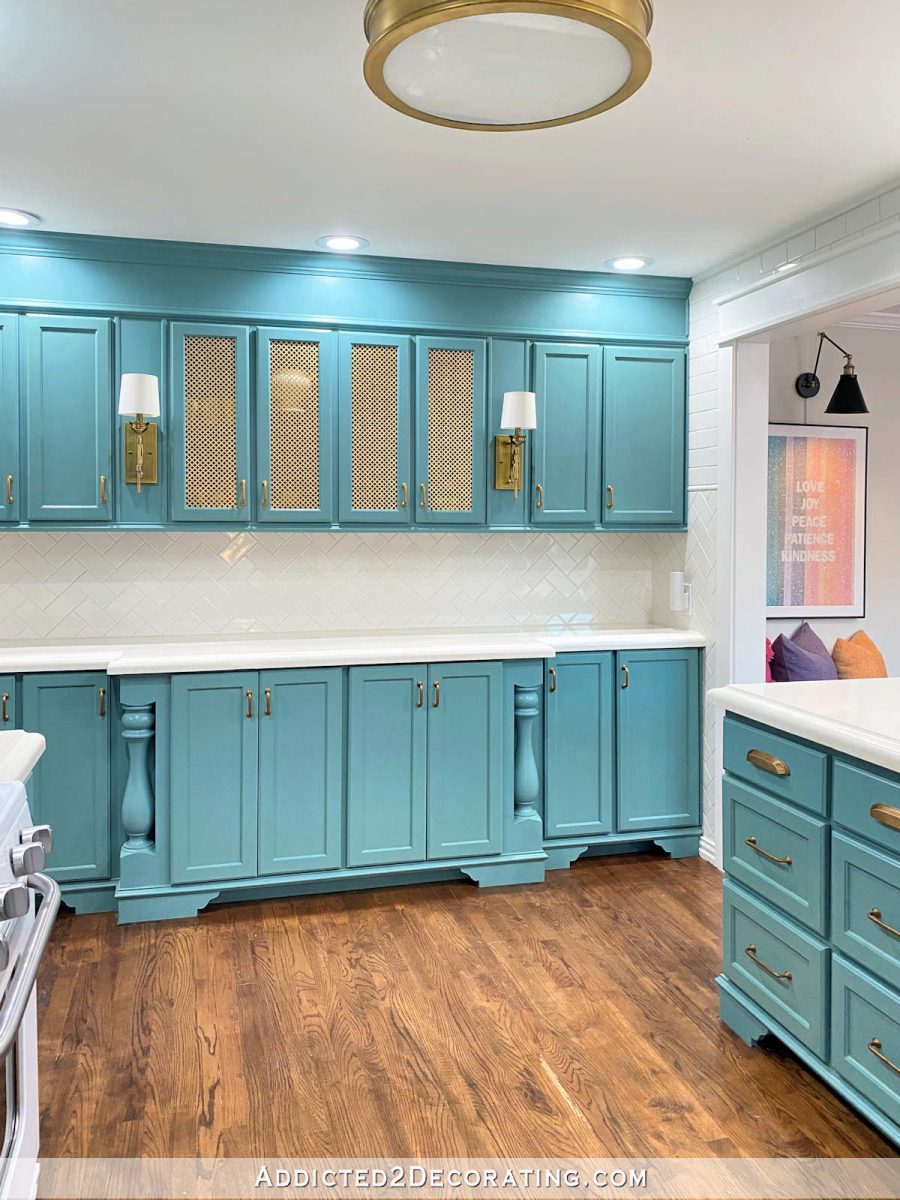
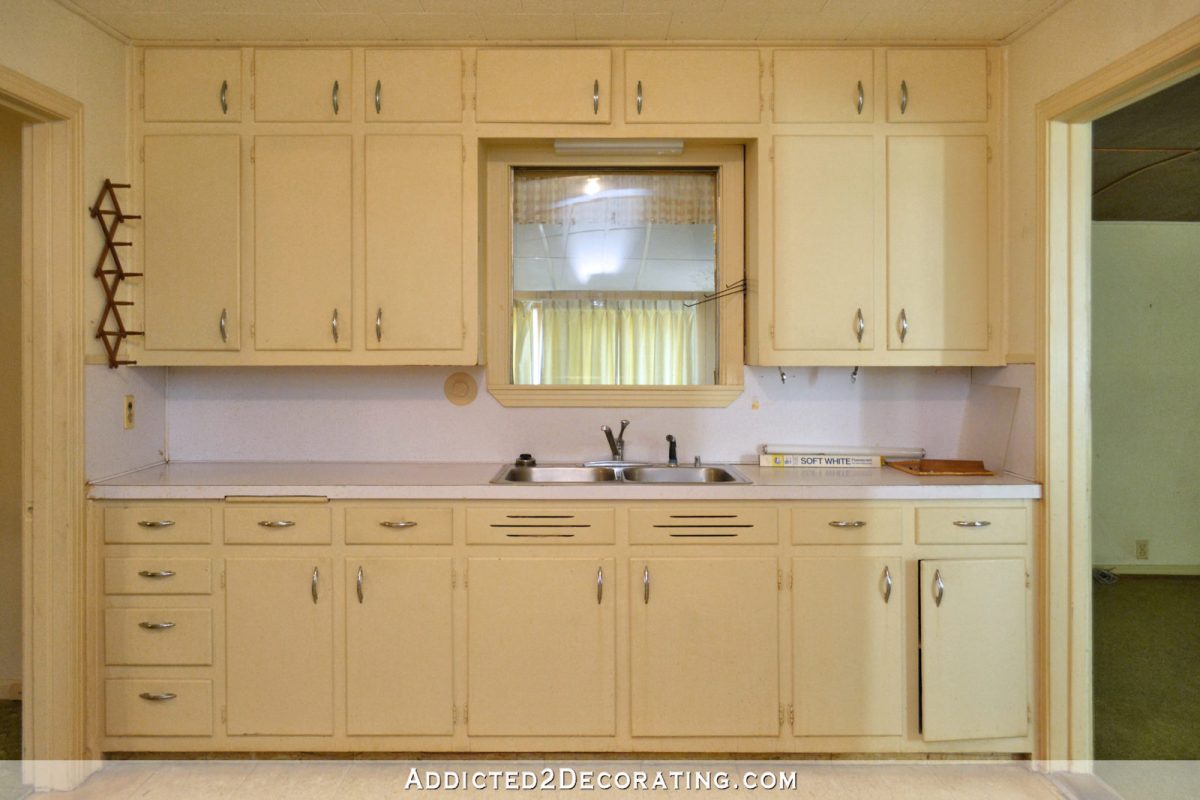
This kitchen was the first big remodel I ever did, and I did most of it by myself. As you can see in the “before” pictures, there wasn’t really anything to salvage from the old kitchen, so I tore it down to the studs, ceiling joists, and subfloor, and then rebuilt everything.
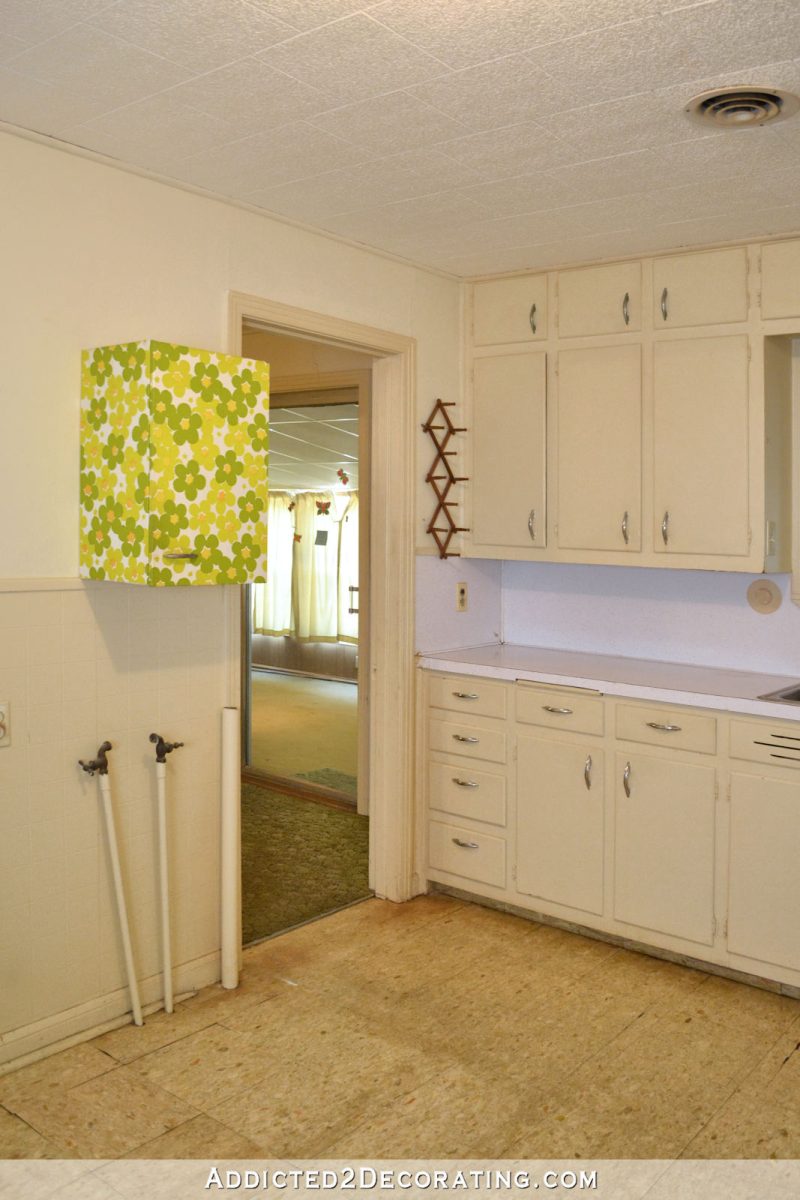
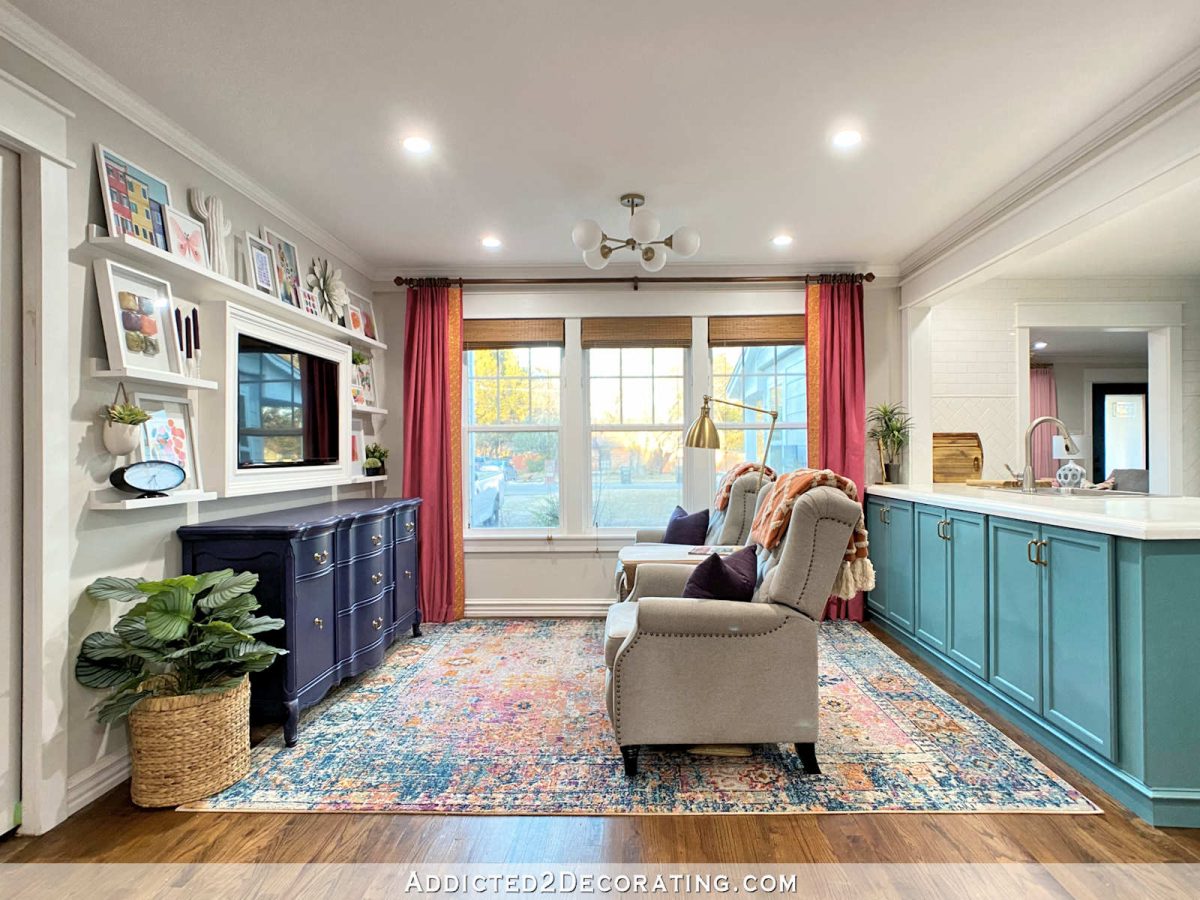
There was originally a wall separating the kitchen and what’s now the sitting room. This wall was originally an exterior wall with two doors leading out to a covered breezeway that connected the house to the garage. When the covered breezeway was enclosed to make an indoor room (which the previous owners called a den), the wall was left in place, as was the slight step down from the kitchen into the den.
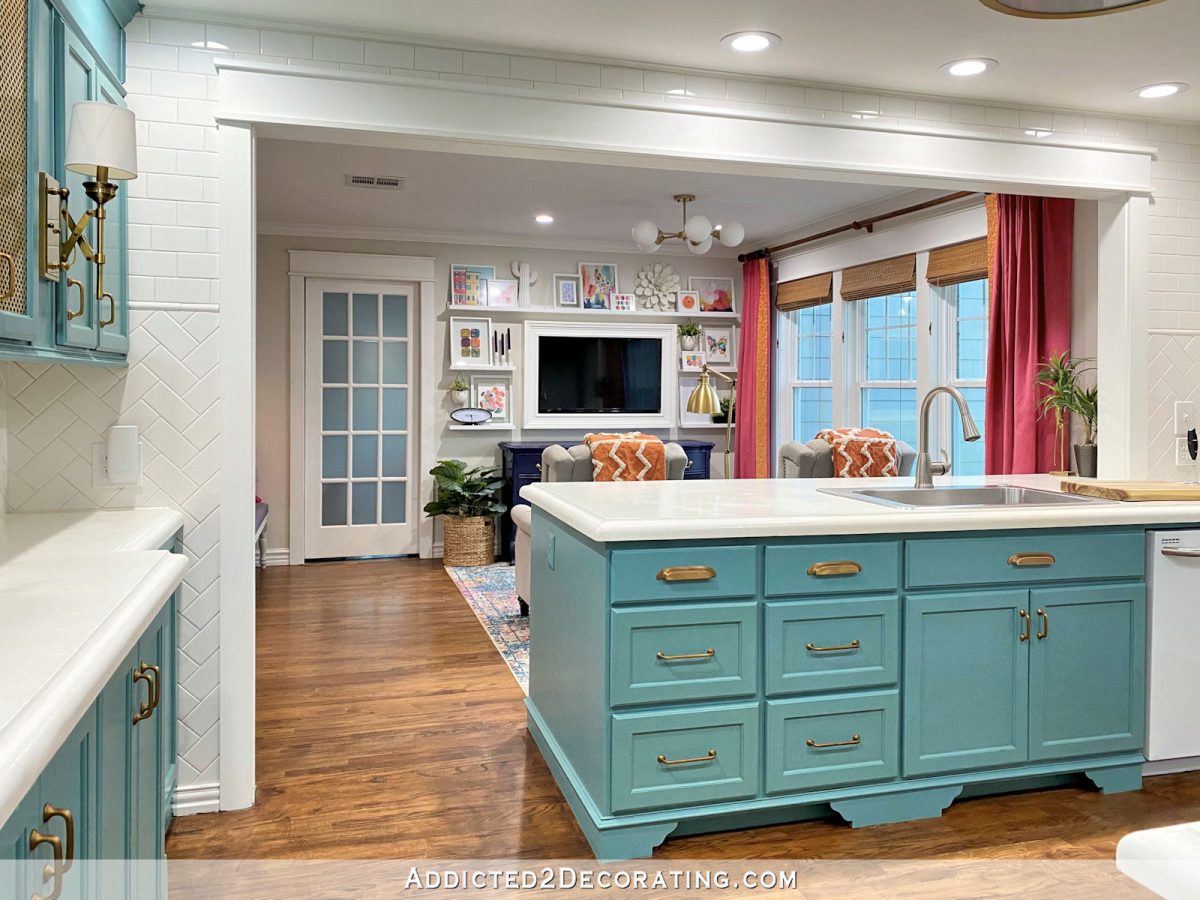
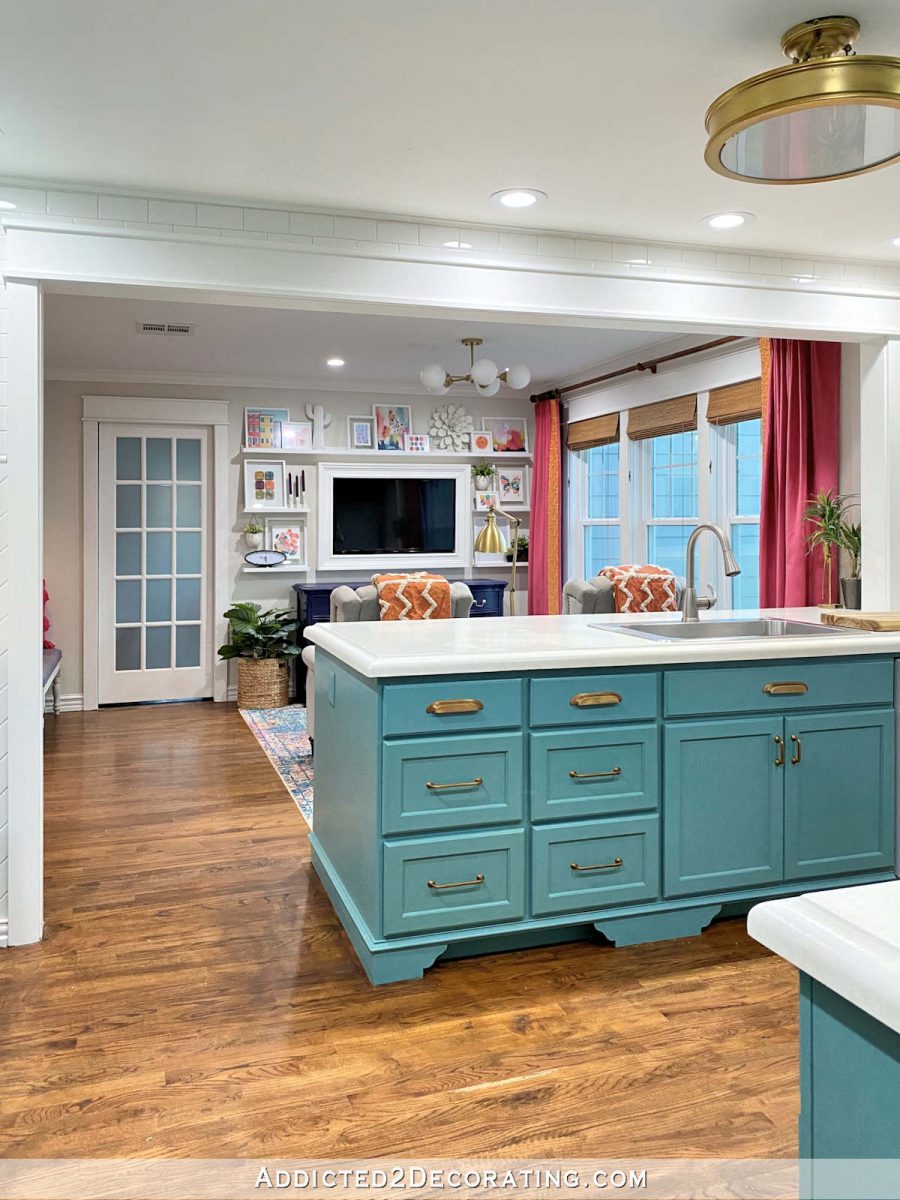
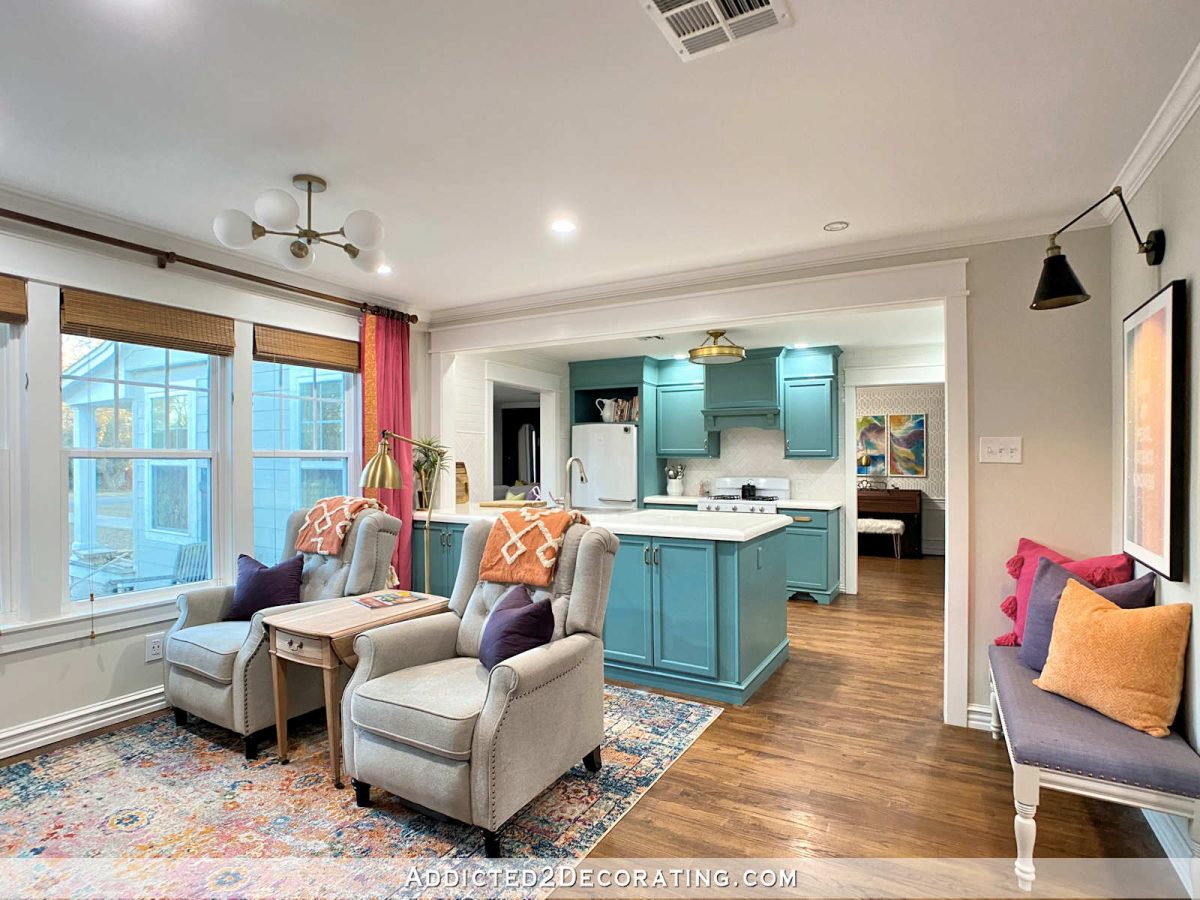
So I took down that wall and replaced it with a cased opening to open up these areas to each other. The door that led to the garage (the gray door in the photo above) now leads to my studio.
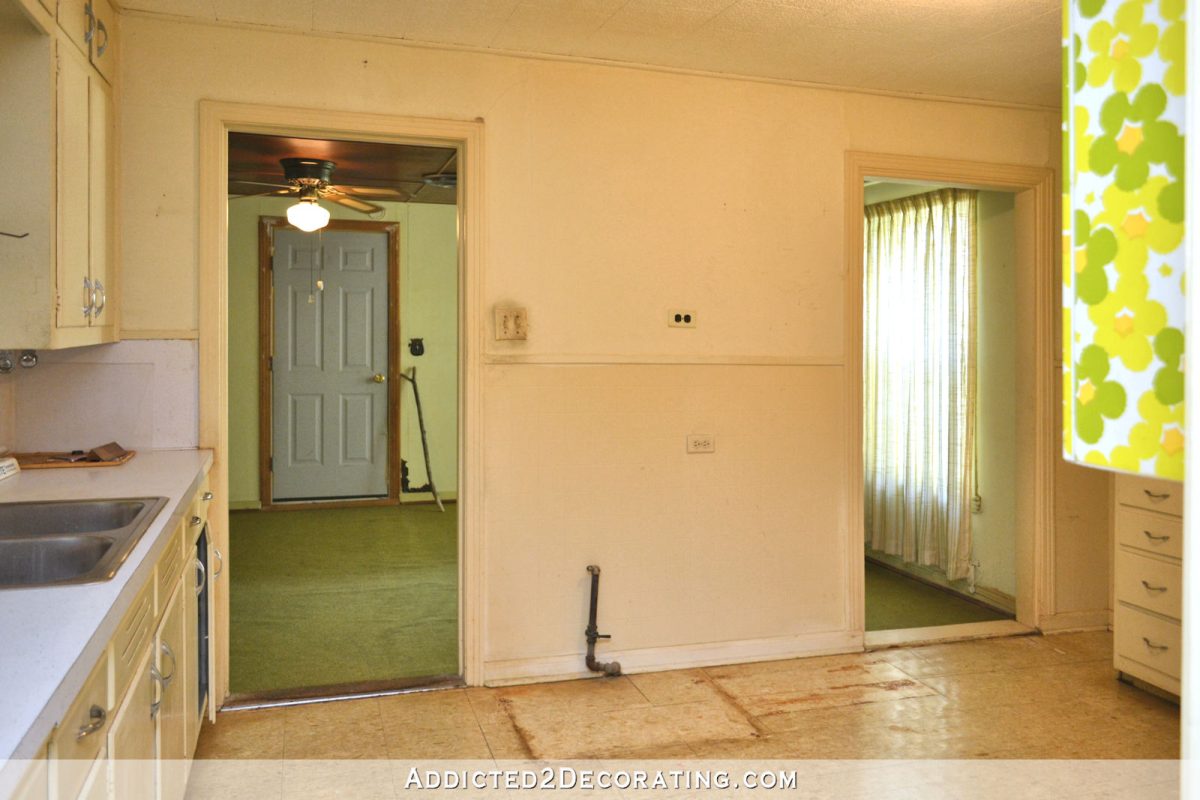
This is the same view with a vertical photo where you can see that the kitchen was lit by one bulb, and just like the rest of the house, the ceiling was covered in polystyrene ceiling tiles.

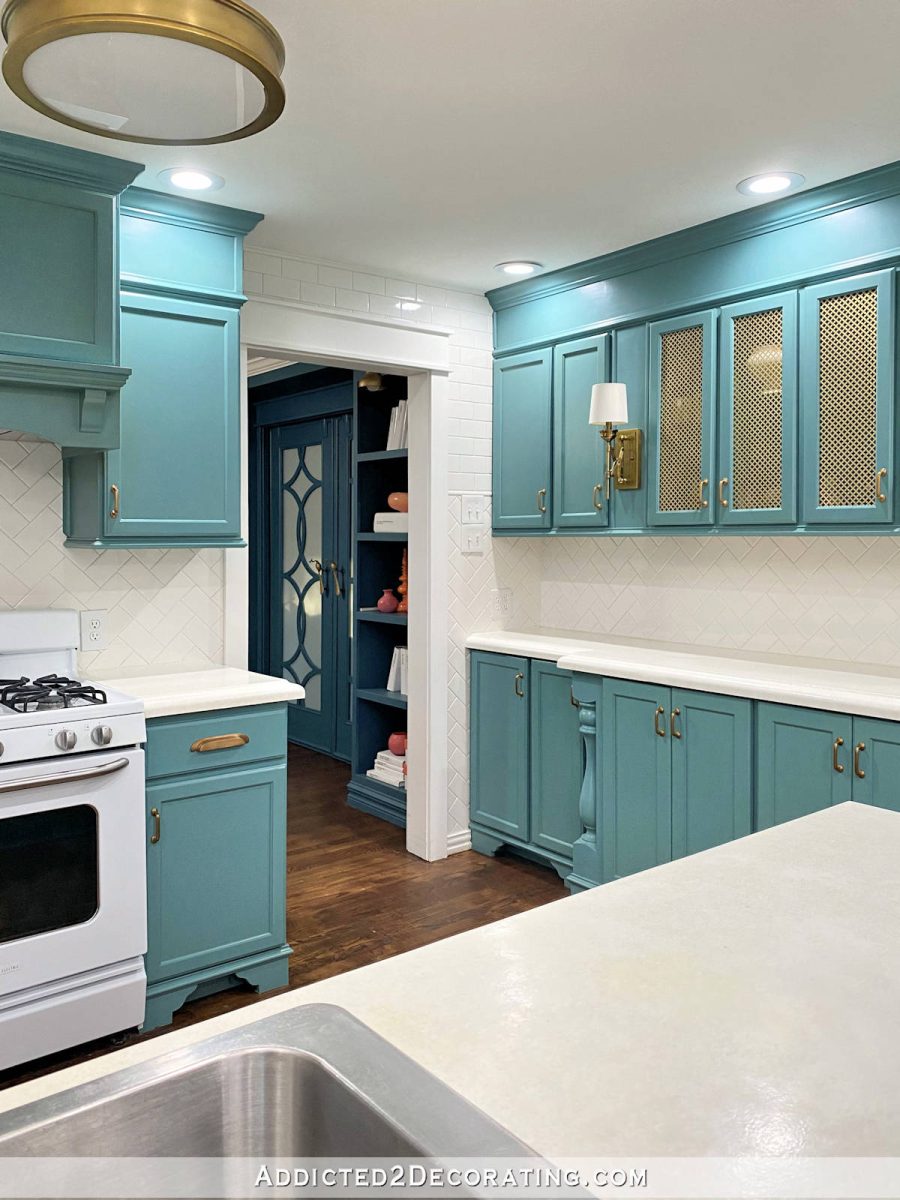
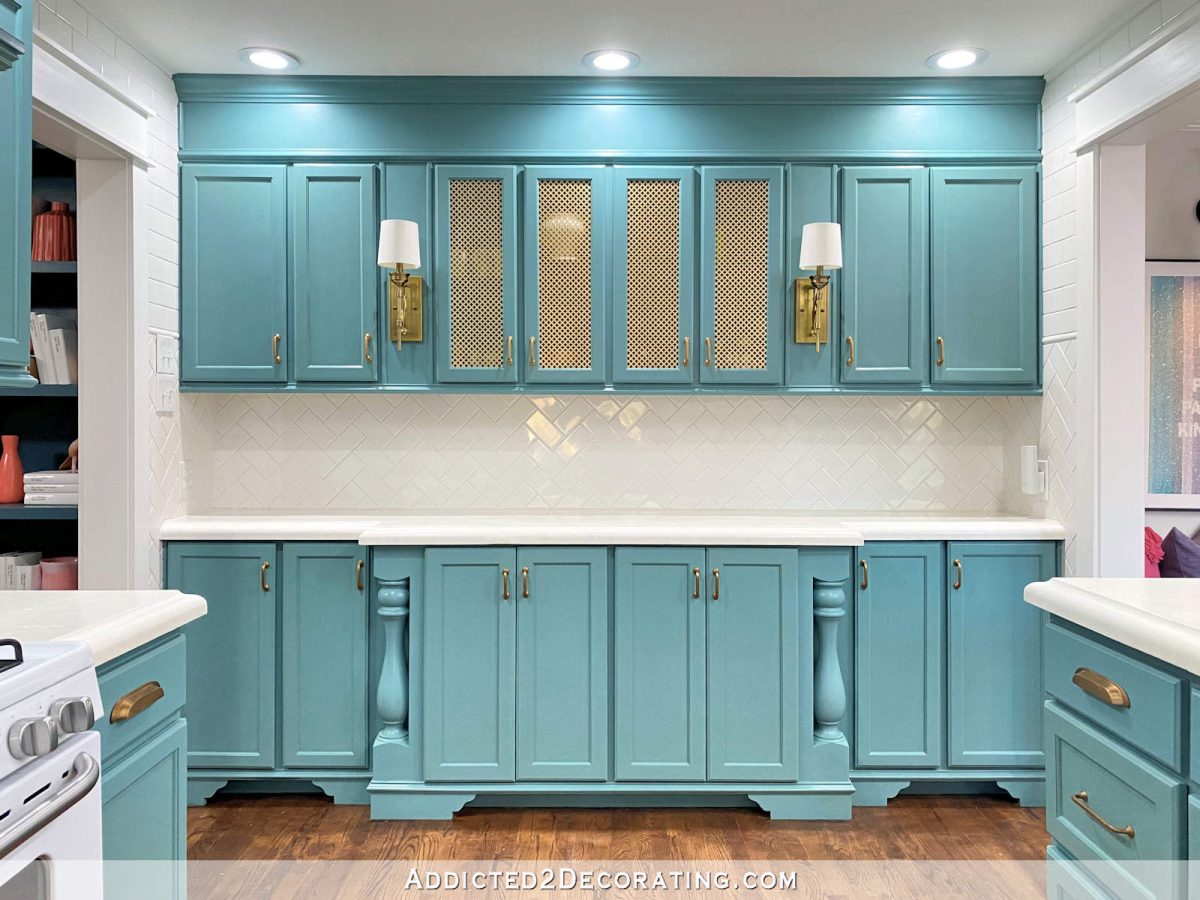
Now the room has considerably more lighting, and there are no more ceiling tiles. And of course, that’s just the tip of the iceberg on the changes I made — new flooring, new cabinets, new cabinet configuration, etc.
The original kitchen felt closed in like a box with the wall separating the kitchen from the den, which blocked out most of the natural light that came in through the large windows in the den.

Opening up that wall made the small kitchen feel so much bigger without the wall blocking the view and blocking out the natural light from those windows.
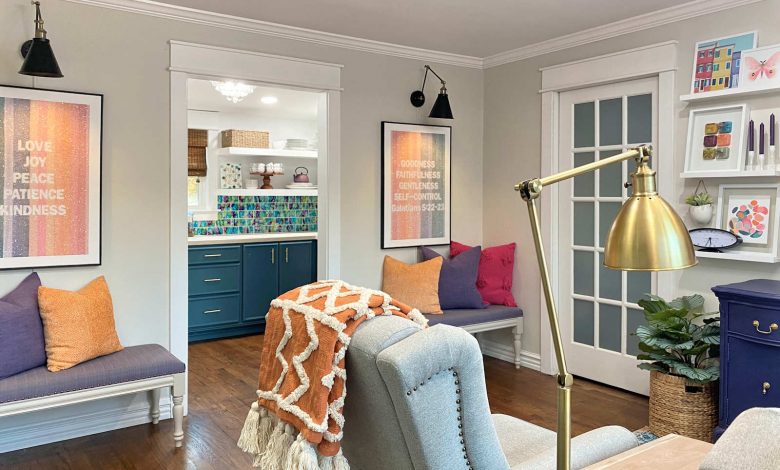
The wall that currently has the cased opening between the kitchen and the living room originally had a full wall of cabinets. The whole arrangement of the original kitchen was incredibly inefficient.

Now that cased opening feels like it has always been there. My kitchen doesn’t have any direct natural sunlight, but it no longer feels like a cave since it has natural sunlight coming in from the sitting room and the living room.
It really amazes me how opening up a couple of walls can make a room feel so much larger. My kitchen really isn’t big, especially compared to today’s standards in new build homes. My kitchen is only about 9′ x 14′. I still can’t get over how tiny it originally felt.

I didn’t enlarge the footprint of the kitchen at all, but it feels about twice as big as it did originally.

If I were to list the top five changes I made to this house that made the biggest impact, adding a cased opening on this wall would definitely be on that list.
It might even take the #1 place on that list. And even though it made furniture placement in the living room a little more challenging, I still never choose to go back to a solid wall here.

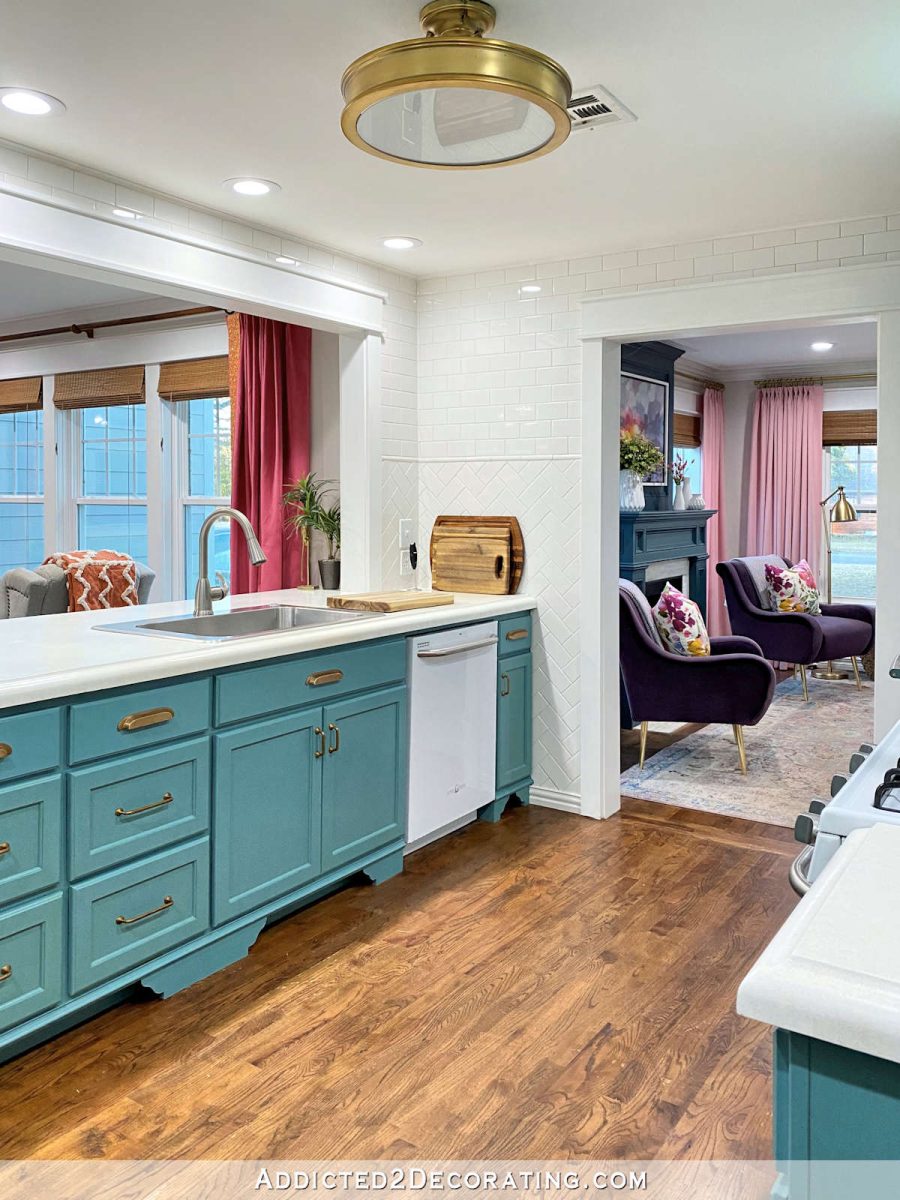
The original opening from the music room (which was the original dining room) into the kitchen was also pretty narrow.

I was able to widen it just a few inches — enough to make a big difference to Matt — while still having enough wall space for the cabinets and range to the left, and cabinets on the wall to the right.

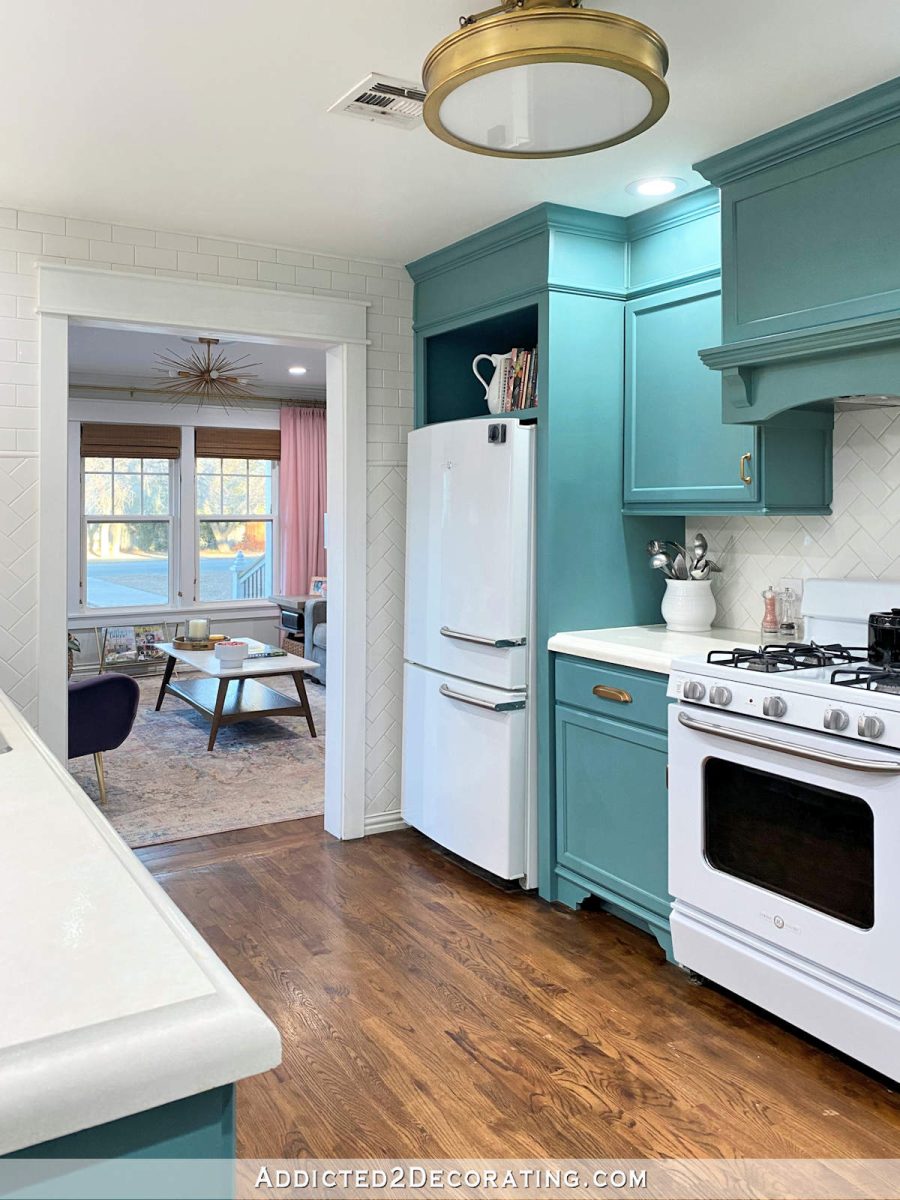
From this angle, you can see the original sliding glass door that was in the music room (aka, the original dining room) that led into the sunroom. That’s the room that will eventually be torn down. We plan to add on a family room/media room through those doors.
So for now, from this angle, I get to see my pretty music room sliding doors that I made. I blocked the view into the sunroom by using “frosted” window adhesive on the glass on those doors.
To the right of that back wall of kitchen cabinets, you can see the back of the original den, which is now the pantry.
That room was so long (around 24 feet), so I portioned off the back seven feet of space by building a new wall to create the pantry.
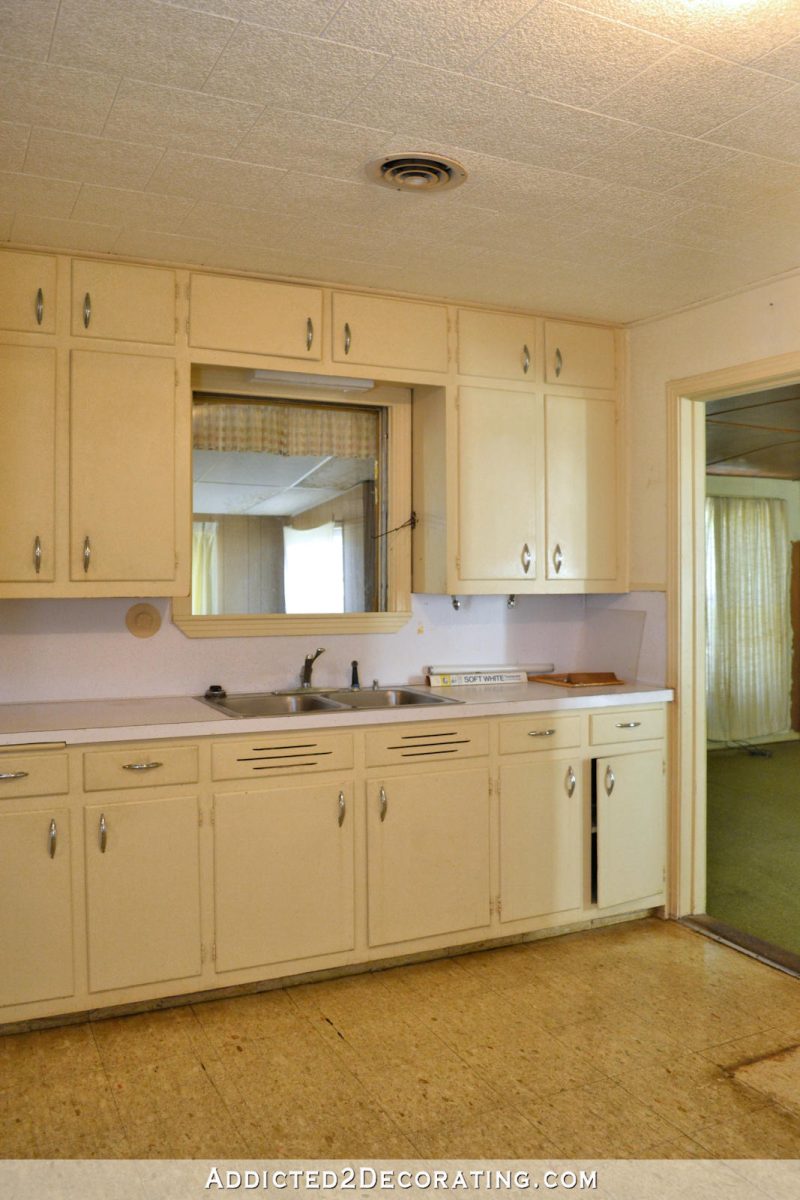
The back wall of the kitchen is where the sink was original located, which was relocated to the peninsula. This wall also had a window looking into the sunroom. Of course, that window was originally an exterior window, and the sunroom was added on later.
Since we do plan on adding onto the back of the house eventually, I removed the window and installed a whole wall of cabinets.
The previous owners used this room between the kitchen and the garage as a den. The floor in this room was about two or three inches lower than the kitchen floor, and it had a dreary dark plywood ceiling that sloped down at the back of the room.

This whole room went through quite the transformation — concrete poured to raise the floor to the same height as the kitchen, plywood ceiling and wood walls replaced with drywall, the back seven feet sectioned off to make a pantry, the two large windows at the back replaced with one small window to give me more storage space, etc.
Obviously, that just scratches the surface, but you get the idea. The door that leads to my studio is in the exact same place as the previous door that led to the garage, so that gives you an idea of where the wall was built to section off my pantry at the back. I also removed that sloping ceiling at the back, and turned it into an angled ceiling in the pantry.

And then standing at the back of the room and looking towards the front, this was the original view, with the kitchen on the right, and the garage on the left.

Since I couldn’t stand as far back to take this current photo (because I’d be standing in the pantry, and the view would be blocked by pantry walls), I had to step in front of the pantry walls and use my wide angle lens to get the view as the “before” picture. Wide angle lenses distort things a bit and make things look bigger than they are, but you can still get the idea. The distance from the garage (studio) door to the front wall of the sitting room is still the exact same distance today.
And I had to do the same with this one. To take this original picture, I stood in the back corner of the den and took the picture towards the kitchen.

If I did that today, I’d be standing in the back corner of the pantry, and this is the view you’d see.

So I stepped out of the pantry and used my wide angle lens to get a view as close to the “before” picture as possible. Obviously, that puts the angle off from the original photo, but you get the idea. 🙂
Again, this is the original exterior door that led to the garage. It sat right about in the middle of this long side wall of the den.

That door is in the exact same place, but it leads to my studio. And the back portion of that room is now sectioned off to create my pantry.

And standing in the front corner of the original den and looking back angled towards the kitchen, this was the original view. That closed door led to the sunroom.

The door to the sunroom is gone. The two windows on the back wall were replaced with one smaller window. There’s now a wall sectioning off the back of that room to create my pantry. And the wall separating this room from the kitchen is gone and replaced with a cased opening and a peninsula of cabinets and the kitchen sink.

So I’ll wrap up this part of the home tour here. In Part 2 (which I hope to post either tomorrow or Wednesday), I’ll share the living room, entry, and music room.
By the way, if you want to see more details about these room remodels, you can check out my archives here:

Addicted 2 Decorating is where I share my DIY and decorating journey as I remodel and decorate the 1948 fixer upper that my husband, Matt, and I bought in 2013. Matt has M.S. and is unable to do physical work, so I do the majority of the work on the house by myself. You can learn more about me here.
I hope you’ll join me on my DIY and decorating journey! If you want to follow my projects and progress, you can subscribe below and have each new post delivered to your email inbox. That way you’ll never miss a thing!
Source link