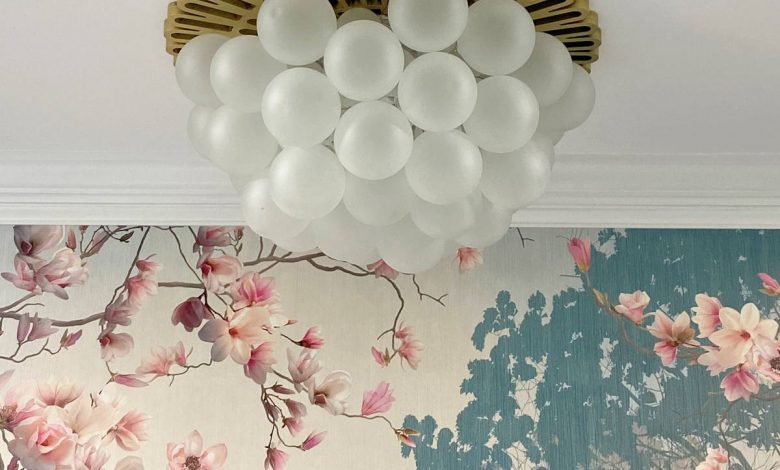
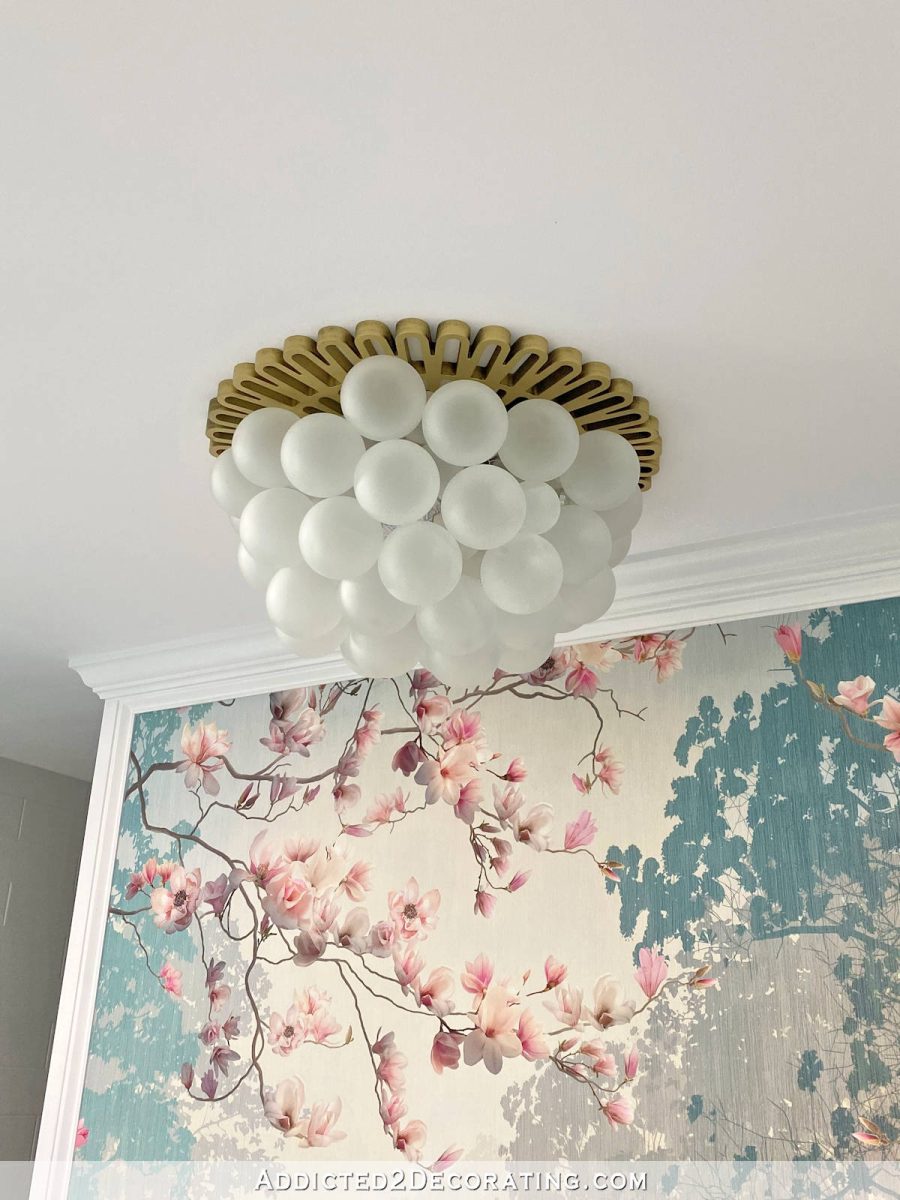
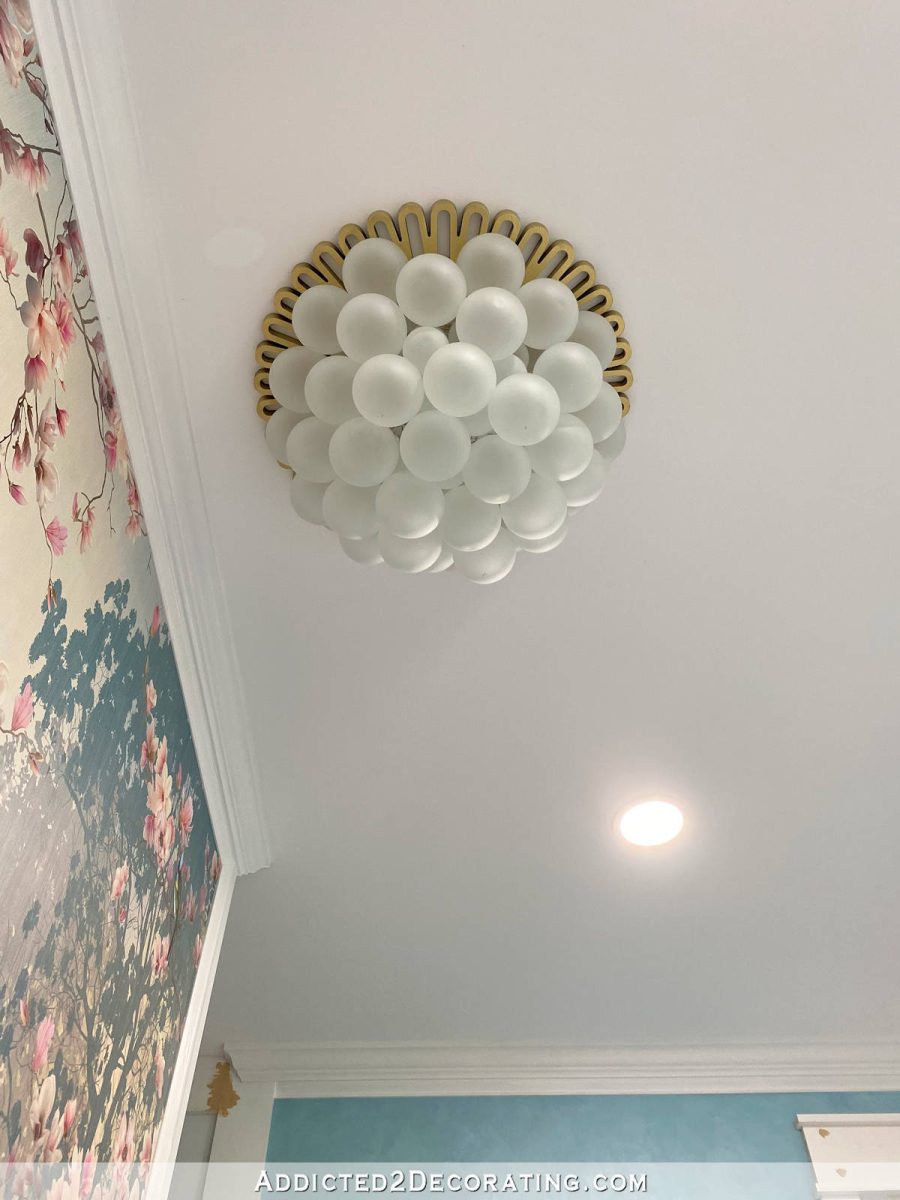
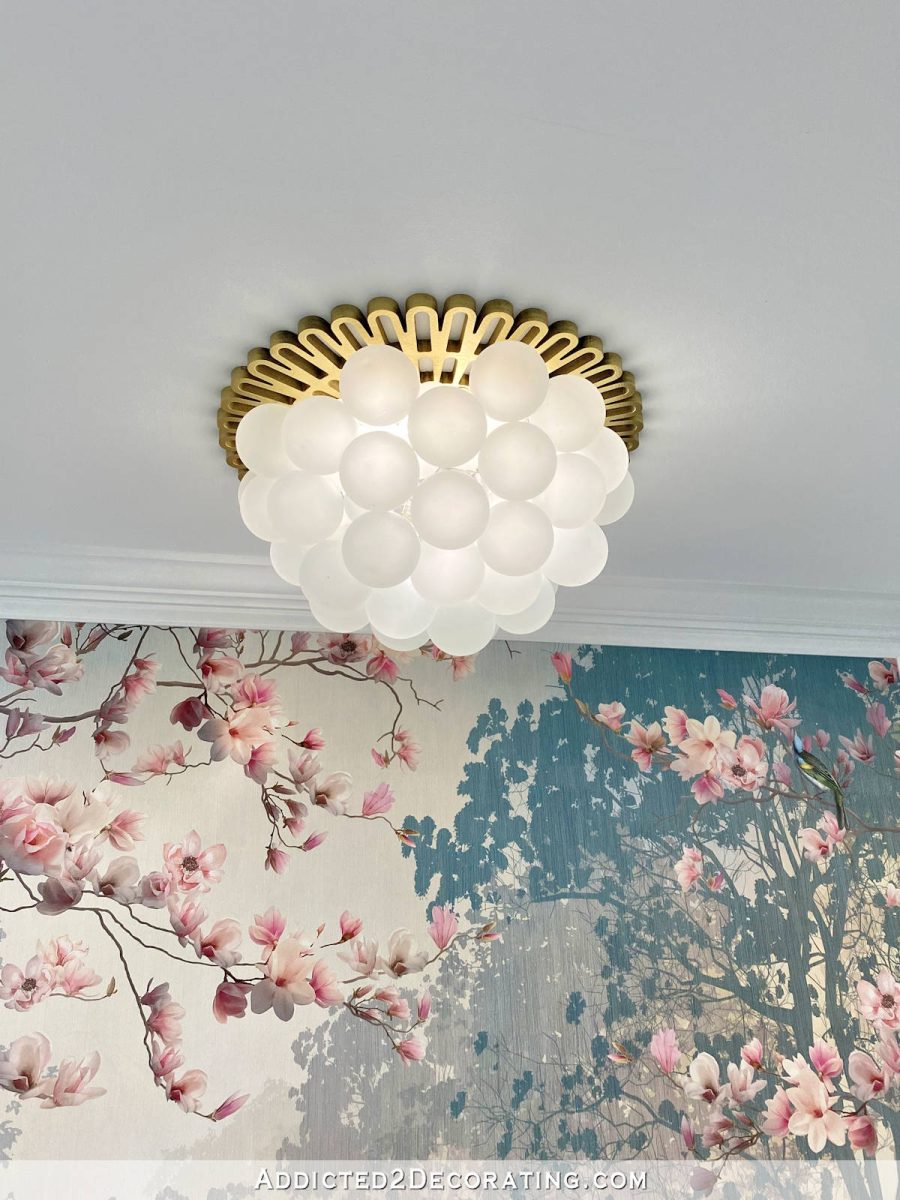
I’ve been dreaming of a glass bubble chandelier over my bathtub for many months now, and I finally have it. This is a DIY light that I made myself, and I did that for two reasons. First, I wanted a large flush mount bubble light, and those are virtually impossible to find. But the main reason is that I didn’t want the actual decorative part of the chandelier to have any electricity running to it. I know that strange, right?
The reason for that is because this is going over my bathtub, and it’s against building code to put a chandelier over a bathtub. So I had to get a little creative with this and find a way to get the look of a chandelier without the decorative parts that hang below the ceiling being wired. In other words, a person could stand in my bathtub filled with water and touch any part of my chandelier, and it wouldn’t shock them because my chandelier is nothing more than a ceiling mounted decoration hanging around a recessed light. The recessed light provides the light, but it is not connected in any way to the decorative part of the chandelier.
So here’s how my DIY glass bubble chandelier turned out…
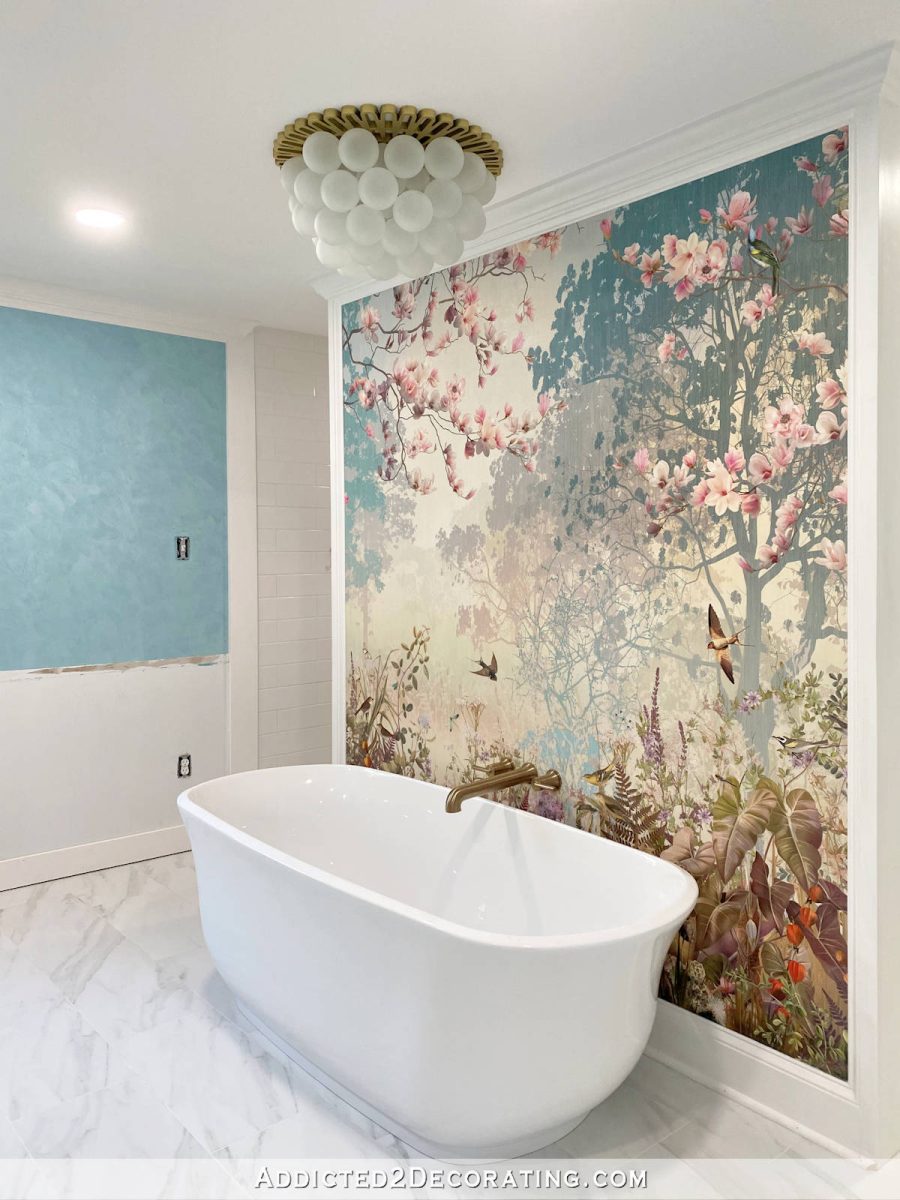
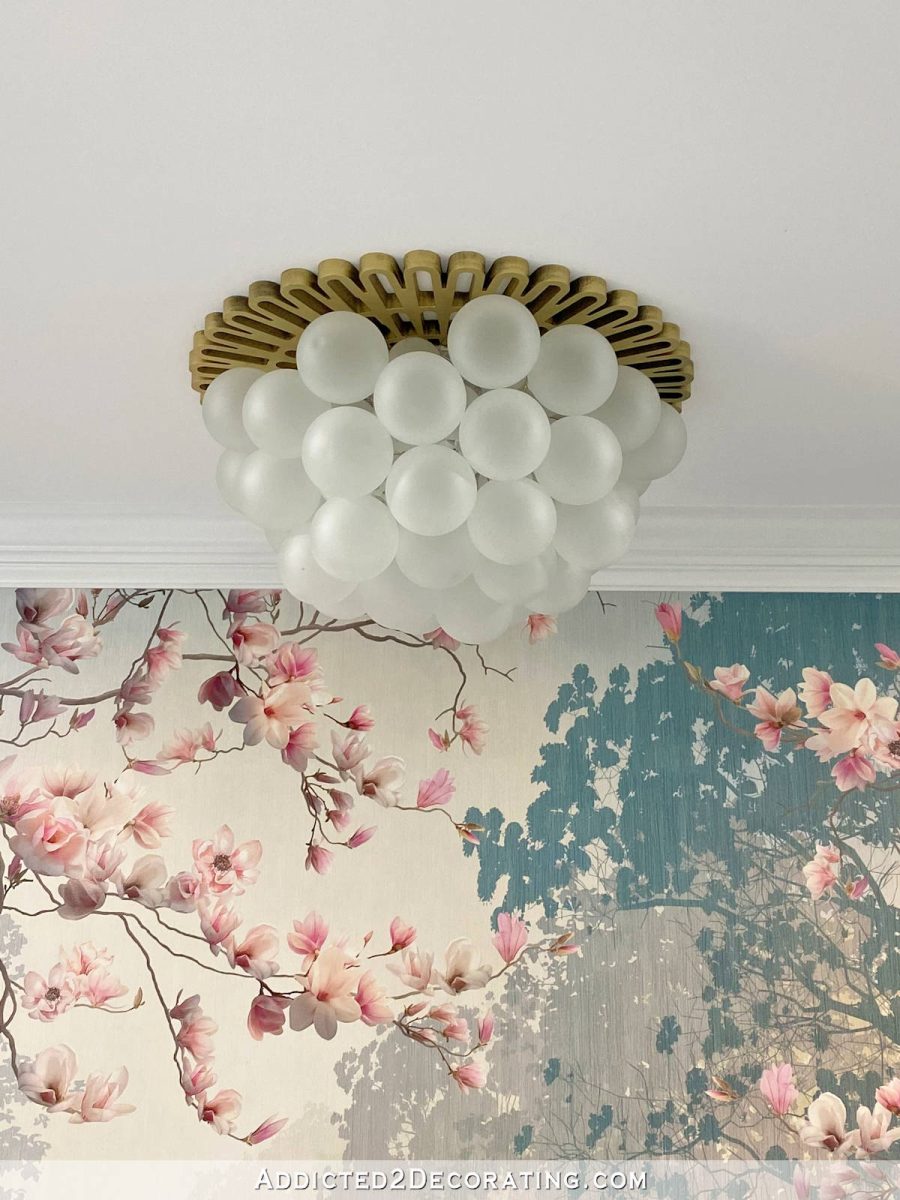
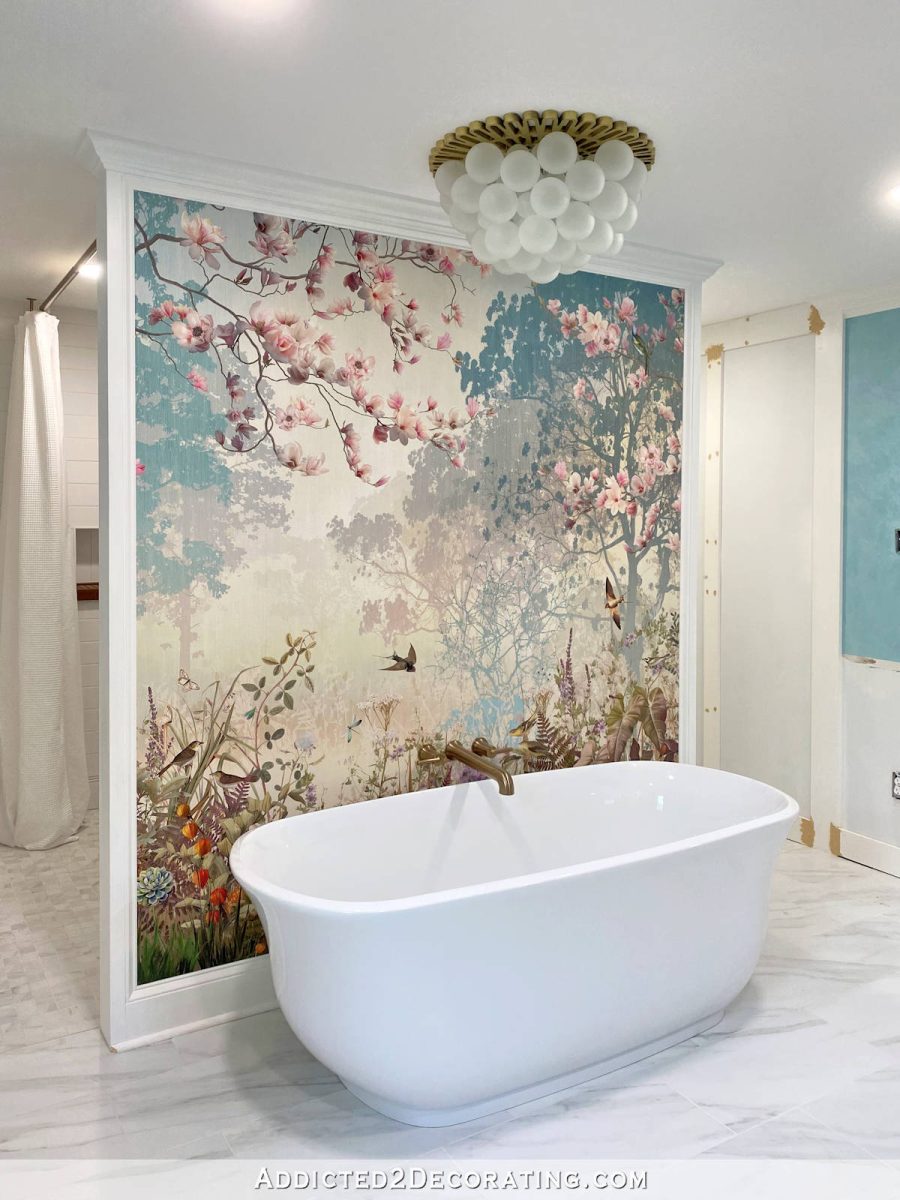
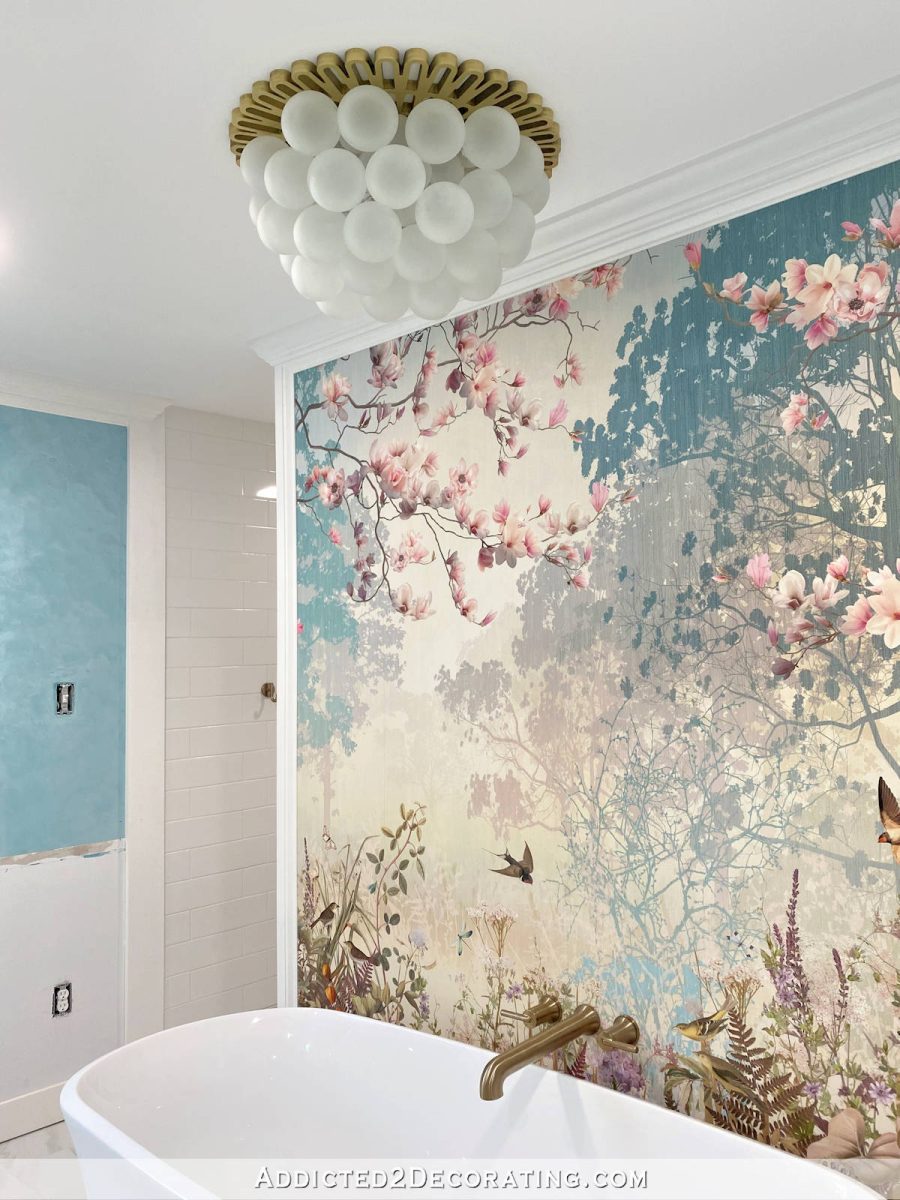
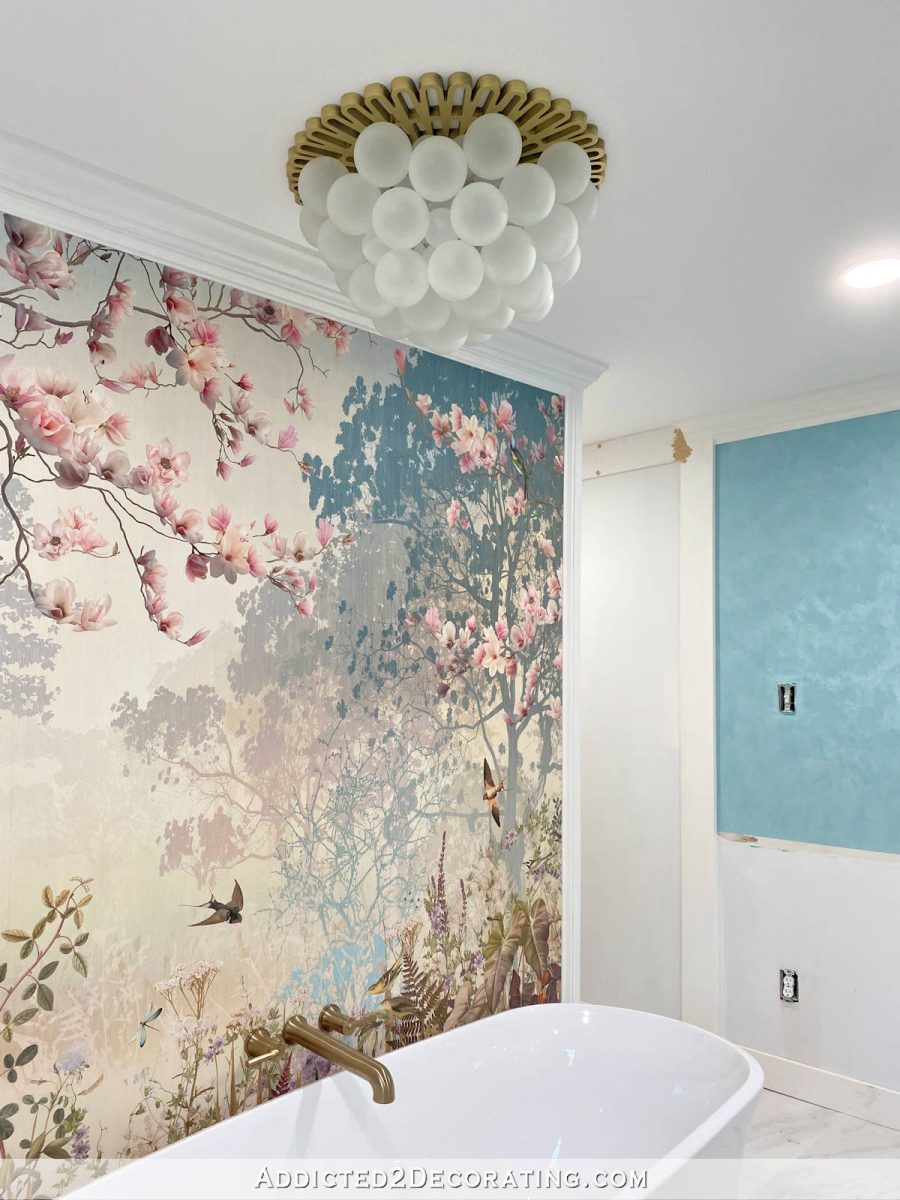
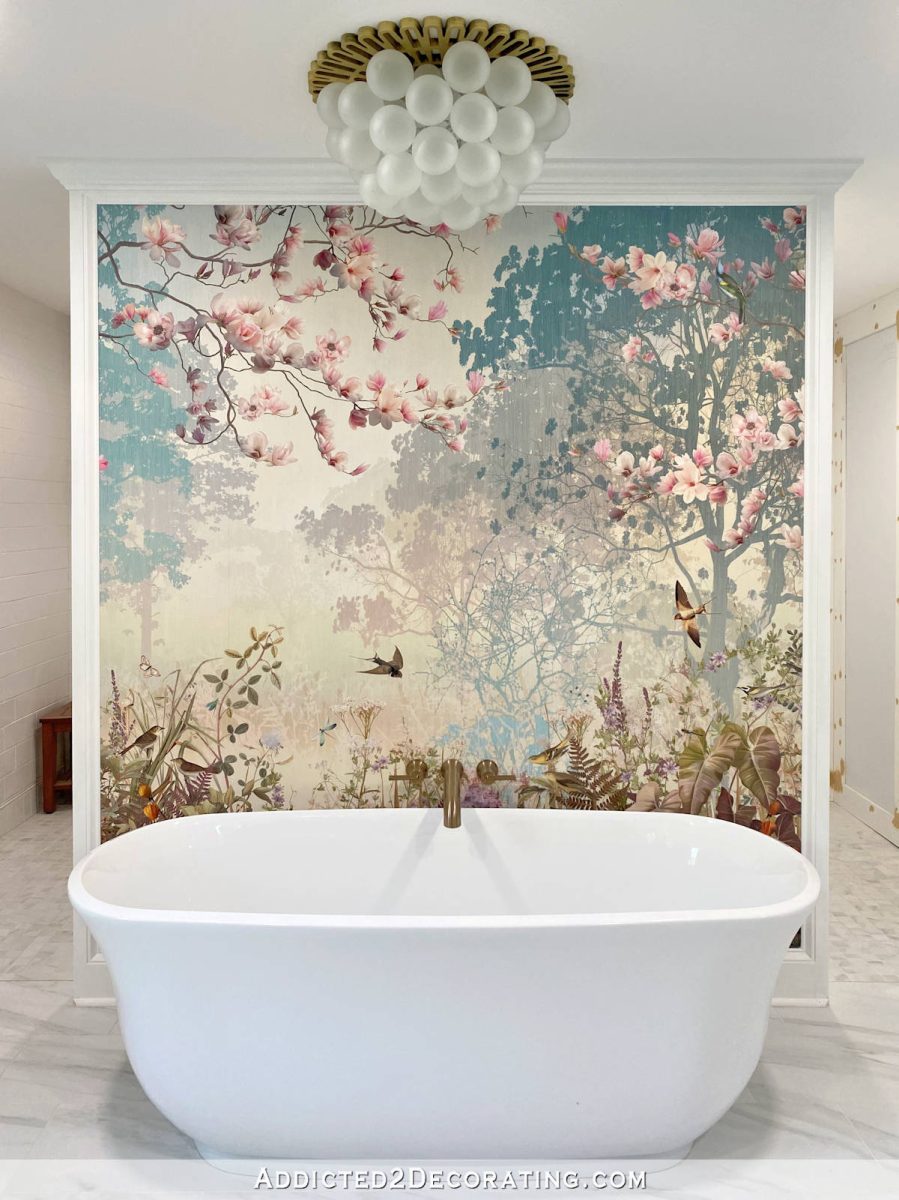
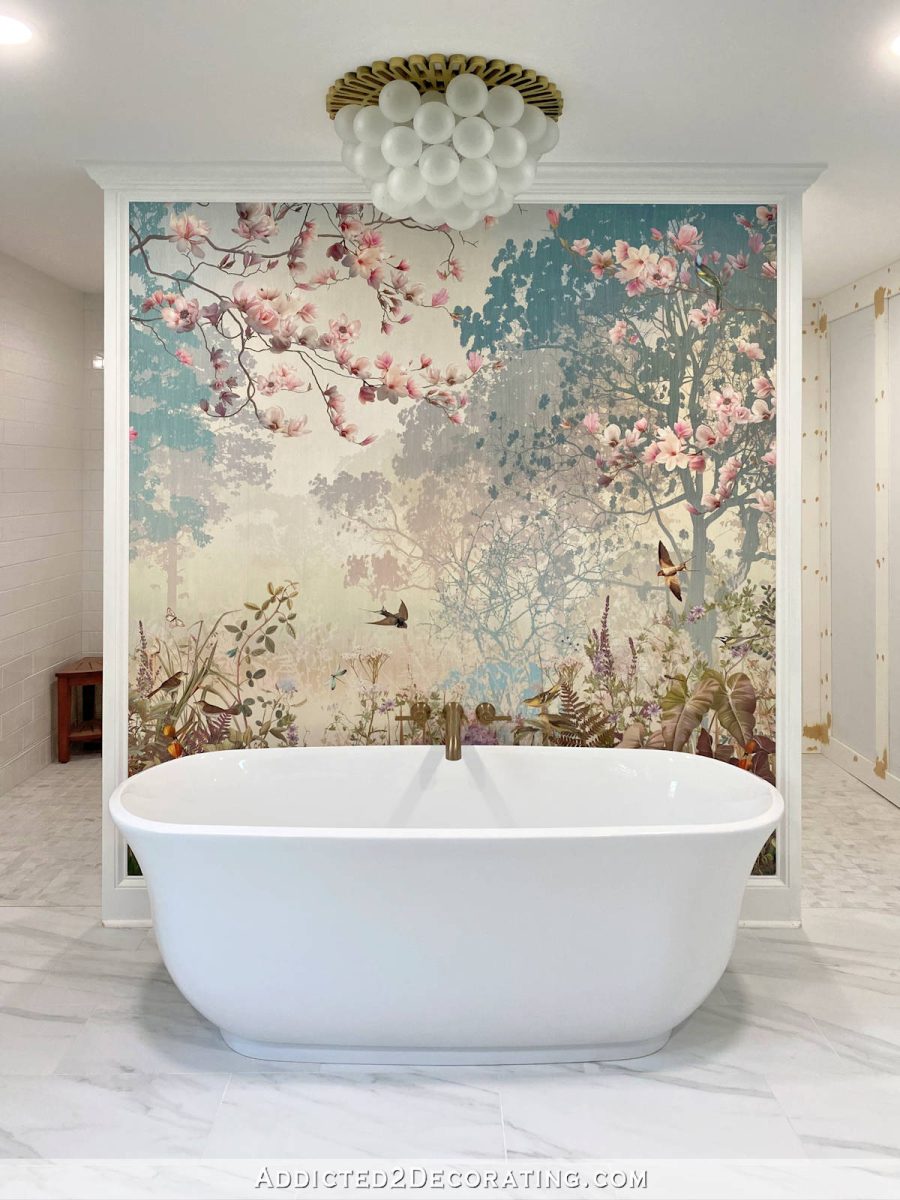
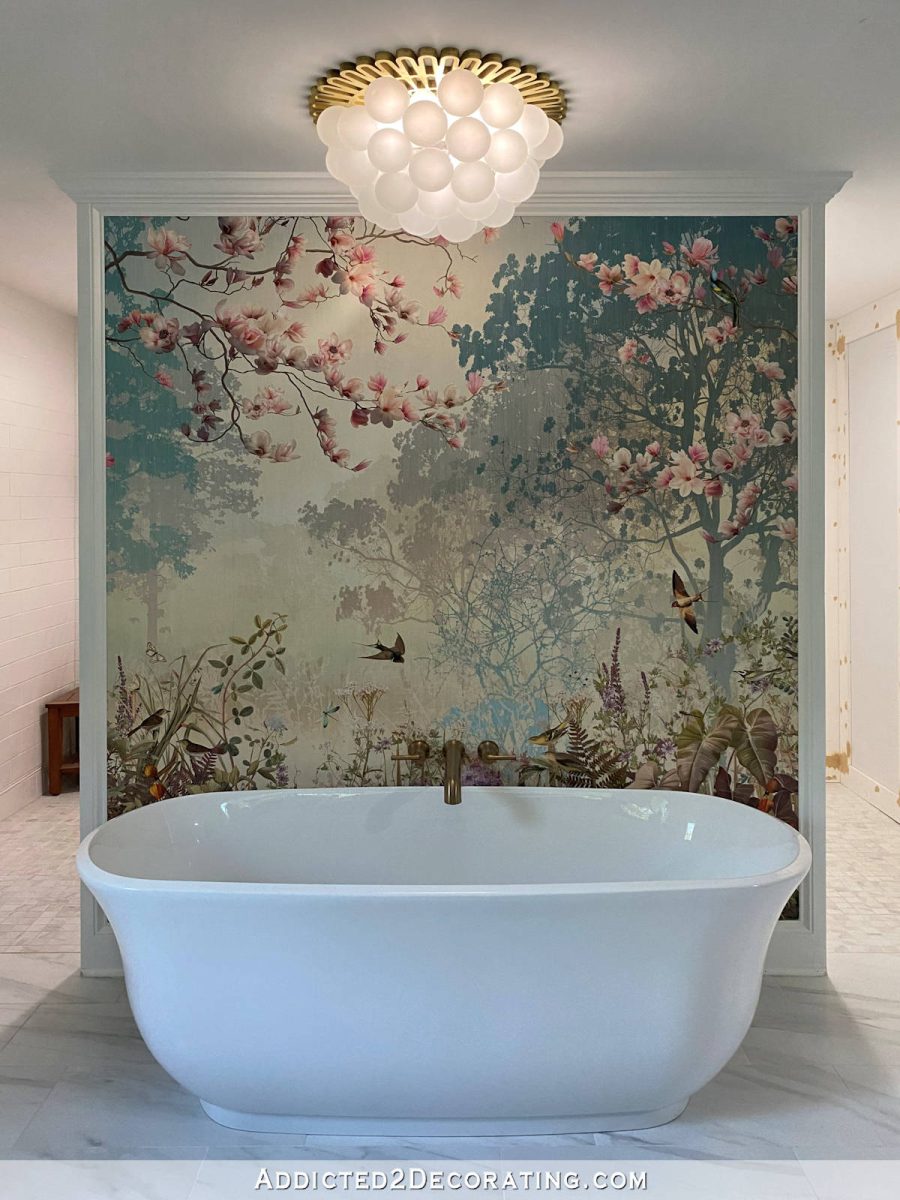
And here’s the whole view with the bathtub, the mural, and the chandelier (with an unfinished wall on the left side)…
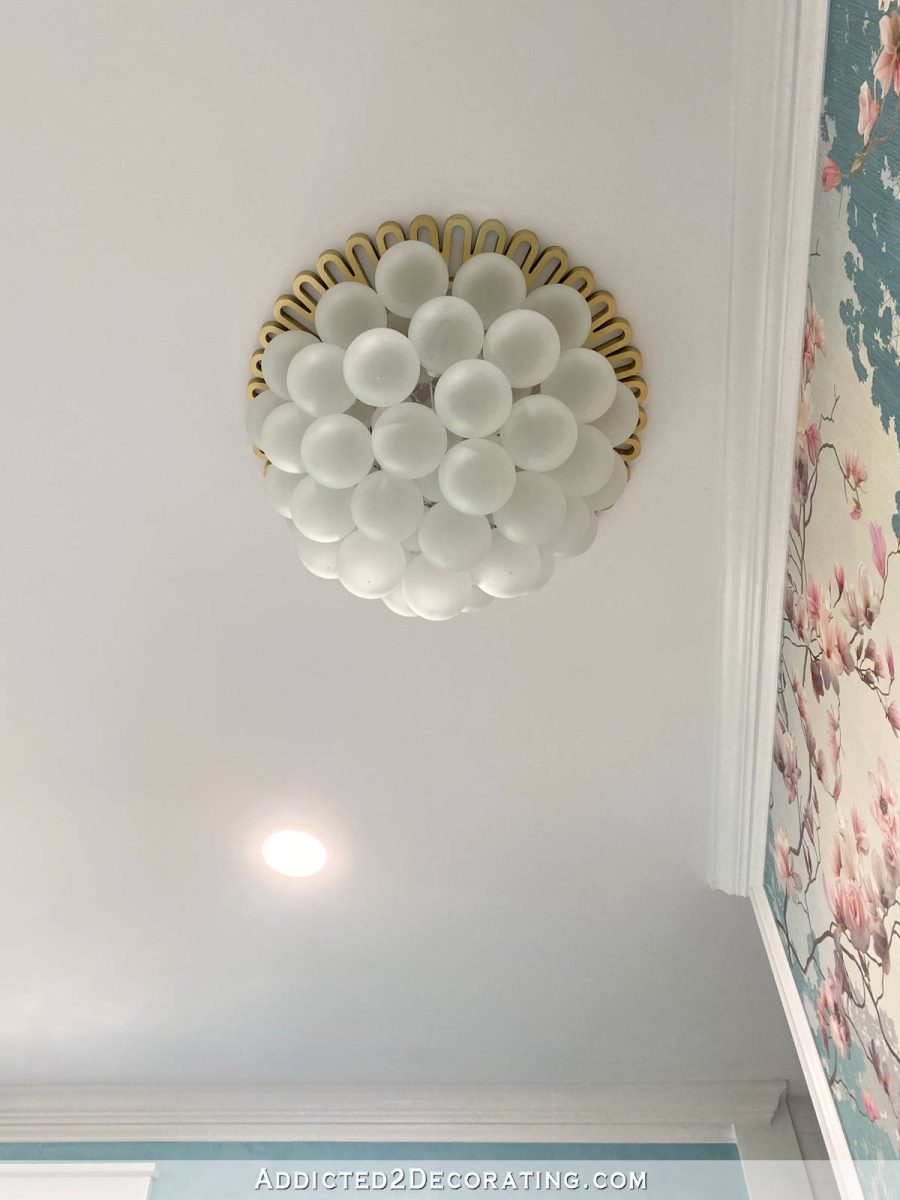
And again, all of those glass bubbles are hanging around a recessed light, which does work, and does provide light through all of those glass bubbles. Here’s what it looks like when that recessed light is turned on and the other recessed lights are turned off…
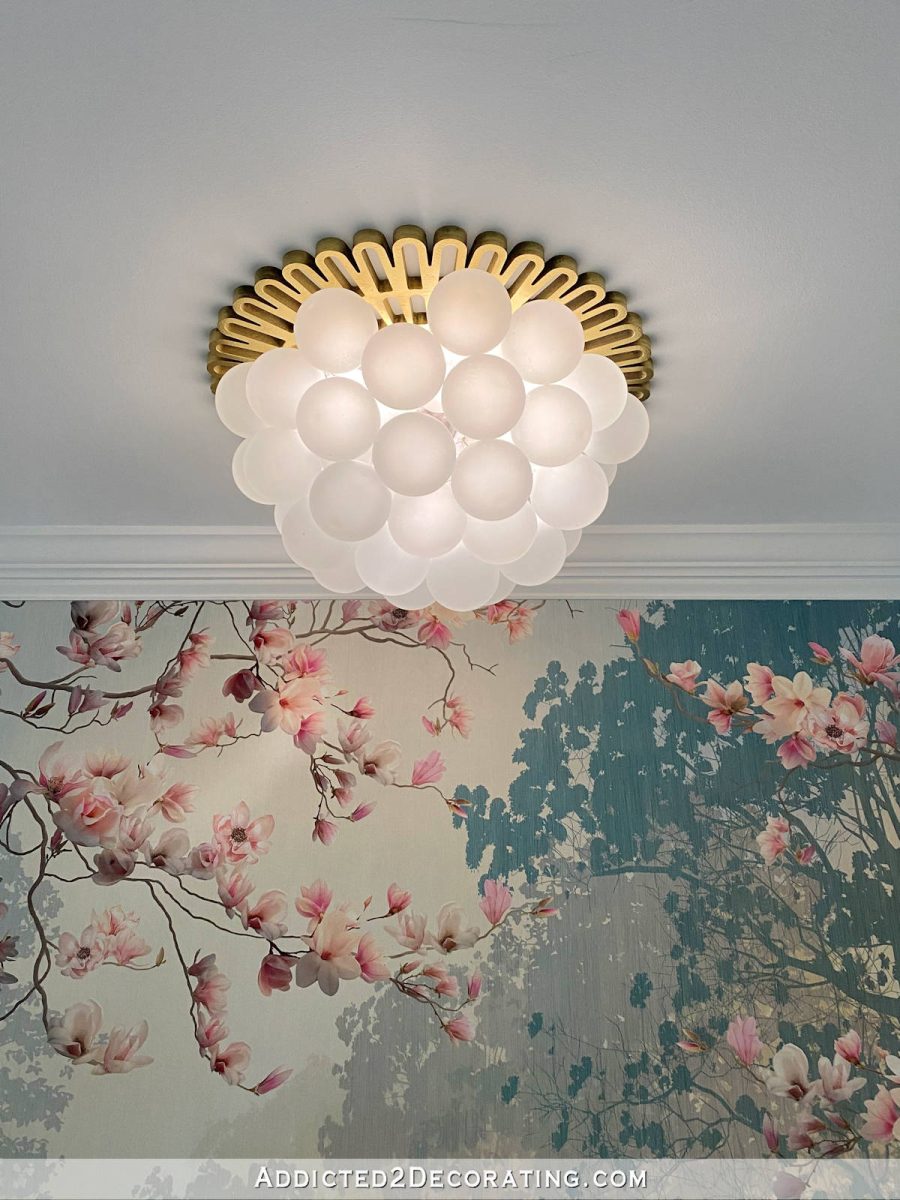
It’s such a pretty glow of light, which is the perfect amount of ambient light when I want to take a bubble bath at night.
So let me show you how I made this DIY glass bubble light.
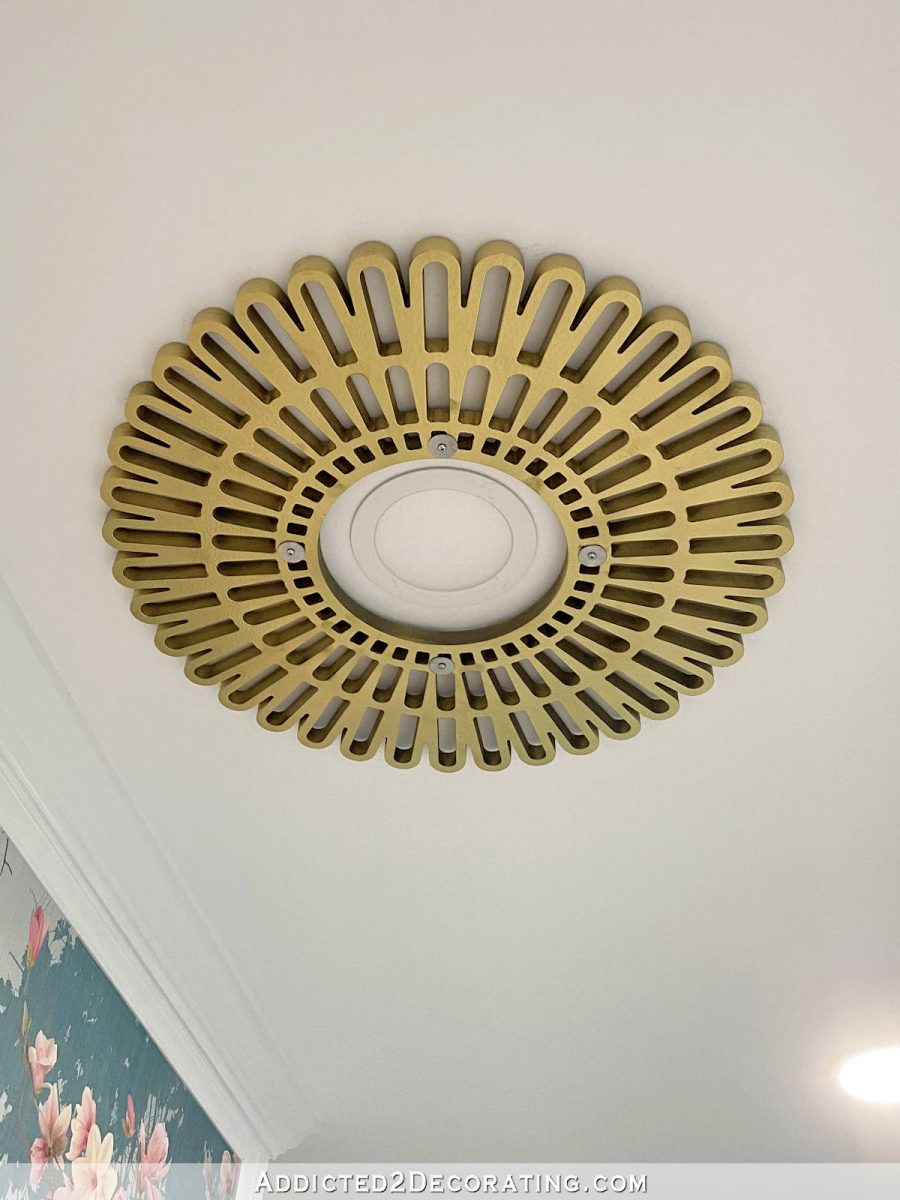
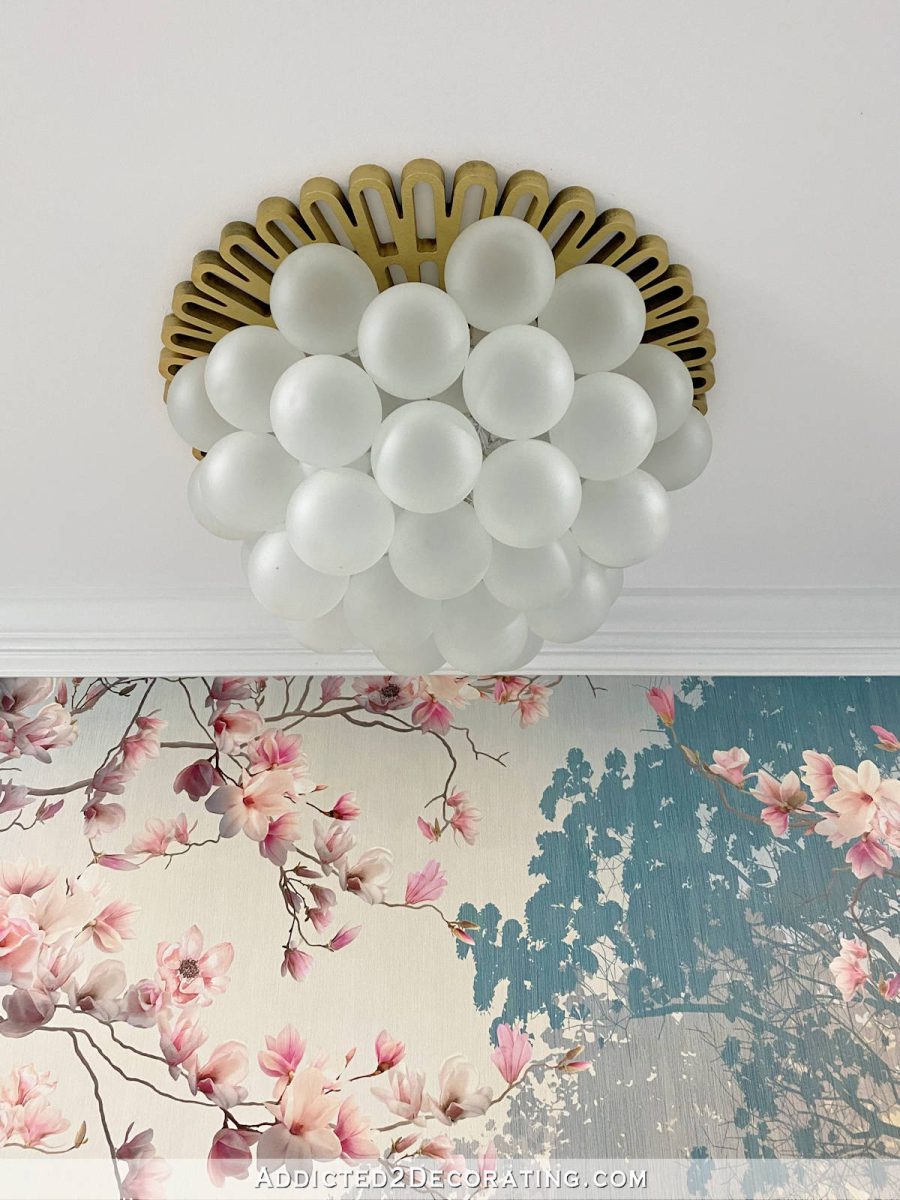
First, I started with a ceiling medallion. I purchased this one from Wayfair, and I selected the antique brass finish and the 24-inch size.
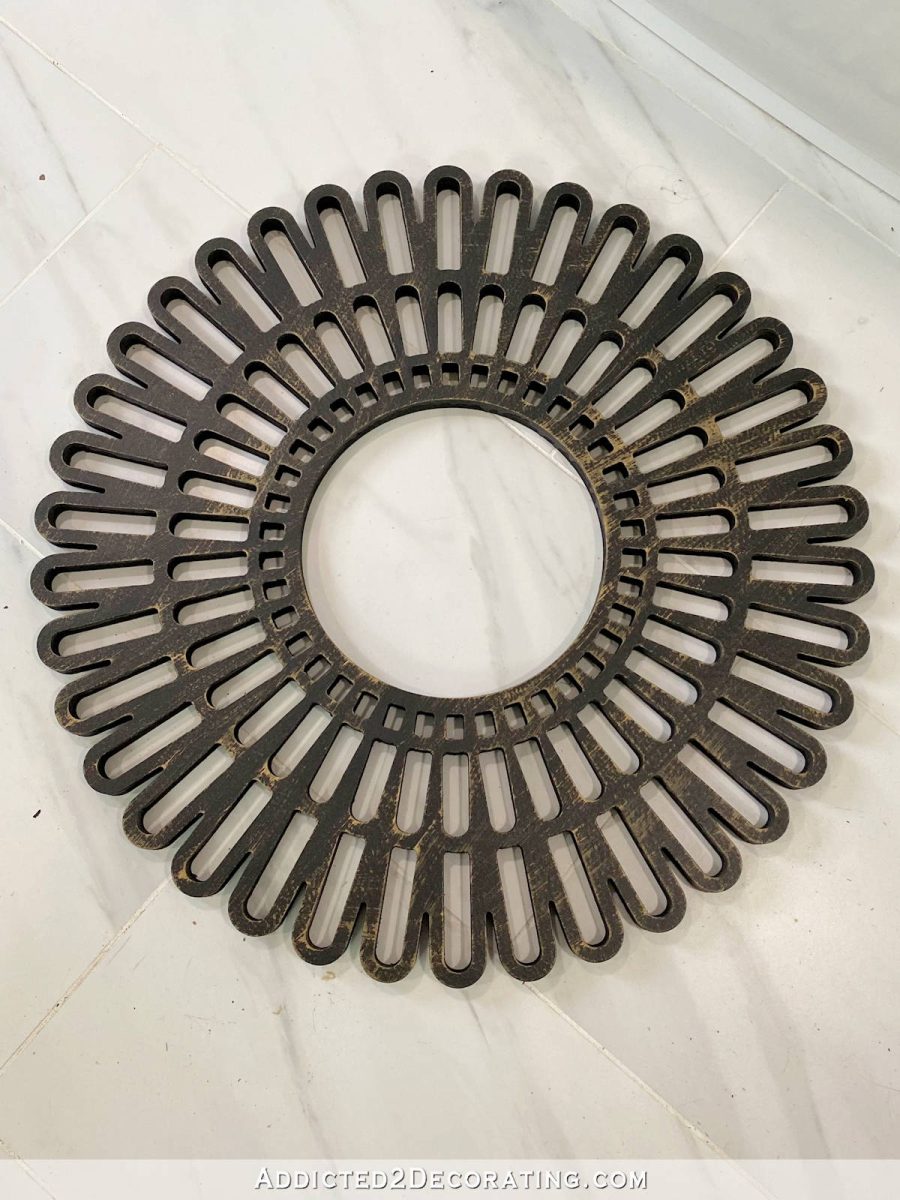
As you can see, the color of the one I received is nothing like the color of the antique brass medallion on the Wayfair website, even though the one I received was labeled “antique brass” on the back. Oh well. That’s nothing that a couple of coats of spray paint can’t fix. This is the spray paint I used…
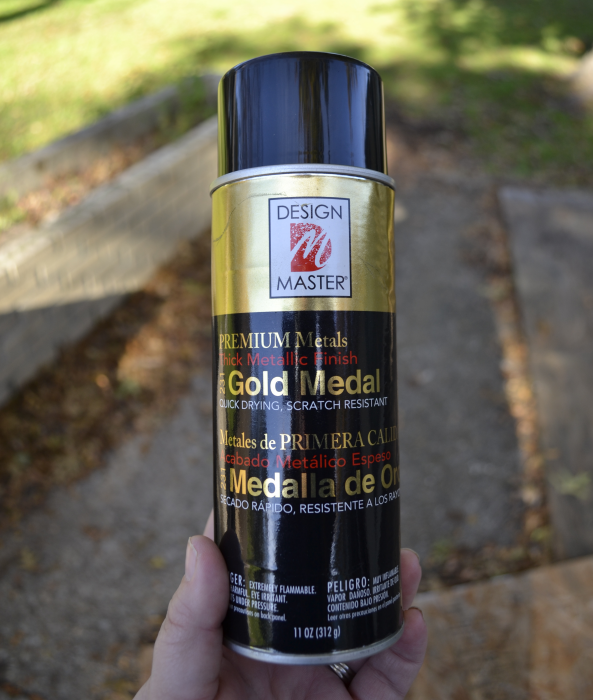
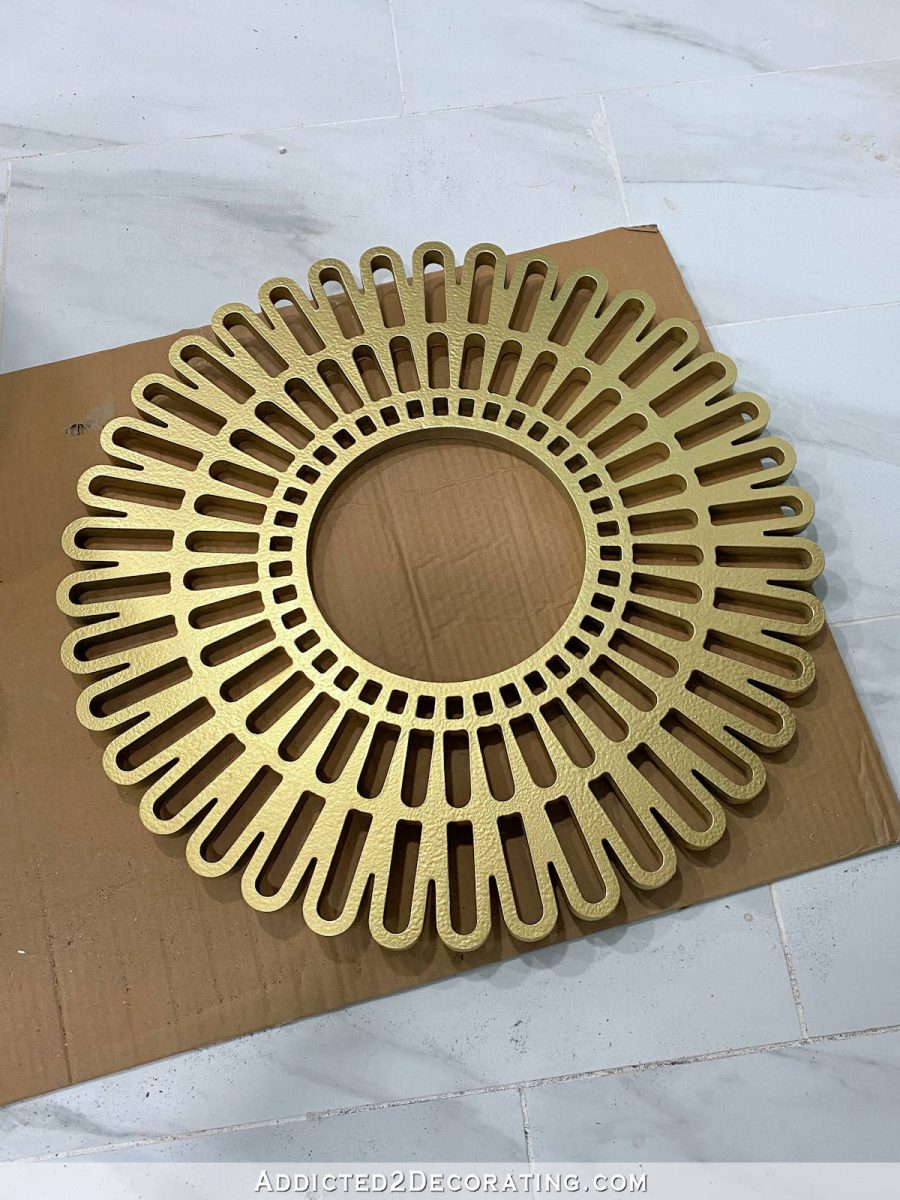
That spray paint was perfect, and I had a perfect antique gold medallion…
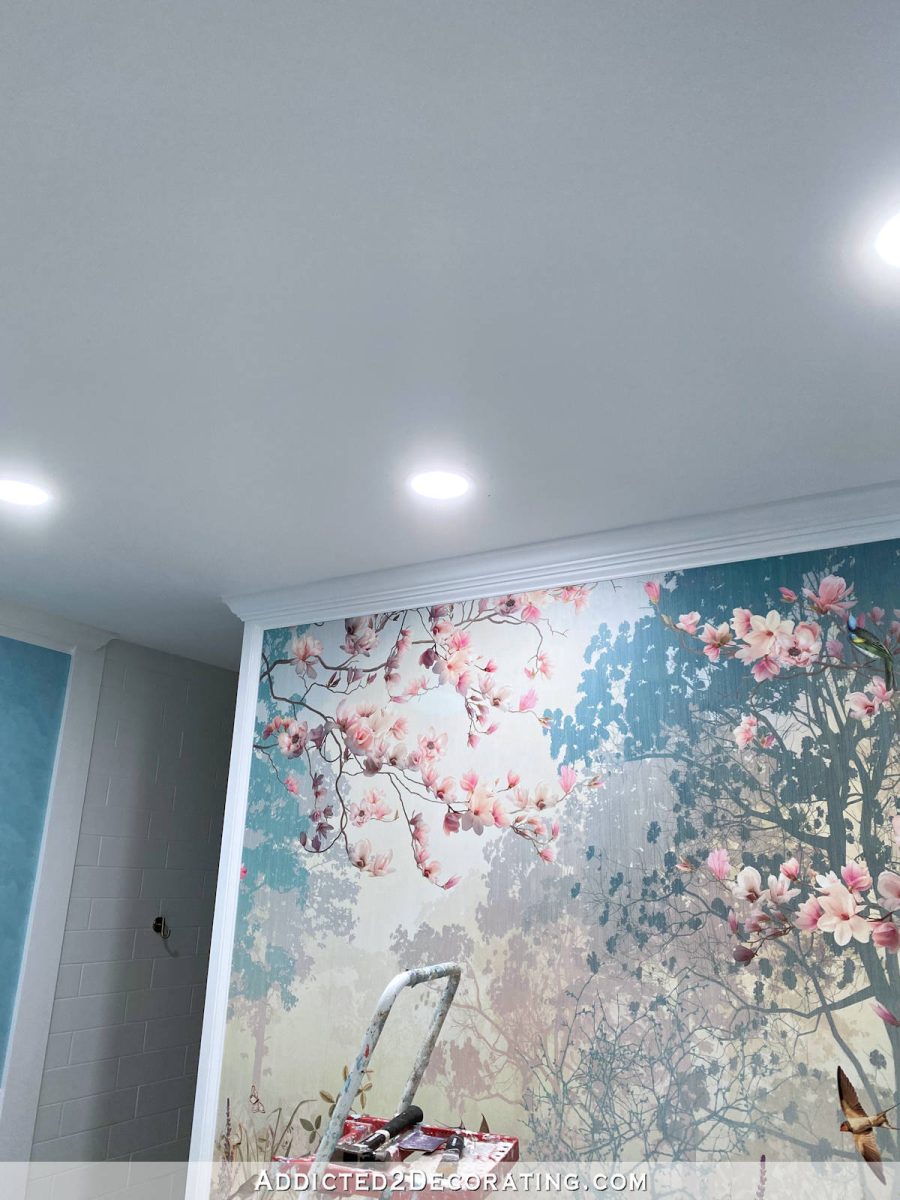
Here’s a look at the light above the bathtub. As you can see, it’s just a normal recessed light, and I had it wired on a separate switch from the other recessed lights in the room.
To install the medallion, I used washers, 2-inch screws, and drywall anchors to screw the medallion onto the ceiling through the small holes. I didn’t screw them tight to the ceiling at this point. I left them a bit loose so that I could attach the form onto which the glass bubbles would be hung.
And the form that I used was a flower basket that I found on Amazon.
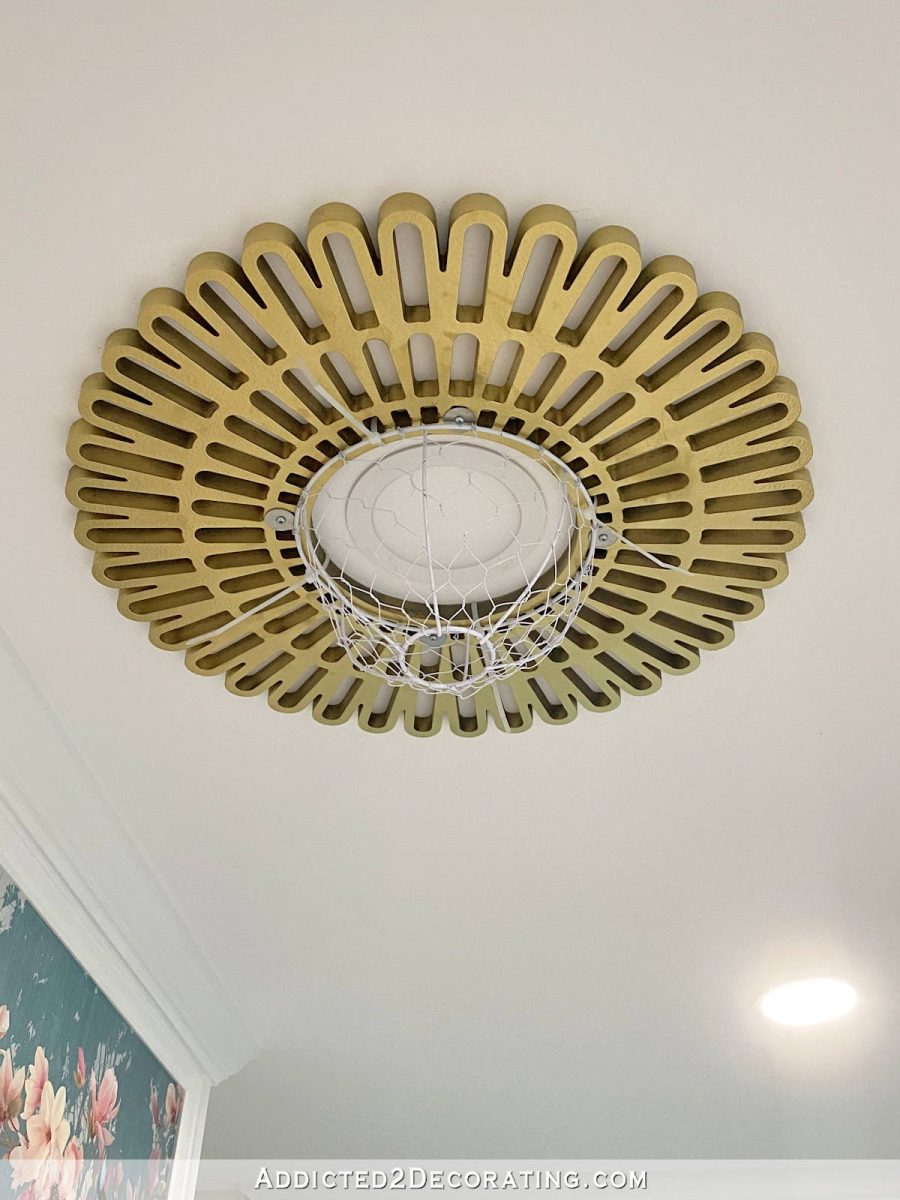
I planned this chandelier back in December of last year (2021). That’s when I bought all of the “bubbles” (which are frosted glass Christmas ornaments), but I wondered for a long time exactly how I was going to attach all of the bubbles. Then one day a couple of months ago, I saw an Instagram reel from Chris Loves Julia of their bubble chandelier (which cost about $2500) being installed and put together, and when I saw the form to which those glass bubbles were attached, I thought, “Oh my gosh! That looks exactly like a hanging flower basket!”
So that’s exactly what I used. And I just attached it to the ceiling medallion using zip ties, which you can find in the electrical department of the big box home improvement stores. Simply zip tie the hanging flower basket to the ceiling medallion, cut off the excess, and then tighten up the screws the rest of the way so that the ceiling medallion is snug against the ceiling. Then I just used some gold acrylic paint that I had on hand to paint those screws and washers before moving on to the next step.
Next, I used standard size frosted glass Christmas ornaments (about 2.5″) around the top of the basket. I just used the little hangers that come on the ornaments to attach them to the wire basket so that they would be as close as possible.
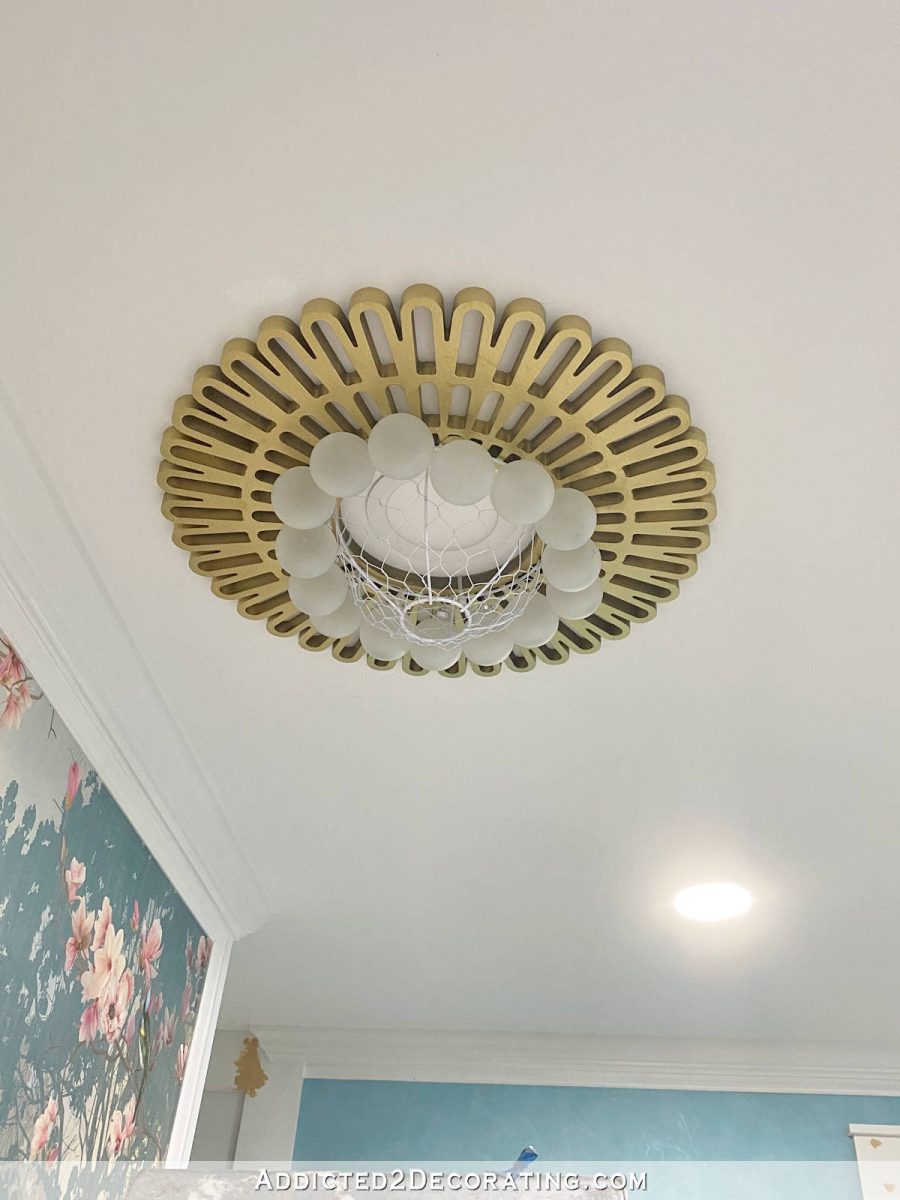
And then I continued with another row, and then another, to cover as much of the wire basket as possible.
Once I had the basket covered up close, then I started adding the large 4-inch ornaments. Again, I bought these last Christmas at Hobby Lobby when they were all on sale. (I would only recommend buying them on sale during the Christmas season, because if you have to purchase them in the off season, you’ll pay a ridiculous price for them.)
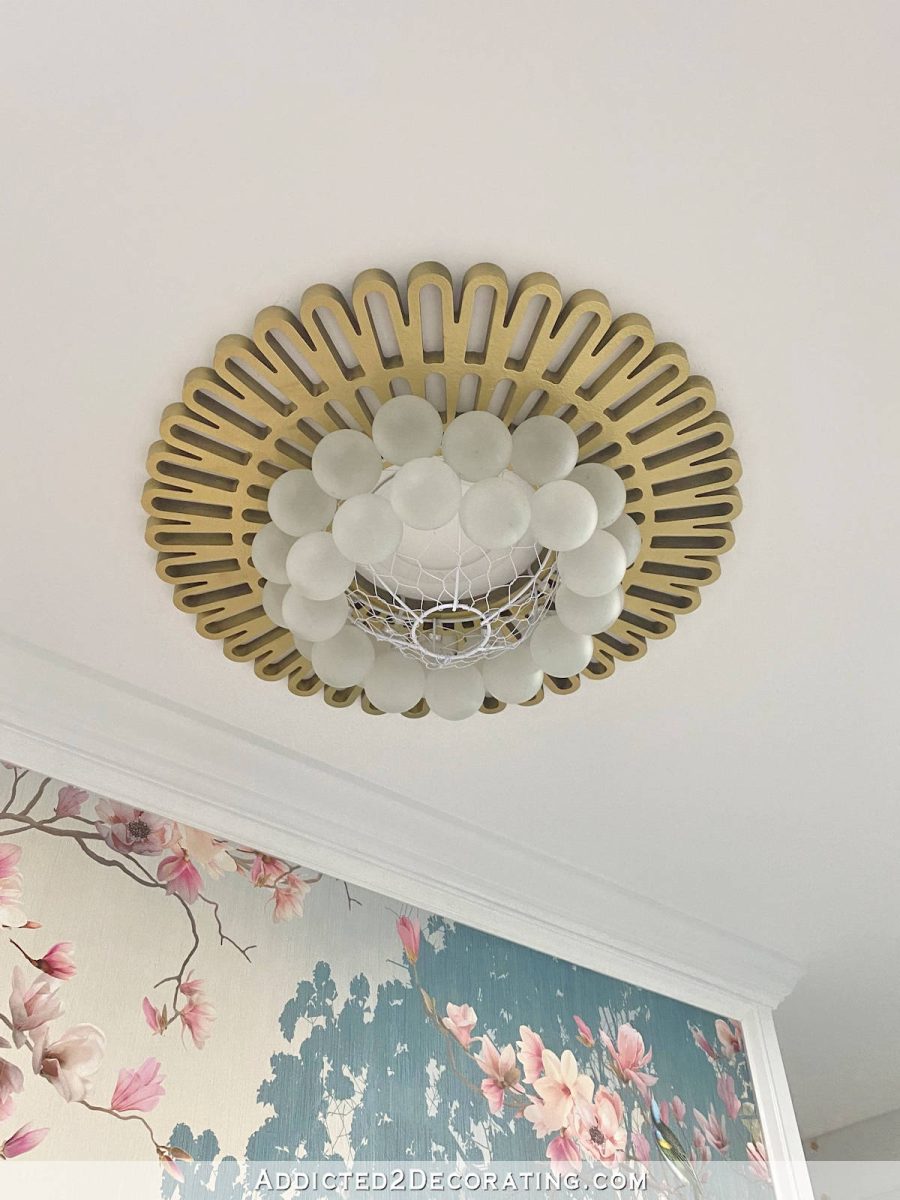
To hang the large ornaments, I used some 12-gauge craft wire that I bought at Michael’s…
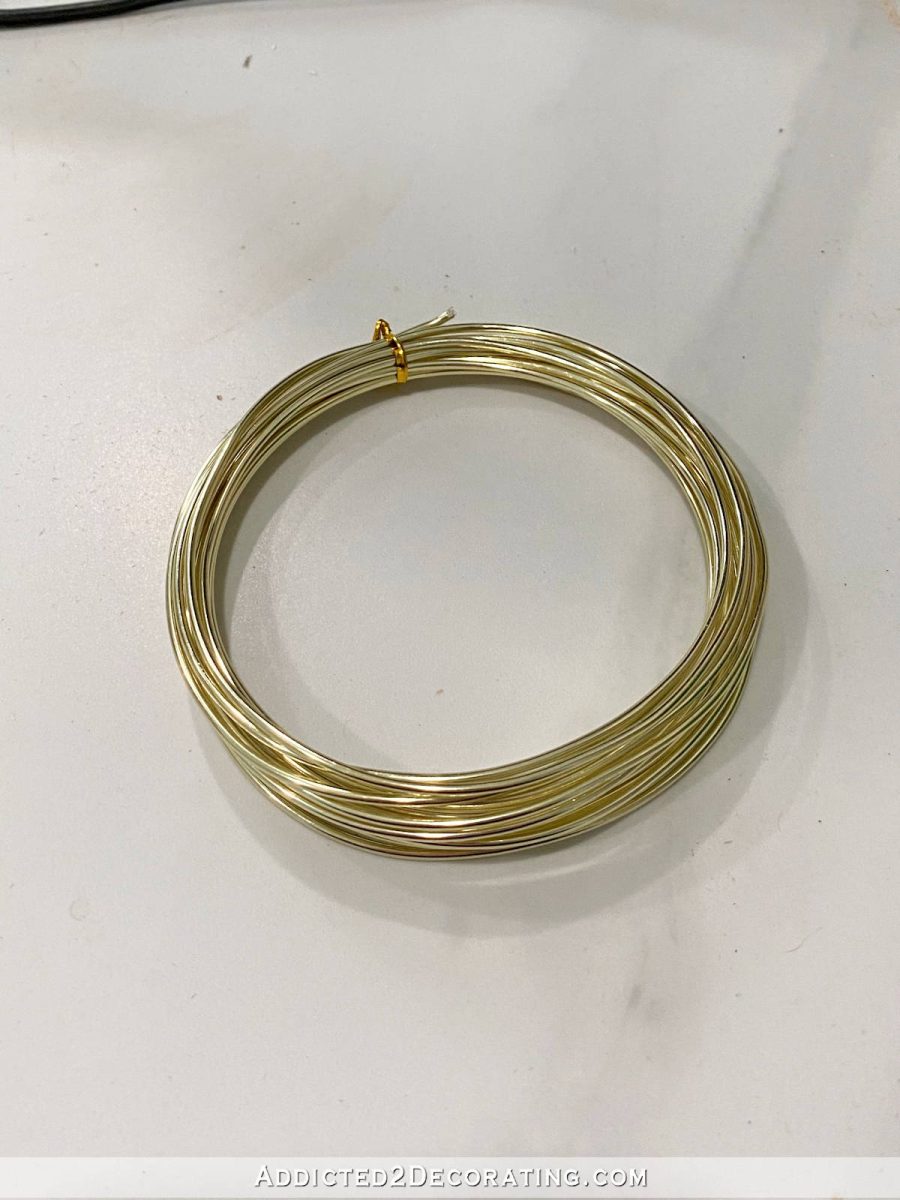
Using my needle nose pliers that have a wire cutter on them, I cut the wire to 4-inch lengths, and formed one end into a loop that hooked onto the ornaments.
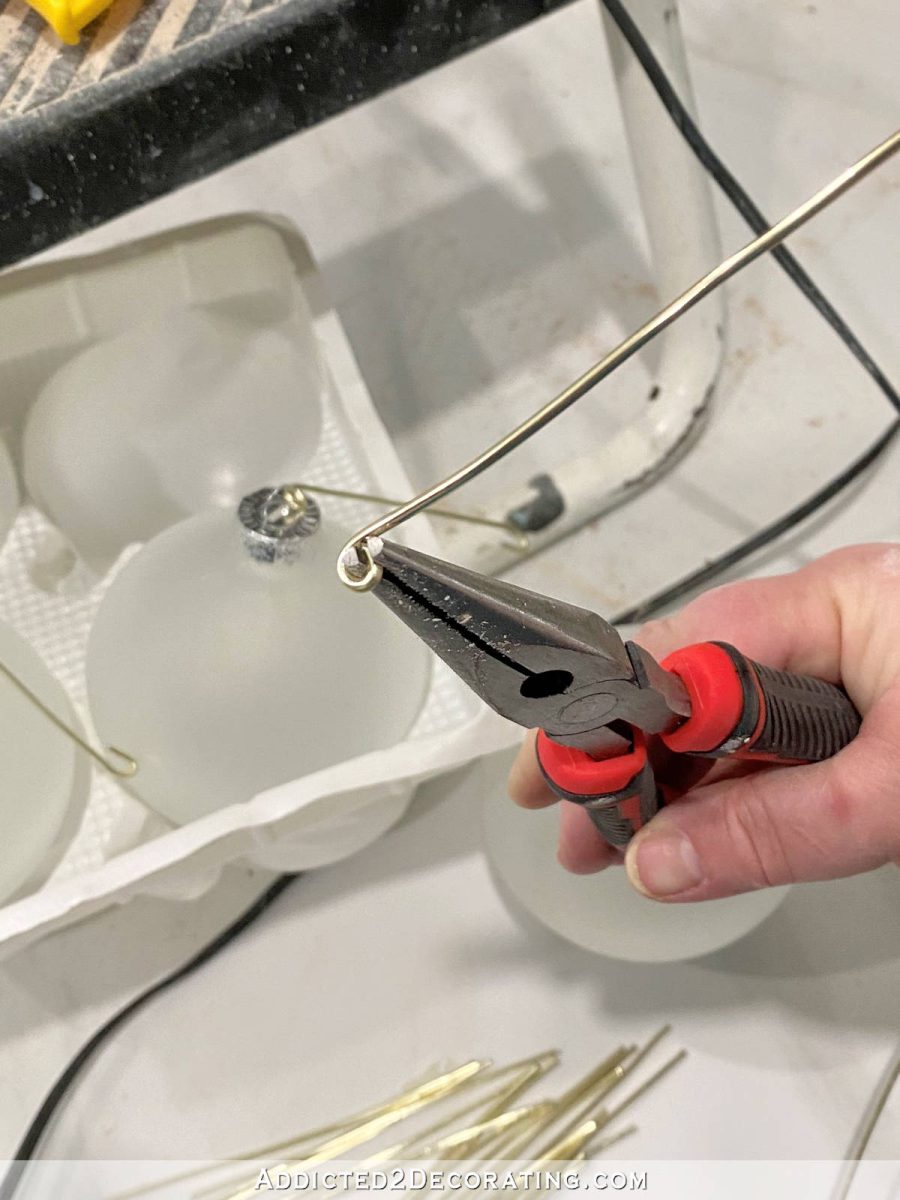
Once they were attached, I squeezed the loop together to hold it securely onto the ornament.

And then, still using my needle nose pliers, I formed the other end into a hook that would attach to the wire basket.
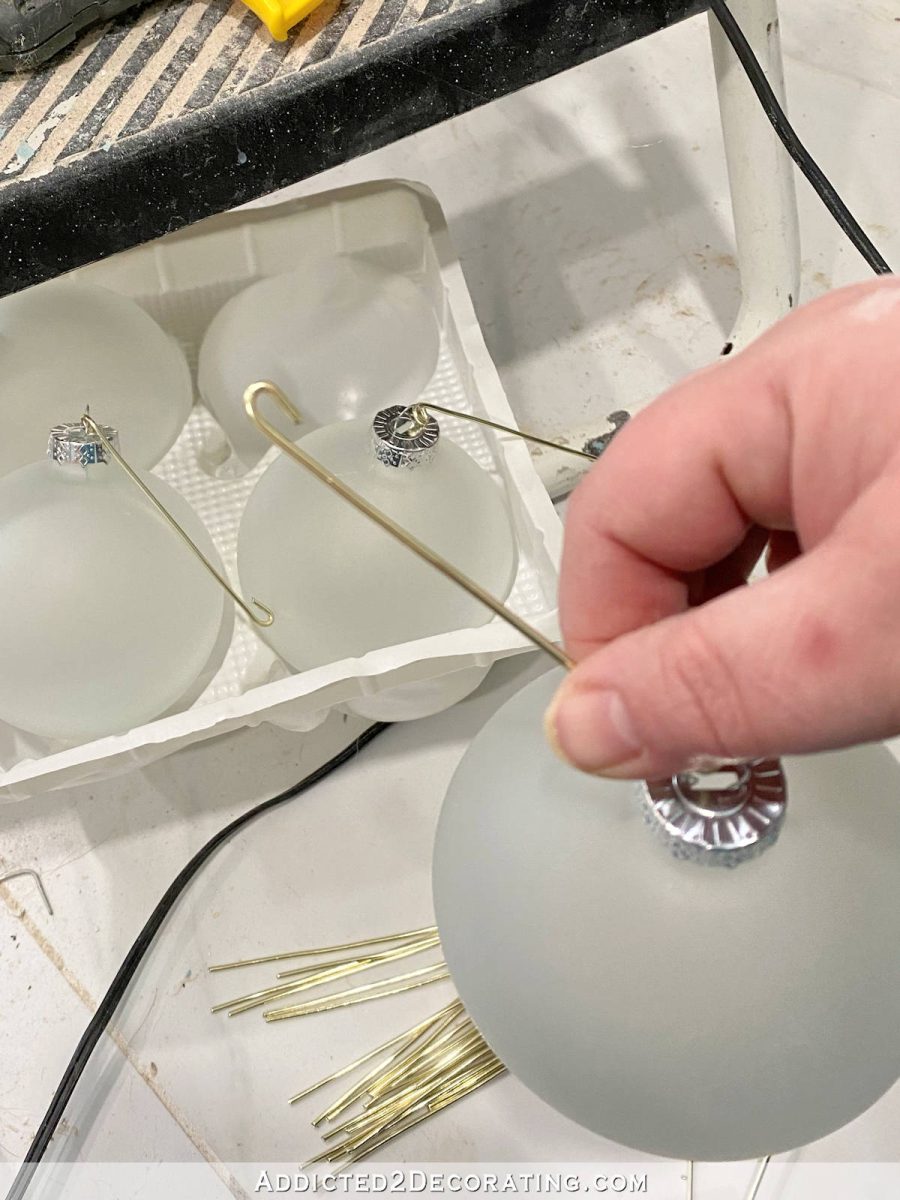
Once I hooked each large ornament onto the wire basket, I used my needle nose pliers to squeeze the hook so that it wouldn’t slip off of the wire basket. I won’t lie. This was easier said that done, especially as the light became more and more filled up with bubbles, and it became a very tight squeeze to get my pliers in between all of those ornaments. But I did my best, and it took a whole lot of patience, but I finally got them all attached.
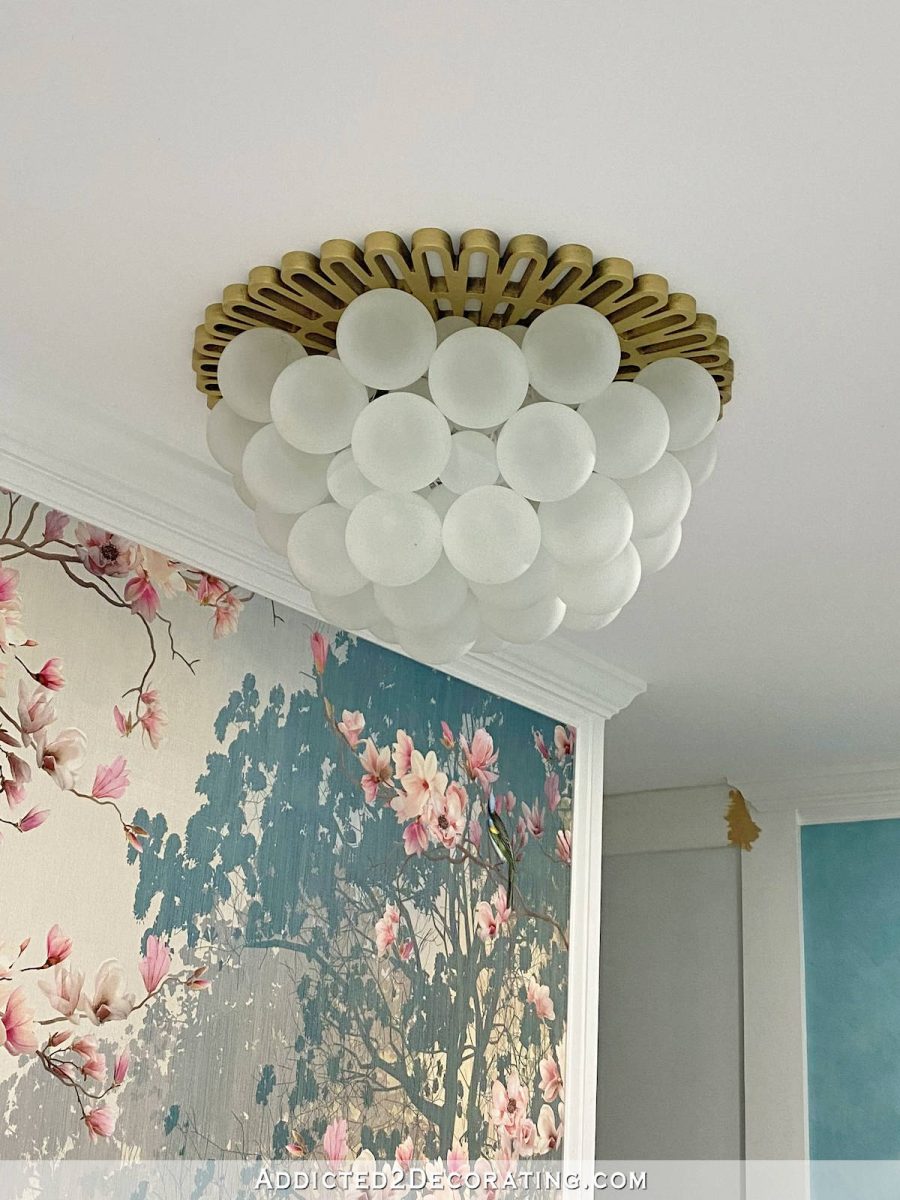
In all, I used 34 of the large ornaments to create the whole chandelier. The ceiling medallion is 24 inches in diameter, so that gives you an idea about the size.
I’m pretty darn excited about how it turned out. It actually turned out much better than I had envisioned, and it fits the needs of this space. It hugs the ceiling, and since these decorative parts aren’t connected to electricity at all, there’s no building code violation at all. But I still get that pretty chandelier look above my bathtub.
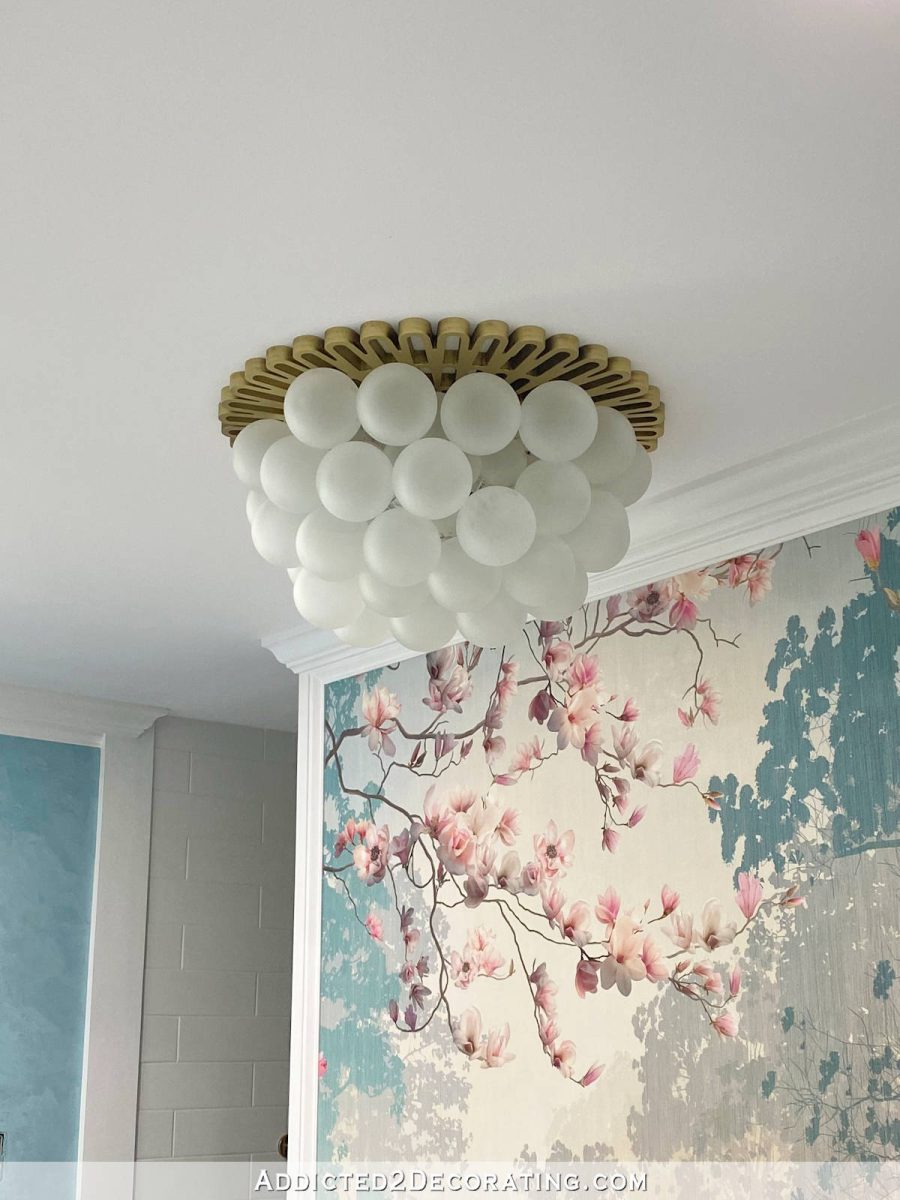
And speaking of bathtub, here’s the view from underneath. This is the view that I get of the light as I take a bath in the tub.
And here’s the other direction…
I’m seriously so proud of how this turned out.
Here’s the whole view. Please disregard the unfinished walls in the rest of the room. 🙂
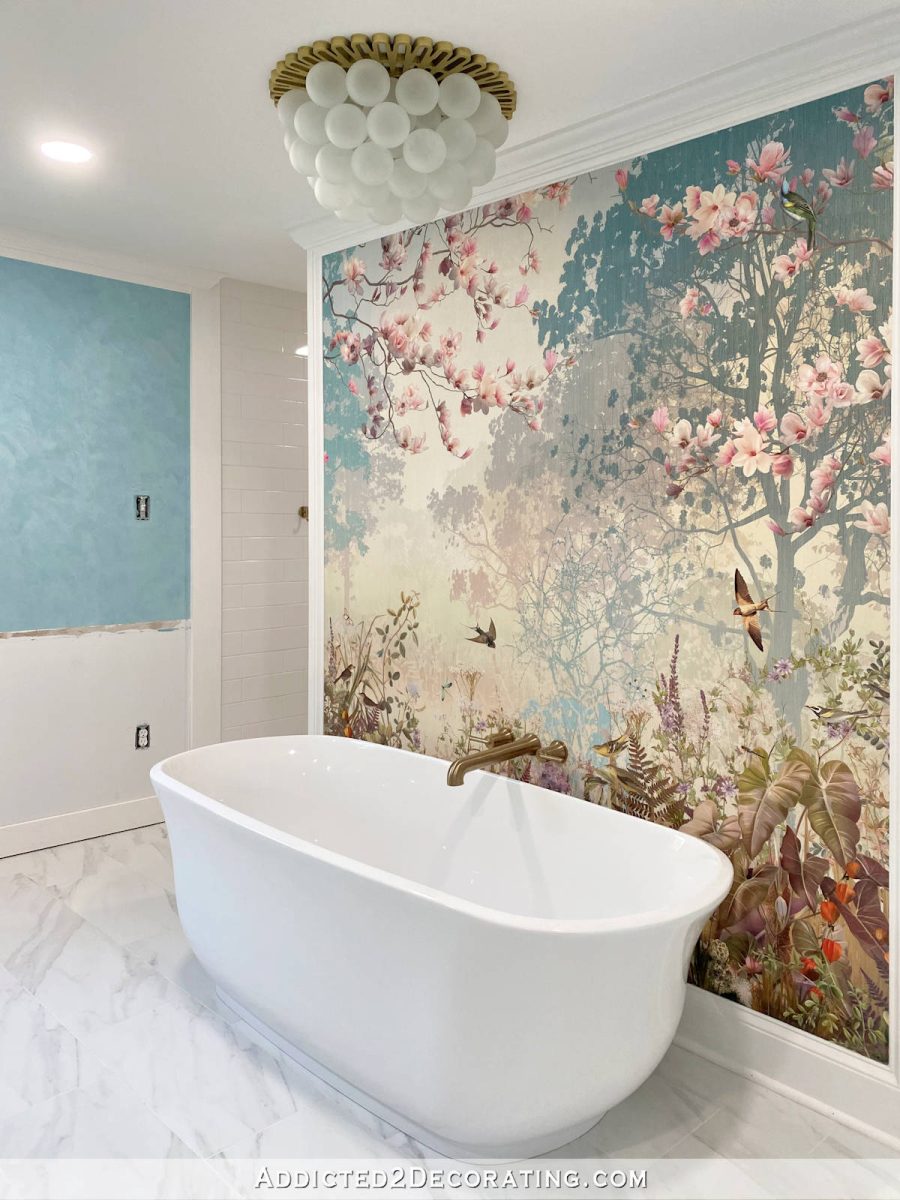
And here are a couple of closer pictures. I tried to get the faucet and the chandelier in one view…
It turned out pretty great, right? I love it!
I actually think my little DIY glass bubble chandelier is much better than the one I had in my original mock up of the room, which was one from Pottery Barn (I think).
Again, here’s how the chandelier looks when the light is turned on. It’s such a pretty glow. This is with the other lights turned on as well…
And this is with the other lights turned off…
Here’s the full view of the light turned on with the other recessed lights turned off…
That’s pretty good for a DIY bubble light, right? I had tried the bubble light without the medallion before (which you can see here), but I wasn’t really liking it. That’s why I considered some other options, like tinting the bubbles a color to contrast with the ceiling.
But in the end, all it needed was a medallion, and this one in particular was suggested by a commenter on a previous post. I think it’s perfect! And thanks to that medallion, the original frosted bubbles turned out to be perfect. I love that they kind of give the feeling of a cloud above the tub.

Addicted 2 Decorating is where I share my DIY and decorating journey as I remodel and decorate the 1948 fixer upper that my husband, Matt, and I bought in 2013. Matt has M.S. and is unable to do physical work, so I do the majority of the work on the house by myself. You can learn more about me here.
I hope you’ll join me on my DIY and decorating journey! If you want to follow my projects and progress, you can subscribe below and have each new post delivered to your email inbox. That way you’ll never miss a thing!
Source link