Long DIY Countertop Made With Laminate Flooring (How To Make A 20-Foot-Long Countertop For Around $300)
[ad_1]
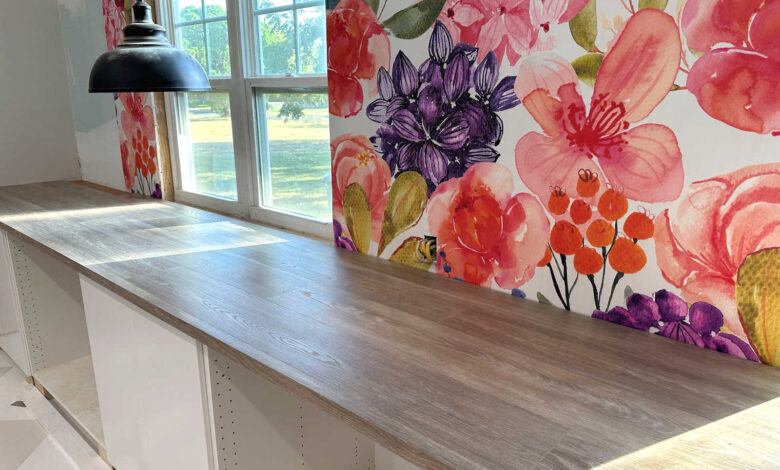
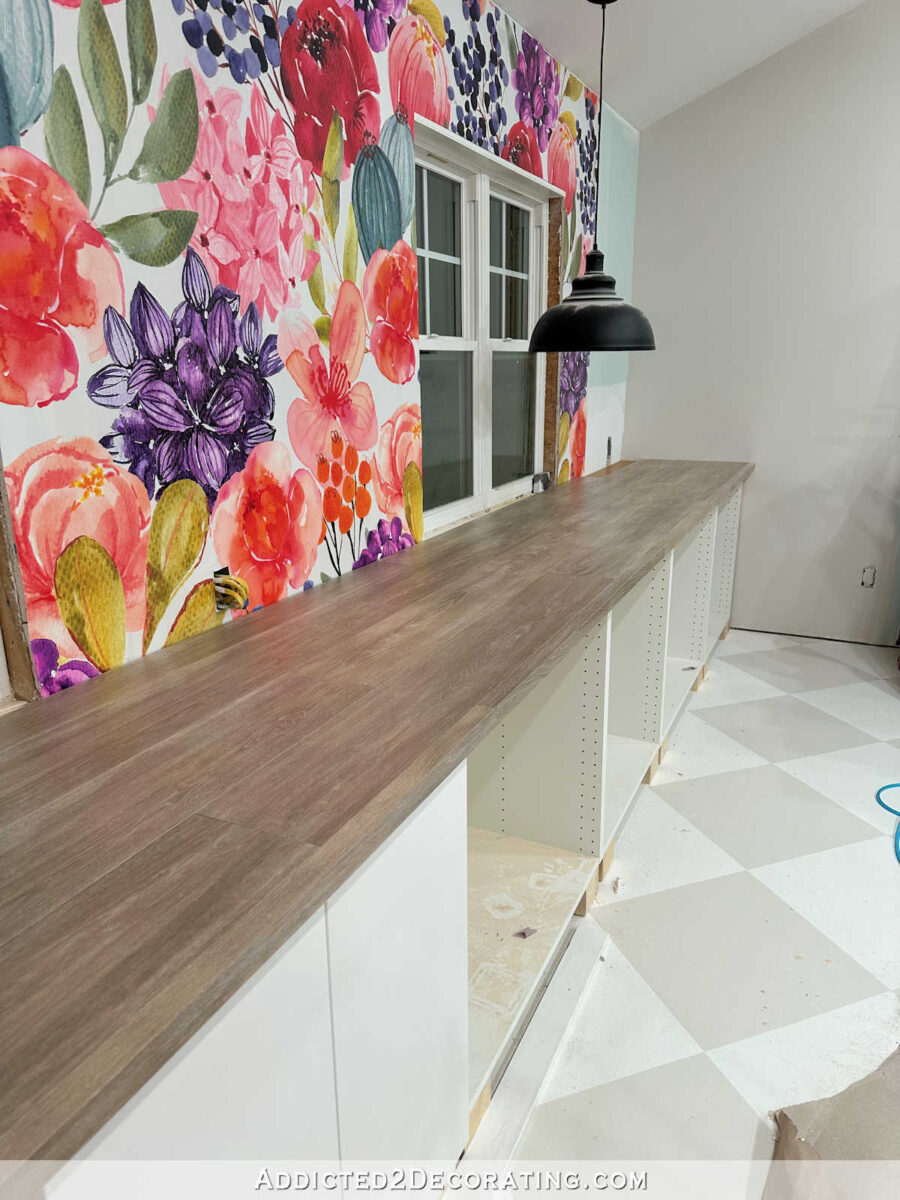
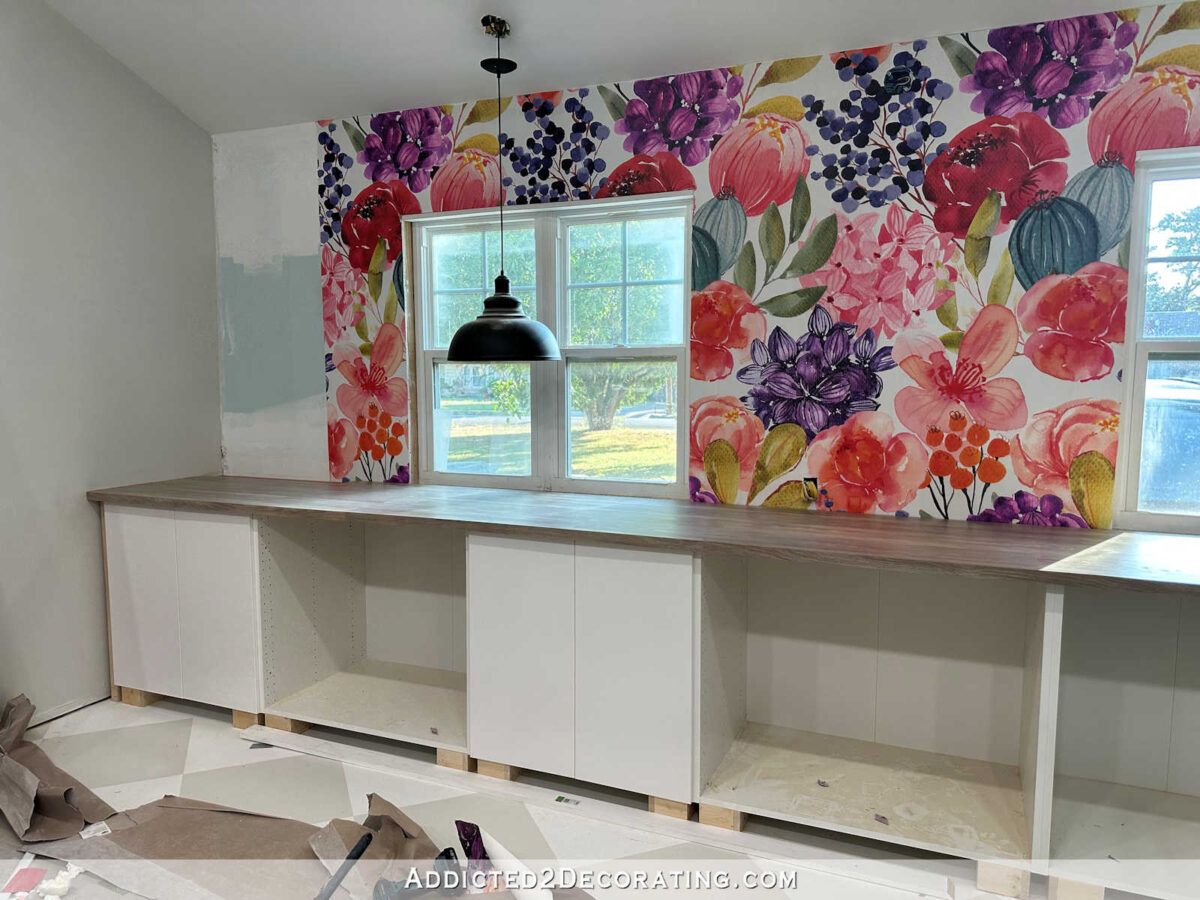
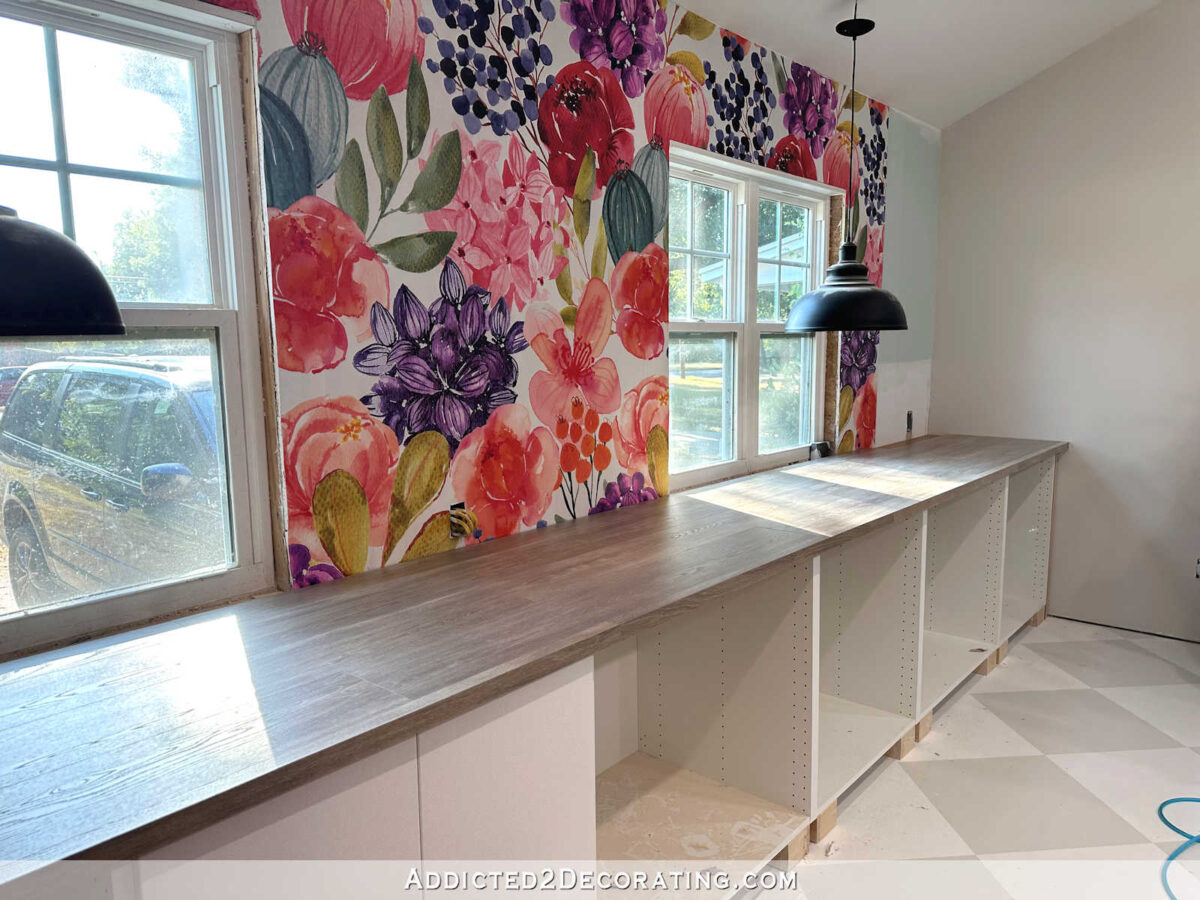
Yesterday, I got a big project finished in my studio. The long DIY countertop made with laminate flooring is done! That was a daunting project, and I’m so glad to have it checked off of my list.
What made it daunting was the length. That countertop is almost 20 feet long, and it took me forever to come up with a plan to cover that 20-foot span while not spending a fortune. The whole 20-foot countertop cost about $300, and I’m so proud of how it turned out!
I can’t get the whole countertop in a single picture (at least not right now with the work tables in the way), but here’s a look at how the countertop turned out.
I’ll have to take pictures later in the day when light isn’t streaming through those front windows, but that will have to do for now. Doesn’t that look so good?! Especially for a $300 countertop! And the process as really quite simple. So let me start at the beginning and show you how I made this countertop.
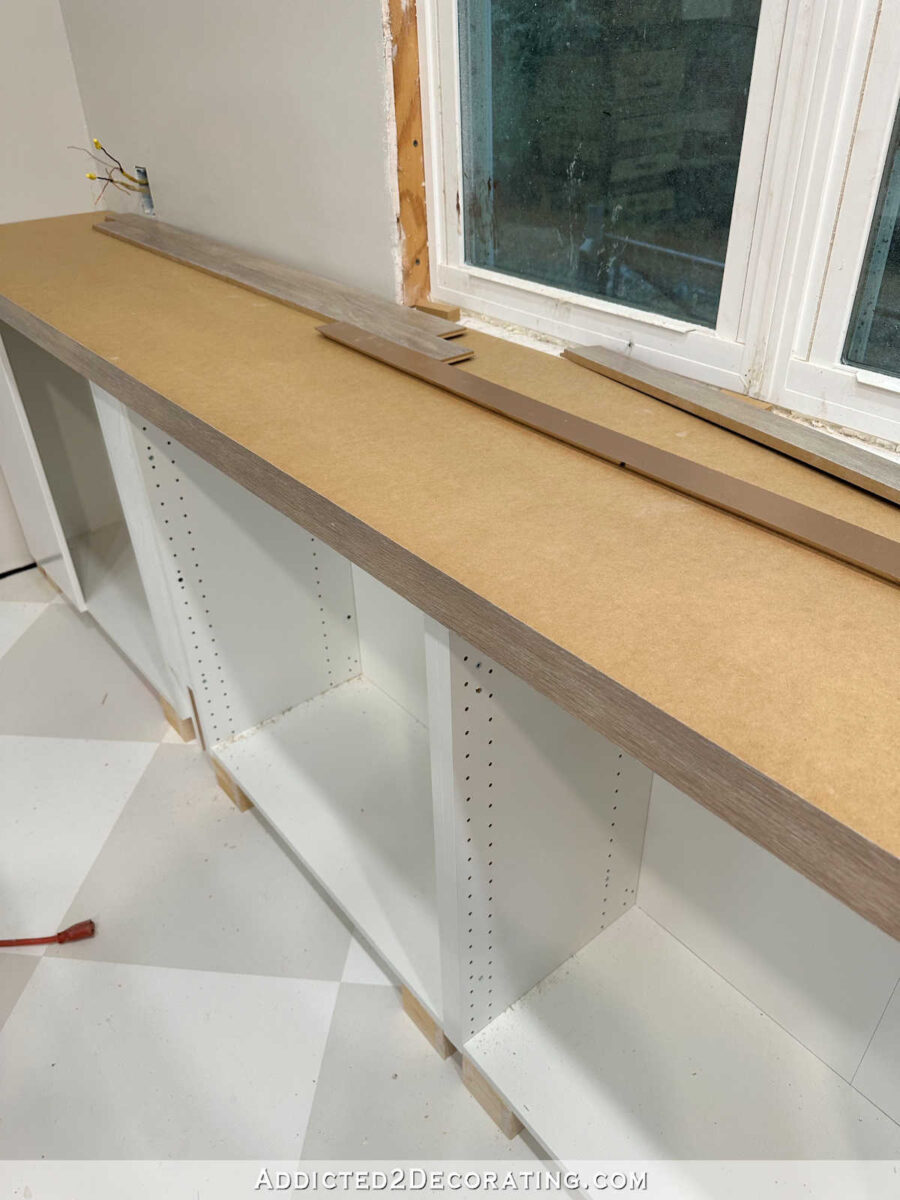
I started out by cutting a single layer of 3/4-inch plywood to fit on top of the cabinets. Since I was using MDF, I had the pieces cut at Home Depot. MDF is really heavy, and I don’t like having to lift and cut those big pieces myself, so I let them do the heavy lifting for me. 🙂 I had them cut the MDF to my finished countertop depth minus 1/2 inch, which is the thickness of the laminate flooring I would be using.
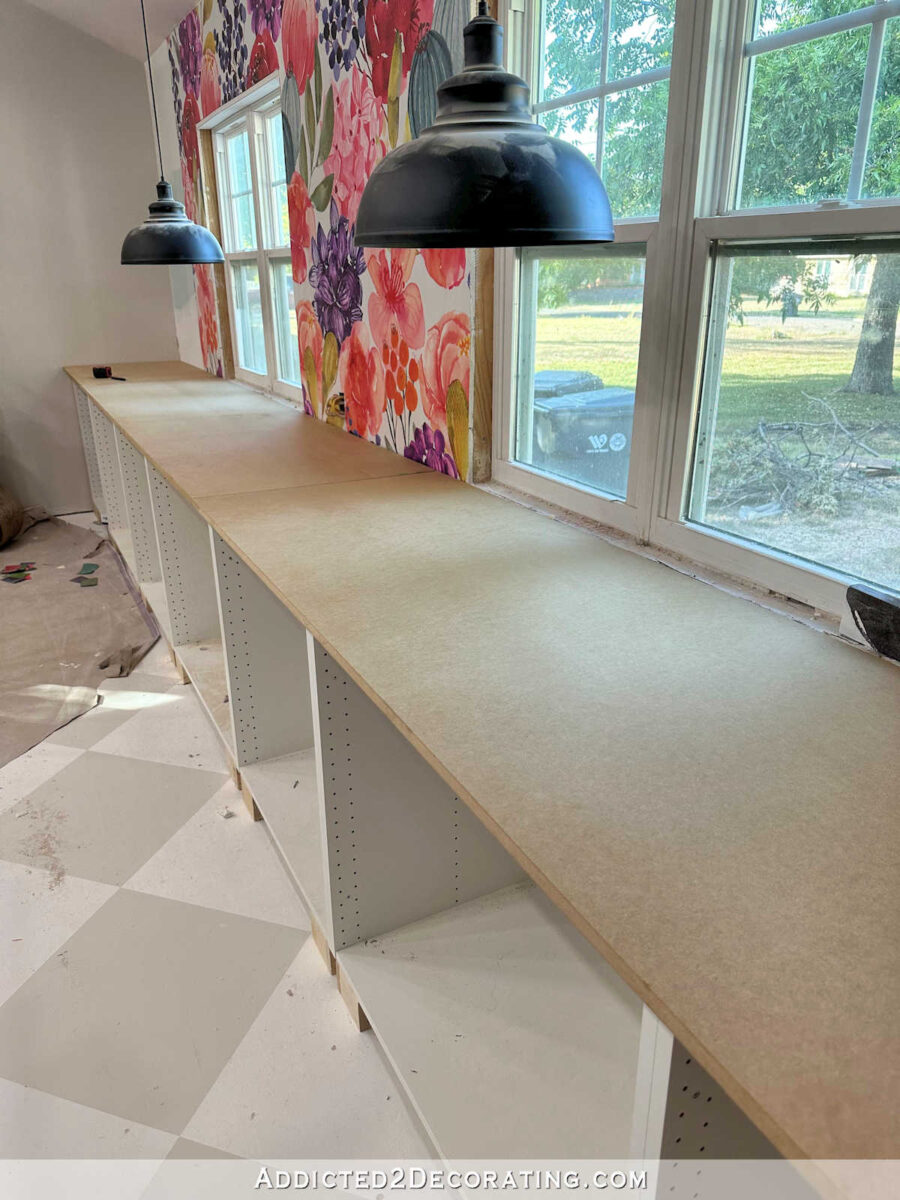
I’ll have to show you these next steps on the other countertop in the studio, but the process was the same on both.
I started at the front and worked my way to the back. So starting on the front, I used my table saw to cut strips of the laminate flooring (I used this Capistrano Beach Oak laminate flooring from LL Flooring) so that it fit the thickness of the MDF (3/4 inch on the long countertop) with a 45-degree mitered edge on top. And then I attached those strips using wood glue and 18-guage finish nails. Here’s a view of that piece from the front…
That top mitered edge doesn’t show from the front, but here’s a view of the back side of that piece. Hopefully you can see how the top edge is mitered at 45 degrees.
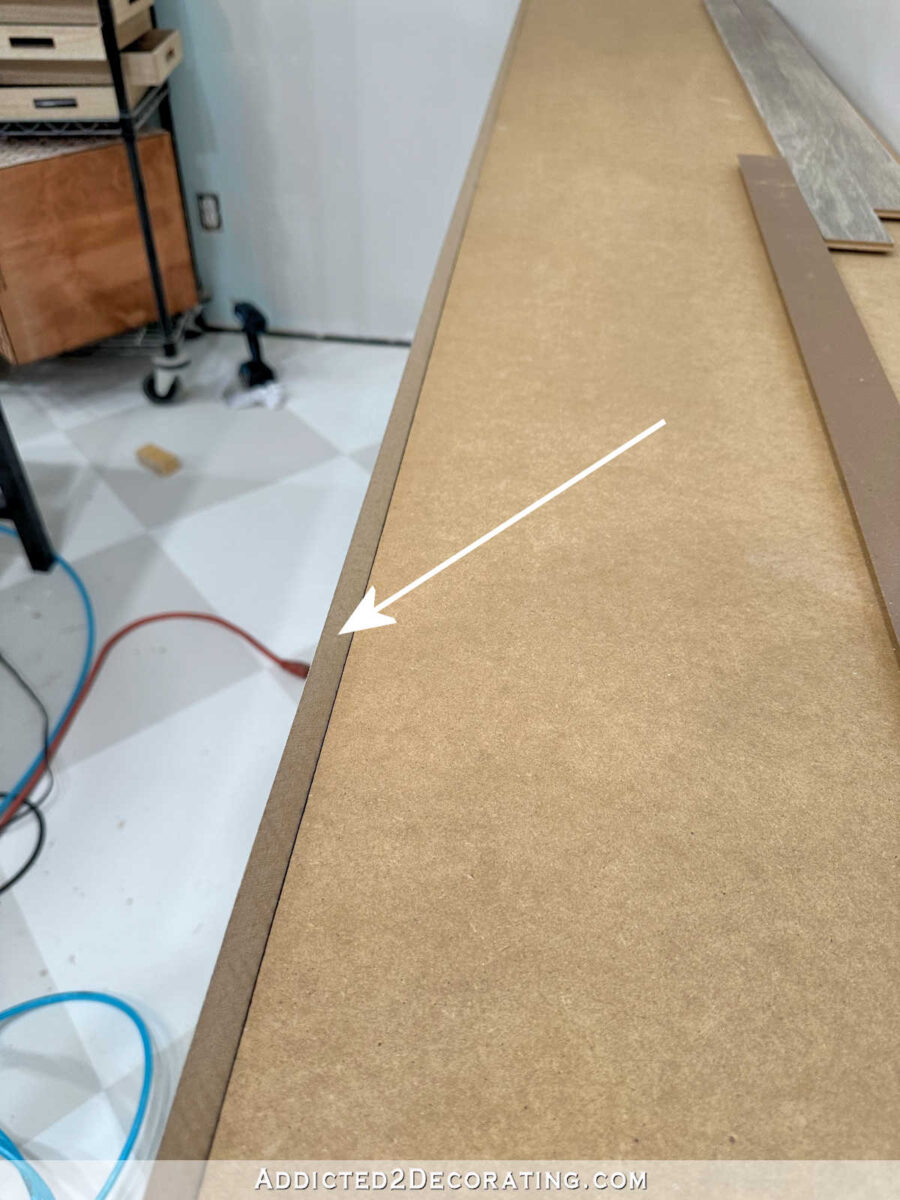
And if you couldn’t see it in the picture above, hopefully you can see the top mitered edges on the corner of this countertop or where that front piece meets the wall.
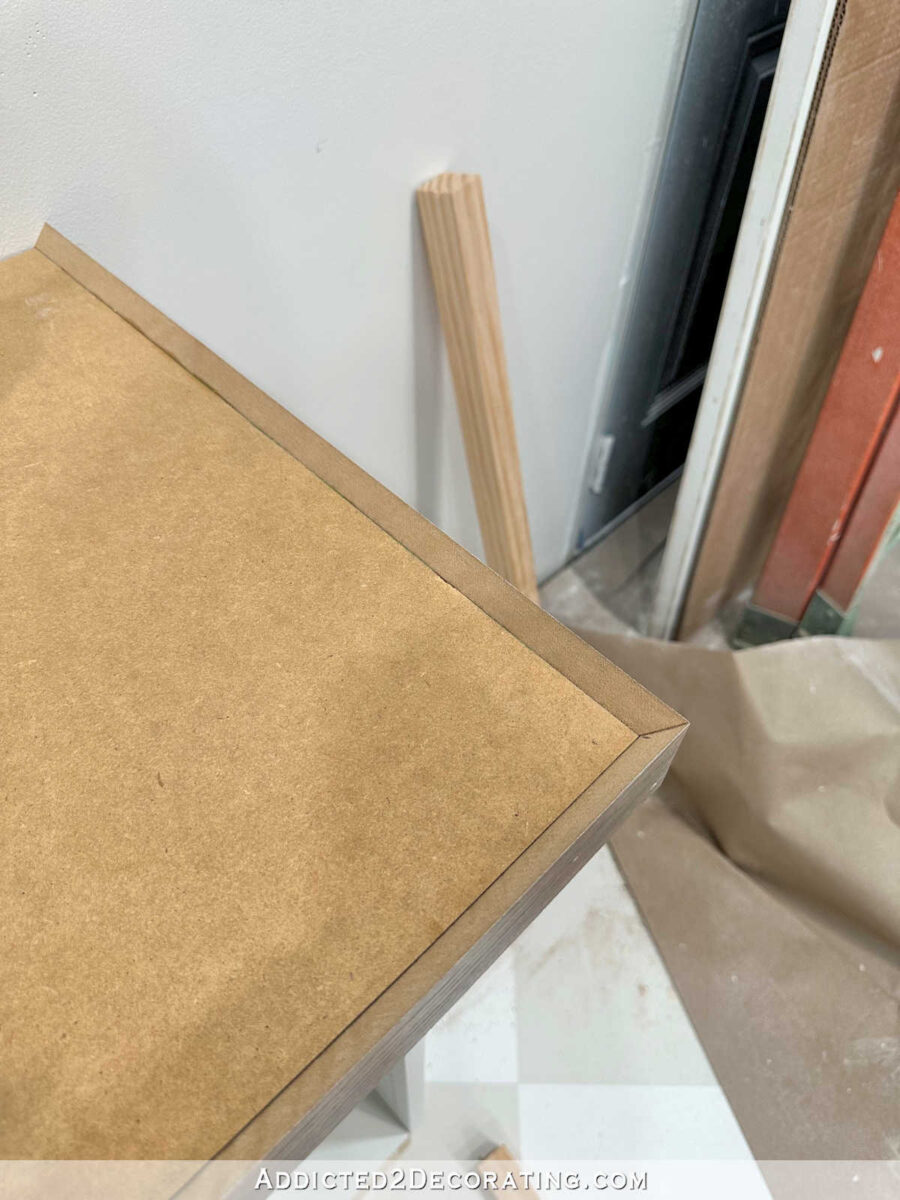
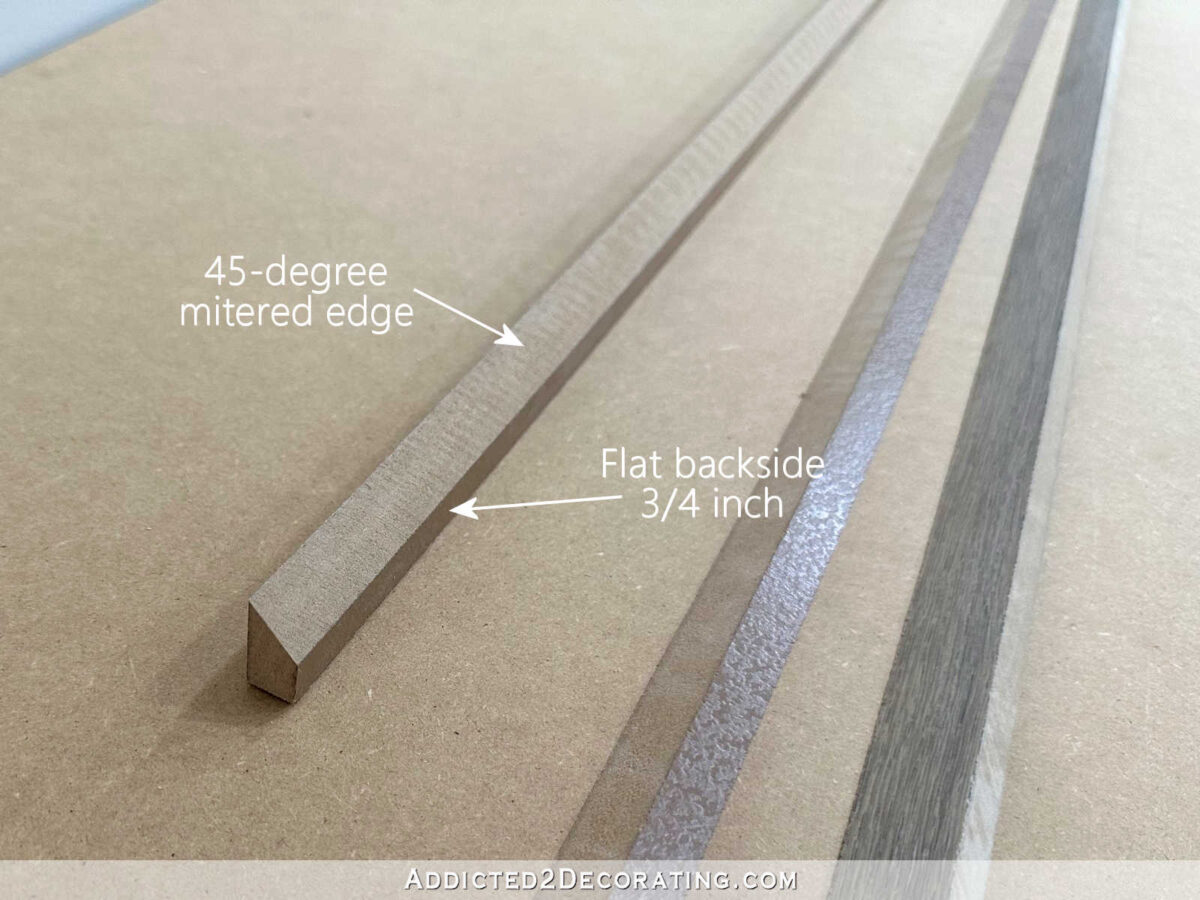
Once the front pieces were attached, I cut the pieces that would be attached to the top to finish off that front piece. Again using my table saw, I cut them so that the flat backside of these pieces was 3/4 inch wide, and these also had a 45-degree mitered edge.
And then I attached those so that the two mitered edges met and gave the appearance of a solid front piece of wood. I glued and nailed these pieces on in the same way I did the front pieces.
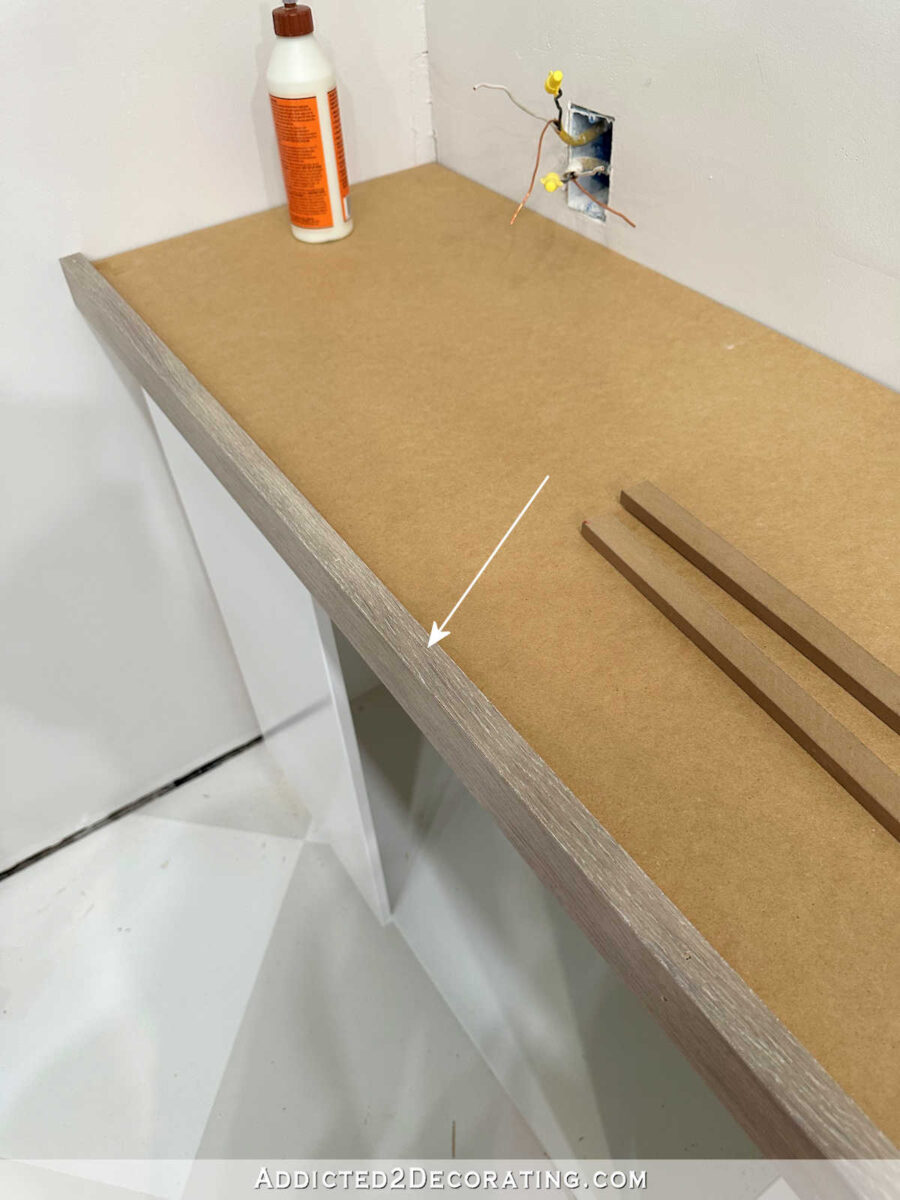
Once those two pieces were attached, this is what it looked like…

Again, keep in mind that the pictures I showed above of the steps I took on the front edge were all pictures of the other countertop in the room, and on that countertop, I used a double thickness of 3/4 MDF as the base for the countertop. That would have made the finished countertop two inches thick, which is too thick for my taste, so I only used one thickness of 3/4 MDF as the base for the long countertop, making the finished countertop 1 1/4 inches. That looked much better.
So the rest of the steps I’ll show you on the actual 20-foot countertop that I finished. Although, the rest of the steps are incredibly simple.
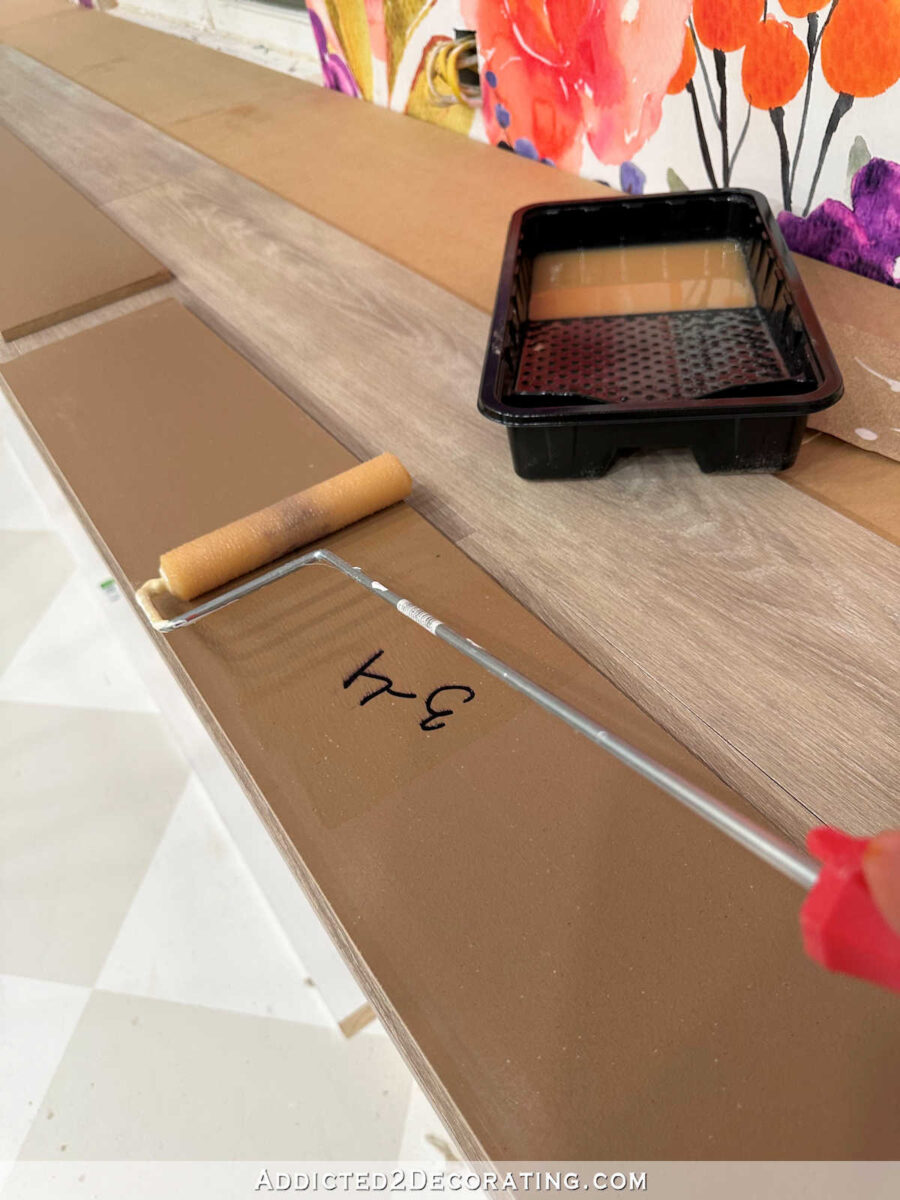
I started by using my table saw to cut off the tongue and groove edges of every piece of flooring. Why? Because most laminate flooring or prefinished flooring has obvious grooves between the boards when you put them together the proper way (i.e., using the tongue and groove on the boards). Even if they don’t look obvious when you’re shopping for flooring, they’ll be obvious when you try to use them for a countertop. So I just ran each board through my table saw twice and cut off the tongue and groove on each side.
And then I filled in the countertop area, starting at the front and working my way to the back, with the trimmed pieces. It was like putting together a very simple puzzle made for a 3-year-old. 😀 Some of the pieces had to be cut to length using my miter saw, and the very back row had to be ripped on the table saw to fit the remaining space. But other than that, it was incredibly easy.
Once I had the pieces fit together and the countertop completely covered, I removed the pieces row by row and numbered the backs so that I’d know which row to place each piece, and which order to install them. And then, using a 6-inch roller, I applied two coats of Contact Cement to the back of each piece, letting the first coat dry thoroughly before applying the second.
With those flooring boards placed aside to dry, I applied two coats of Contact Cement to the MDF, letting the first coat dry thoroughly before applying the second.
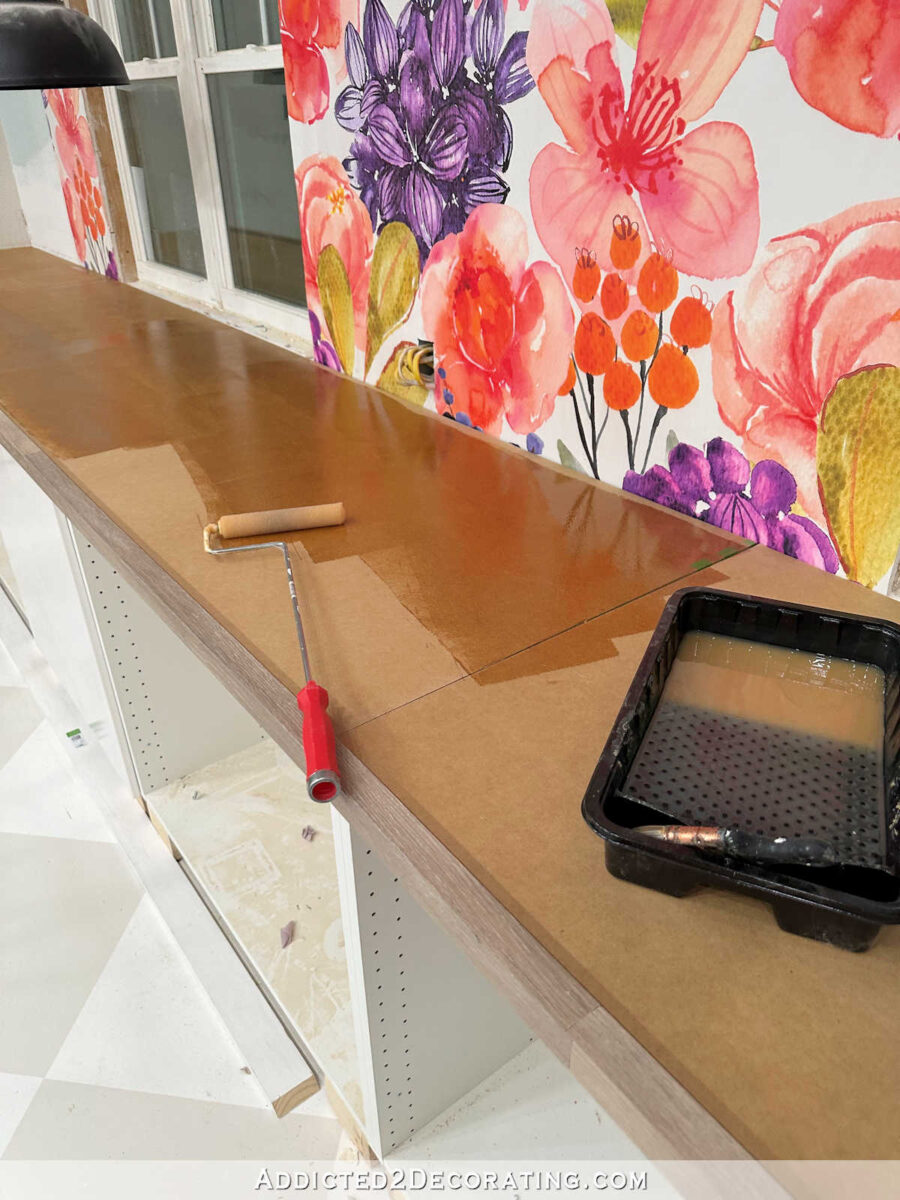
Once the Contact Cement was dry on the MDF, I began putting my big puzzle back together, starting at the front and working my way to the wall. Putting everything back together took about fifteen minutes, if even that long. It was so quick and easy.
As I put each piece in place, I pressed it down (especially focusing on the corners) as hard as I could to make sure it was making good contact with the MDF and sticking properly. And then once all of the boards were in place, I went back and pressed everything down one more time. If I had a flooring roller, this would have been a very good use for it.

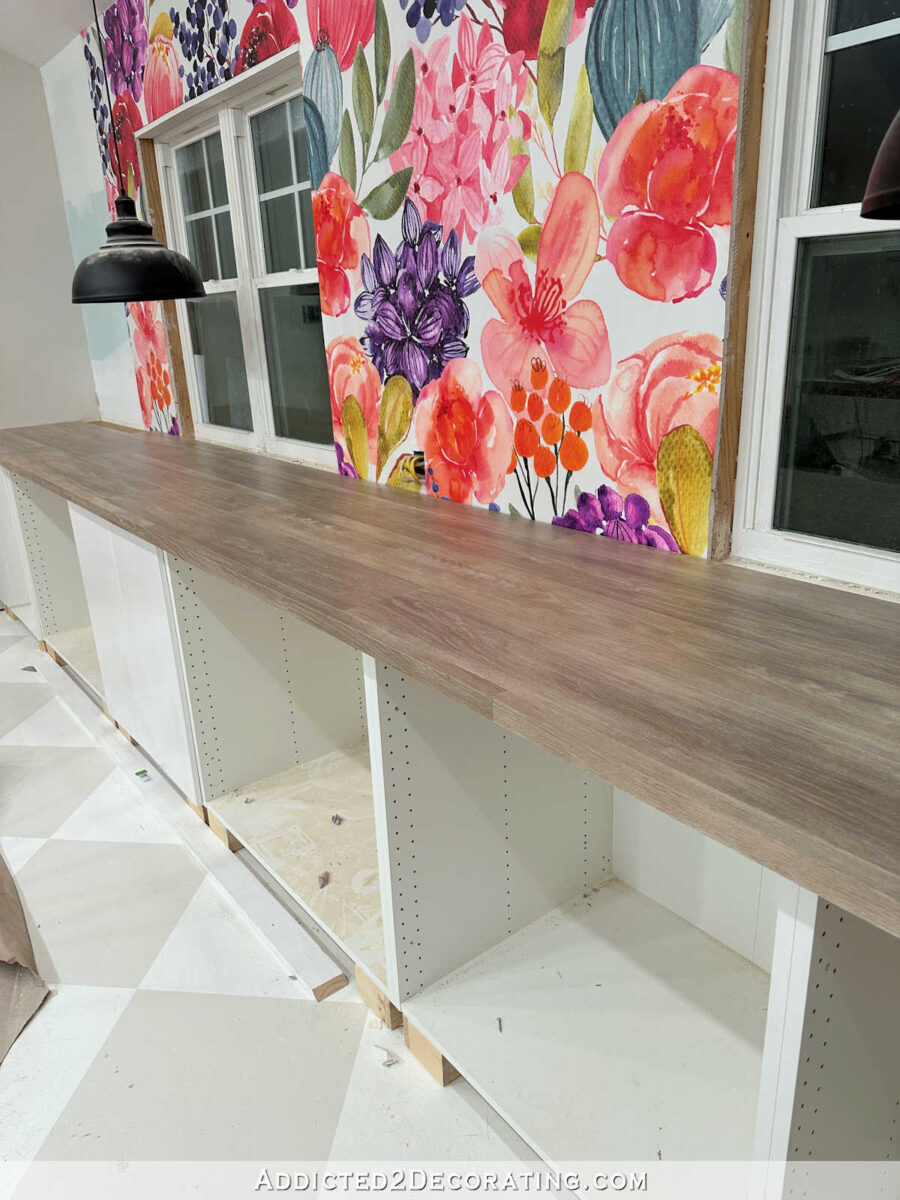
At that point, it looked pretty good, but it still wasn’t finished.
Since all of the pieces had been cut on the table saw and miter saw, they didn’t fit together perfectly. I mean, they were a good fit, but not a perfect fit. Some of the boards had tiny cracks between them like this…

So I took a scrap piece of the flooring to Home Depot and had them color match the darkest color in the flooring as closely as possible, and then I brought that home and mixed some of that paint into latex caulk.
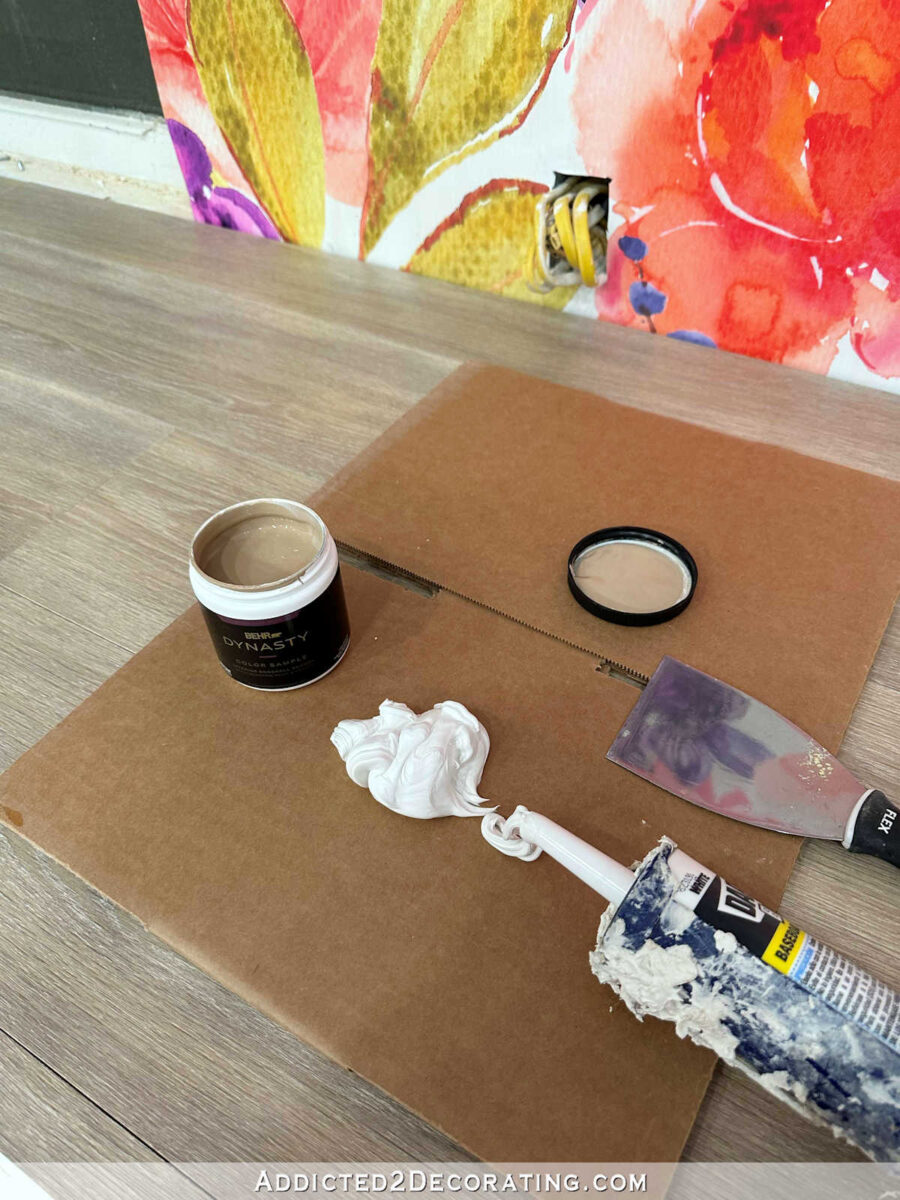
I had them match the darkest color in the flooring because the white of the caulk would lighten the color once it was mixed.
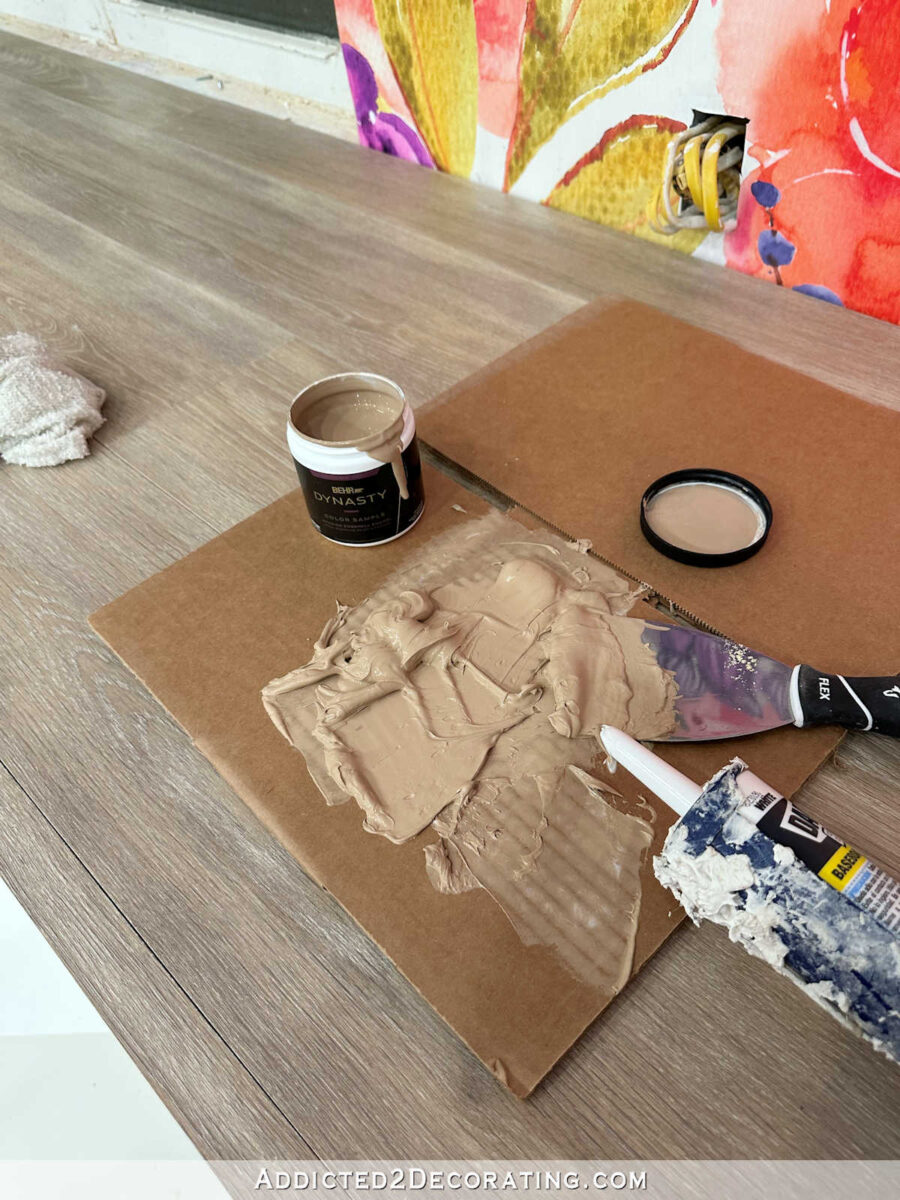
And then I used my most trusted and most used tool ever (my finger) and filled in the cracks with the colored caulk. You can see one of the little cracks along the front edge of the countertop in the photo below. This was before caulking.
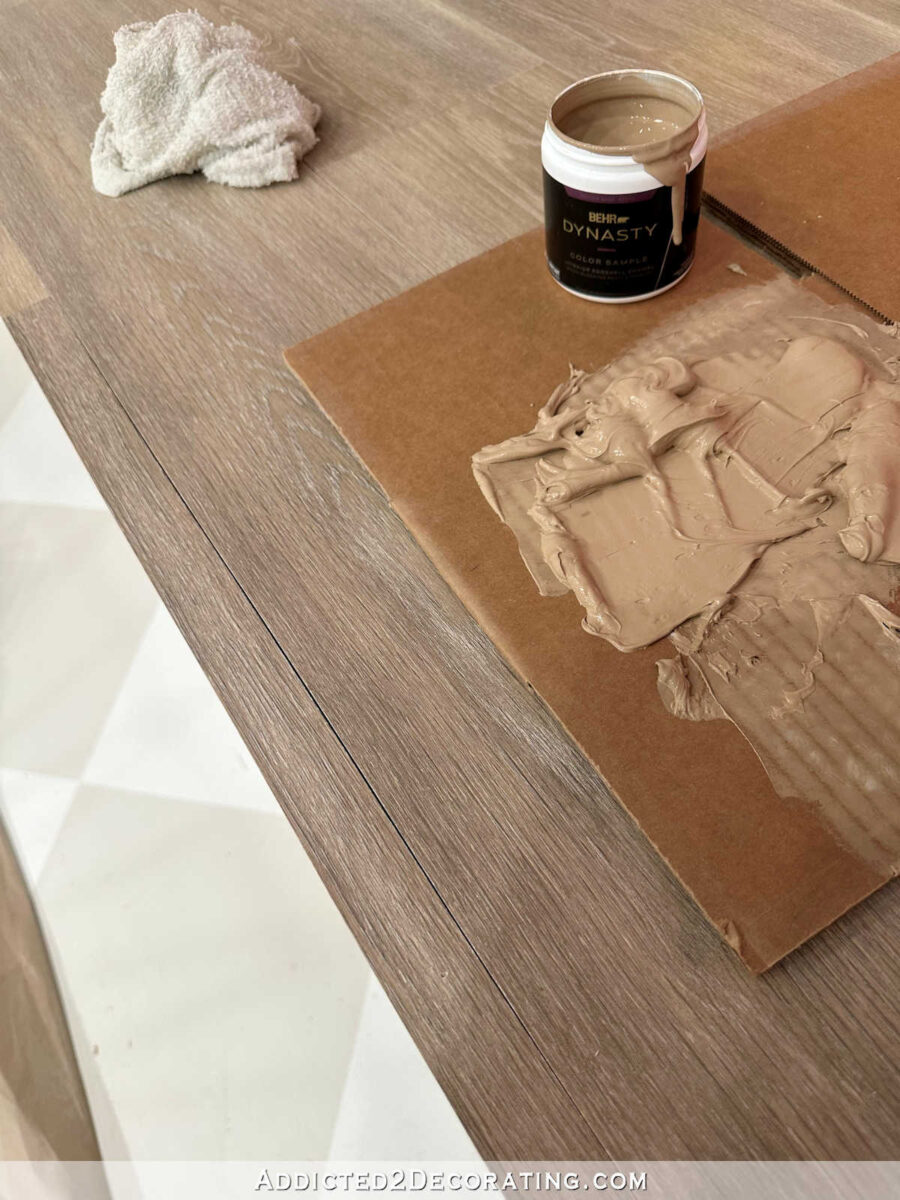
I just smeared it on with my finger, making sure that I pressed it down into the crack…
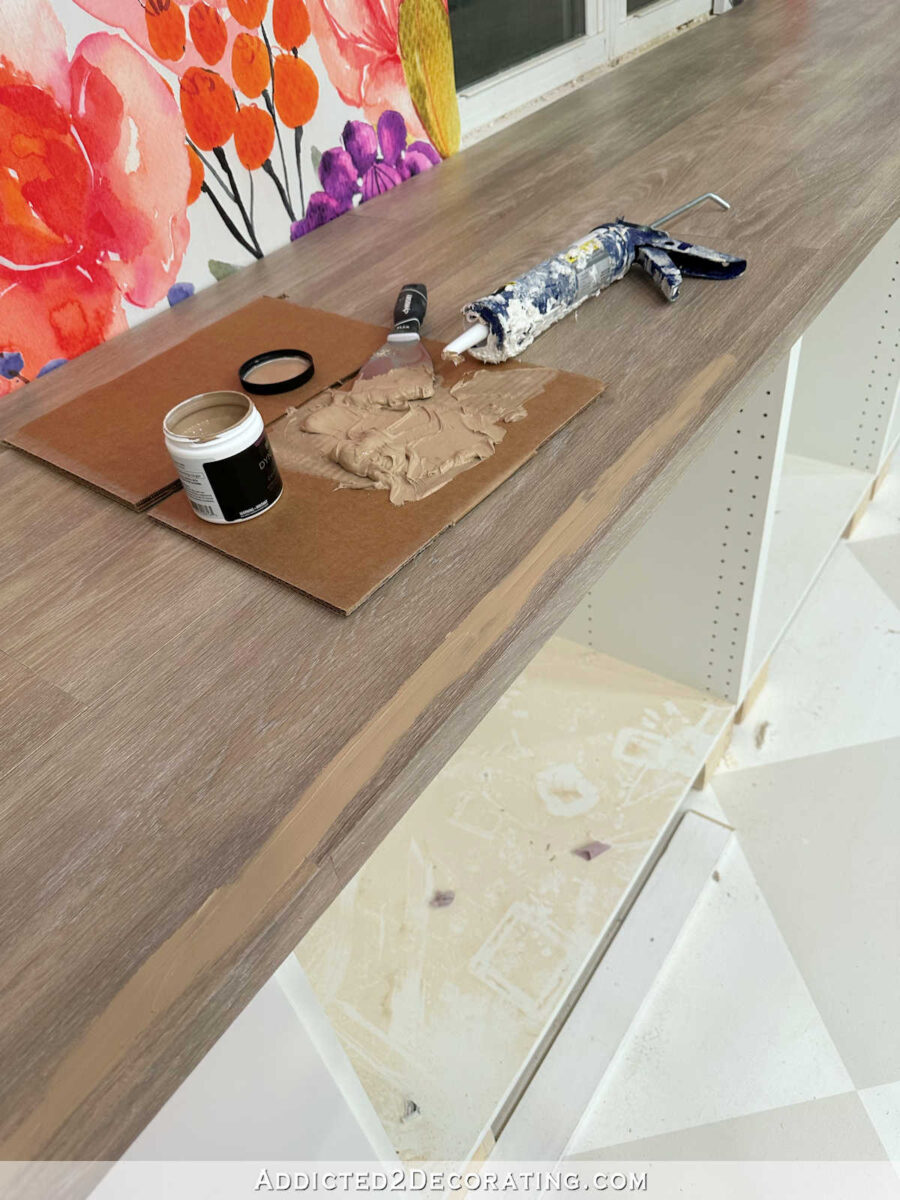
And then when I wiped off the excess with a wet rag, it looked much better! No more dark crack.

I’ll probably go back and do a second coat because I think adding the latex paint to the caulk made the caulk shrink more than usual as it dried. But that will be a quick and easy process.
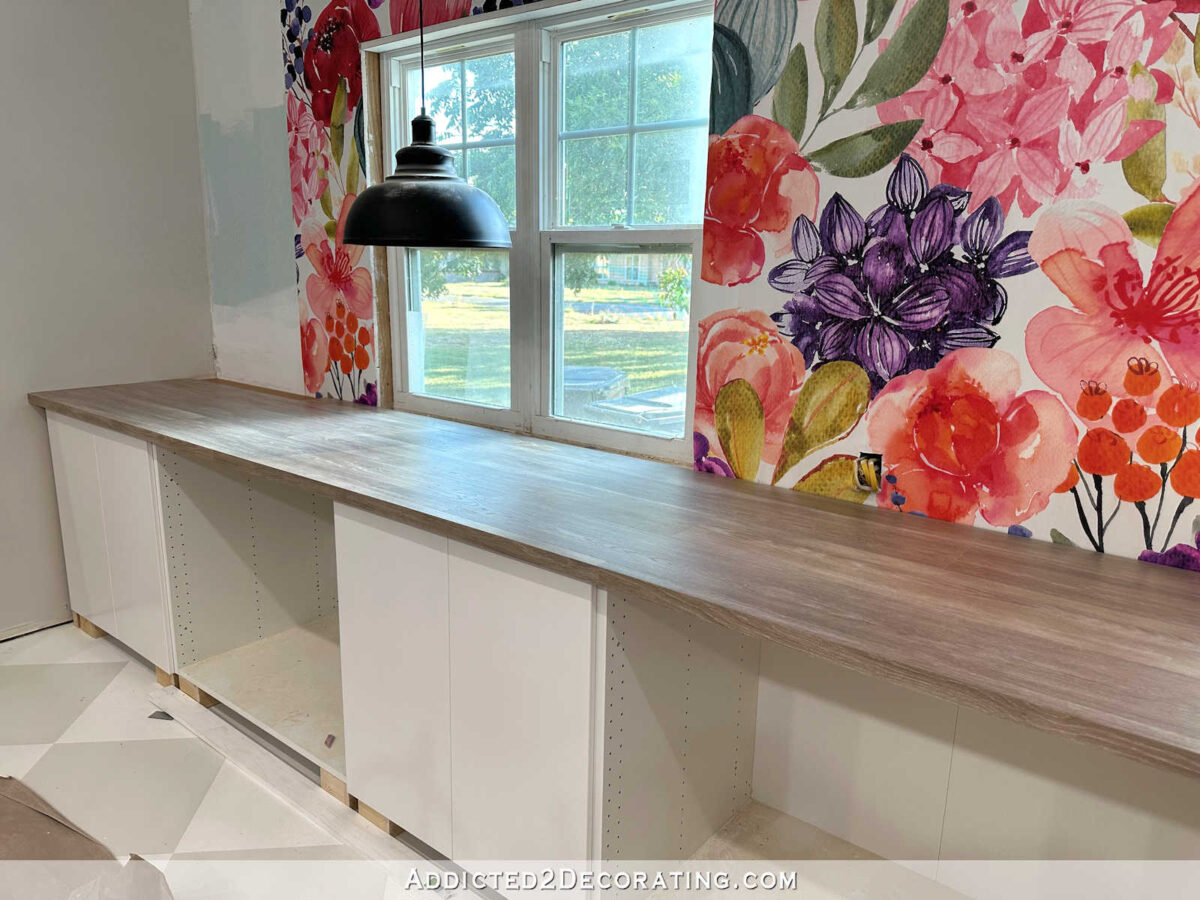
I’m so pleased with how this countertop turned out! And I can’t believe I made a 20-foot-long countertop for around $300. I don’t think you can beat that! 😀

Again, I’ll have to take better pictures later in the day when the sun isn’t coming through those windows so directly, but I think you can see it well enough even with the sun.
This actually exceeded my expectations, and was so much easier to make than the pantry countertop that I made using real hardwood flooring that had the be completely sanded and finished once the boards were installed. With this, all that was needed after the boards were installed was a little bit of caulking. You can’t beat that!

And now…finally…I get to put the upper cabinets in place on either end of this countertop and cover up the areas that have no wallpaper. You may notice that the very back corner on each end doesn’t have a piece of flooring attached.
That’s because I was literally one flooring board short of covering both countertops, and there was absolutely no way I was going to purchase another full package of this flooring just for one additional board, so I just made sure the uncovered areas would be directly below the upper cabinets. 😀 I’ll find some other 1/2-inch material to fill in those areas before setting the upper cabinets in place.
Now that the countertop is finished, the next steps will be putting together the upper cabinets and trimming those out, trimming out the bottom cabinets, and finishing the electrical outlets in the backs of the cabinets. I’ve already got one outlet in place, but I have three to go. And then the scary part. I have to cut 3-inch holes in the countertop for the countertop grommet outlets. Yikes! That’s scary to me, but it has to be done if I want easy access to electrical outlets on this wall.

Addicted 2 Decorating is where I share my DIY and decorating journey as I remodel and decorate the 1948 fixer upper that my husband, Matt, and I bought in 2013. Matt has M.S. and is unable to do physical work, so I do the majority of the work on the house by myself. You can learn more about me here.
[ad_2]
Source link