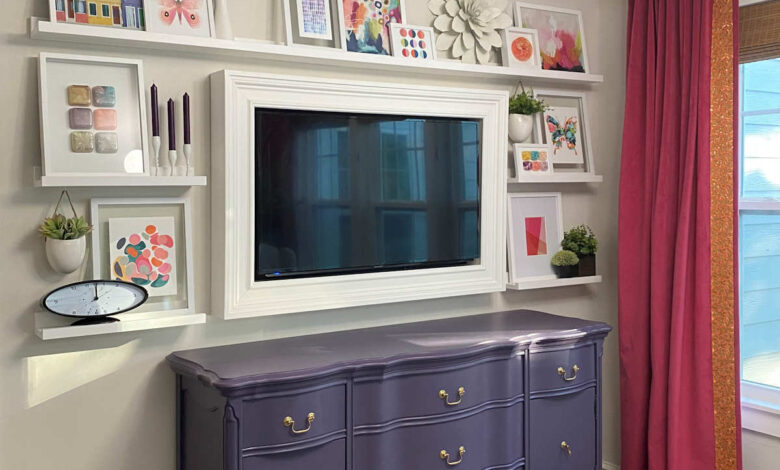
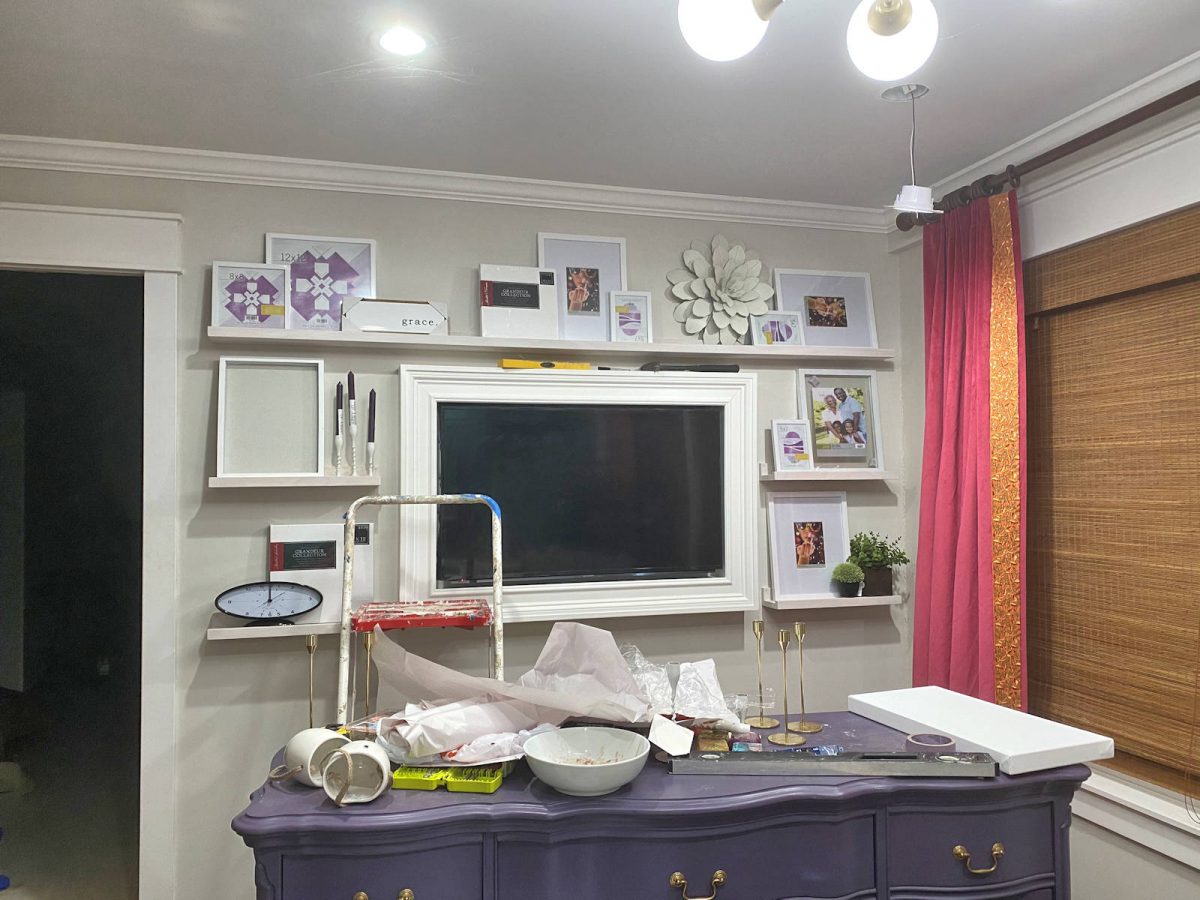
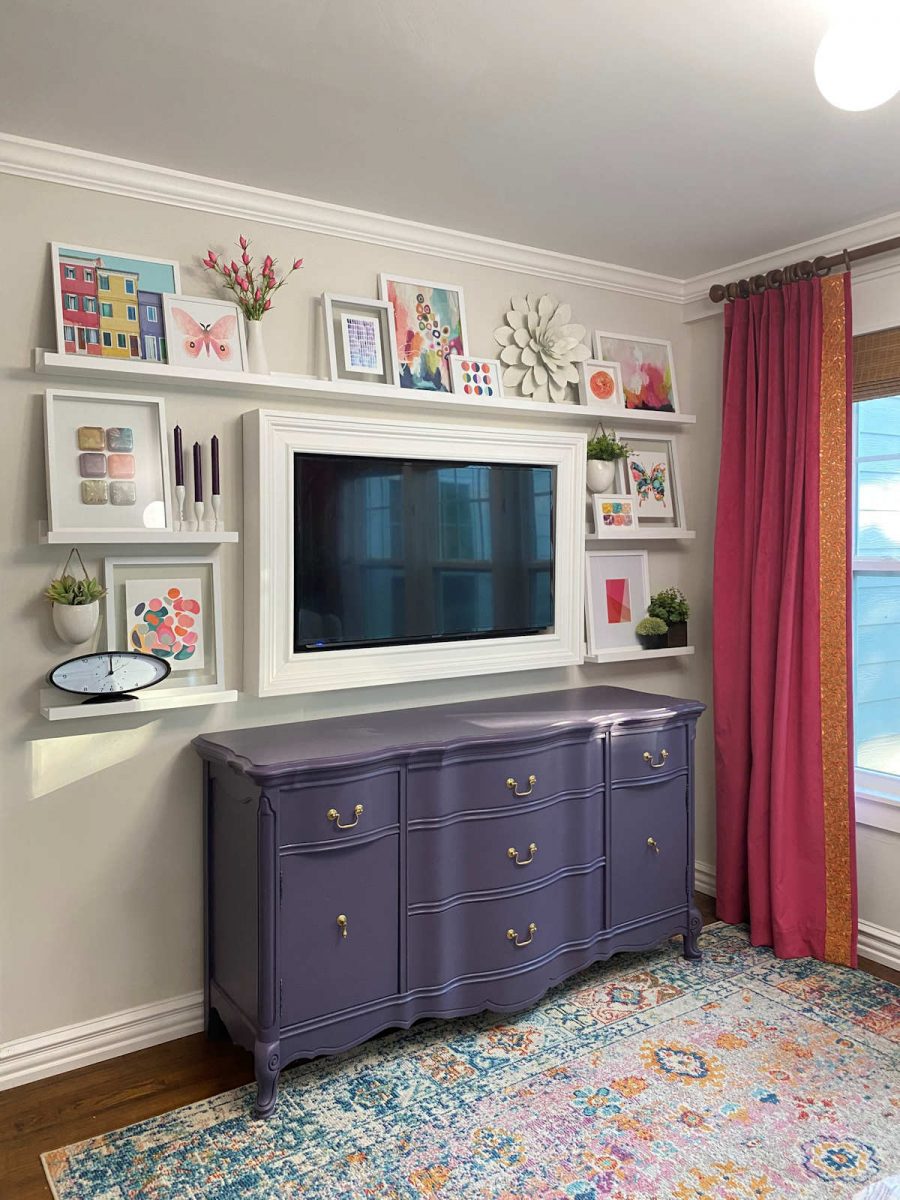
Remember my failed attempt at a floral wall mural on the TV wall of the sitting room (i.e., our breakfast room)? I finally painted over it last week (while Matt sat in his recliner and literally booed me repeatedly throughout the process 😀 ). , and replaced it with something that I absolutely love. I didn’t want to get rid of the frame that I built years ago for the TV, so in order to make it look not so dominant on that wall, I needed to come up with a solution that integrated the framed TV while taking some of the attention away from the TV. My solution was to build some simple DIY picture ledges to surround the TV. Once I had those built and installed, I filled them up with colorful artwork. Here’s how this project turned out…
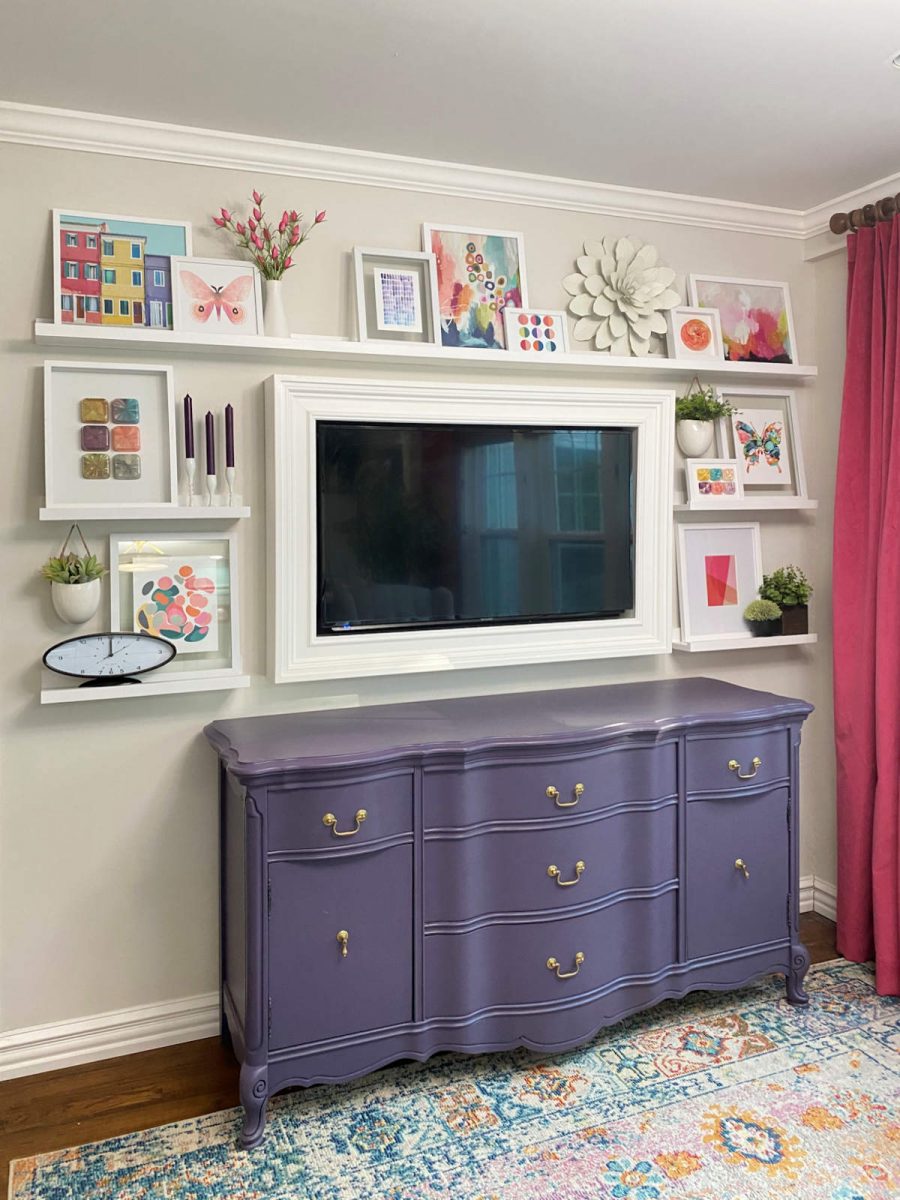
I can’t even tell you how much I love this! I’ll be the first to admit that when you add velvet curtains to a room, especially in a somewhat dark and saturated color, things can go in a very formal and serious direction in a hurry. Well, that was the last thing I wanted, and I think this wall went a long way towards lightening things up, injecting lots of color and brightness, and adding some lightheartedness to the room.
I absolutely love to walk through this room or sit in my recliner and just take it all in. My goal was to fill those shelves with bright and colorful art that I would actually enjoy looking at day after day, and while it took me a couple of hours of scouring Etsy for prints that fit the bill, I managed to find a collection that I love to see as I’m walking through or sitting in the room.
These picture ledges were so incredibly simple to build, so let me show you the process.
I started with a 1″ x 3″ x 8′ board and a 1″ x 4″ x 8′ board. I put a bead of wood glue on the edge of the 1″ x 4″ board…
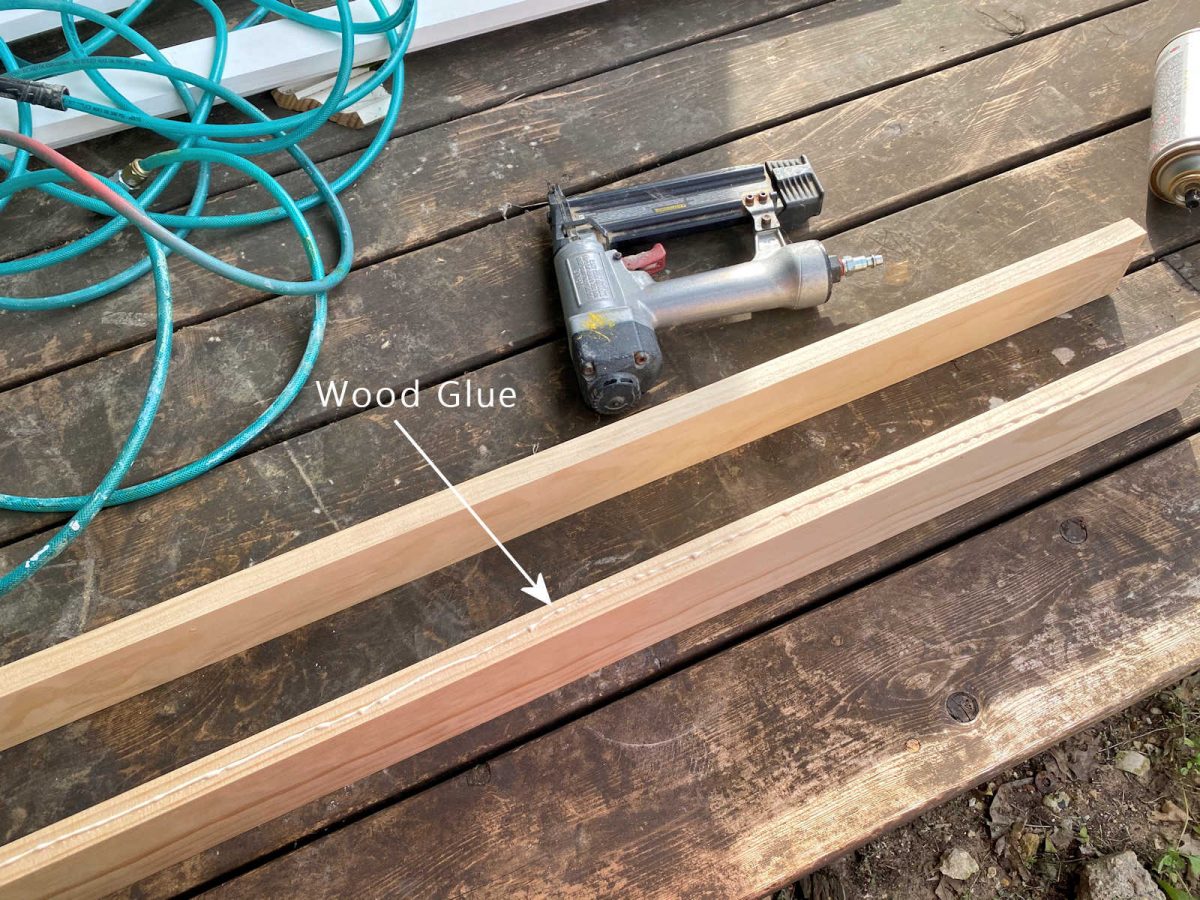
…and then placed the 1″ x 3″ board on that, lining up the edges, and nailing that into place with 18-gauge 1.5-inch nails in my nail gun.
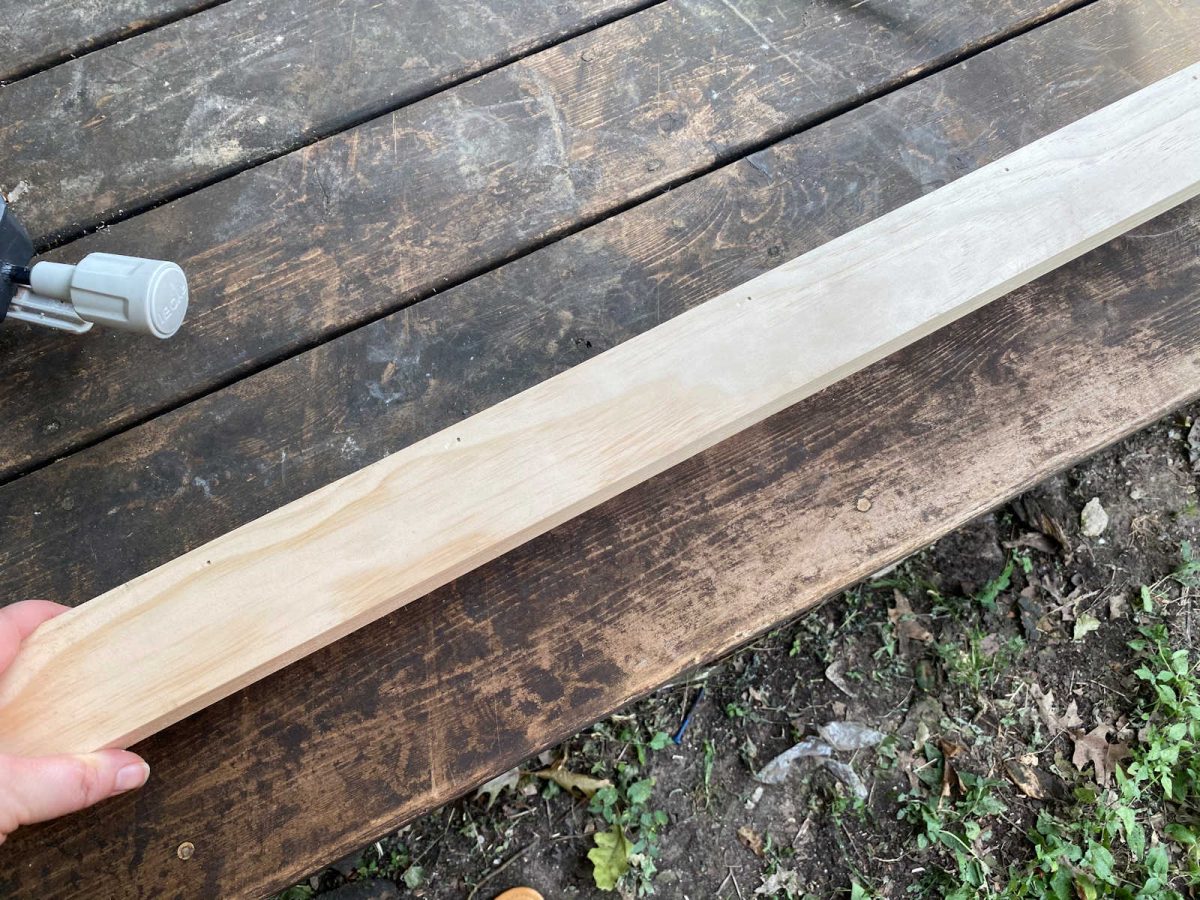
Here’s how it looked once those were nailed together and placed upright as it would appear against the wall.
Here’s a view of the profile so you can see how they’re nailed together…

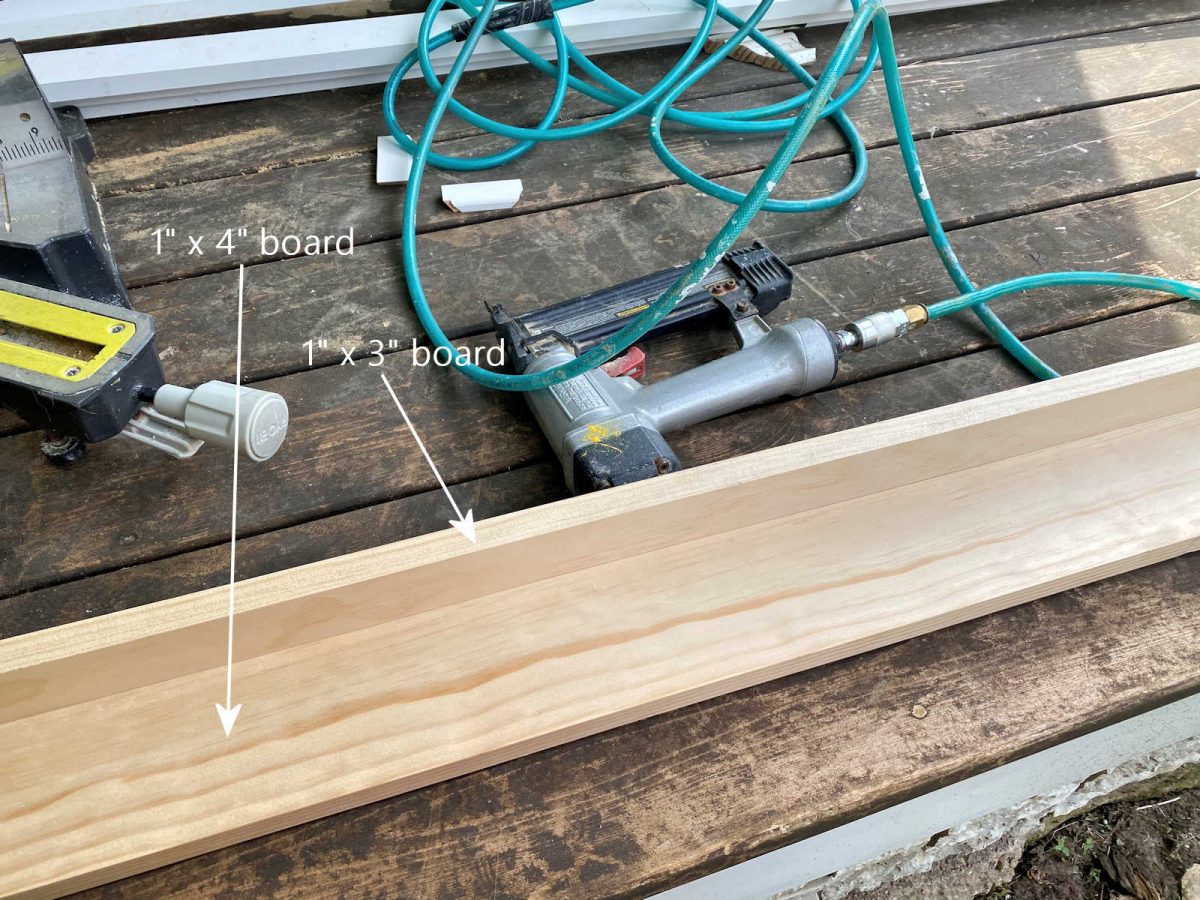
For the lip on the front edge of the ledge, I used my table saw to rip a 1″ x 3″ board in half, and then attached that to the front using wood glue and the same 18-gauge 1.5-inch nails.
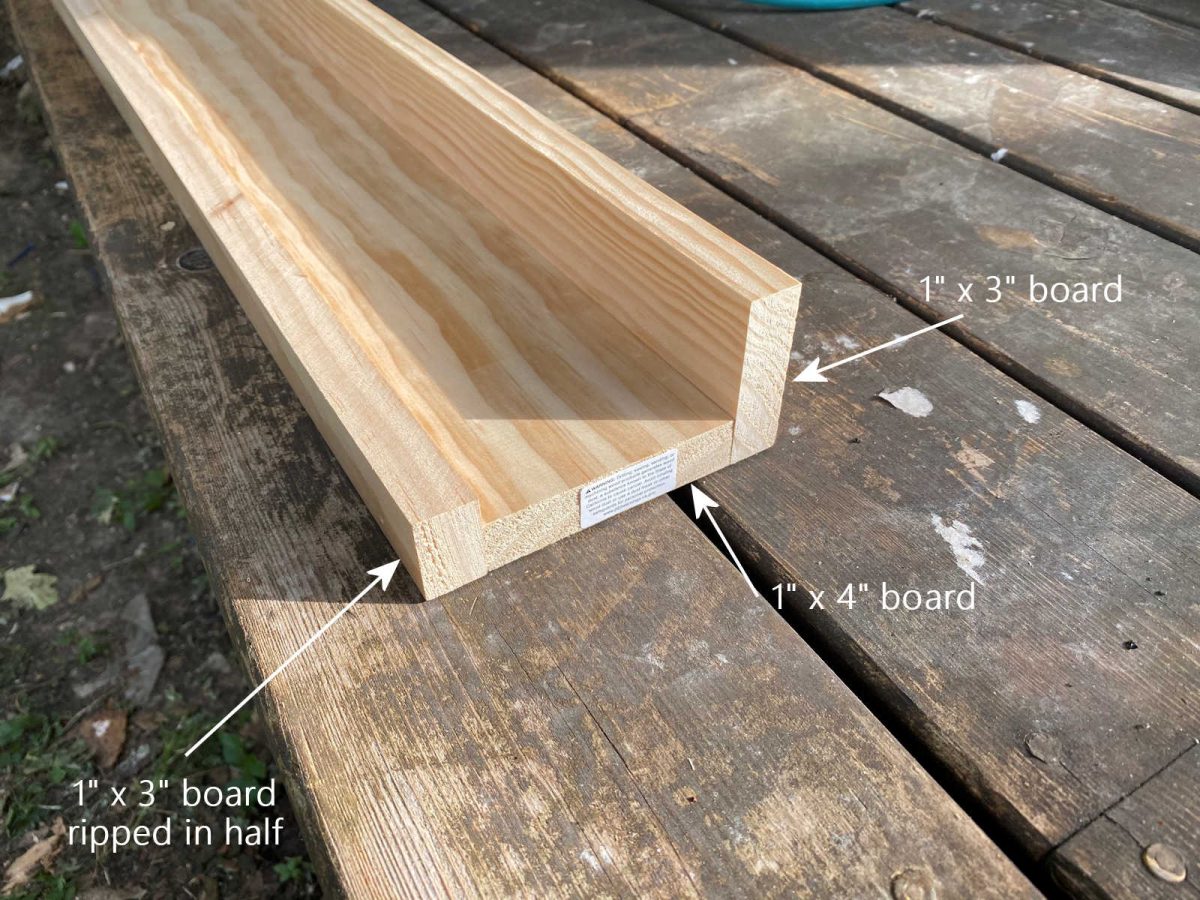
If you don’t have a table saw, you can simply purchase a simple trim that covers the front edge and provides a little lip.
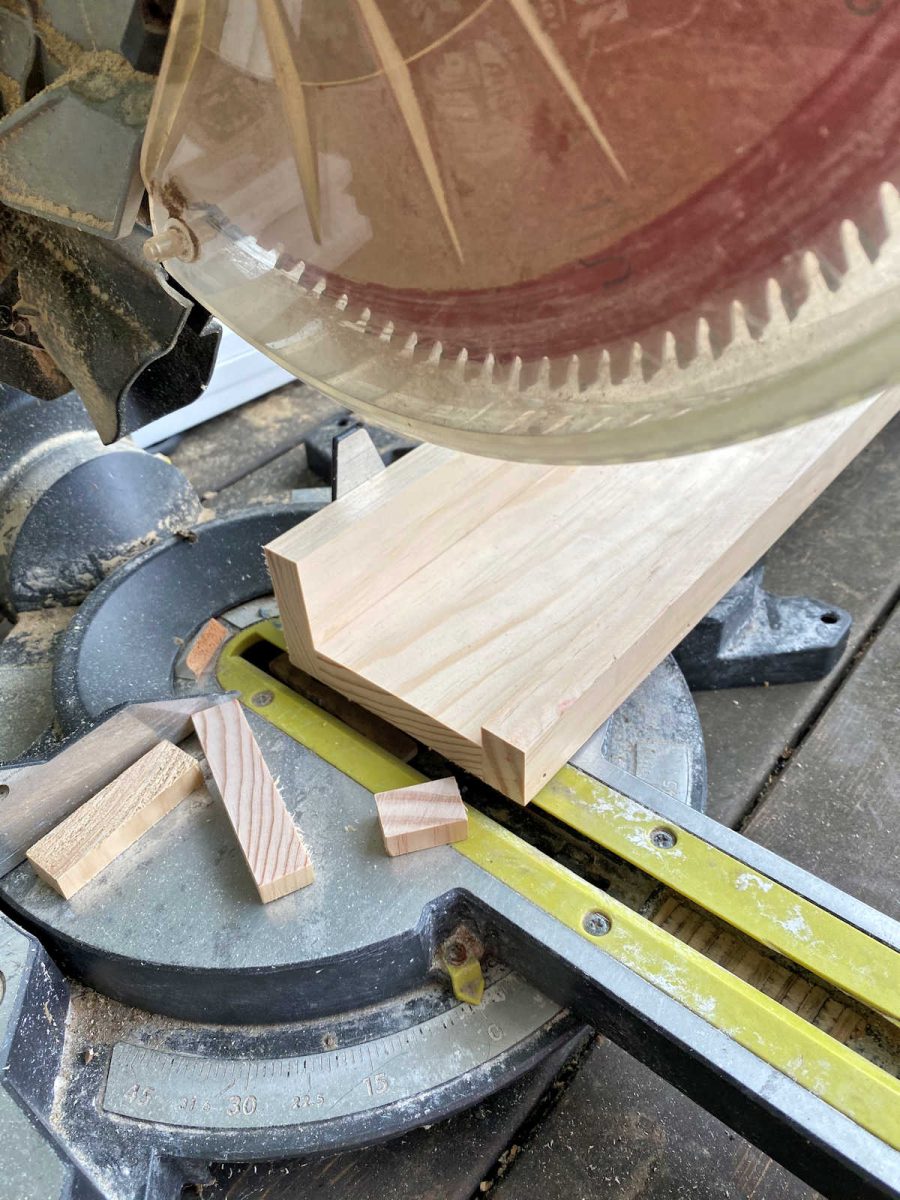
Once the ledge was assembled, I cut the sizes I needed for my wall. I recommend assembling the ledge first and then trimming the edges so that all three pieces are cut at the same time to give a really nice end.
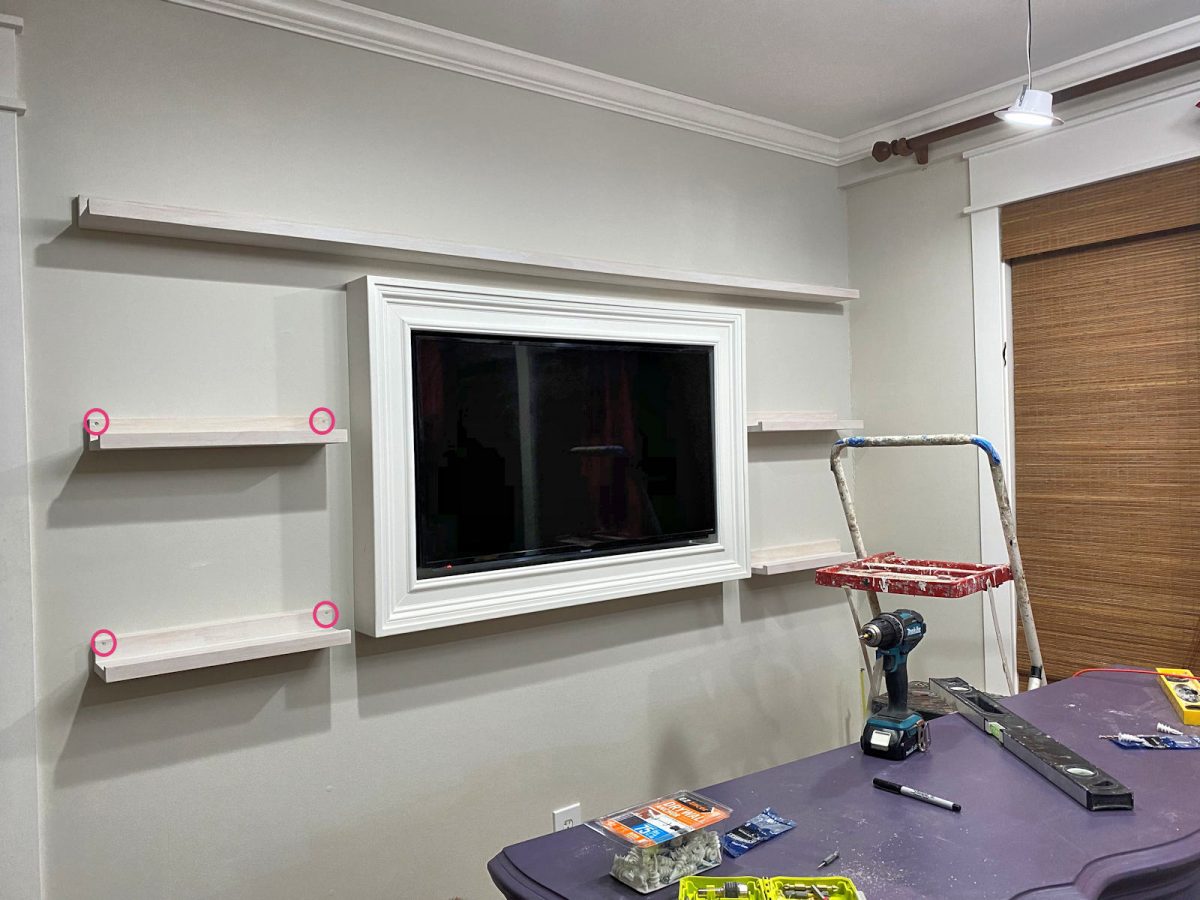
Once the ledges were cut to size, I went ahead and installed them on the wall before priming and painting. For the little shelves, I used two screws (one at the top of each corner) and screwed into drywall anchors. For the long shelf, I used three screws (adding one in the very center of the ledge), also screwed into drywall anchors. You can see the placement of the screws circled in pink below.
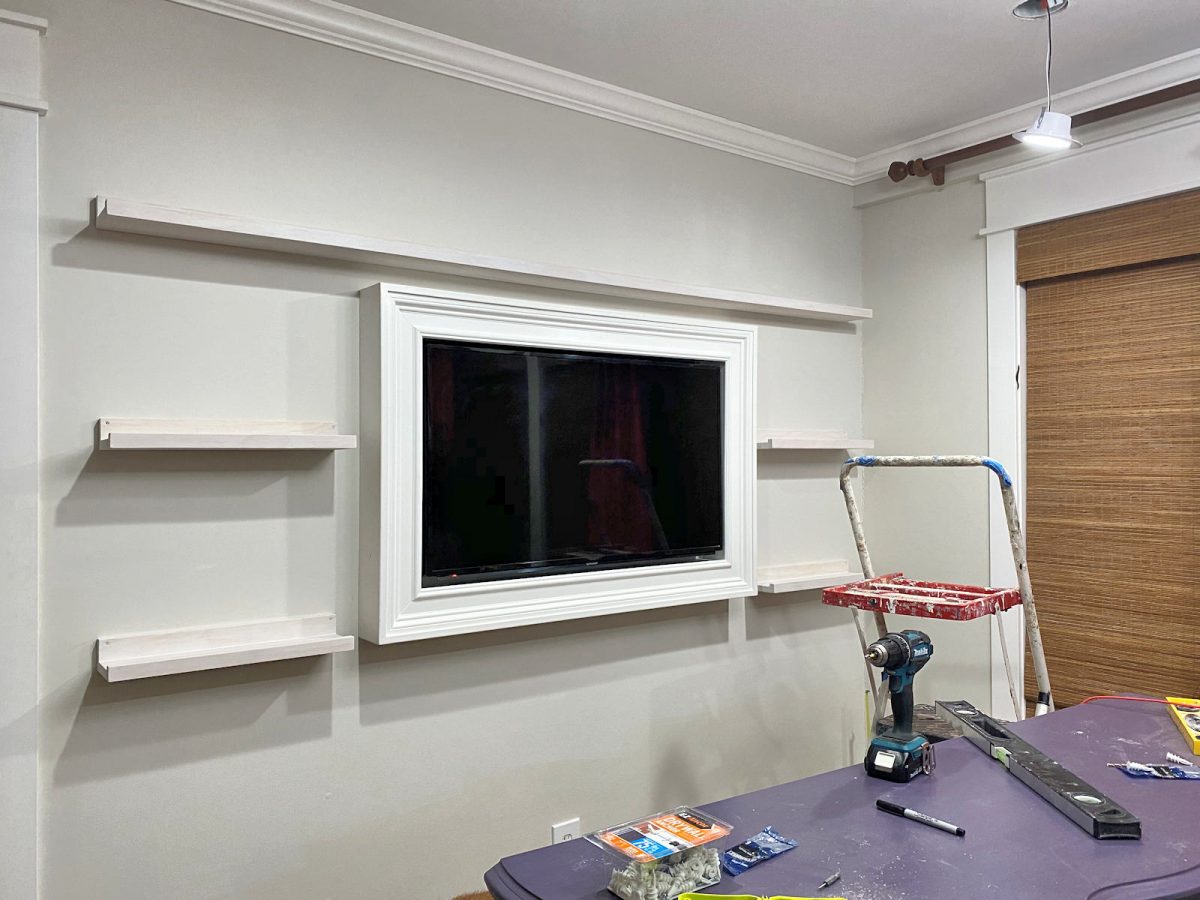
Of course, you can prime and paint the ledges before installing them, but I found it was much easier to install and then paint.
After two coats of paint, I gave them about 24 hours to dry, loaded up on some frames that I found on sale at Hobby Lobby, and then set about arranging them to see what size would go where to give me an idea of what direction to head with artwork.
All of the artwork I purchased came from Etsy, and they were all instant downloads. I did change the colors on three of them so they would better coordinate with my room, and then I uploaded them to the Walgreen’s website, and they were ready in under an hour.
Here’s where I found each item:
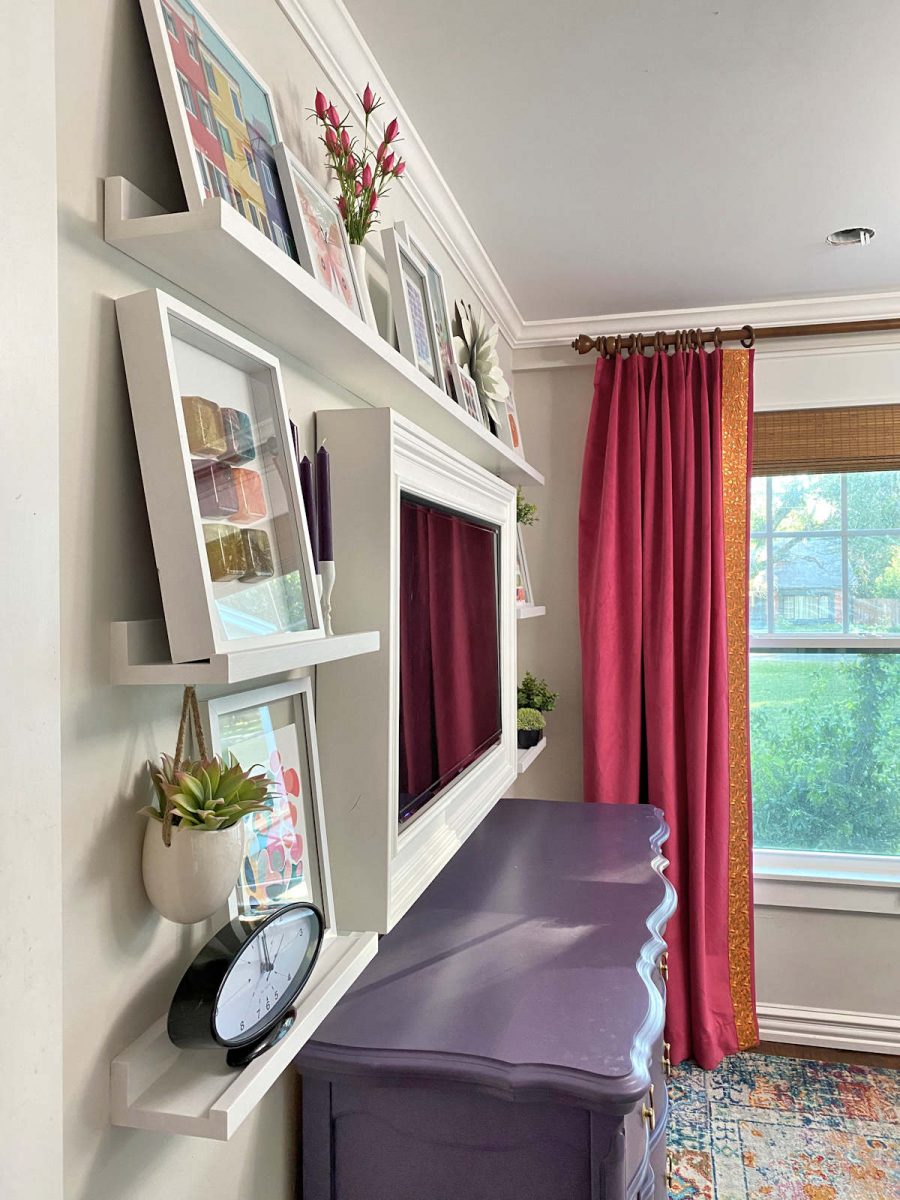
Here’s how the picture ledges look from the side view.
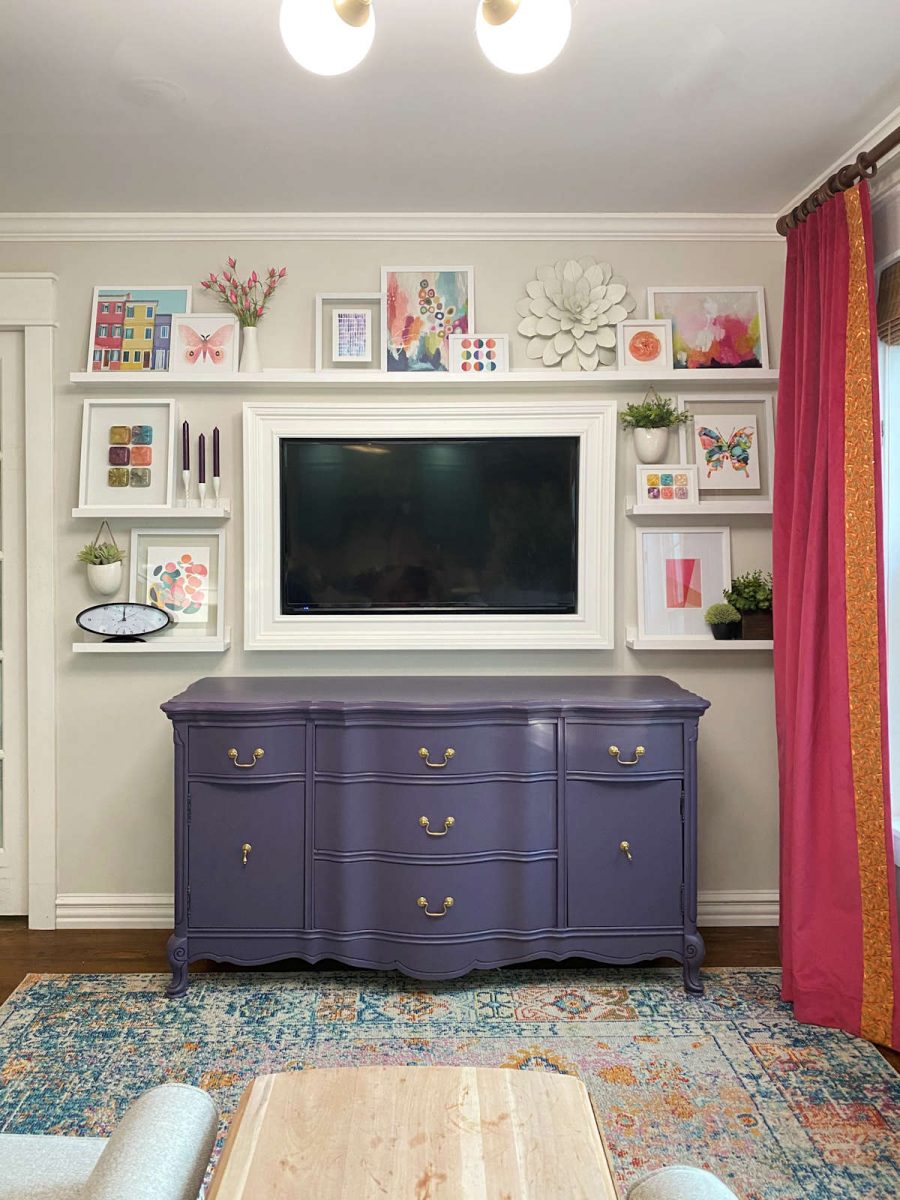
And this is the awesome view that I have when I’m sitting in my recliner. This whole thing, with all of it’s bright and happy colors, just makes me smile.

I hadn’t planned on “training” my curtains to hang perfectly because for the last few years, I’ve found myself preferring the less structured look. But I think I’m going to go ahead and “train” these curtains to hang in a more structured way so that they don’t cover up the ends of the shelves on the right. When I’m sitting in my recliner and relaxing at the end of the day, I want to be able to see everything as much as possible without the curtains obstructing any of the view. 🙂
Here are a few close(er) up views of the items on the shelves…


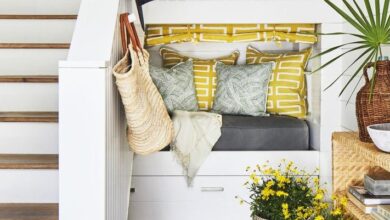
Now I just need some new pillow covers for the pillows on the benches flanking the pantry, and this room will be finished.
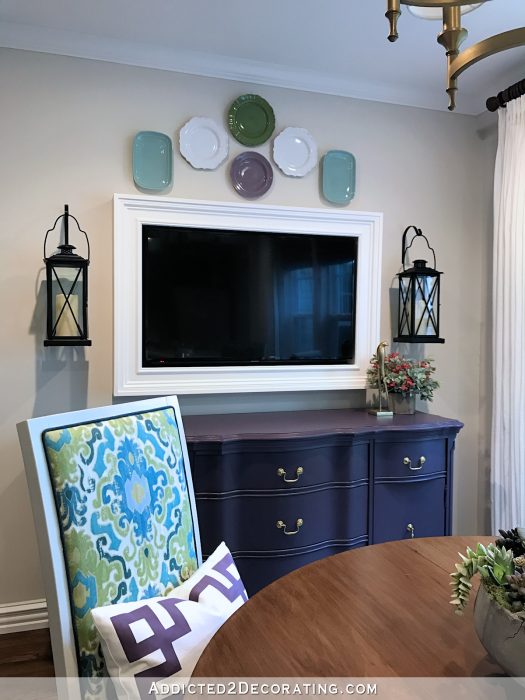
Here’s how this wall used to look. There’s nothing inherently wrong with this, but it just wasn’t me. It’s missing the warm colors that I’ve realized I love so much, and it’s a little too plan for me.
And here’s it’s new more colorful look. This is definitely more me — colorful and busy. 😀

Addicted 2 Decorating is where I share my DIY and decorating journey as I remodel and decorate the 1948 fixer upper that my husband, Matt, and I bought in 2013. Matt has M.S. and is unable to do physical work, so I do the majority of the work on the house by myself. You can learn more about me here.
I hope you’ll join me on my DIY and decorating journey! If you want to follow my projects and progress, you can subscribe below and have each new post delivered to your email inbox. That way you’ll never miss a thing!
Source link