[ad_1]
I got quite a bit done on the studio this past weekend, but I also had a set back with the countertop. It wasn’t necessarily a fail. It would have been just fine had I kept it the way it was initially, but I didn’t love it, so I’m determined to redo it.
But we’ll get to all of that in a minute. First, let’s go back to the cabinet install. When I left y’all on Friday, the cabinets in the office section of the studio had been assembled and the feet attached, but the cabinets weren’t actually installed on the wall because I was still trying to decide how to handle these spaces.
I didn’t have to deal with those spaces on the long wall because the IKEA cabinets were a much better fit on that wall (you can see how I installed those cabinets here). But for this shorter wall, in order to get the cabinets centered on the window and symmetrical on each side of the window, there had to be spaces.
Y’all gave me tons of ideas for how to use those spaces, but in the end, I decided it just wasn’t worth it. The space was only 4.5 inches wide, so by the time I subtract the width taken up by whatever I built for that space (for example, a pull out would have taken up one inch for the box (two sides of 1/2-inch plywood) plus 1/2-inch for the drawer pulls), the space left for actual use would have been so little as to not make it worth it for an office space. A kitchen would have made sense since spices or cookie sheets can fit in a tiny space like that, and since kitchen cabinets are 24 inches deep. But for this office space with 15-inch-deep cabinets, building something for those tiny spaces just seemed like a waste of time.
So I ended up just using spacers. These aren’t the finished look, obviously. The finish pieces will go on top of these spacers. But I made four identical spacers, and used two for each of the two spaces — on at the back of the space between the cabinets, and one at the front of the space with the front of the spacer flush with the front edges of the cabinet boxes. Then I’ll attach a finished 5/8-inch-thick piece of lumber to the front of the spacer, which means it will be flush with the fronts of my 5/8-inch-thick IKEA Veddinge doors.
Once I get the finish pieces attached to the front of those spacers, I might even dress it up to look like pull-out cubbies, kind of like the false drawer front on the kitchen sink cabinet or the bathroom sink cabinet that I always put a drawer pull on because I like the look. But we’ll see. I may just leave them as obvious spacers, which I’m okay with as long as I get my symmetry. 😀
And speaking of symmetry, in order to have both sides perfectly symmetrical, I’ll also be adding spacers and an end panel to this end. That way when I get my upper cabinets placed on top of the countertop and lined up with the bottom cabinets, they’ll be trimmed out identically. If that doesn’t make sense to you, I hope it will make more sense as I make more progress.
Okay, now let’s talk about the countertop. I’m a big fan of thick countertops. And by thick, I mean 1.5 inches. I almost always prefer them over thin countertops, by which I mean the standard .75-inch countertops. That’s not a hard and fast rule. In our master bathroom, we have .75-inch countertops, and I love them. So it really is dependent upon the individual room and situation, but I do tend to gravitate towards the thicker countertops in most situations.
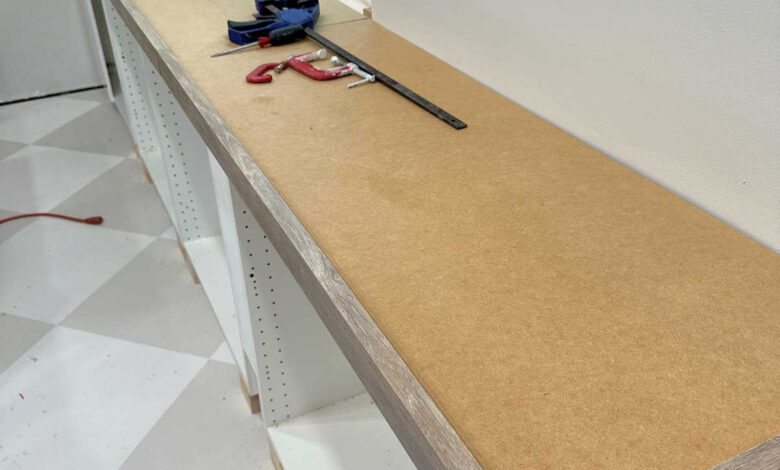
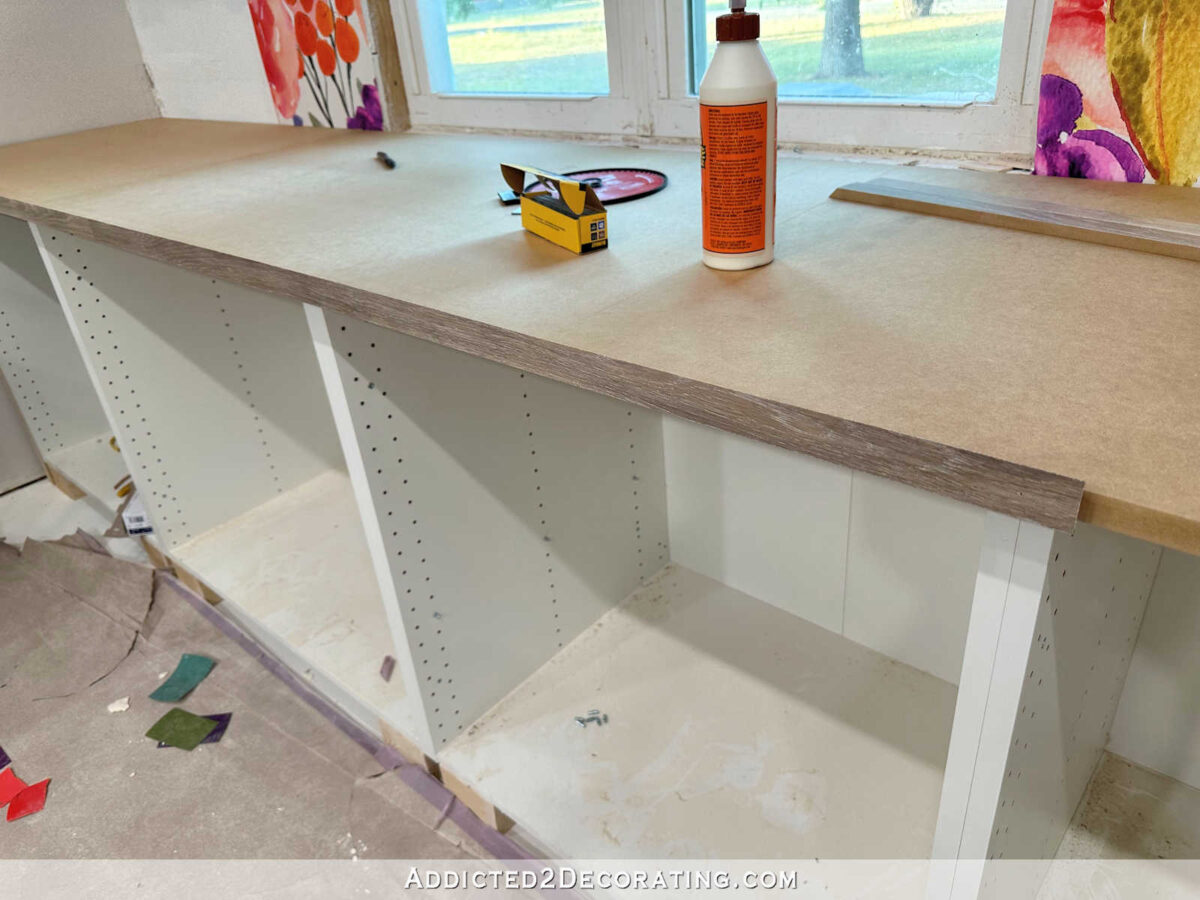
So when it came time to make my countertops for the studio, I figured thick is good. And even if it’s thicker than 1.5 inches, that would be fine. I figured I would use two layers of 3/4-inch MDF for the base of the countertop, and then place the flooring boards that I selected for the countertop on top of the MDF. That was the plan, so I got my two layers of MDF on the cabinets, glued them together, and clamped them to dry.

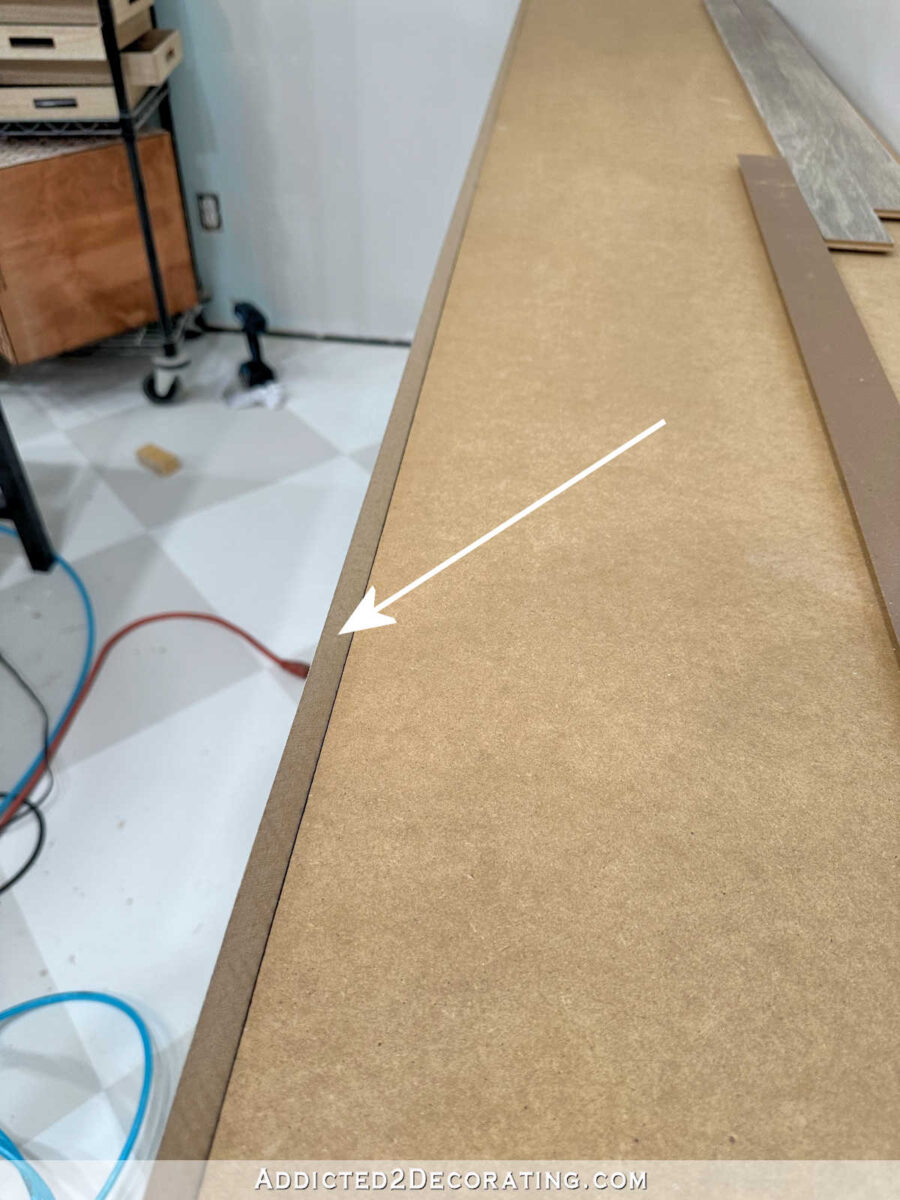
And then I started cutting the flooring boards to go on the front edge of the MDF. I figured it would be easier to start at the front and work my way back towards the wall. So I cut strips to cover the 1.5 inches of MDF, and mitered the strips on the top with a 45-degree angle. I attached them with wood glue and 18-guage finish nails.

It’s hard to see that mitered top edge in pictures. Hopefully this will give you a better view of it…
And here you can see it on the corner and the side edge…
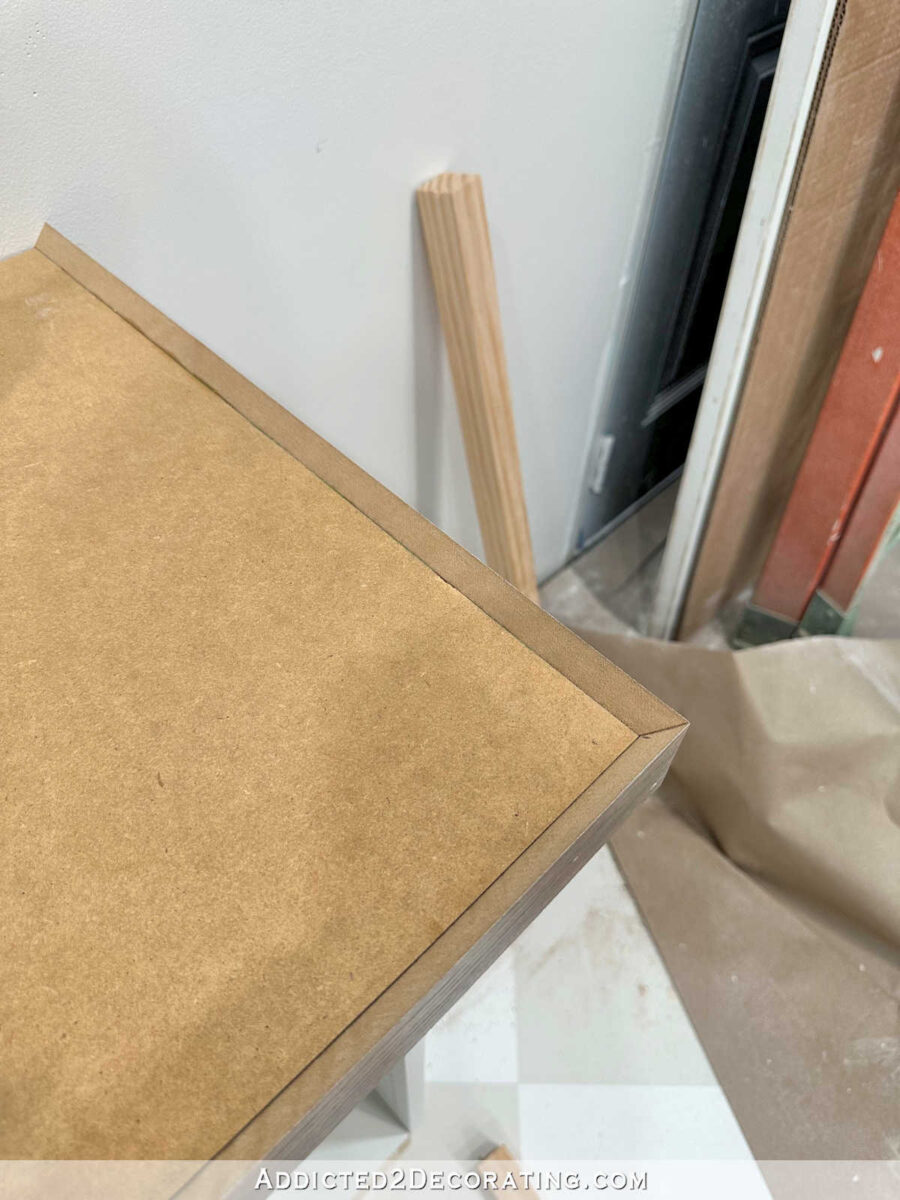
After those were installed, I cut and mitered the top pieces that would sit right against that front mitered piece to look like a solid piece. I attached these pieces in the same way…

By the time I got to this point, I was so proud of my progress, and I knew the hard part was over. Filling in the rest with straight cut pieces would be a breeze, and I’ve have this countertop finished in no time! But the longer I looked at it, the more I disliked it.

The thickness, which ended up being a two-inch finished thickness once the flooring boards were attached, was just too overpowering and bulky for my taste. It seems that my limit on countertop thickness is 1.5 inches.
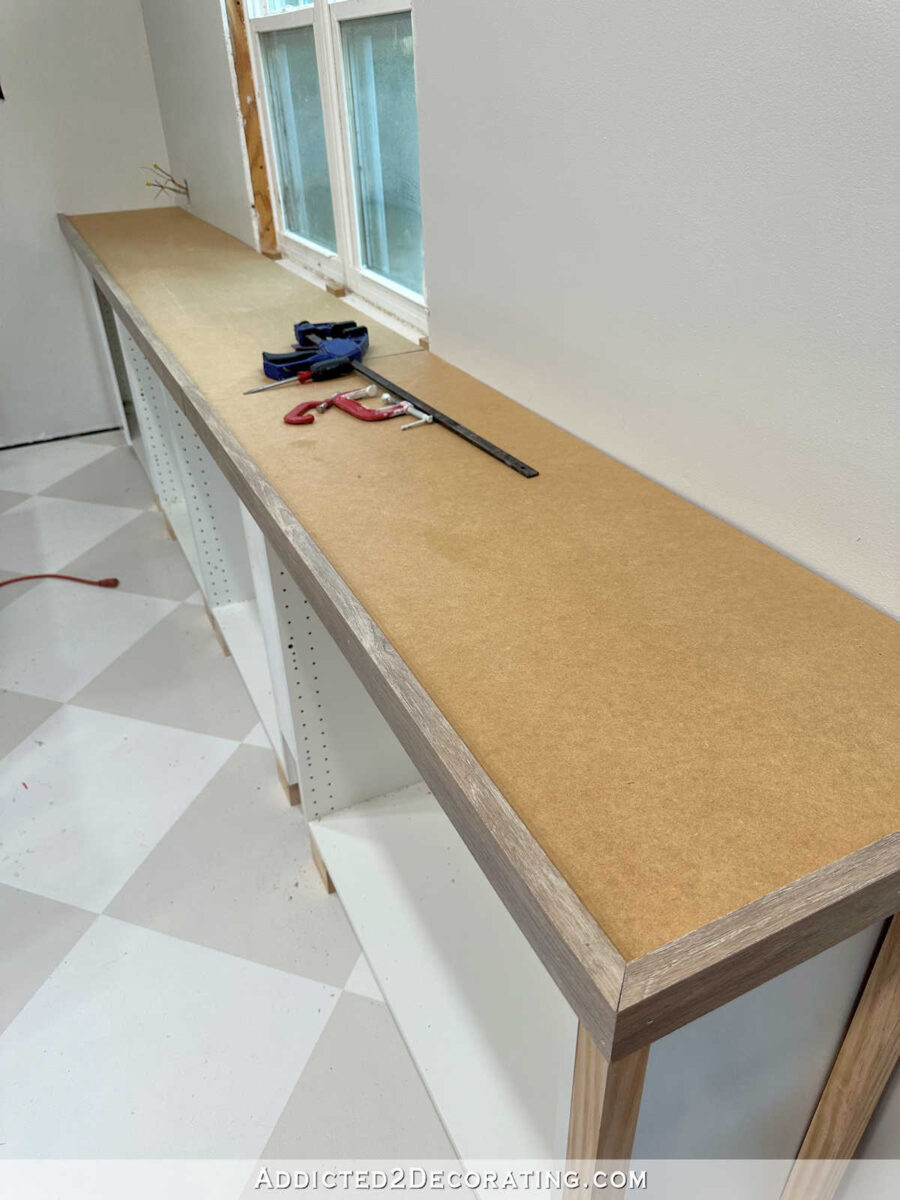
I stopped working on it and figured I’d give myself (and my eyes) a break from the countertop for the evening and come back the next day and see what I thought. Well, the next day, it was still too thick for my liking. Thank goodness I started with the smaller countertop!
So I got busy on the long countertop, but this time, I only used one piece of 3/4-inch MDF as the base instead of two.
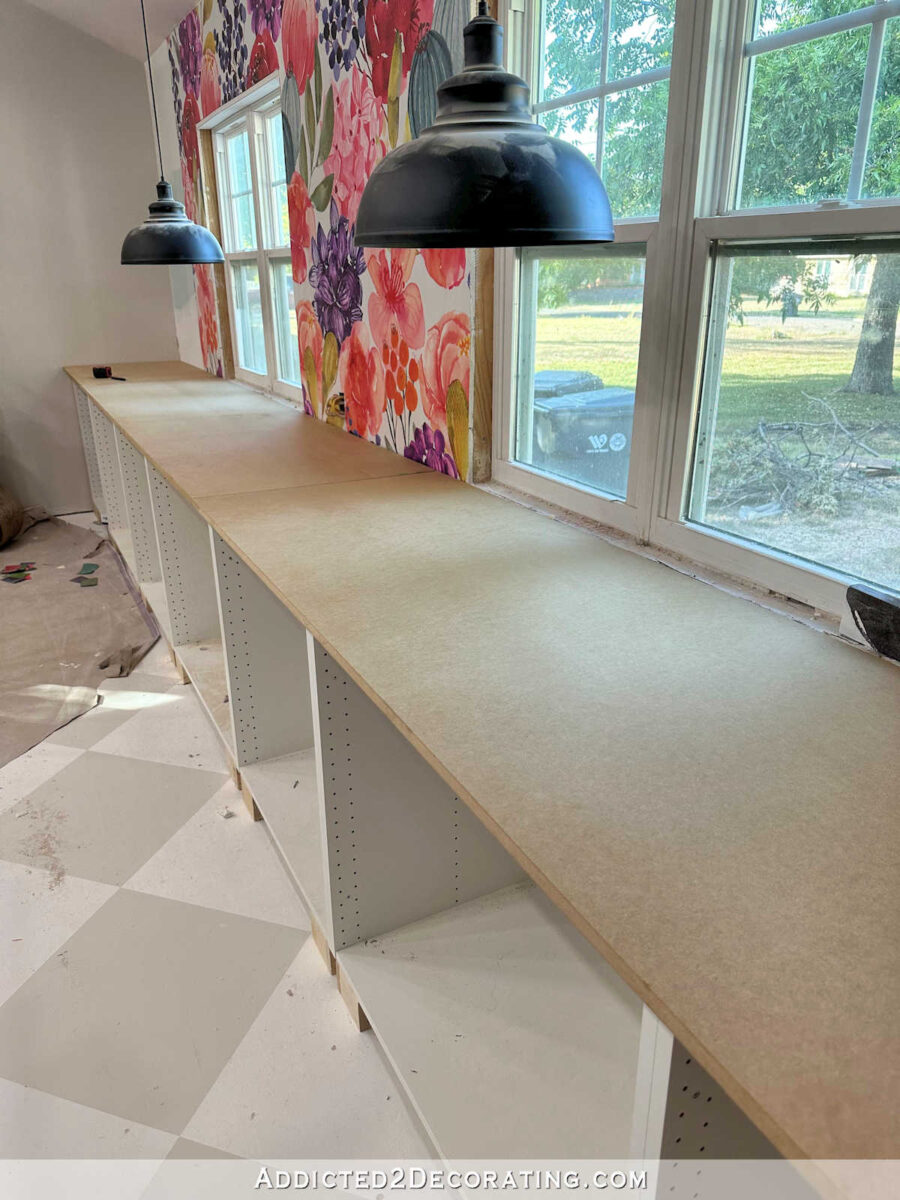

And then I followed with the exact same process, except that this time, the front pieces were 3/4-inch thinner than the previous front strips for the other cabinets.
This looked so much better to my eye.

So that’s as far as I got — second wall of cabinets installed, one countertop fail, and another countertop underway that I think is much better. I’m not too upset about that other countertop, though. It was a learning experience, and I learned something about my likes and dislikes that I didn’t previously know. Now I know! And thankfully, I have plenty of extra MDF, so I won’t need to make another trip to Home Depot to buy more. Hopefully there won’t be any more mistakes, and I can get these countertops knocked out very soon!

Addicted 2 Decorating is where I share my DIY and decorating journey as I remodel and decorate the 1948 fixer upper that my husband, Matt, and I bought in 2013. Matt has M.S. and is unable to do physical work, so I do the majority of the work on the house by myself. You can learn more about me here.
[ad_2]
Source link