Master Bedroom To Wheelchair Accessible Master Bathroom Conversion – How Much Did It Cost? (Cost Breakdown And Sources)
[ad_1]
I finally had the opportunity to sit down and go through 18 months worth of receipts to figure out just how much our master bedroom-to-master bathroom conversion cost us. The whole reason we needed to do this conversion in the first place is because Matt (he’s my husband, for those of you who are new around here) has M.S. and is confined to a wheelchair. So he needs a large bathroom with plenty of room to move around, a wheelchair accessible vanity, and a large, curbless, wheelchair accessible shower.
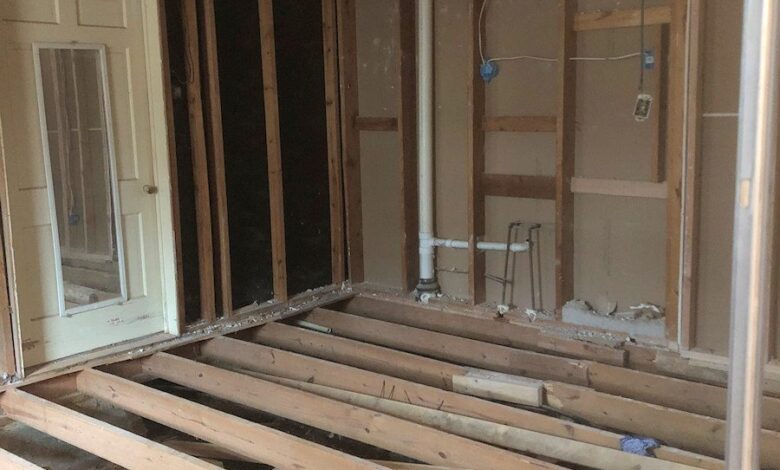
So starting back in the summer of 2021, we hired a contractor and had him and his workers get to work. My family and I had already done all of the demolition on the room, so the contractor took the room from this…
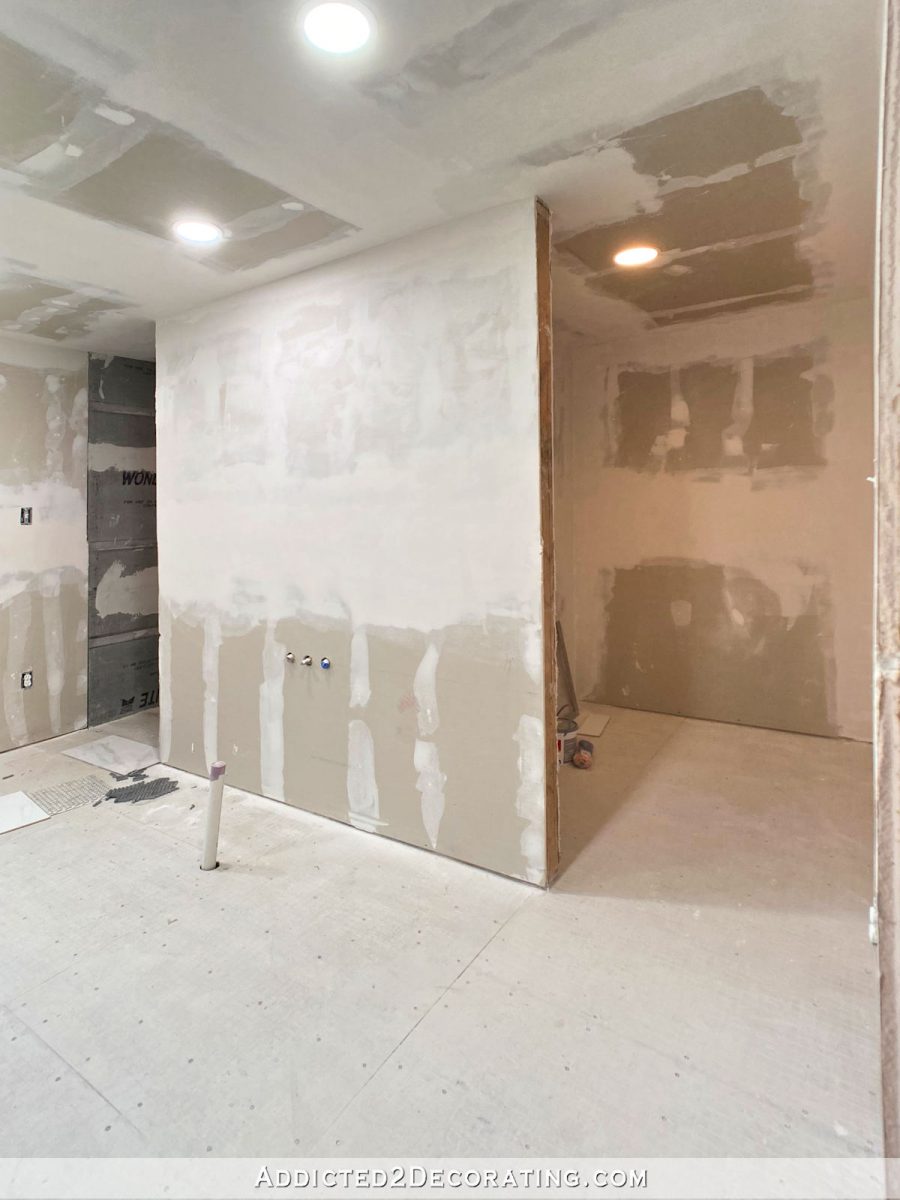
…to this…
Getting the room to that point required moving a wall to square up the room and give us a bathroom that is 18.5′ x 12.5′. So the bathroom is 231.25 square feet. That’s over twice as large as my kitchen. 😀
So how much did it cost to have the contractor do all of this work? Here’s how those costs break down, along with the total we paid out to the contractor.
Contractor Costs:
- Demoing and reframing hallway wall – $1,230.00
- Pocket door framing installation – $550.00
- Joist repair – $450.00
- Plumbing repair – $1,300.00
- Framing – $1,200.00
- OSB subfloor – $1,864.00
- Hardiboard subfloor – $1,258.00
- Electrical – $1,430.00
- Subfloor insulation – $694.00
- Wall insulation – $361.00
- Rough-in plumbing – $3,000.00
- Drywall – $3,730.00
- Shower pan installation – $1,400.00
- Toilet installation – $75.00
- Bathtub installation – $800.00
- Contractor fees – $1,840.00
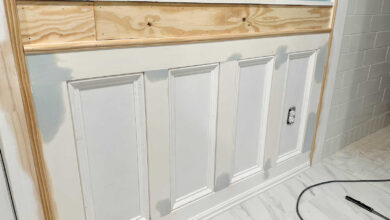
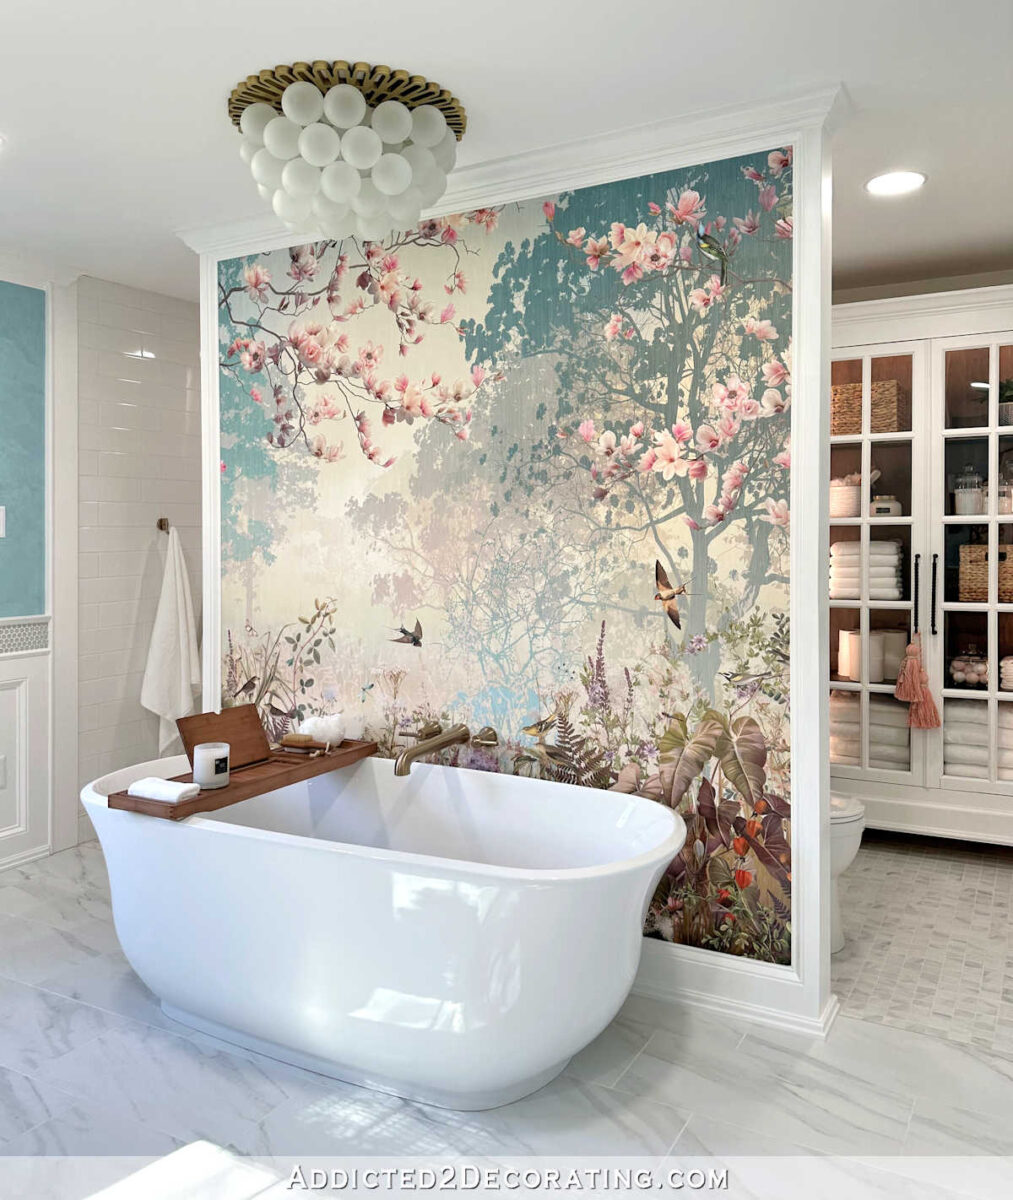
After the contractor finished his part, it was up to me to take the room from what you see in the photo above and turn it into this…
The whole project took a year-and-a-half because it was just so extensive, and I got overwhelmed with it on several occasions and had to turn my attention to other things. Plus, last year was a very exciting year for us, filled with a whole lot of new and non-house-related things, so those things took my attention away from the bathroom as well.
But I finally finished the whole bathroom in December 2022. If you missed the whole before and after post, you can click here to see all of the pictures and details.
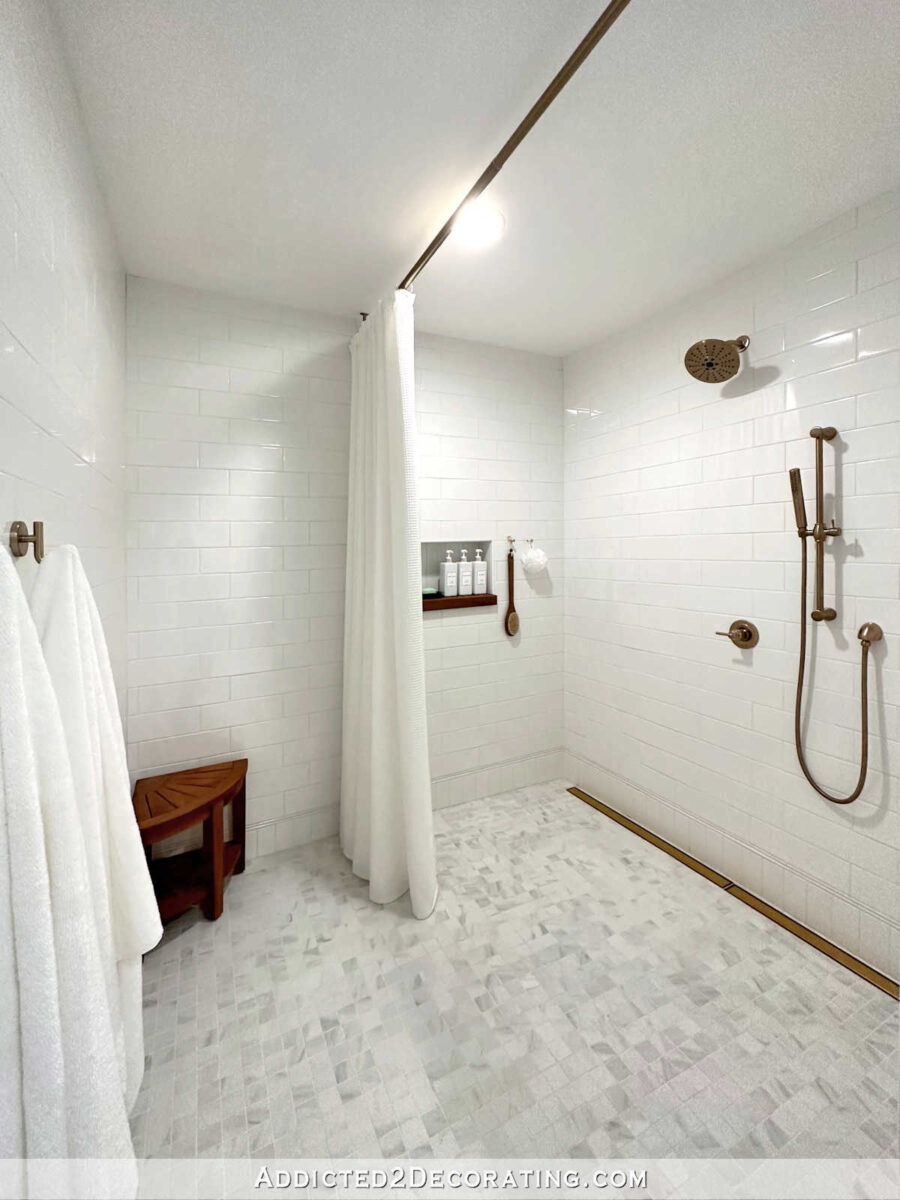
Among the first projects I had to tackle in the room was all of the tile — the shower walls and floor, the toilet area floor, and the main bathroom floor. The shower alone was a beast of a project because it’s so large.
So here’s how all of the tile and tile supply costs break down. I’m sure I’ve forgotten some things, but they would be minor costs.
Tile & Grout
The biggest challenge in this whole bathroom was building the walnut vanities and storage cabinet. It took me a very long time to figure out how to make the vanities wheelchair accessible without making them look like wheelchair accessible vanities (if you know what I mean). My final solution was to build table-style vanities with plenty of room underneath, and then add a storage cabinet between them to make up for the lack of storage on the actual vanities.
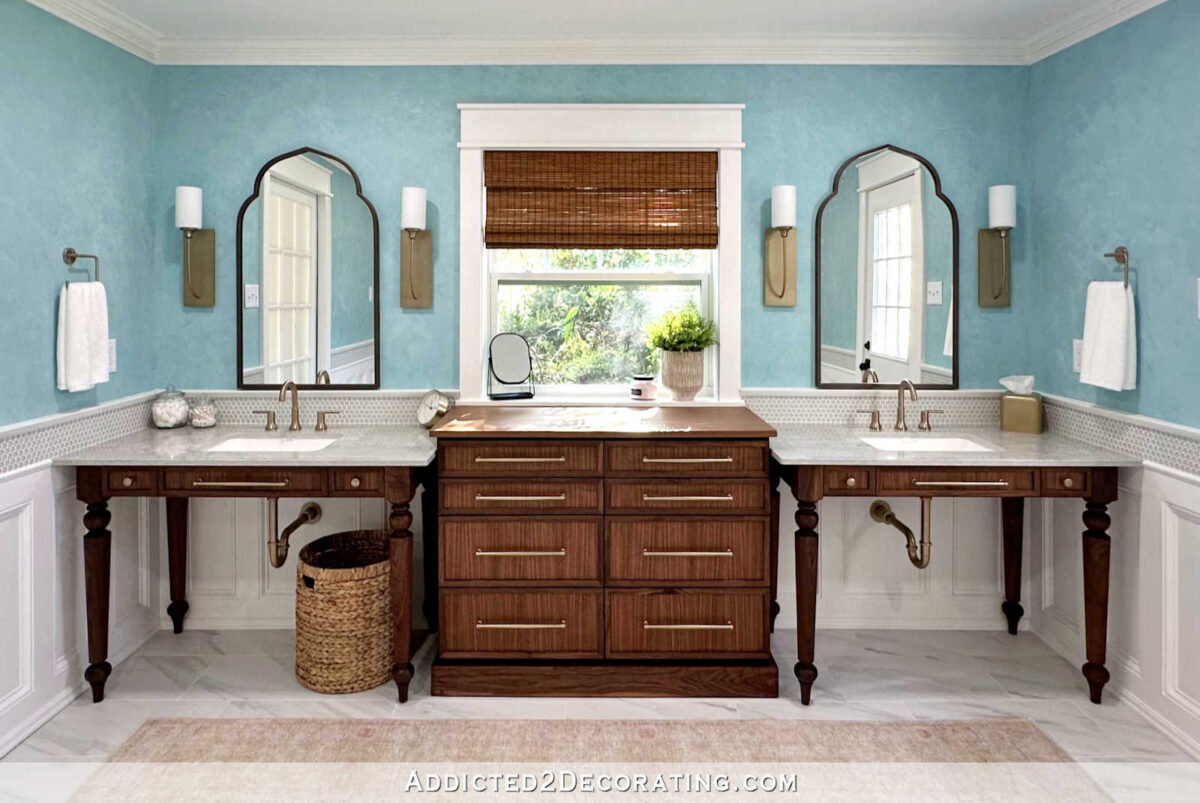
I knew that building with walnut would cost quite a bit more than building with a lower grade lumber that could be painted. I was expecting the higher cost, and willing to pay it because I really wanted walnut for this feature wall, and this is our master bathroom, so the added expense was worth it to me.
What I wasn’t counting on was the cost of the quartz countertops. I mean…YIKES!!! Granted, of the samples that caught my eye, and that I brought home, I did go with the most expensive one. It’s the one I liked the most, and I just kept telling myself that it’s worth it because it’s our master bathroom. I’m very glad I went with it, but it sure did blow that vanity and storage cabinet budget out of the water.
I guess it’s really not bad considering we’re talking about walnut “furniture” spanning a 12.5-foot wall. Here’s how those costs break down.
Walnut Vanities & Storage Cabinet
All of the plumbing fixtures really added up as well. It’s very difficult to find an entire line of matching fixtures to fit your exact needs and wants, but I ended up going with the Delta Trinsic line in the Champagne Bronze for all of the metal plumbing fixtures.
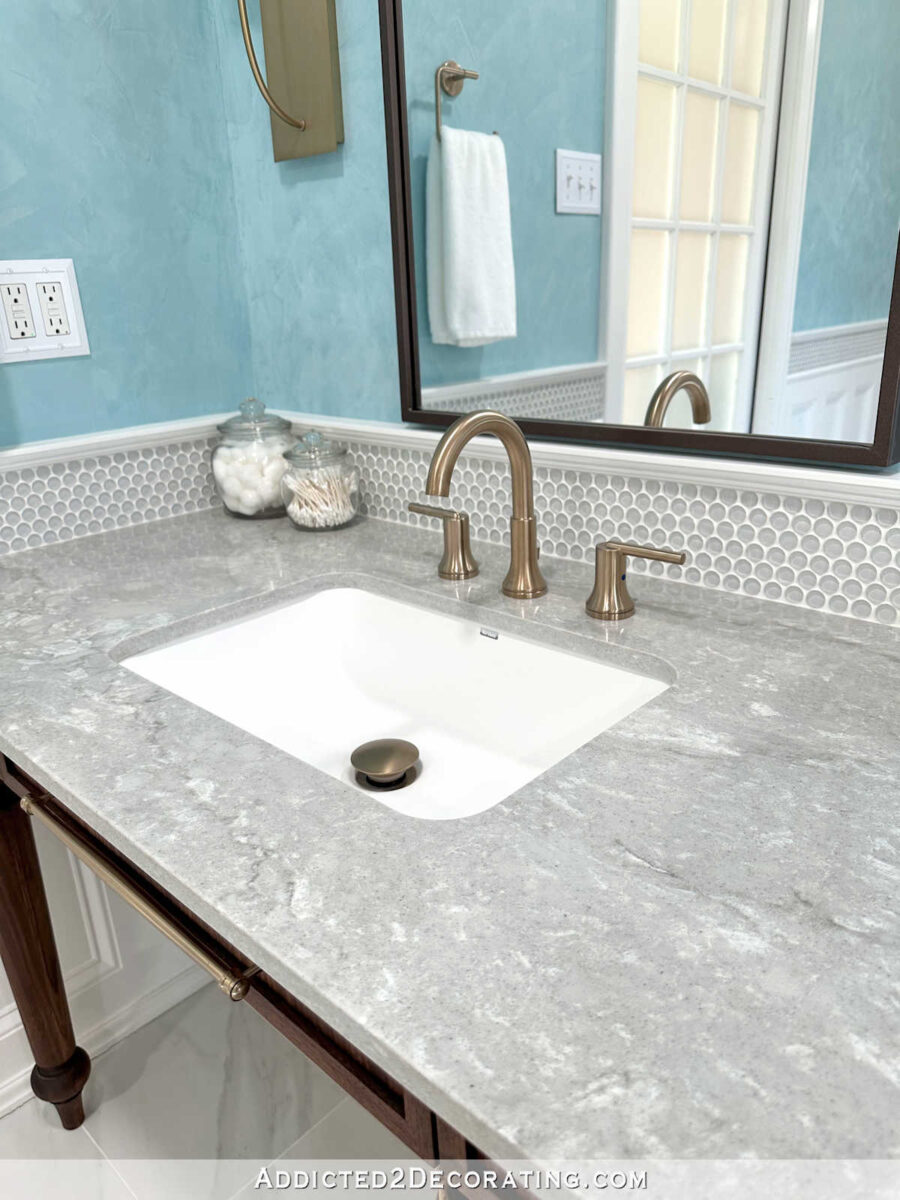
Here’s the breakdown of all of the plumbing fixtures for the room…
Plumbing Fixtures
- Delta Trinsic Faucets, champagne bronze – $763.08
- Delta Trinsic hand shower, slide bar, and hose, champagne bronze – $250.62
- Delta Universal Mixing Rough-In valve – $54.22
- Delta diverter rough-in valve – $83.32
- Delta Trinsic diverter trim, champagne bronze – $164.32
- Delta hand shower wall supply elbow, champagne bronze – $63.96
- Delta Trinsic shower head and volume control, champagne bronze – $503.27
- Delta Trinsic wall mounted tub filler, champagne bronze – $855.16
- Delta wall-mount rough-in – $97.88
- Streamline Bath freestanding bathtub – $1,024.26
- Neodrain 36-inch brushed brash linear drains – $259.78
- Delta Trinsic universal trip lever, champagne bronze – $30.00
- Orhemus brass P-traps – $84.42
- Kraus popup drains, brushed gold – $86.50
- Kraus Natura bathroom sinks, matte white – $606.10
- Delta Foundations toilet – $161.29
- Miscellaneous plumbing supplies – $141.30
About half of the lighting for the room is pretty standard — ultra thin ceiling lights, light and exhaust fan combos. But then I wanted some nice sconces flanking the vanity mirrors, and I wanted a bubble light above the tub. I wanted the bubble light to be an eye-catching feature in the room, so when I couldn’t find one available that suited my needs and my taste, I decided to DIY my own bubble light.

Here’s how the costs of all of the lighting break down for the room…
Lighting
Had we done this bathroom remodel before 2020, the cost of all of the lumber, as well as the French door, would have been about half of what I ended up paying. But lumber these days is so expensive! And when you’re doing wainscoting and lots of trim in a really large room, those costs add up quickly.

I had to go through 18 months of Home Depot receipts, which can get pretty confusing. So the cost of the lumber and trim is the best estimate I could come up with.
Lumber & Building Products
The primer, paint, and clear topcoat (used for cabinet drawers) is pretty standard in every room I do. But unique to this room is the Modern Masters Venetian plaster. I had to mix the color myself to get exactly what I wanted, so unfortunately, I don’t have a formula to pass along to those who have asked about the color.
I had done a similar technique in my mom’s master bathroom remodel over a decade ago (and it’s still beautiful today), but this was my first time working with the Modern Masters Venetian plaster. It cost quite a bit more than latex paint, but I think the final look was well worth the cost. (Actually, it costs about the same as Benjamin Moore Aura paint, so it’s equivalent in cost to a high quality latex paint.)

Here’s the cost breakdown for the paint and other finishes for the room…
Paint & Finishes
Since this bathroom is so big, it needed way more decorative items than a standard bathroom might need. I did a butterfly gallery wall, built a large glass-front storage cabinet, installed a mural behind the bathtub, etc.

I didn’t put every little thing on this list. I tried to keep it to the main bathroomy stuff. So here’s how the costs of the decorative items break down…
Decorative Items
This final category was, by far, the hardest category to figure. I tried my hardest to separate those things that were purchased specifically for the bathroom (sandpaper, caulk, wood filler, sanding discs, blades, etc.) from those things that I purchased while working on the bathroom, but can use for many other projects down the line (like the set of hole saw attachments for my drill). So this is just my best estimate, but I think it’s pretty close…
Miscellaneous
- Miscellaneous supplies – $650.00 (estimate)
And that’s it! So how much did this massive project — turning a master bedroom into a huge wheelchair accessible bathroom cost?
GRAND TOTAL: $40,868.79
That’s a large amount to pay for one room. I’m very well aware of that. 🙂 But in the whole scheme of things, I’m pretty satisfied with that cost. (Remember, this is one of the reasons we bought a house that only cost $80,000. We wanted to be able to fully customize it to fit our needs, and to tackle each room as we saved up money for it so that we wouldn’t be taking on a huge mortgage and wasting thousands upon thousands of dollars on interest. This way, we do it on our timeline, accrue no debt, pay zero interest, and have exactly what we want in the end.)
Considering how large the bathroom is, and how open and useful it is for my wheelchair-bound husband, I think it’s worth it. And considering that we’re post-pandemic, and everything costs way more than it did pre-2020, that’s just the way things go these days. Everything costs more, and there’s really no way around that.
I’m very glad I DIYed half of the room myself, though. I’m pretty sure that number would have been closer to $60,000 (or more) had I hired out every last bit of this room and hadn’t done anything myself. So even though that final number is quite large, I’m very confident that I saved us quite a large chunk of money with my DIYing. And that’s money that can go towards finishing up my studio with all of that custom cabinetry that I need to build!

Addicted 2 Decorating is where I share my DIY and decorating journey as I remodel and decorate the 1948 fixer upper that my husband, Matt, and I bought in 2013. Matt has M.S. and is unable to do physical work, so I do the majority of the work on the house by myself. You can learn more about me here.
I hope you’ll join me on my DIY and decorating journey! If you want to follow my projects and progress, you can subscribe below and have each new post delivered to your email inbox. That way you’ll never miss a thing!
[ad_2]
Source link