Prepping My IKEA Veddinge Cabinet Doors & Drawer Fronts For Paint – Sanding, Adding Trim, Etc.
[ad_1]
When purchasing IKEA Sektion cabinets for my studio, I opted for the Veddinge cabinet doors and drawer fronts for one reason. They were one of the least expensive options. And when you need as many as I needed for my studio (which is probably equivalent to a very large kitchen), those savings added up quite a bit. And while I didn’t want flat front cabinet doors and drawer fronts in my final studio design, I knew that I could add my own trim and still end up with quite a savings. Plus, my plan from the beginning was to paint my cabinets a fun color, so adding trim wouldn’t be that big of a deal.
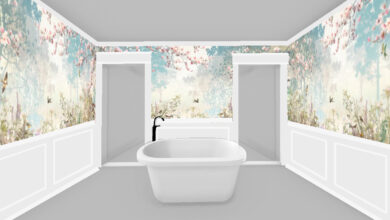
I did have a hard time deciding just how I wanted to trim them out, though. I considered lots of designs (some of which you can see here), and different options to get that design. I thought I had landed on the idea of using Overlays (which are laser cut designs that you adhere to the fronts of the doors), but it all came down to the one cabinet right in the middle of the mural wall that has six 5-inch-high drawers. In the end, I decided that I wanted those drawers trimmed out individually, but no design I tried would fit on those short drawer fronts.
After trying every design I could think of, I finally concluded that the only design that would fit on those doors was a simple rectangle. And if I’m going to do a simple rectangle, there’s really no need to order Overlays and wait their three-week turnaround time when I could just buy some simple trim and cut my own trim to make rectangles.
So that’s what I did. I had in mind that I would use wood lattice trim. The price for wood lattice is quite the range, from $1.48 per linear foot (which would have cost $556.48 for the amount I needed) to $0.98 per linear foot (which would have cost $368.48 for the amount I needed).


There’s also a small trim called screen, which I’ve used many times over the years for various projects. It’s $0.78 per linear foot, which would have come to $293.28. I probably would have purchased this one had they had enough in stock. But they were almost sold out.

And I’m glad I kept looking because I landed in a section that I never look at and never even consider — the plastic trim. It’s called polystyrene, which I always associate with Styrofoam, but this is a hard plastic. They had the same screen trim in the plastic trim, but this cost $3.48 per 8-foot piece. That’s $0.44 per linear foot.

So that’s what I got, and it cost $163.56 for all the trim I needed for all three sections of cabinets in the studio.
To prep the cabinet doors and drawer fronts for trim and paint, I needed to sand the super shiny finish off of all of them. I did this using my electric sander and 100-grit sandpaper discs. I tried 120-grit, but that didn’t cut through that factory finish. (The finish on IKEA Veddinge cabinet door and drawer fronts is amazing and incredibly durable, FYI. I would imagine they’re all like this, and I’m quite impressed with the quality.) The 100-grit worked really well, though. I took more of the finish off than was necessary on this first cabinet door. On the subsequent ones, I sanded just enough to remove the shine, but not really enough to see through the white paint.

After they were all sanded, I made myself a jig to mark where the trim would go on each door and drawer front. Since IKEA Veddinge doors are 5/8-inch thick, I made the jig so with one piece ripped to 1 3/8 inch, and nailed that to another piece ripped to 1 inch. That way, when they were nailed together, the inside of the bigger piece was 5/8 inch to fit perfectly on the edge of the door or drawer front, and the piece that would go on top of the door would mark the 1-inch space that I wanted to leave on the edge before the trim.

I cut the pieces to 36 inches long since that was the width of the widest drawer fronts.

So after sanding each door and drawer front, I used my jig, placed on the edge with the 1-inch piece on top of the door, and marked that line. After doing this on all four sides, I had a perfectly spaced rectangle to mark where the trim would be attached.

Before actually adding the trim, I wanted to drill holes for the cabinet hardware. For the drawers, I bought these 10-inch pulls. So I folded a piece of paper (using cardstock or thick photo paper would have been preferable) and marked the width of the screw holes.

Then I used my tape measure to measure and mark the center between the screw holes.

Before marking the drawer fronts, I placed a piece of painters tape where the pull would go…

And then using my tape measure, I measured and marked the center of the height of the drawer. I did this in two places.

And then using a straight edge, I used those two marks to draw a line right down the center of the drawer height.

Next, I measured over from the edge and marked the middle of the drawer.

With the middle marked, I used the pattern I had made and lined up the middle marks, and marked the screw hole positions on the center line I had drawn.

That gave me the perfect spacing for the drawer pull.

Before I drilled the holes on the very first drawer front, I double checked the marks. But once I knew my pattern was right, I didn’t double check the subsequent drawer fronts.

And then I was ready to drill the holes.

And voila! Perfectly placed, perfectly spaced holes for the drawer pull.

I know that seemed like a long, drawn out process, but once you have the pattern marked, the rest goes really fast. I think it took me about two minutes to do each drawer front.
Once the holes for the hardware were drilled, I was ready to attach the trim. I cut all of the trim with my miter saw, cutting the ends at a 45-degree angle. And they all needed just a bit of sanding with 220-grit sandpaper on the cut ends before assembling the frames.
I assembled the frames before attaching them to the drawer fronts, and I assembled them using my hot glue gun. It only took just a very small amount of hot glue to put the frames together.

I let the glue dry for a minute or two, and then flipped the frame over and added a bead of Loctite construction adhesive to the back. One thing I love about this plastic trim is that the back is actually indented, making it perfect to use with construction adhesive. When using trim that has a flat back, the construction adhesive usually squishes out the sides once the trim is applied. I didn’t have that issue with this trim.

And because I had already measured and marked the lines where the trim would go, putting the trim in place was very easy. There was no guess work, no measuring required, and no room for mistakes.
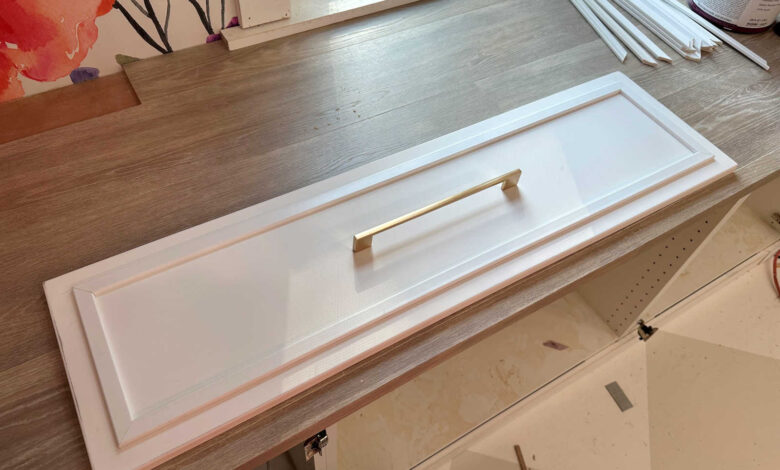
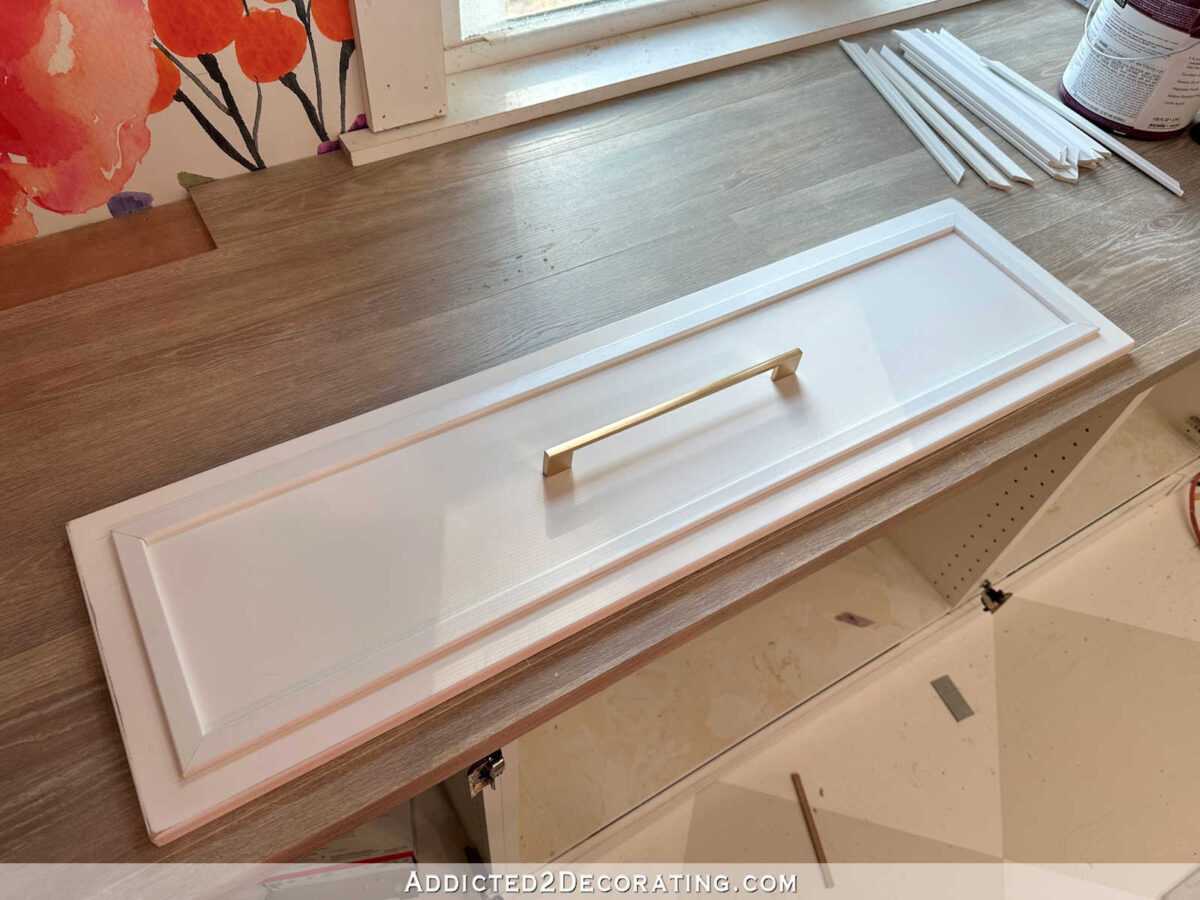
And here’s a peek at a drawer front with the new trim and a drawer pull sitting in place.
I’m not quite finished adding the trim to the cabinet doors, and once I finish that, I’ll have one more step before I’m ready for priming and painting. I still want to caulk the corners of the trim to eliminate those tiny cracks in the joints, and then I want to caulk all the way around all of the trim. That won’t be a quick and easy process since I have so many drawers and door fronts, but it will be worth it. Those types of details really go a long way to taking a DIY project to the next level.
So that’s the progress so far. My new order of IKEA cabinets is arriving today, so I’ll have even more sanding and trimming to do. But I’m really hoping I’ll be ready for paint by this weekend!

Addicted 2 Decorating is where I share my DIY and decorating journey as I remodel and decorate the 1948 fixer upper that my husband, Matt, and I bought in 2013. Matt has M.S. and is unable to do physical work, so I do the majority of the work on the house by myself. You can learn more about me here.
[ad_2]
Source link