[ad_1]
I’ve been hard at work on my studio the last few days, and I’m finally working on the cabinet doors and drawer fronts for all of the cabinets. This is my first time using IKEA cabinets, and because I can’t leave well enough alone, I’m sanding them all down, adding trim, and priming and painting them. And while starting with IKEA cabinet doors and drawer fronts will save me a lot of time, this whole process is reminding me of all the times I made my own cabinet doors and drawer fronts from scratch.
I’ve never made anything like Shaker doors the “proper” way, but I have my own simple go-to method for making cabinet doors and drawer fronts that always produces a result that I’m pleased with.
Making your own cabinet doors and drawer fronts is one of the best ways to update an outdated kitchen or bathroom if the cabinet boxes are still in good shape and you’re not changing the layout of the room. And once you’ve got that down, and if you can build a simple box, you can then build your own cabinets or pieces of furniture from scratch.
1. Our Condo Hallway Bathroom
The very first time I made my own cabinet doors and drawer fronts was for our tiny condo hallway bathroom. I worked on that bathroom just over ten years ago, in March 2013.
You can see how I made those cabinets doors here, and see the whole bathroom before and after here. It’s hard to believe that was over a decade go! And yet, that dark teal that I used on the walls in that bathroom (Behr Mythic Forest) is the same color I have on our music room bookcases and doors and the cabinets in our walk-in pantry today. 😀 Some things never change, like my love for teal. Anyway…
I really had no idea what I was doing at the time. I only had a few basic tools (a $99 nail gun and compressor set, a very basic miter saw, etc.) at the time, so I knew that I couldn’t make “proper” cabinet doors that required the use of a router or table saw. Instead, I’d have to rely on my basic tools and lots of trim to make some pretty (and basic) cabinet doors.
They may have been basic, but I was very pleased with how they turned out. They were a huge upgrade from the original doors.
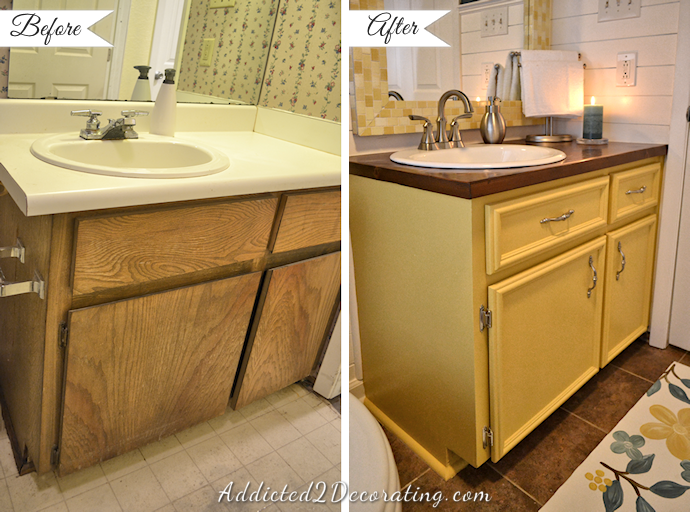
Unfortunately, ten years ago, I didn’t realize how easy it is to use a Kreg Hinge Jig to drill the perfect holes for hidden cabinet door hinges. That would have made those new DIY cabinet doors look even better.
2. Our Hallway Cabinet
When I built the cabinet in our hallway, I definitely had acquired more tools than I had when we lived in the tiny condo. But I still didn’t have the tools required to make something like a Shaker door (which is really not my style anyway), so I went back to my condo bathroom days and used that same idea.
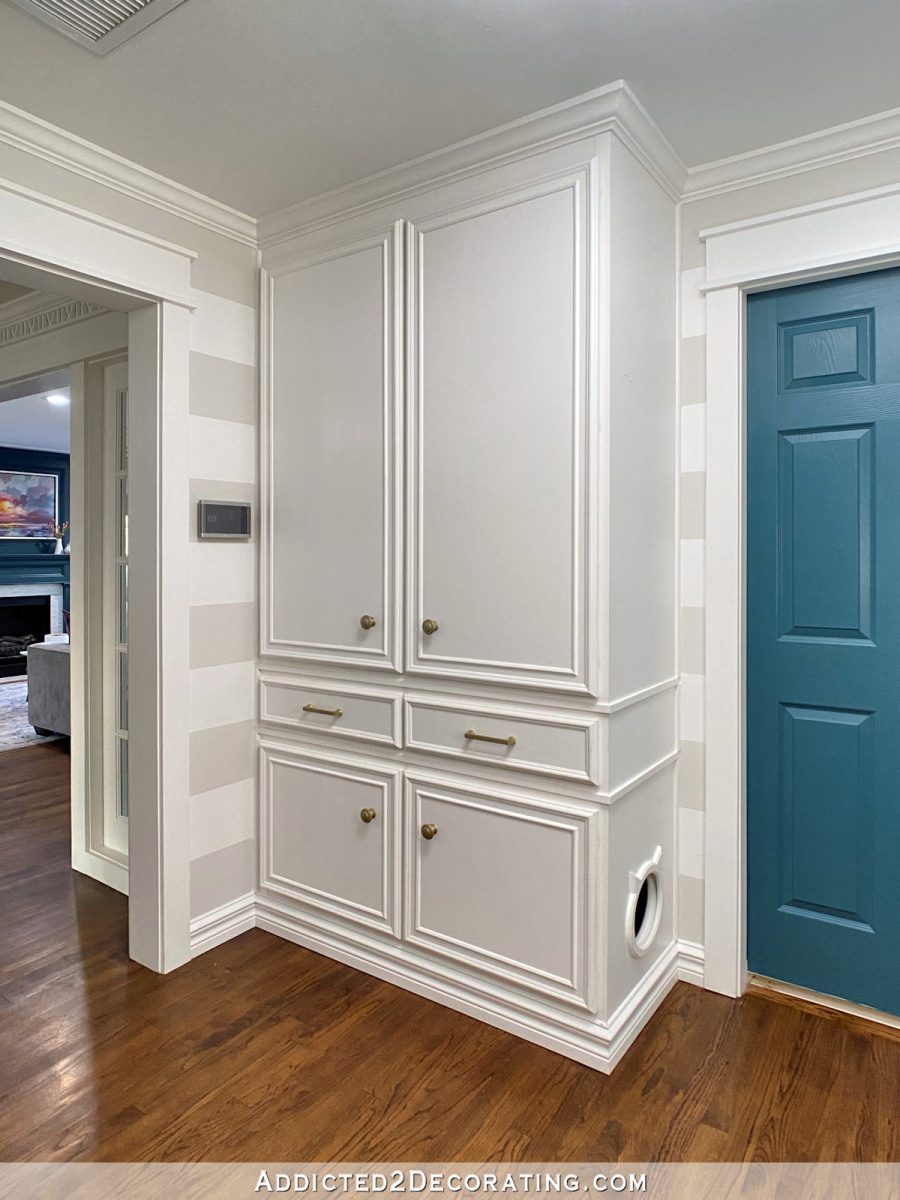
I did make some changes on these cabinets doors and drawer fronts, like adding more trim, and using the Kreg Hinge Jig so that the hinges on the cabinet doors wouldn’t show. Just that one change alone really took these doors up a notch from my original condo bathroom cabinet doors with the exposed hinges.
3. Our Walk-In Pantry Cabinets
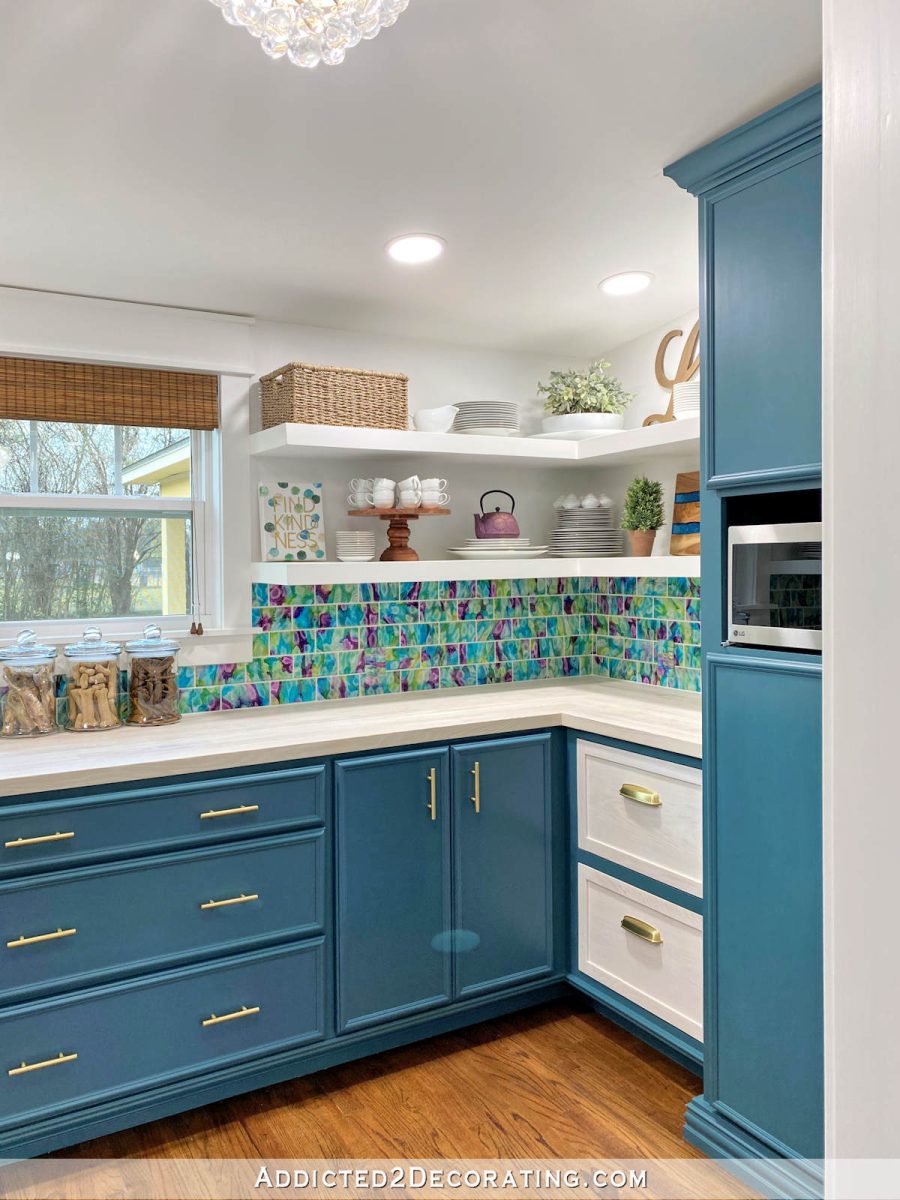
Our walk-in pantry was the first time I had ever built a full room of cabinets from scratch. And once again, when it came time to do the doors and drawer fronts, I went back to my old trusted (and very easy) style of cabinet doors and drawer fronts.
Are you sensing a theme here? 😀 Basically, in all my years of DIYing and remodeling, I’ve never made a proper Shaker door or any other type of door or drawer front that requires table saws or routers or anything like that. Just a circular saw, a miter saw, and a brad nailer is all I’ve ever used to make cabinet doors and drawer fronts. Well, those plus a Kreg Hinge Jig. And I’ve been pleased with them every time!
I like that they have a little bit of visual interest with the trim, but they’re not overly fussy. They’re the perfect blend of simple and elegant. But most of all, they’re just easy to make, and don’t cost a fortune.
The four white drawers in the pantry are a different style, but still very simple. Those drawer fronts are just solid pieces of oak lumber cut to size with thin oak trim attached to the face around the edges. Very simple. You can see more of the before and after of our walk-in pantry here.
4. My Mom’s Kitchen Cabinets
At the beginning of 2020, my mom and I gave her kitchen a pretty extensive makeover. She didn’t want to change the layout of her kitchen at all, and her cabinet boxes were in great shape. She just wanted to update the doors and drawer fronts.
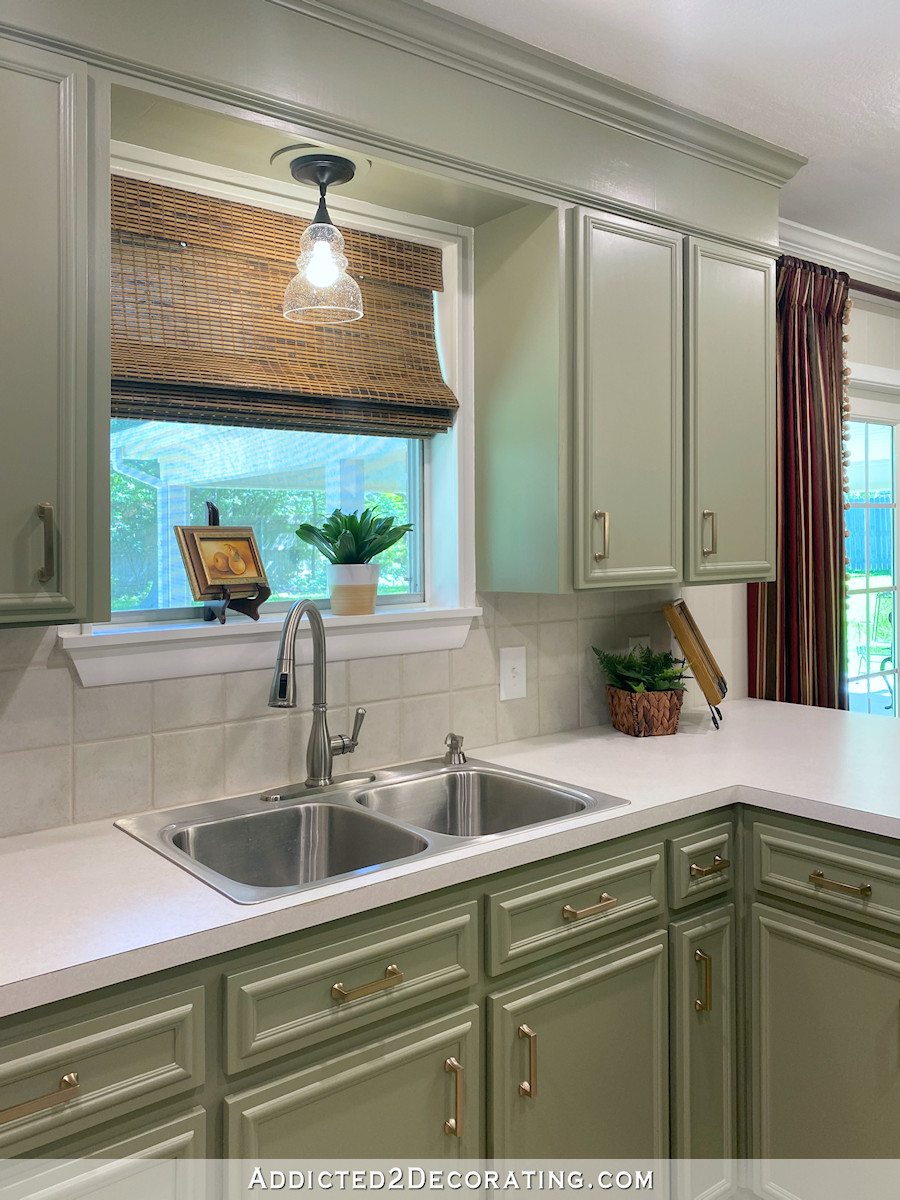
So we made very simple plywood slab doors with the edges finished off with edge banding, and then a bit of trim inset on the faces of the doors. What she ended up with was simple yet elegant, and once again, didn’t require any fancy tools.
And these new doors and drawer fronts were a great update from the quintessential thin 1960s cabinet doors with the routed design on front that she started out with.
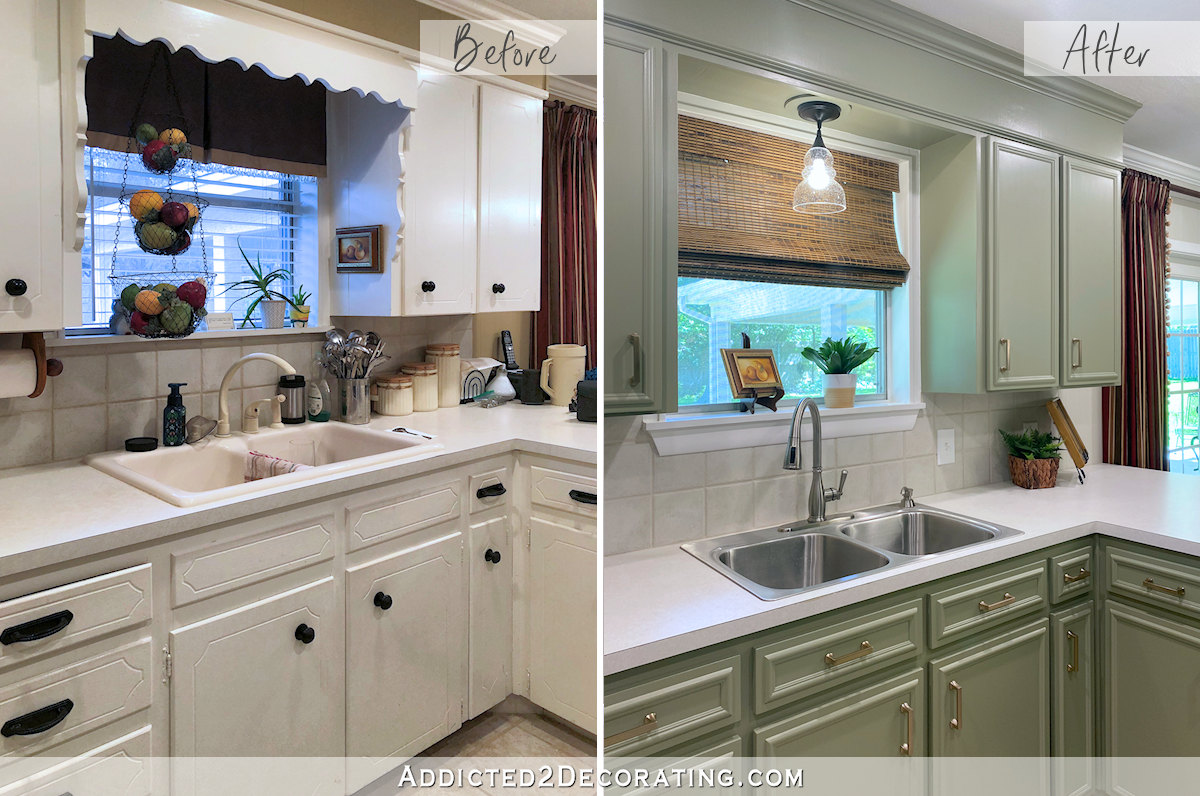
It really is amazing what a little bit of trim can do. And if you’ve been around here for long, you know how much I love trim! 😀 You can see more of my mom’s kitchen makeover here.
5. Our Master Bathroom Cabinet
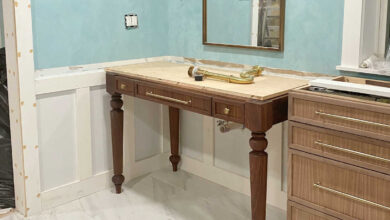
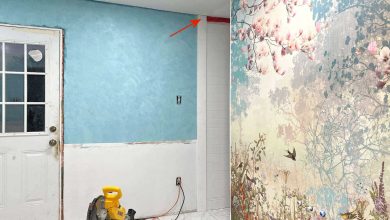
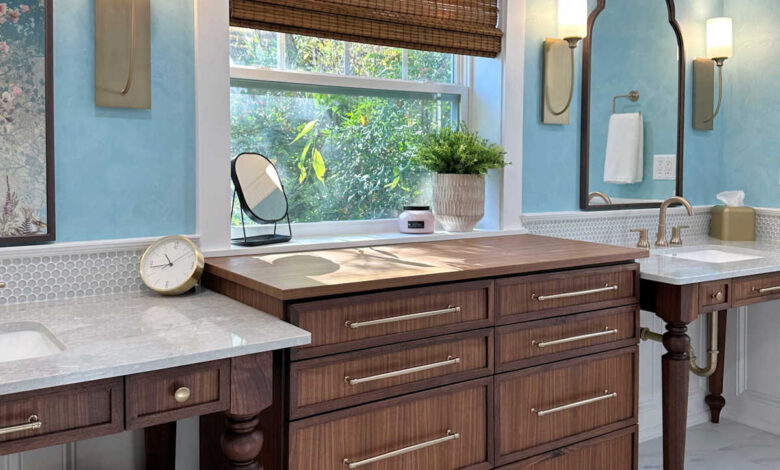
When it came time to build the vanities and storage cabinet for our master bathroom remodel, I decided to change things up a bit. Instead of using my tried and true cabinet door and drawer front method, I made drawer fronts that were a bit more involved. And this time, they did require the use of a table saw (or I could have used a router) to make a frame for each drawer.
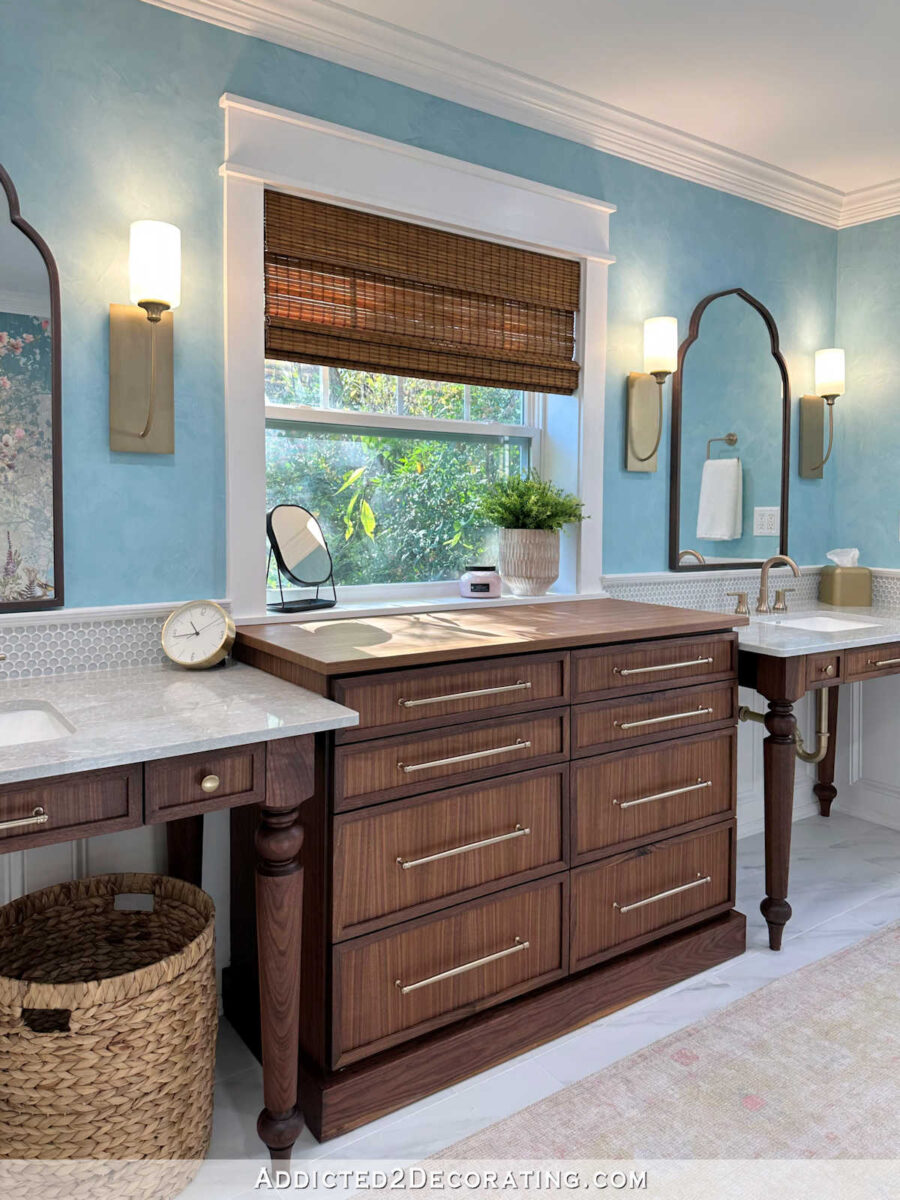
This was also my first time to build cabinets out of nice wood (walnut) that wasn’t going to be primed and painted. That meant that everything had to be more precise because I wouldn’t be able to cheat and hide my mistakes with wood filler and caulk before priming and painting. I love those firsts that stretch my DIY abilities just a bit more. Even after 30+ years of DIYing, I’m still learning.
You can see how I made those drawer fronts here, and you can see the whole bathroom before and after here.
So after three decades of DIYing, I’ve still never made fancy cabinet doors that require fancy tools. And you know what? I probably never will. I’m pretty happy with my simple methods that I use, so why fix something that isn’t broken? 😀 So if you’re needing new cabinet doors and drawer fronts, but buying new isn’t an option, and making fancy ones that require lots of tools seems overwhelming to you, just stick with something simple that requires basic tools. You can transform the look of your kitchen or bathroom with new cabinet doors and drawer fronts that are very simple to make.

Addicted 2 Decorating is where I share my DIY and decorating journey as I remodel and decorate the 1948 fixer upper that my husband, Matt, and I bought in 2013. Matt has M.S. and is unable to do physical work, so I do the majority of the work on the house by myself. You can learn more about me here.
[ad_2]
Source link